Skip to content
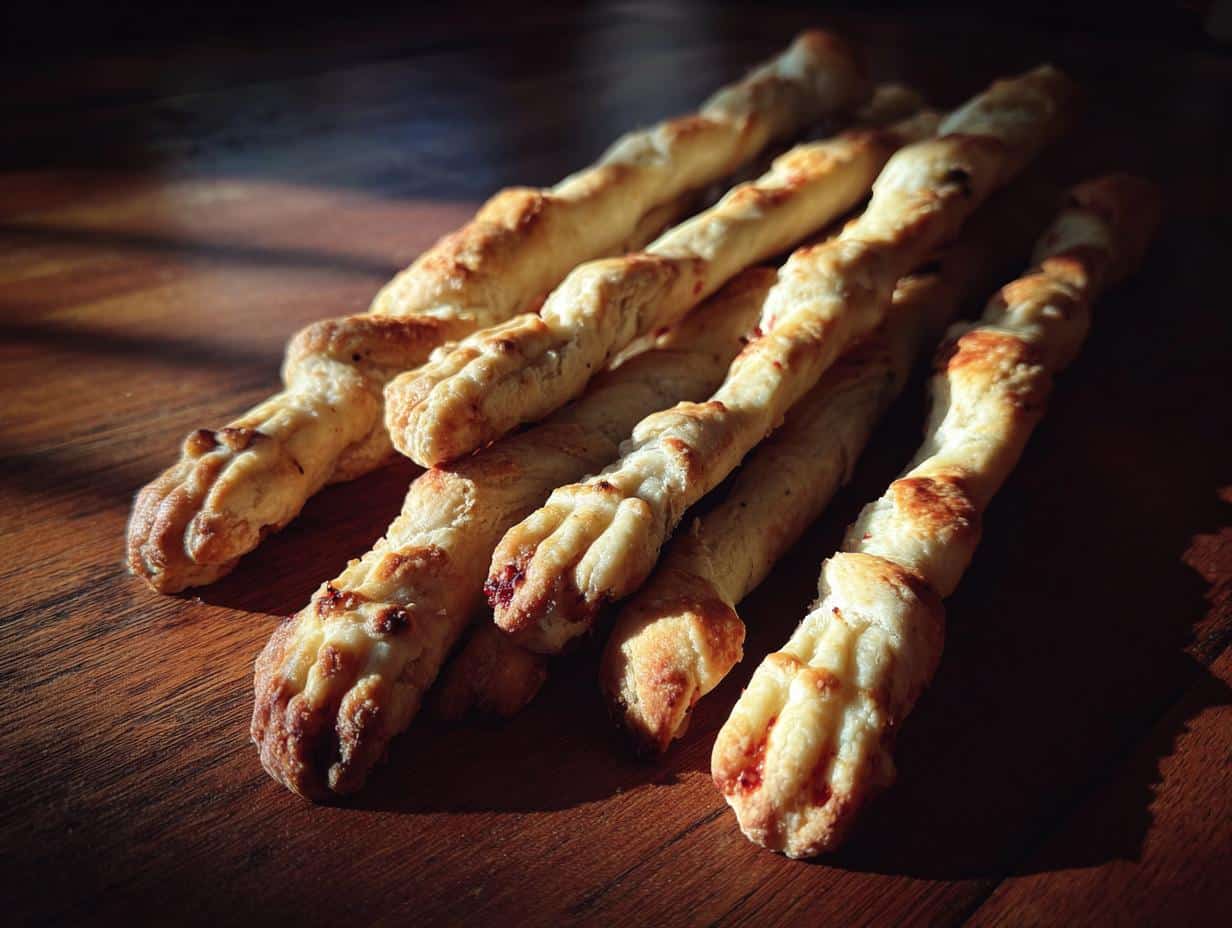
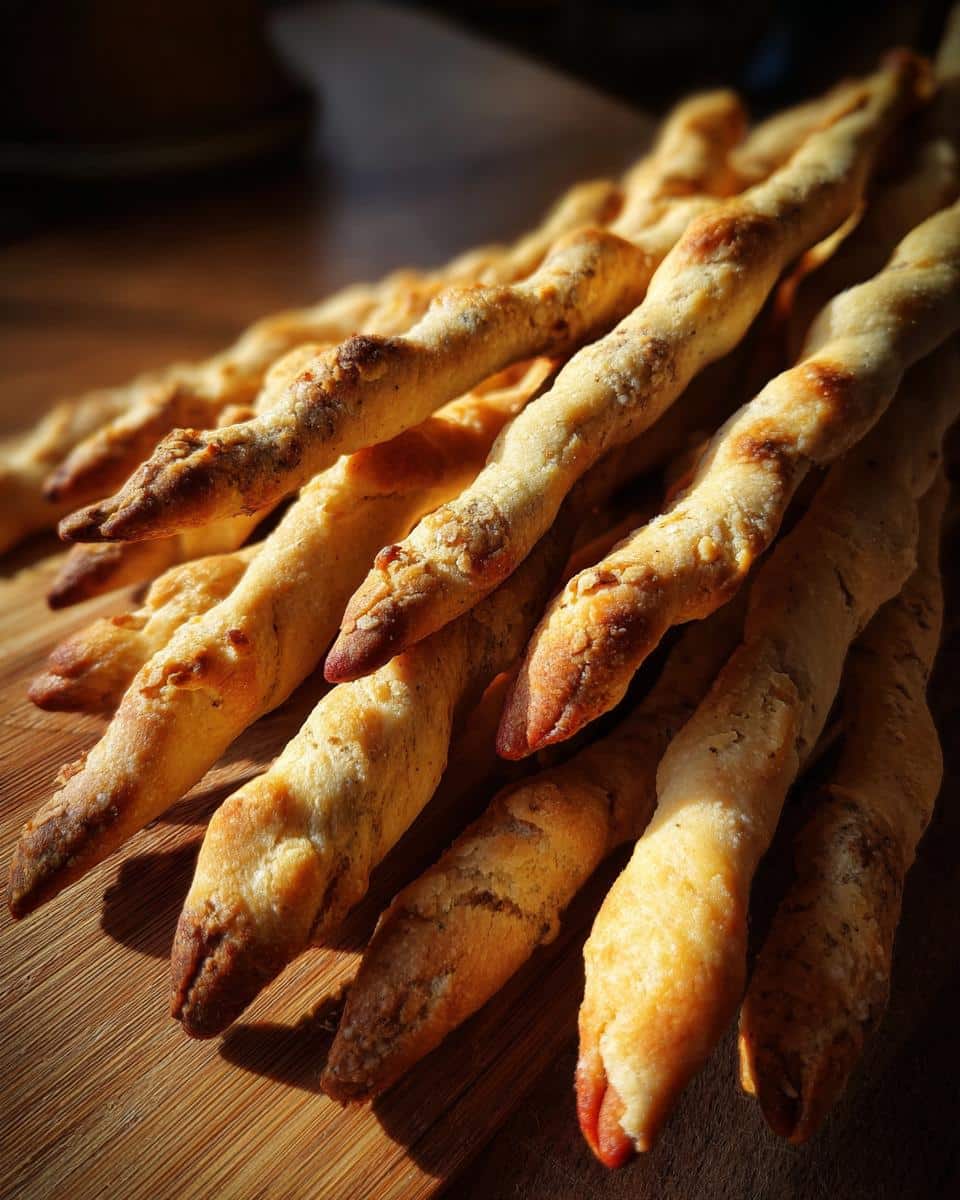
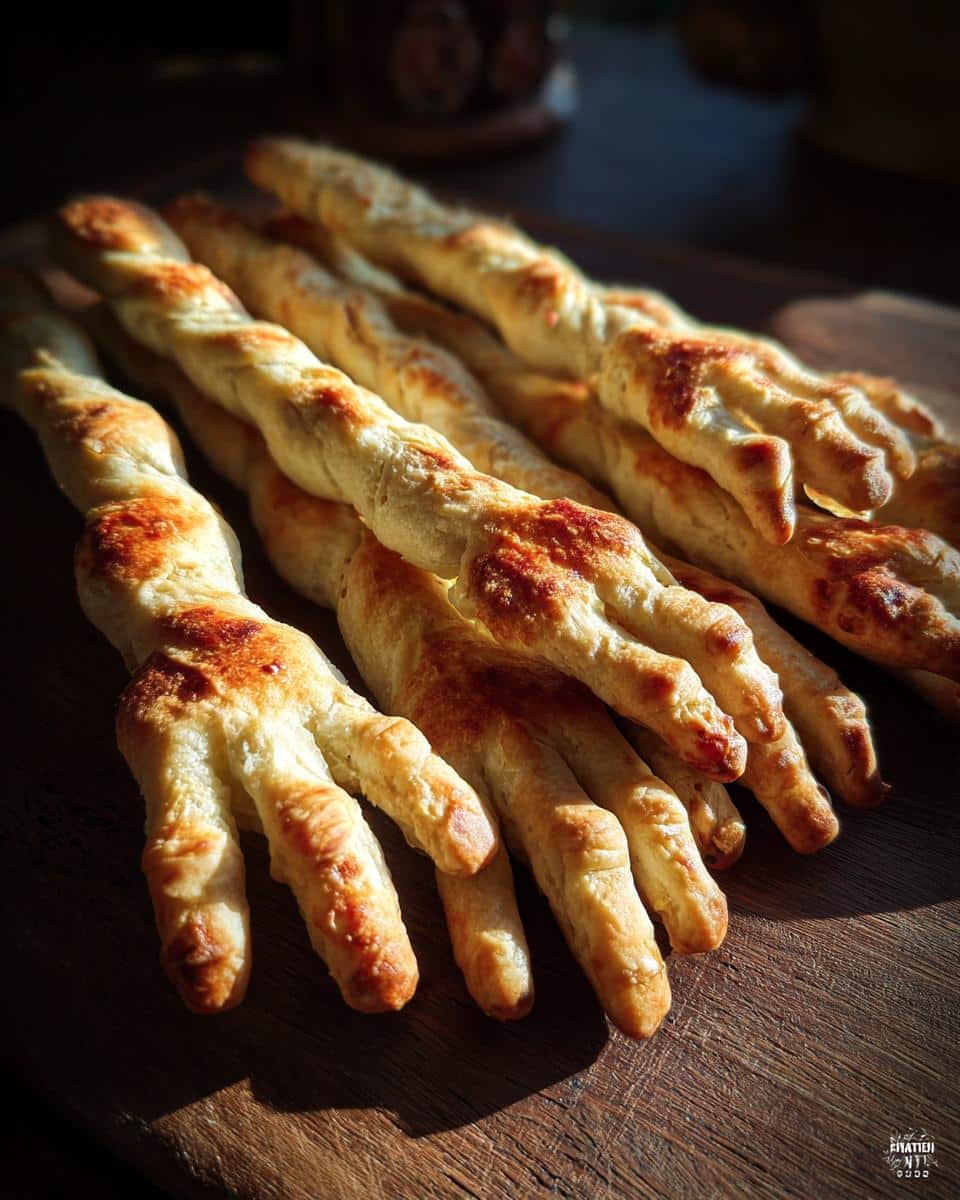
There’s something magical about Halloween baking—especially when it’s deliciously creepy! My Witch’s Fingers Breadsticks have been stealing the show at our Halloween parties for years. The first time I made them, my nephew screamed (then immediately grabbed three). These spooky snacks look like they crawled straight out of a witch’s kitchen, but trust me, they’re just warm, buttery breadsticks in disguise. The best part? They’re shockingly easy to make. Whether you’re hosting a monster mash or just want to surprise the kids, these ghoulishly good breadsticks always disappear faster than a black cat at midnight.
Table of contents:
Why You’ll Love These Witch’s Fingers Breadsticks
Listen, these aren’t just any breadsticks—they’re the life of the Halloween party, every single time. Here’s why they’re so good:
- Easier than you think: No fancy skills needed—just roll, shape, and bake. Even if your dough looks wonky at first, those “witch fingers” will still come out creepy-cool.
- Kid-approved magic: Little ones go wild for these (seriously, my niece once “accused” me of baking real fingers). Let them press in the almond nails—it’s their favorite part.
- Spook-tacular versatility: Add red food dye for bloody nails, swap almonds for pumpkin seeds, or go full zombie with green-tinted dough. Make it your own kind of scary!
Plus, they smell like fresh-baked bread while looking straight out of a haunted house. Win-win.
Ingredients for Witch’s Fingers Breadsticks
Gather these simple ingredients—you probably have most in your pantry already! The magic happens when ordinary bread dough transforms into something delightfully creepy. Here’s exactly what you’ll need:
- 2 cups all-purpose flour (plus extra for dusting—witches are messy bakers)
- 1 teaspoon salt (just enough to balance the spell)
- 1 tablespoon sugar (to wake up the yeast—they’re lazy little creatures)
- 1 packet active dry yeast (about 2 ¼ teaspoons if you’re using a jar)
- ¾ cup warm water (around 110°F—think “warm bath” temp, not “cauldron boil”)
- 2 tablespoons olive oil (or melted butter for extra richness)
- 1 egg (for that golden egg wash glow—no magic potions required)
- 24 whole almonds (the “nails”—slivered almonds work too if your witch has a manicure)
- Red food coloring (optional, but oh-so-perfect for bloody tips!)
That’s it! No eye of newt or dragon scales required—just good ol’ kitchen staples ready for a spooky makeover.
Equipment You’ll Need
No cauldron required—just these basic kitchen tools (I bet you already have most of them lurking in your drawers!):
- Mixing bowl (for brewing up your dough)
- Baking sheet (lined with parchment—no sticky finger mishaps!)
- Pastry brush (to give those fingers a golden “egg wash” glow)
- Sharp knife (for carving creepy knuckle creases)
That’s it—now let’s make some magic!
How to Make Witch’s Fingers Breadsticks
Ready to turn ordinary dough into something delightfully spooky? Follow these steps—I promise it’s easier than brewing a potion (and way more fun). Just imagine the looks on your guests’ faces when they see these creepy fingers poking out of the bread basket!
Preparing the Dough
First, let’s wake up that sleepy yeast. In a small bowl, mix your warm water (test it on your wrist—it should feel comfortably warm, not hot), sugar, and yeast. Let it sit for about 5 minutes until it gets foamy like a tiny science experiment. If it doesn’t bubble, your water might have been too hot or cold—just start over (witches are patient creatures).
In a larger bowl, whisk together the flour and salt. Make a well in the center and pour in the yeast mixture along with the olive oil. Stir with a wooden spoon until shaggy, then turn it out onto a lightly floured surface. Now comes the fun part—kneading! Push the dough with the heels of your hands, fold it over, and repeat for about 5-7 minutes until it’s smooth and elastic. It should feel like a witch’s earlobe—soft but springy. Too sticky? Add a sprinkle more flour. Too dry? A few drops of water will do the trick.
Pop the dough back in the bowl, cover with a damp towel, and let it rise in a warm spot for about an hour. It should double in size—I like to whisper “abracadabra” to mine for good measure.
Shaping the Witch’s Fingers
Now for the transformation! Punch down the dough (take out all your Halloween frustrations here) and divide it into 24 equal pieces—I eyeball it, but you can weigh them for perfection. Roll each piece into a skinny rope about 4-5 inches long. Don’t worry about uniformity—real witch fingers aren’t identical!
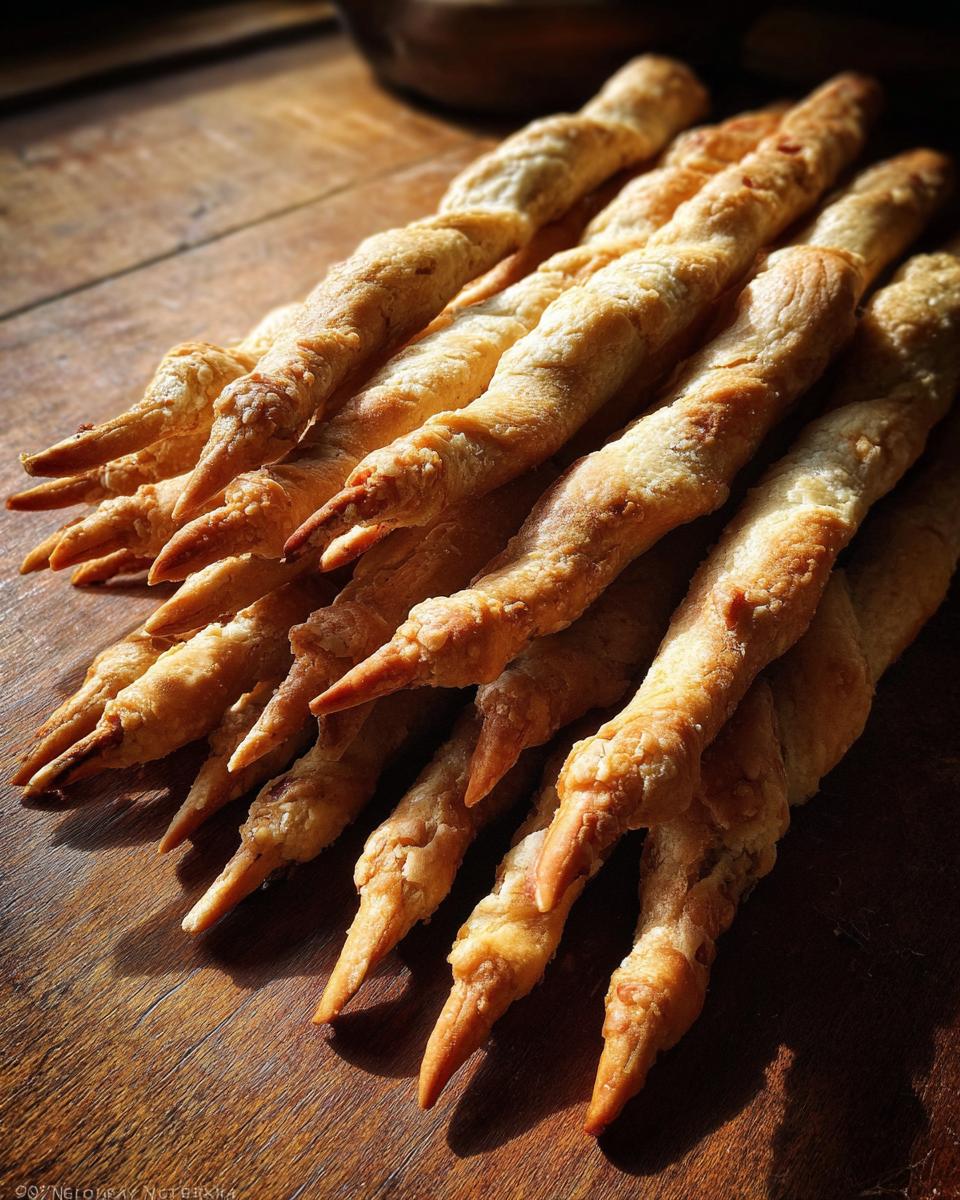
Here’s the key to creepy realism: pinch one end to create a knobby “knuckle,” then use the blunt side of a knife to make two shallow indentations about an inch apart for the other knuckles. Press a whole almond firmly into the opposite end for the nail. Want extra horror? Dab a tiny bit of red food coloring on the almond tip with a toothpick for that freshly-picked blood look.
Baking and Finishing Touches
Preheat your oven to 375°F while you arrange your witch fingers on a parchment-lined baking sheet—space them about an inch apart so they don’t hold hands while baking. Beat your egg with a splash of water and brush it lightly over each finger for that golden-brown glow (this keeps them from looking too ghostly pale).
Bake for 15-20 minutes until they’re lightly golden and sound hollow when tapped. Let them cool slightly—if you can resist!—before serving. Pro tip: arrange them crawling out of a hollowed-out pumpkin or “graveyard” dip bowl for maximum Halloween drama. Watch them disappear faster than a black cat at midnight!
Tips for Perfect Witch’s Fingers Breadsticks
Want your witch fingers to look like they were plucked straight from a spellbook? Here are my tried-and-true tricks:
- Rest your dough for 10 minutes after dividing—it relaxes the gluten so your fingers won’t shrink back when shaping.
- Slivered almonds work wonders if whole almonds look too bulky on petite fingers (or just break them in half).
- Dust your hands with flour when rolling—sticky dough turns into creepy-crawly blobs fast!
- For extra drama, paint “dirt” under the nails with a mix of cocoa powder and water after baking.
Remember: imperfect fingers look more realistic—witches aren’t manicured!
Variations for Witch’s Fingers Breadsticks
Feel like putting your own spooky spin on these? Try these easy swaps:
- Gluten-free ghouls: Swap all-purpose flour for a 1:1 gluten-free blend—just add an extra tablespoon of water.
- Vegan witches: Use maple syrup instead of egg wash, and skip the almonds or use pumpkin seeds.
- Halloween colors: Knead in a few drops of green or purple food coloring for zombie or witchy vibes.
- Cheesy claws: Mix ¼ cup grated parmesan into the dough for savory fingers that’ll vanish at parties.
Baking magic is all about experimenting—just don’t blame me if your kitchen turns into a haunted bakery!
Serving and Storing Witch’s Fingers Breadsticks
These creepy breadsticks deserve a dramatic Halloween spread! I love arranging them crawling out of a hollowed-out pumpkin bowl filled with bloody marinara or “ectoplasm” hummus. For parties, stick them upright in a loaf of black bread—instant witch’s hand centerpiece! Store leftovers (if you have any!) in an airtight container for up to 3 days—they’ll lose some crispness but stay delicious. Warm them briefly in the oven before serving again for that fresh-from-the-cauldron feel.
Nutritional Information
Okay, let’s be real—witches probably don’t count calories, but in case you’re curious (or need to fend off nutrition-minded mummies at your party), here’s the scoop: Each creepy finger breadstick clocks in at about 80 calories, with 2g fat and 13g carbs. That’s based on my exact ingredients, though—your mileage may vary depending on flour brands, almond sizes, or if you go wild with the olive oil. They’re definitely not health food, but hey, it’s Halloween! Consider it part of your “spooky balanced diet.” Just don’t ask me how many I’ve eaten in one sitting while watching horror movies—some mysteries are better left unsolved.
FAQs About Witch’s Fingers Breadsticks
Can I make these ahead of time? Absolutely! Shape the fingers and refrigerate them (unbaked) overnight—just pop them in the oven before your party. Already baked? They’ll keep for 3 days in an airtight container, though they’re best fresh.
Help! My almond nails keep falling off! No cursed fingers here—press those almonds in deep! If they’re stubborn, dab a tiny bit of egg wash underneath as “glue” before baking. Slivered almonds tend to stay put better too.
Can kids help with shaping? Oh, they’ll love it! Little hands are perfect for rolling dough snakes. Just supervise the knife part (knuckle indentations) and let them go wild with almond placement. Messy fingers = authentic witch vibes!
Why didn’t my dough rise? Likely culprit? Dead yeast. Always check that your water’s between 105-110°F—too hot kills it, too cold puts it to sleep. If your mixture doesn’t foam after 10 minutes, start over with fresh yeast.
Any dip recommendations? Blood-red marinara is classic, but try green guacamole for “witch’s brew” or black bean dip for eerie contrast. Bonus: the stains make the fingers look even creepier!
Share Your Creations!
I live for your spooky kitchen magic—tag me in photos of your witch fingers on Instagram or leave a comment below! Did yours turn out terrifyingly perfect or hilariously wonky? Either way, I want to see those creepy creations! You can also find more Halloween recipe inspiration on Pinterest.
Print
Creepy Witch’s Fingers Breadsticks Recipe (24 Spooky Snacks)
- Total Time: 1 hour 40 minutes
- Yield: 24 breadsticks
- Diet: Vegetarian
Description
Spooky and fun breadsticks shaped like witch’s fingers, perfect for Halloween parties.
Ingredients
- 2 cups all-purpose flour
- 1 tsp salt
- 1 tbsp sugar
- 1 packet active dry yeast
- 3/4 cup warm water
- 2 tbsp olive oil
- 1 egg (for egg wash)
- 24 whole almonds
- Red food coloring (optional)
Instructions
- Dissolve yeast in warm water with sugar and let sit for 5 minutes.
- Mix flour and salt in a bowl, then add yeast mixture and olive oil.
- Knead dough for 5-7 minutes until smooth.
- Cover and let rise for 1 hour.
- Divide dough into 24 pieces and roll each into a finger shape.
- Press an almond into one end to create a fingernail.
- Use a knife to make knuckle indentations.
- Brush with egg wash and bake at 375°F for 15-20 minutes.
- Add red food coloring to almond tips if desired.
Notes
- Let dough rest for easier shaping.
- Use slivered almonds if whole almonds are too large.
- Store in an airtight container for up to 3 days.
- Prep Time: 1 hour 20 minutes
- Cook Time: 20 minutes
- Category: Appetizer
- Method: Baked
- Cuisine: American