Skip to content
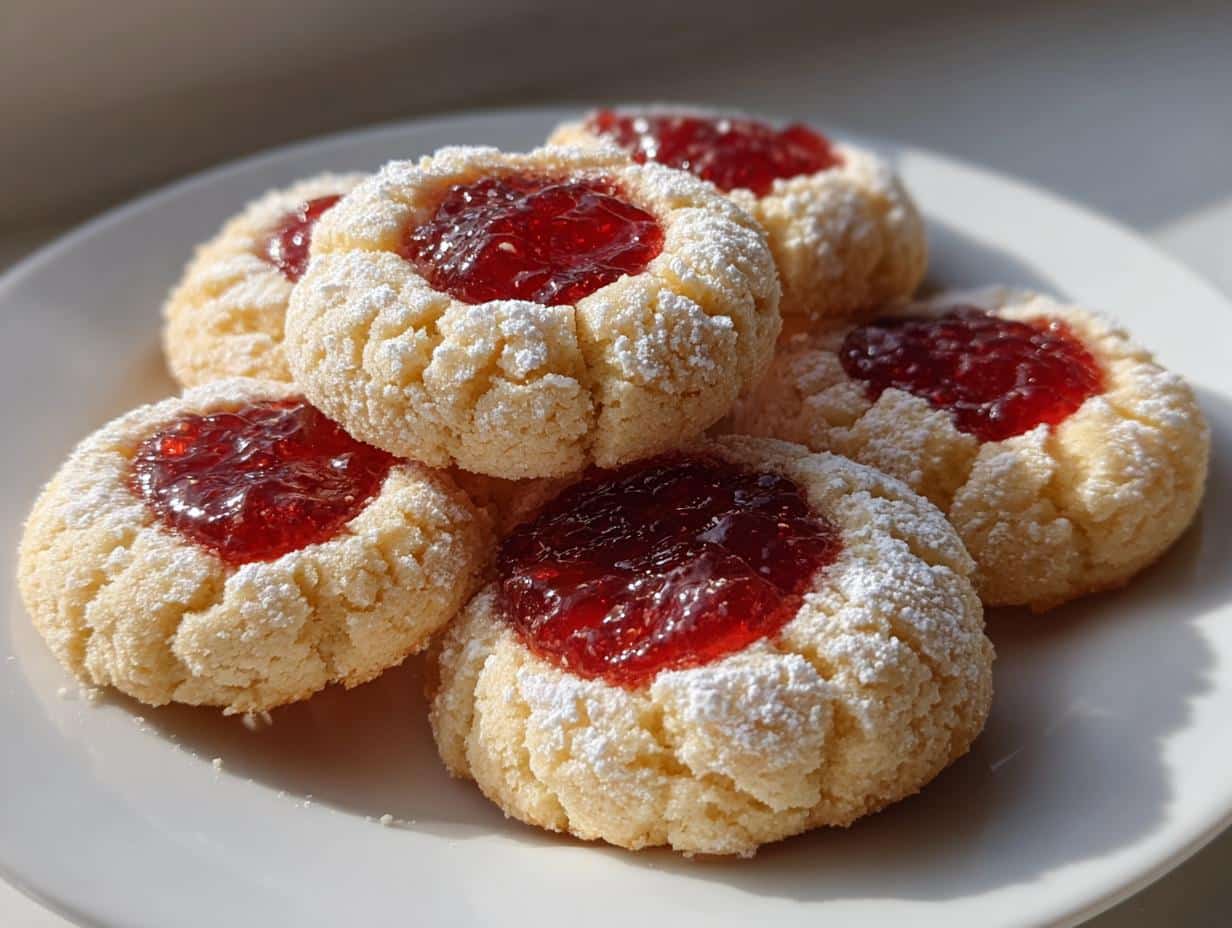
You know those recipes that just make you smile the whole time you’re baking? That’s exactly how I feel about these Strawberry Kiss Cookies – they’re pure happiness in every bite! I first made them for my niece’s tea party last spring, and now they’re my go-to treat for any occasion. The magic happens when buttery cookie dough meets sweet strawberry jam, creating these little bites of joy with the softest texture. Trust me, one whiff of that strawberry-scented dough and you’ll be hooked just like I was. These cookies are simple enough for beginners but special enough to impress anyone!
Why You’ll Love These Strawberry Kiss Cookies – Sweet Craft
Oh, where do I even begin? These cookies have stolen my heart (and probably will steal yours too) for so many reasons:
- They come together in a flash – Seriously, from bowl to baking sheet in under 20 minutes! Perfect for when surprise guests show up or that sudden cookie craving hits.
- The sweetness is just right – Not too sugary, not too bland. That strawberry jam kiss in the center? Absolute perfection.
- They’re versatile little darlings – Tea parties, Valentine’s Day, summer picnics… these cookies fit every occasion beautifully.
- The texture will melt in your mouth – Soft, buttery crumb with that delightful jam surprise? Yes please!
Honestly, I could go on and on – but you’ll understand once you taste them!
Ingredients for Strawberry Kiss Cookies – Sweet Craft
Gathering your ingredients is like assembling a little cookie dream team – each one plays a crucial role in creating these sweet strawberry delights. Here’s what you’ll need:
- 1 cup all-purpose flour – The trusty foundation of our cookie
- 1/2 cup unsalted butter, softened – And I mean properly softened (leave it out for about 30 minutes – not melted!)
- 1/4 cup granulated sugar – For that perfect sweetness balance
- 1/4 cup powdered sugar – The secret to our cookies’ delicate texture
- 1/2 tsp strawberry extract – This is where the magic strawberry flavor comes alive
- 1/4 tsp salt – Just enough to make all the flavors pop
- 1/4 cup strawberry jam – Use the good stuff! No need to heat it
- 1/2 cup powdered sugar (for dusting) – Because everything looks prettier with a snowy dusting
A quick tip from my many batches: measure your flour correctly! Spoon it into the measuring cup and level it off – don’t scoop directly from the bag or you’ll end up with too much. Trust me, I learned this the hard way with some hockey puck cookies back in my early baking days!
Equipment You’ll Need
Now let’s talk tools! One of the things I love about these Strawberry Kiss Cookies is how simple they are to make – no fancy equipment required. Here’s what you’ll want to have ready:
- A good mixing bowl – Medium-sized works perfectly for this batch
- Baking sheet – Standard half-sheet pan is my go-to
- Parchment paper – Lifesaver for easy cleanup and no sticking
- Sifter or fine mesh strainer – For that lovely light flour texture
That’s really it! I sometimes use my stand mixer when I’m feeling lazy, but honestly, a wooden spoon and some elbow grease work just as well for these little beauties. The simpler the better, right?
How to Make Strawberry Kiss Cookies – Sweet Craft
Alright, let’s get to the fun part – making these strawberry dream cookies! I promise it’s easier than you think, and the results will make you feel like a baking superstar. Just follow these simple steps, and you’ll have perfect Strawberry Kiss Cookies every time.
Step 1: Creaming the Butter and Sugars
First things first – preheat that oven to 350°F (175°C). While it’s heating up, let’s work some magic with the butter and sugars. In your mixing bowl, combine the softened butter, granulated sugar, and powdered sugar. Now here’s my secret – beat them together until the mixture turns pale and fluffy, about 2-3 minutes. You’ll know it’s ready when it looks like cloud-like perfection! This step is crucial for that melt-in-your-mouth texture we love.
Step 2: Incorporating Dry Ingredients
Time to bring in the dry team! Sift together your flour and salt – yes, sifting matters here! It prevents lumps and makes the cookies extra tender. Gradually add this to your butter mixture along with the strawberry extract. Mix just until combined – don’t overdo it or your cookies might get tough. The dough should come together nicely and pull away from the sides of the bowl.
Step 3: Shaping and Filling the Cookies
Now for the fun part – shaping our little cookie kisses! Roll tablespoon-sized portions of dough into smooth balls between your palms. Place them about 2 inches apart on your parchment-lined baking sheet. Here comes the signature move – use your thumb (clean, of course!) to make a gentle indentation in each cookie. Not too deep – just enough to hold about 1/4 teaspoon of strawberry jam. Pro tip: if the dough sticks to your thumb, dip it lightly in flour first!
Step 4: Baking and Finishing Touches
Into the oven they go! Bake for 12-15 minutes until the edges just start turning that perfect light golden color. The centers might still look slightly soft – that’s exactly what we want! Let them cool on the baking sheet for 5 minutes before transferring to a wire rack. Once completely cool, dust generously with powdered sugar. I like to use a small sieve for that pretty, even snowfall effect. And voila – your Strawberry Kiss Cookies are ready to steal hearts!
Tips for Perfect Strawberry Kiss Cookies – Sweet Craft
After making these Strawberry Kiss Cookies more times than I can count (and eating way too many test batches!), I’ve picked up some foolproof tricks that’ll guarantee cookie success every time. These are the little things that make all the difference!
Butter temperature is everything
I can’t stress this enough – your butter needs to be just right. Too cold and it won’t cream properly, too warm and your cookies will spread like pancakes. The perfect test? Press your finger into the butter – it should leave an indent without sinking all the way through. If you forgot to take it out ahead of time (we’ve all been there!), cut it into small cubes and let it sit for about 15 minutes.
The jam filling sweet spot
Here’s where I messed up my first batch – overfilled those thumbprints and ended up with jam volcanoes! About 1/4 teaspoon per cookie is perfect. And use room temperature jam straight from the jar – heating it makes it too runny. If your jam is extra thick, give it a quick stir to loosen it up before dolloping.
Watch that baking time
These cookies go from perfect to overdone in what feels like seconds. Set your timer for 12 minutes and start checking – you want just the faintest golden hint around the edges. The centers should still look slightly underdone when you take them out – they’ll firm up as they cool. And whatever you do, resist the urge to move them right away! Those 5 minutes of cooling on the pan are crucial.
The powdered sugar secret
Wait until the cookies are completely cool before dusting with powdered sugar. I learned this the hard way when my first attempt turned into a sticky mess! For that bakery-perfect look, use a fine mesh sieve and hold it high above the cookies – the sugar will fall like fresh snow. And if you’re feeling fancy, a tiny pinch of freeze-dried strawberry powder mixed into the sugar makes them extra special.
Remember – baking is supposed to be fun! Don’t stress if your first batch isn’t picture-perfect. Mine certainly weren’t when I started. The most important ingredient is always love – and maybe a little extra powdered sugar to cover any mistakes!
Variations and Substitutions
One of the best things about these Strawberry Kiss Cookies is how easily you can mix things up! Over the years, I’ve played around with all sorts of fun twists – here are my favorite ways to customize these sweet treats:
Flavor Twists That Work Wonders
Not a strawberry fan? No problem! Swap the strawberry extract for vanilla or almond extract – both create deliciously different vibes. My neighbor swears by using lemon zest instead of strawberry extract with raspberry jam for a tangy surprise. And if you’re feeling adventurous, a tiny pinch of cardamom in the dough adds such a lovely, unexpected warmth.
Jam Alternatives That Shine
While strawberry jam is classic, don’t be afraid to experiment with other preserves. Raspberry jam makes a gorgeous ruby-red center, and apricot preserves give a lovely golden hue. For holiday versions, I’ve used cranberry sauce (the thick kind!) with amazing results. Just steer clear of super-runny jams or jelly – they tend to bubble over during baking.
Dietary Swaps That Actually Work
Need gluten-free? I’ve had success using 1-to-1 gluten-free flour with no other changes. For dairy-free friends, vegan butter works surprisingly well – just chill the dough for 30 minutes before shaping to help it firm up. And if you’re watching sugar, you can reduce the powdered sugar dusting or skip it altogether – the cookies are still delicious without!
The beauty of this recipe is how forgiving it is. My only rule? Whatever variations you try, make sure to taste-test a few (okay, maybe more than a few) before sharing with others. You know, just to be thorough!
Serving and Storing Strawberry Kiss Cookies – Sweet Craft
Now that you’ve baked these gorgeous Strawberry Kiss Cookies, let’s talk about how to keep them tasting fresh and fabulous! These little gems are best enjoyed the day they’re made, but with proper storage, they’ll stay delicious for days. Here’s everything I’ve learned about keeping them perfect:
The Best Way to Serve These Sweet Treats
These cookies shine brightest at room temperature – the butter softens just enough to make them melt-in-your-mouth tender. I love arranging them on a pretty cake stand for tea parties or packing them in cute little boxes as edible gifts. For extra pizzazz, serve them with fresh strawberries on the side – the colors look stunning together!
Storing Like a Pro
Air is the enemy of fresh cookies! Always store them in an airtight container at room temperature. Layer them between sheets of parchment paper if you’re stacking them – this prevents sticking and keeps that beautiful powdered sugar dusting intact. They’ll stay fresh for about 5 days this way (if they last that long in your house!).
Freezing for Future Cookie Cravings
Yes, you can freeze these beauties! Here’s how I do it: let the cookies cool completely, then freeze them uncovered on a baking sheet for about an hour. This “flash freeze” prevents them from sticking together. Once firm, transfer to a freezer bag or airtight container with parchment between layers. They’ll keep for up to 3 months this way. Thaw at room temperature for about an hour before serving – a quick dusting of fresh powdered sugar brings them right back to life!
Quick Refresh for Day-Old Cookies
If your cookies have been sitting out and lost their fresh-baked magic, here’s my trick: pop them in a 300°F oven for 2-3 minutes to revive that just-baked texture. Let them cool slightly before dusting with more powdered sugar. It’s like giving them a little spa treatment!
One last tip from my cookie-loving heart: these make amazing ice cream sandwiches when slightly warmed! Just sandwich a scoop of vanilla ice cream between two cookies and enjoy immediately. You’re welcome!
Nutritional Information
Okay, let’s be real – we’re not eating these Strawberry Kiss Cookies because they’re health food! But if you’re curious about what’s in each sweet bite, here’s the breakdown per cookie (based on making 24 from this recipe):
- Calories: 80
- Total Fat: 4g (2.5g saturated)
- Cholesterol: 10mg
- Sodium: 25mg
- Total Carbohydrates: 10g
- Sugars: 6g
- Protein: 1g
Now, here’s my little disclaimer (because I’m not a nutritionist, just a cookie enthusiast!): Nutritional values are estimates and vary based on ingredients used. The exact numbers will change depending on your specific brand of butter, jam, etc. But honestly? When you’re enjoying one of these strawberry-kissed delights, the only number that really matters is how many you can eat before feeling blissfully happy!
Frequently Asked Questions
Over the years, I’ve gotten so many questions about these Strawberry Kiss Cookies – and I love sharing all the little tips and tricks I’ve learned! Here are the most common things people ask me:
Can I freeze these cookies?
Absolutely! These little beauties freeze like champs. Just make sure they’re completely cooled first, then pop them in a freezer bag with parchment between layers. They’ll keep happily for up to 3 months. When cookie cravings hit, just thaw at room temperature for about an hour and give them a fresh dusting of powdered sugar.
How long do Strawberry Kiss Cookies stay fresh?
In an airtight container at room temperature, they’ll stay delicious for about 5 days. The jam helps keep them moist! If they start to lose their freshness, a quick 2-3 minute warm-up in a 300°F oven works wonders.
Can I use fresh strawberries instead of jam?
While I love the idea (and the fresh strawberry flavor!), fresh berries release too much moisture during baking and can make the cookies soggy. Stick with good quality jam for that perfect kiss of strawberry goodness in every bite.
Why did my cookies spread too much?
Ah, the classic cookie conundrum! Usually this means your butter was too soft or the dough got too warm. Next time, try chilling the shaped cookies for 15 minutes before baking. And always make sure your oven is fully preheated – that initial blast of heat helps set the edges quickly.
Can I make these without strawberry extract?
Of course! The jam still gives plenty of strawberry flavor. If you skip the extract, you might want to add an extra 1/4 teaspoon of vanilla to round out the flavor. Or get creative with other extracts – almond or lemon would be lovely!
Try this recipe and share your results in the comments! I’d love to hear about your strawberry cookie adventures and any fun variations you come up with. Happy baking!
Print
15 Irresistible Strawberry Kiss Cookies – Sweet Craft Recipe
- Total Time: 30 minutes
- Yield: 24 cookies
- Diet: Vegetarian
Description
Strawberry Kiss Cookies are sweet, fruity treats perfect for any occasion. Soft, buttery cookies with a hint of strawberry flavor.
Ingredients
- 1 cup all-purpose flour
- 1/2 cup unsalted butter, softened
- 1/4 cup granulated sugar
- 1/4 cup powdered sugar
- 1/2 tsp strawberry extract
- 1/4 tsp salt
- 1/4 cup strawberry jam
- 1/2 cup powdered sugar (for dusting)
Instructions
- Preheat oven to 350°F (175°C). Line a baking sheet with parchment paper.
- In a bowl, cream butter, granulated sugar, and powdered sugar until fluffy.
- Add strawberry extract and mix well.
- Sift flour and salt into the mixture. Stir until a dough forms.
- Roll dough into small balls and place on the baking sheet.
- Press your thumb into each cookie to make an indentation.
- Fill each indentation with strawberry jam.
- Bake for 12-15 minutes or until edges are lightly golden.
- Let cookies cool, then dust with powdered sugar.
Notes
- Store in an airtight container for up to 5 days.
- Replace strawberry extract with vanilla for a different flavor.
- Prep Time: 15 minutes
- Cook Time: 15 minutes
- Category: Dessert
- Method: Baking
- Cuisine: American