Skip to content
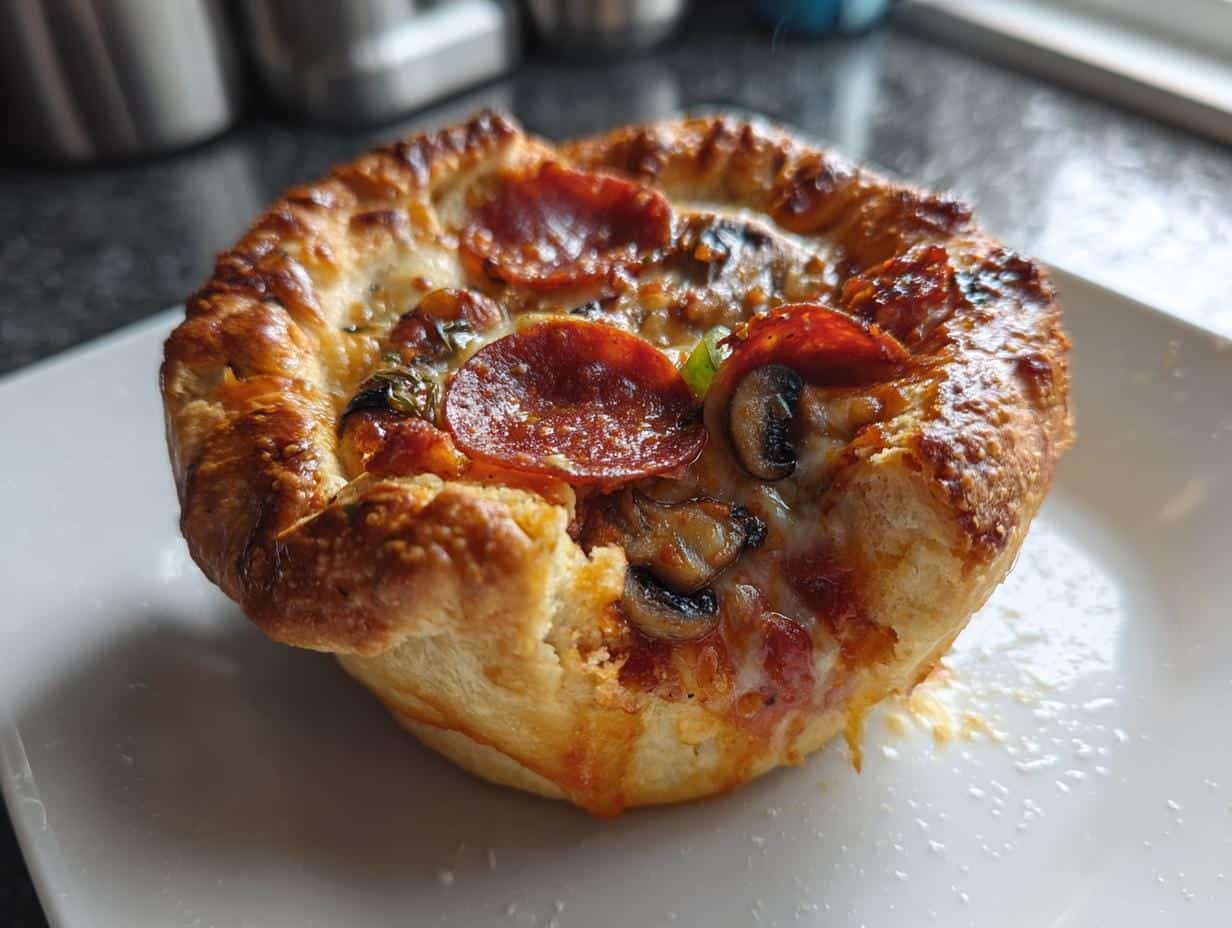
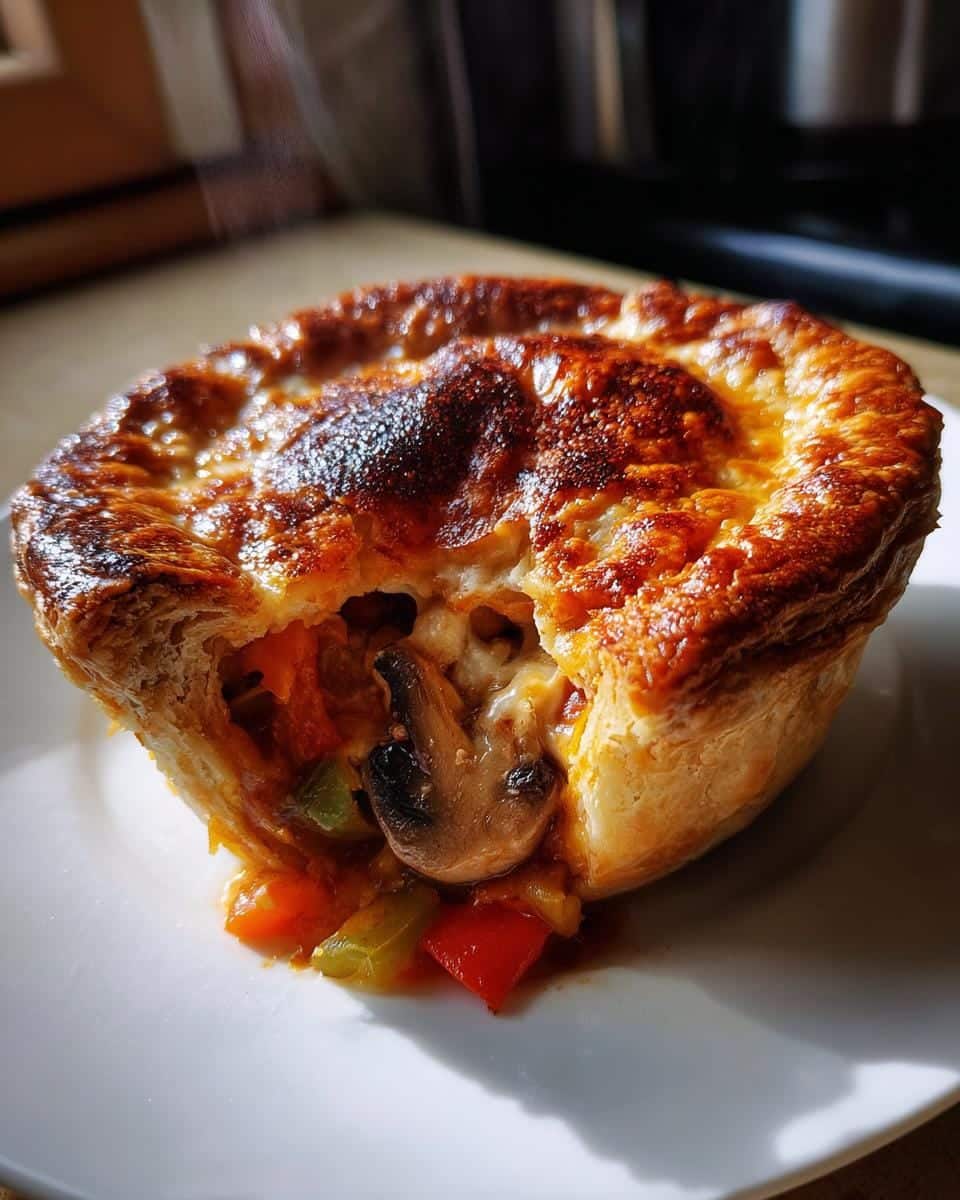
I’ll never forget the first time I made pizza pot pies – it was during a chaotic game night when my friends demanded pizza but I wanted something more fun than the usual delivery box. These adorable little personal-sized pies are everything I love about pizza, but with bonus crispy edges and a surprise inside that makes everyone at the table ooh and ahh. The best part? You can customize each one with different toppings to please picky eaters (my nephew only wants pepperoni while my sister insists on extra mushrooms). They’re faster to make than you’d think, and that golden-brown crust brushing against the ramekin? Pure magic.
What started as a kitchen experiment has become my go-to comfort food when I want pizza night to feel special. These pizza pot pies capture all the cheesy, saucy goodness of your favorite slice but in a perfectly portioned package that’s just begging to be pulled apart while steaming hot. Trust me, once you try the first bite with that crispy dough giving way to molten cheese, you’ll understand why my friends now request these more than traditional pizza!
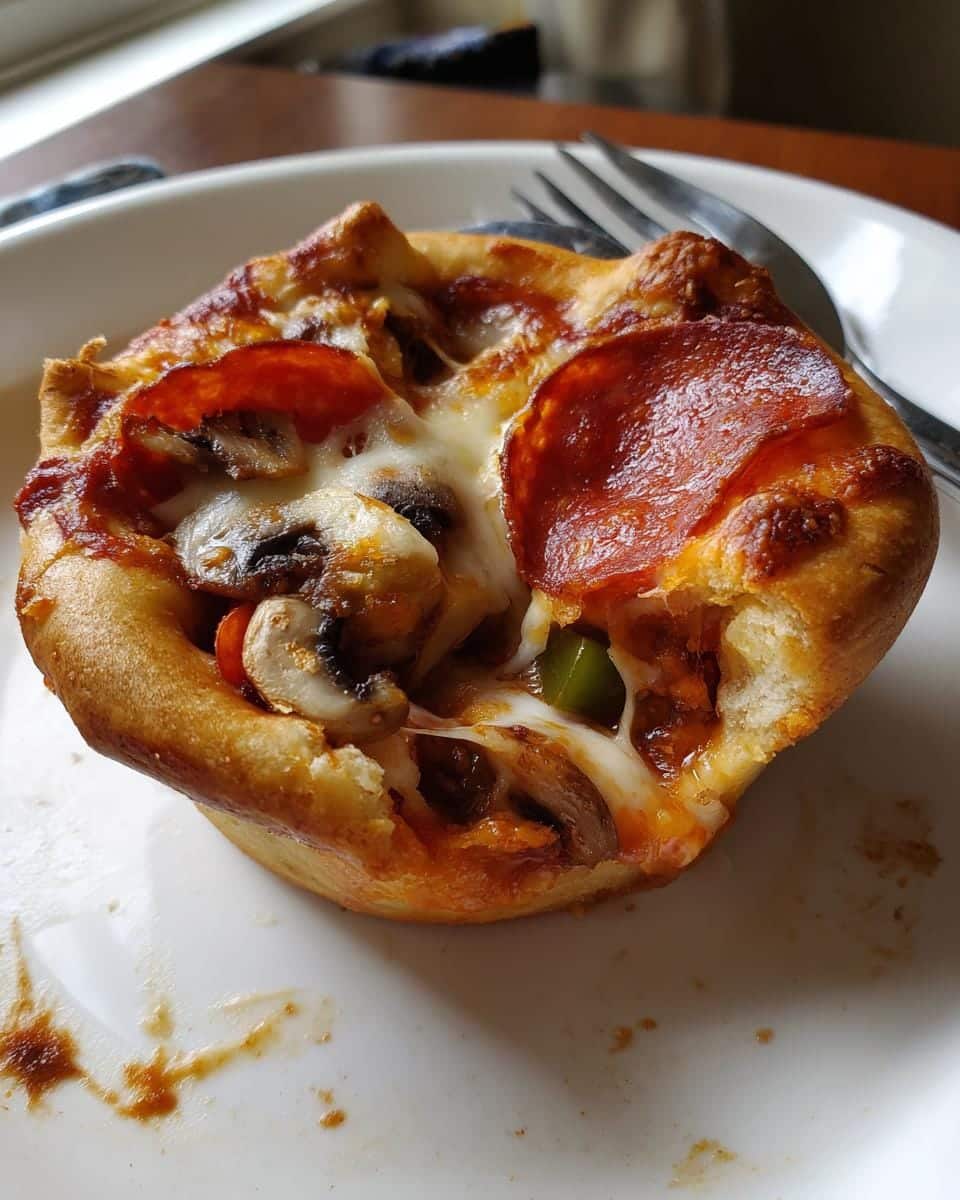
Table of contents:
Why You’ll Love These Pizza Pot Pies
These little pizza pot pies stole my heart (and my friends’ appetites) for so many reasons. First off, they’re ridiculously easy to throw together—even on busy weeknights when takeout seems tempting. The dough comes together in minutes, and the filling? Just layer and go! Here’s why you’ll adore them:
- Customizable for everyone: Picky eaters? No problem. Make one with all meats, another veggie-loaded—it’s like a pizza buffet in ramekins.
- Perfect portion control: No more fighting over who got the bigger slice (we’ve all been there).
- Party magic: Serve them straight from the oven for that “wow” factor—guests love peeling back the crispy crust to reveal the cheesy center.
Oh, and that sauce-soaked, golden edge? Worth baking them just for that alone.
Ingredients for Pizza Pot Pies
One of my favorite things about these pizza pot pies is how simple the ingredient list is – you probably have most of this in your fridge right now! Here’s everything you’ll need for four perfectly portioned personal pies:
- 1 cup pizza dough (homemade or store-bought – no judgment here!)
- 1/2 cup pizza sauce (I use my favorite jarred marinara in a pinch)
- 1 cup shredded mozzarella cheese (freshly grated melts better than pre-shredded)
- 1/2 cup pepperoni slices (or swap in cooked sausage if you prefer)
- 1/4 cup diced bell peppers (about half a medium pepper – I use colorful ones for fun)
- 1/4 cup sliced mushrooms (baby bellas are my go-to for extra flavor)
- 1 tsp Italian seasoning (that little jar in your spice rack finally gets its moment!)
- 1 tbsp olive oil (for that gorgeous golden crust)
Psst – that bell pepper measurement is about what fits in my palm – no need to stress over exact amounts here!
Equipment You’ll Need
Don’t worry—you won’t need any fancy gadgets for these pizza pot pies! Just grab:
- 4 oven-safe ramekins (6-ounce size works perfectly)
- Rolling pin (or an empty wine bottle in a pinch—I’ve been there!)
- Pastry brush (for that shiny olive oil glaze)
- Baking sheet (to catch any cheesy drips—trust me, it happens)
That’s it! Now let’s get those little pies bubbling.
How to Make Pizza Pot Pies
Okay, let’s dive into making these adorable pizza pot pies! Don’t let the fancy look fool you – the process is as fun as eating them. I’ll walk you through each step just like I did when teaching my niece (who nailed it on her first try!).
Preparing the Dough
First, grab that pizza dough and let’s get rolling! Here’s how I do it:
- Lightly flour your counter (or that clean spot on your kitchen table) and roll out the dough to about 1/4-inch thickness.
- Use a bowl or large glass to cut out 4 circles slightly larger than your ramekins – I aim for about 5 inches across.
- Grease those ramekins well with olive oil or cooking spray – this is crucial for easy removal later!
- Gently press each dough circle into a ramekin, letting the edges drape over the sides like a cozy blanket. No need to be perfect – rustic is charming!
Layering the Fillings
Now comes the fun part – building those flavor layers! My golden rule? Don’t skimp on the cheese.
- Start with a tablespoon of sauce in each ramekin, spreading it evenly over the dough.
- Sprinkle half the cheese – this first layer melts into the sauce beautifully.
- Add your toppings! I like to do pepperoni first, then veggies, so everything gets nice and toasty.
- Top with remaining cheese – this creates that glorious stretchy cheese pull we all love.
- Fold the dough edges over the filling, pleating as you go – think rustic, not perfect!
Baking the Pizza Pot Pies
Almost there! Here’s how to get that perfect golden finish:
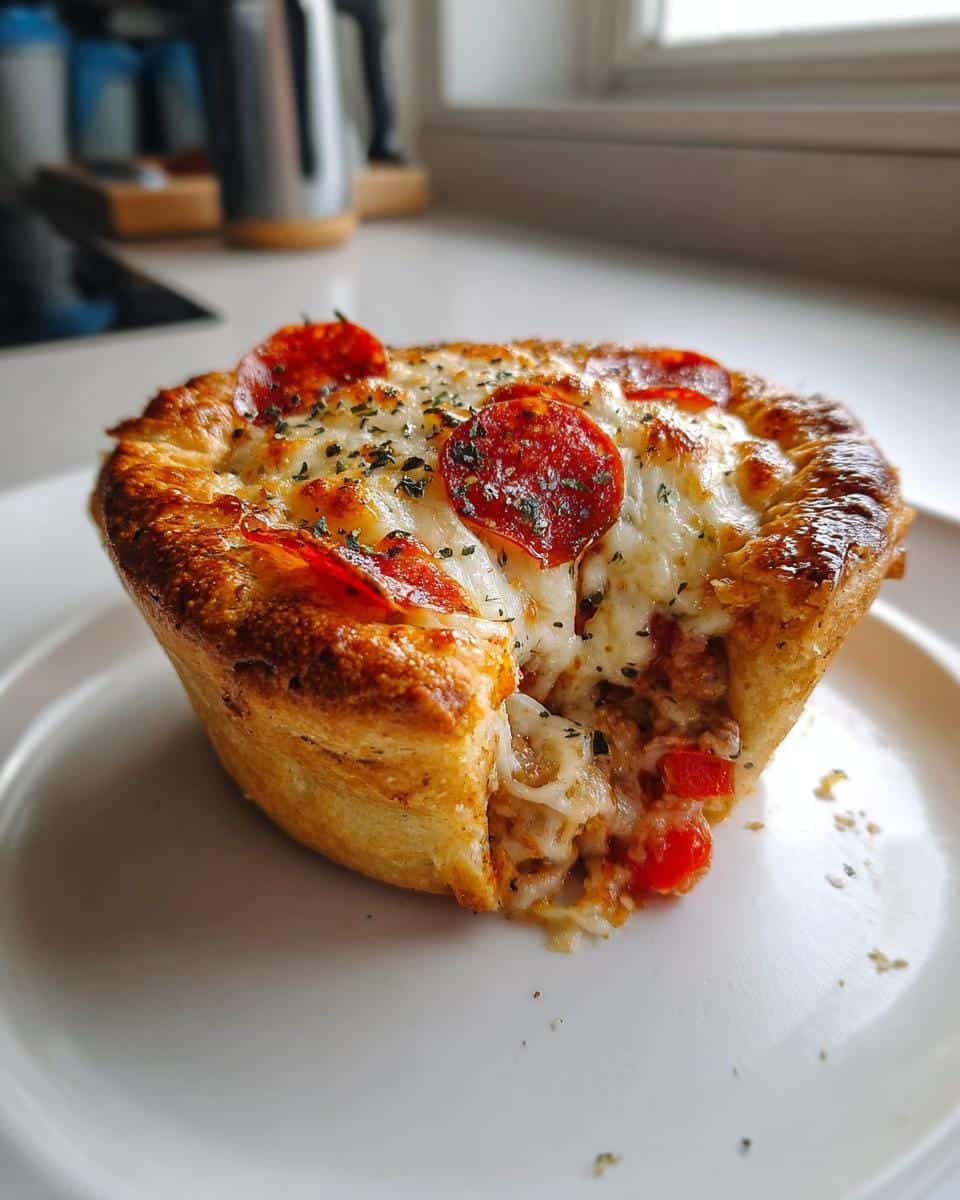
- Brush the folded dough with olive oil and sprinkle with Italian seasoning.
- Pop them in a 375°F oven for 20-25 minutes until the crust turns golden brown.
- You’ll know they’re done when the cheese is bubbling and the kitchen smells like heaven.
- Let them cool for 5 minutes – I know it’s hard to wait, but molten cheese burns are no joke!
Pro tip: If your oven runs hot, check at 18 minutes. That first crispy bite? Worth every second!
Tips for Perfect Pizza Pot Pies
After making these pizza pot pies countless times (and surviving a few early disasters), here are my foolproof secrets:
- Grease those ramekins well – I learned this the hard way when my first batch stuck like cement!
- Pre-bake the crust for 5 minutes if you want extra crispiness – just poke the dough with a fork first.
- Don’t overfill – leave about 1/4 inch at the top so cheese bubbles don’t overflow.
- Let them rest for 5 minutes after baking – the filling sets perfectly this way.
Oh, and always make extras – they disappear fast!
Variations for Pizza Pot Pies
One of my favorite things about pizza pot pies is how endlessly adaptable they are! Here are some delicious twists I’ve tried (and loved) over the years:
- Meat Lover’s Dream: Swap in cooked Italian sausage, crispy bacon bits, and ham cubes alongside the pepperoni – just be sure to drain any excess grease first!
- Veggie Delight: Load up with roasted zucchini, caramelized onions, black olives, and sun-dried tomatoes. I sometimes add a sprinkle of feta cheese for extra zing.
- Hawaiian Twist: My controversial but delicious combo – Canadian bacon with pineapple chunks and a drizzle of barbecue sauce instead of pizza sauce (don’t knock it till you try it!).
- Gluten-Free Option: Use your favorite GF pizza dough (the pre-made kind works great here) and check that all toppings are GF-friendly.
- Breakfast Pizza Pot Pie: For weekend brunch, I fill them with scrambled eggs, breakfast sausage, hash browns, and cheddar cheese – bake until bubbly!
The possibilities are truly endless – I’d love to hear what creative combinations you come up with in your kitchen!
Serving and Storing Pizza Pot Pies
Here’s the best way to enjoy your pizza pot pies – serve them piping hot straight from the ramekins! I always warn guests to wait about 5 minutes after baking (that molten cheese is dangerously delicious). If you have leftovers (a rare occurrence in my house!), let them cool completely before covering and refrigerating for up to 3 days. To reheat, pop them back in a 350°F oven for 10 minutes – the microwave works in a pinch, but the crust won’t stay as crispy. Trust me, they taste just as amazing the second day!
Nutritional Information for Pizza Pot Pies
Now, I’m no nutritionist (as my love for melted cheese probably makes obvious), but here’s a general idea of what you’re getting in each delicious pizza pot pie:
- Calories: About 320 per pie – totally reasonable for a main dish!
- Fat: 18g (but hey, that includes all the good cheese and olive oil)
- Protein: 12g from all that melty mozzarella and pepperoni
- Carbs: 28g (mostly from that crispy, golden dough we all love)
A quick heads-up – these numbers can change based on your toppings. Swap in turkey pepperoni and part-skim mozzarella, and you’ll trim some fat. Load up with extra veggies? More fiber! The beauty of homemade is you control what goes in.
My philosophy? Everything in moderation – including moderation! These pizza pot pies pack plenty of flavor in sensible portions, making them a smarter choice than those giant takeout slices that leave you in a food coma.
Frequently Asked Questions About Pizza Pot Pies
I get asked about these pizza pot pies all the time – here are the most common questions (and my honest answers) from friends, family, and even curious neighbors who smelled them baking!
Can I freeze pizza pot pies?
Absolutely! These freeze beautifully. I assemble them completely but don’t bake – just wrap each ramekin tightly in plastic wrap and foil, then freeze for up to 3 months. When ready to eat, bake straight from frozen (add 5-10 extra minutes to baking time). The crust might not get quite as golden, but the flavor stays perfect!
What’s the best way to remove them from the ramekins?
Here’s my foolproof method: Run a butter knife around the edges first, then invert onto a plate while still warm. If they’re being stubborn (it happens!), let them cool for just 2 more minutes – the filling contracts slightly, making release easier. Bonus tip: those cute mini silicone spatulas work great for scooping out any cheesy bits that stick!
Can I make these without ramekins?
You bet! I’ve used oven-safe coffee mugs in a pinch (just check they’re heatproof first). For a fun twist, try muffin tins for mini pizza pot pies – reduce baking time to 15 minutes. My most creative friend even used hollowed-out bell peppers as edible “ramekins” – genius!
How do I prevent the bottoms from getting soggy?
Three words: pre-bake that crust! Just pop the dough-lined ramekins in the oven for 5 minutes before adding fillings. Also, don’t go overboard with sauce – a thin layer is plenty. I learned this after one unfortunate “pizza soup” incident early in my pot pie adventures!
What’s the best dough to use?
I love homemade dough for flavor, but store-bought works great too! Look for “pizza dough” in the refrigerated section – not biscuit dough, which behaves differently. My secret? Let refrigerated dough sit at room temp for 30 minutes first – it rolls out WAY easier without springing back.

45-Minute Pizza Pot Pies That Will Blow Your Mind
- Total Time: 40 minutes
- Yield: 4 servings
- Diet: Vegetarian
Description
A delicious twist on traditional pizza, these pizza pot pies combine the flavors of pizza in a convenient single-serve dish.
Ingredients
- 1 cup pizza dough
- 1/2 cup pizza sauce
- 1 cup shredded mozzarella cheese
- 1/2 cup pepperoni slices
- 1/4 cup diced bell peppers
- 1/4 cup sliced mushrooms
- 1 tsp Italian seasoning
- 1 tbsp olive oil
Instructions
- Preheat oven to 375°F (190°C).
- Roll out pizza dough and cut into circles to fit ramekins.
- Press dough into greased ramekins, leaving edges hanging over.
- Spread pizza sauce over dough.
- Layer cheese, pepperoni, bell peppers, and mushrooms.
- Fold dough edges over the filling.
- Brush tops with olive oil and sprinkle with Italian seasoning.
- Bake for 20-25 minutes until golden brown.
- Let cool for 5 minutes before serving.
Notes
- Use any pizza toppings you prefer.
- For crispier crust, bake an extra 5 minutes.
- Let pies cool slightly to avoid burns.
- Prep Time: 15 minutes
- Cook Time: 25 minutes
- Category: Main Course
- Method: Baking
- Cuisine: Italian-American