Skip to content
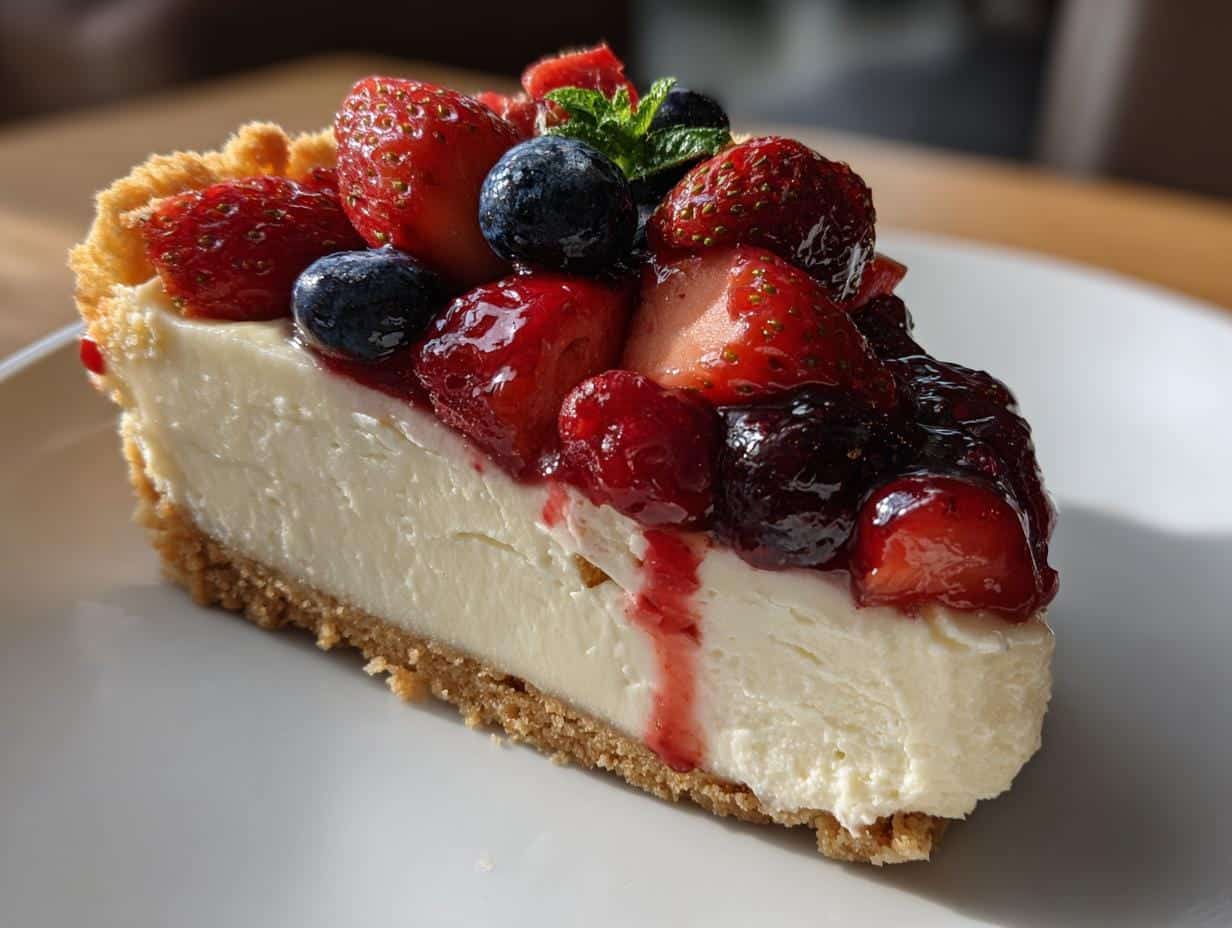
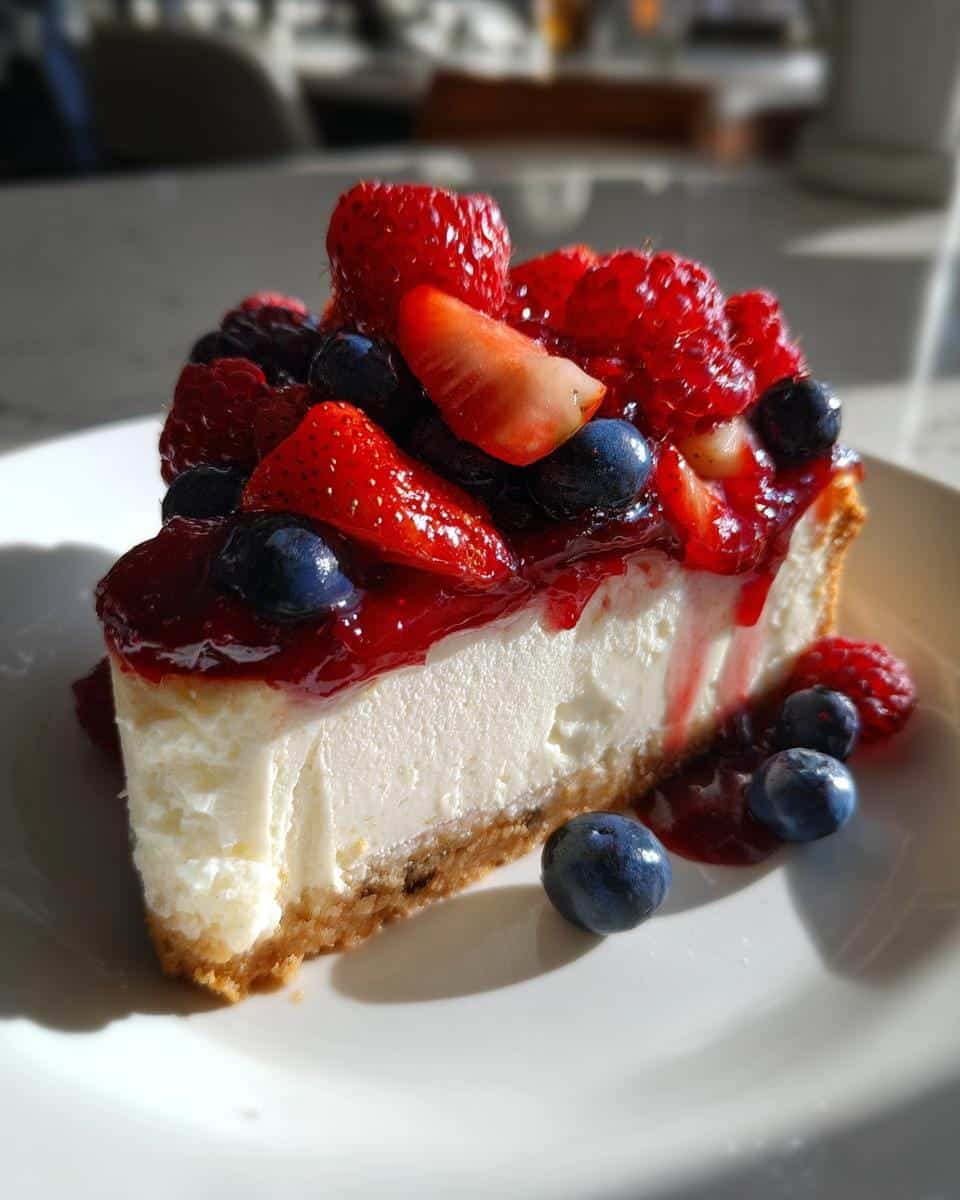
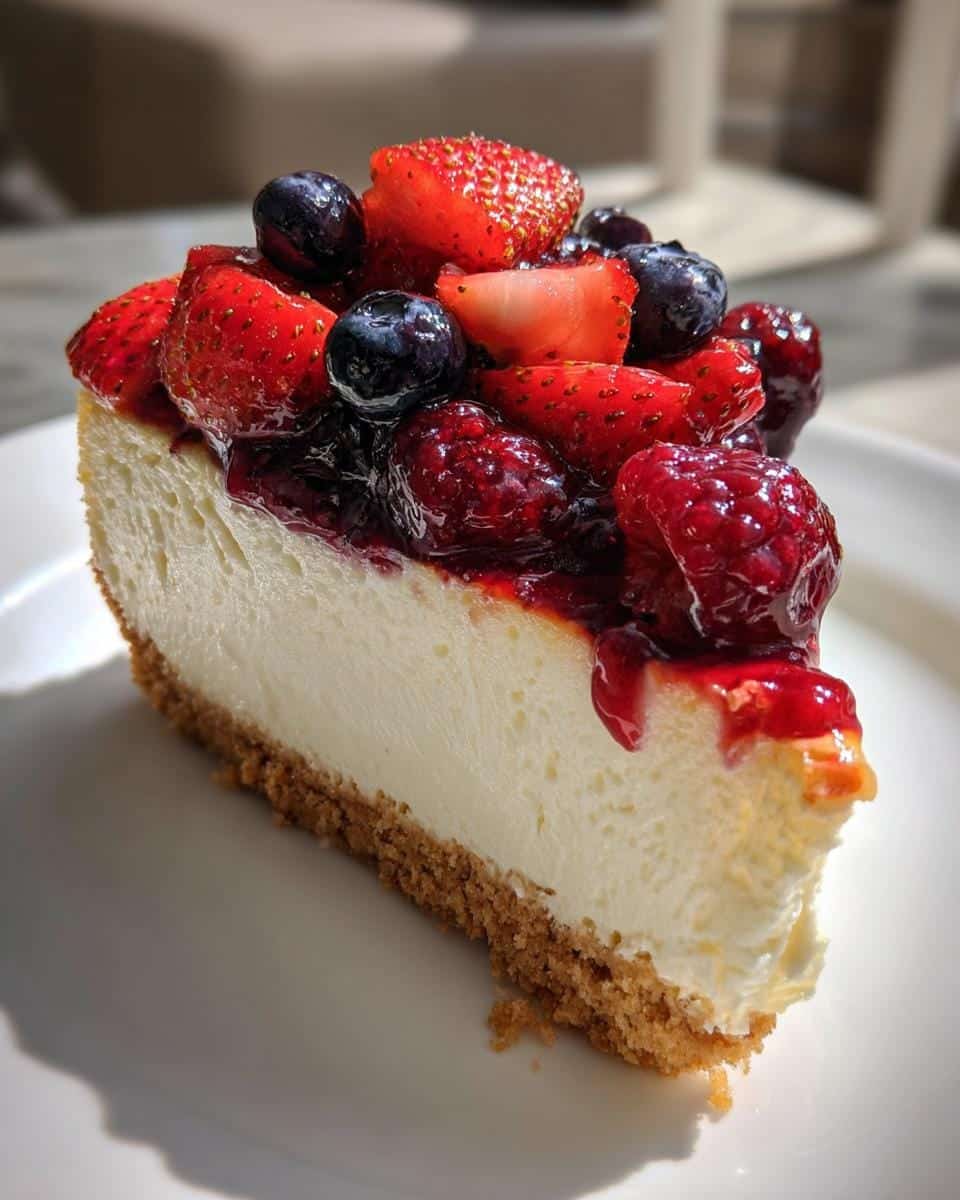
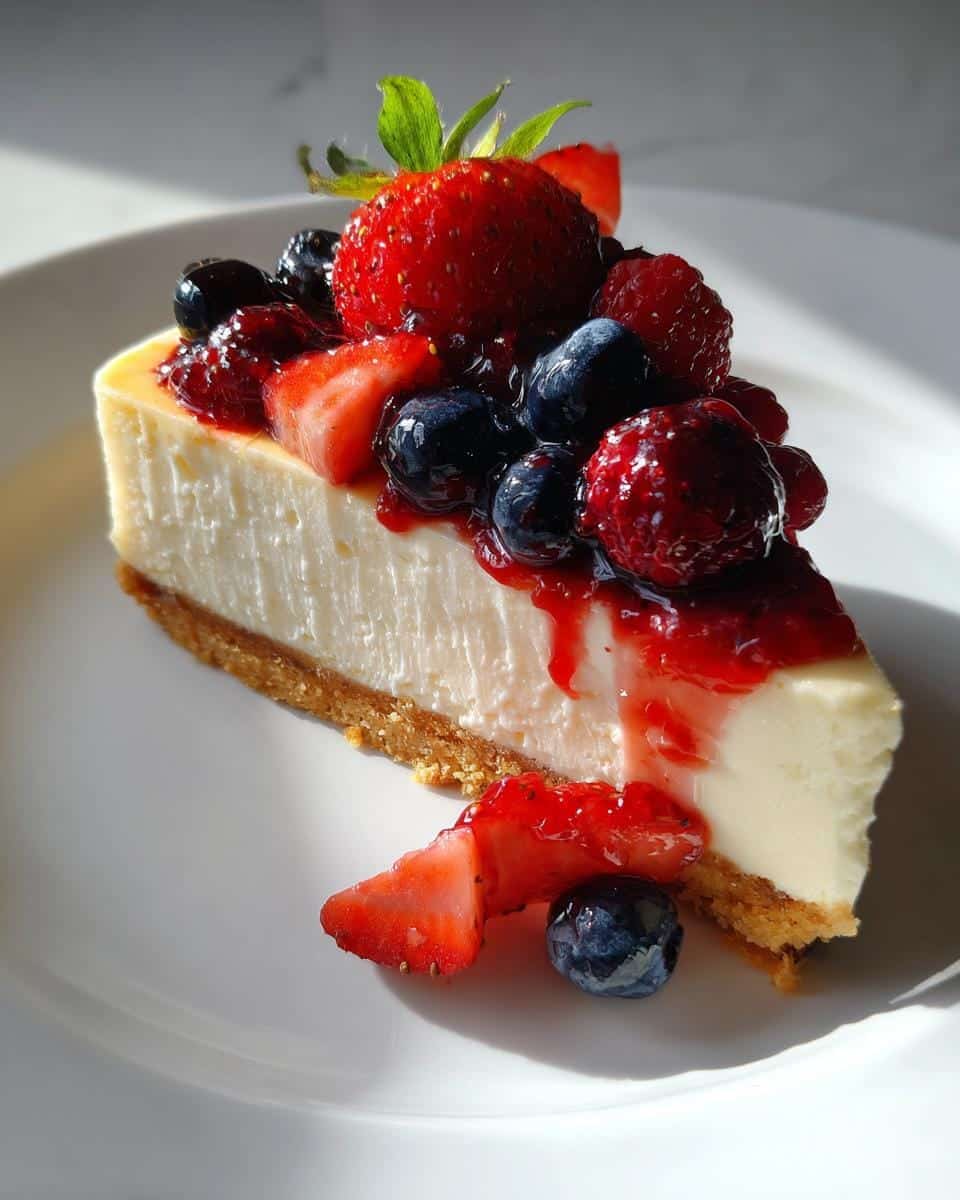
You know those summer days when the thought of turning on the oven makes you break into a sweat? That’s when my no-bake cheesecake with berry becomes my kitchen hero. I first learned this trick from my aunt during a heatwave—she waltzed in with this creamy, dreamy dessert, and I couldn’t believe it never saw the inside of an oven. The best part? It’s practically foolproof. Fresh berries burst with sweetness against the rich, velvety filling, and that buttery biscuit base? Pure magic. Now it’s my go-to when I need a showstopper without the sweat. Trust me, once you try it, you’ll be as obsessed as I am.
Table of contents:
Why You’ll Love This No-Bake Cheesecake with Berry
Let me count the ways this dessert will steal your heart (and probably your next potluck invitation)! First off, it’s the ultimate lazy baker’s dream—no oven, no stress, just pure creamy bliss in every bite. Here’s why it’s become my summer staple:
- Cool as a cucumber: When the mercury rises, this recipe saves you from oven-induced meltdowns. Your kitchen stays chill while the cheesecake sets in the fridge.
- Creamy cloud texture: That velvety smooth filling made with whipped cream and cream cheese? It’s like eating a sweet, tangy cloud—but way more satisfying.
- Berry beautiful: The juicy mixed berries on top aren’t just pretty—they give that perfect pop of freshness against the rich filling. Bonus: you get to pretend it’s healthy!
- Foolproof fun: No tricky water baths or cracked tops here. If you can mix ingredients and press crumbs into a pan, you’ve got this.
- Make-ahead magic: Whip it up in the morning, forget about it in the fridge, and voilà—instant dessert hero by dinnertime.
Seriously, this no-bake wonder checks all the boxes: easy, impressive, and downright delicious. Your future self will thank you when you’re lounging with a slice instead of babysitting an oven!
Ingredients for No-Bake Cheesecake with Berry
Gather these simple ingredients – most might already be in your pantry! Exact measurements matter here for that perfect creamy-set texture:
- 200g digestive biscuits: These British-style cookies make the ideal crumbly base (but see my swap tips below!)
- 100g unsalted butter, melted: Use real butter – it gives that rich, toasty flavor margarine just can’t match
- 500g full-fat cream cheese, softened: Leave it out 30 minutes beforehand – cold cheese = lumpy filling
- 100g powdered sugar: Sift it first to avoid gritty surprises
- 1 tsp real vanilla extract: Skip the imitation stuff here – we taste the difference
- 300ml heavy cream: Must be cold straight from the fridge
- 200g mixed fresh berries: I love strawberries + raspberries, but use what’s seasonal
- 2 tbsp berry jam (optional): Gives the topping that glossy finish
Ingredient Notes & Substitutions
No digestive biscuits? Graham crackers work beautifully – just pulse 1.5 cups into crumbs. For a nuttier twist, try gingersnaps or Biscoff cookies! If you’re watching calories (though why would you?), light cream cheese can work, but expect a softer set. Greek yogurt makes an interesting tangy swap for half the cream cheese – my fitness-fanatic sister swears by this version. Frozen berries? Thaw and pat dry or they’ll bleed everywhere. And if you’re dairy-free, coconut cream whips up nicely instead of heavy cream – just refrigerate the can overnight first.
Equipment You’ll Need
This no-fuss recipe keeps the gadget list short and sweet – you probably own everything already! Here’s what should be on your counter:
- 8-inch springform pan: The removable sides make serving a breeze
- Food processor or rolling pin: For crushing those biscuits to perfect crumbs
- Electric mixer: A hand mixer works great (but elbow grease and a whisk can too in a pinch)
- Mixing bowls: One large for filling, one medium for whipping cream
- Spatula: For that satisfying final scrape of every creamy bit
That’s it! No fancy tools needed – just the basics to create something spectacular.
How to Make No-Bake Cheesecake with Berry
Now for the fun part—let’s dive into making this dreamy dessert! I’ll walk you through each step, sharing all my little tricks to ensure your cheesecake turns out perfect. Grab your mixing bowls and let’s get started!
Step 1: Prepare the Crust
First things first—that buttery biscuit base. Here’s how to nail it:
Crush your digestive biscuits into fine crumbs (I whiz mine in the food processor, but a rolling pin and some frustration works too!). Mix them with the melted butter until it resembles wet sand. Now press this heavenly mixture firmly into the bottom of your springform pan—I use the bottom of a glass to really compact it. Pop it in the fridge for at least 15 minutes to set. This chill time is crucial—it prevents the crust from crumbling when you add the filling later!
Step 2: Make the Cheesecake Filling
While the crust chills, let’s make the star of the show:
Beat the softened cream cheese with powdered sugar and vanilla until completely smooth—no lumps allowed! Scrape down the bowl sides halfway through. Now, in another bowl, whip the cold heavy cream to soft peaks (don’t overdo it!). Gently fold the whipped cream into the cream cheese mixture—this is where the magic happens! I fold in three batches, being careful not to deflate all that airy goodness. The mixture should be light, fluffy, and dreamily cloud-like.
Step 3: Assemble and Chill
Time to bring it all together:
Pour your creamy filling over the chilled crust, smoothing the top with a spatula. Now comes the hardest part—waiting! Refrigerate for at least 4 hours, but overnight is even better. This slow chilling helps the cheesecake set properly so it slices cleanly. Pro tip: resist the urge to peek—every time you open the fridge, you let warm air in!
Step 4: Add the Berry Topping
The grand finale:
Right before serving, arrange your fresh berries artfully (or just pile them on joyfully—I won’t judge!). For extra shine, warm the berry jam slightly and drizzle it over. Then run a knife around the pan’s edge before releasing the springform sides. Stand back and admire your masterpiece before digging in!
See? I told you it was easy. Now go enjoy your well-earned slice (or two—no one’s counting).
Tips for the Perfect No-Bake Cheesecake
Want that bakery-perfect texture every time? Here are my hard-won secrets (learned from many delicious “mistakes”!):
- Chill everything cold: Your mixing bowl, beaters, even the cream—cold tools mean fluffier whipped cream that holds its shape.
- Patience with the cream cheese: Let it soften completely before mixing—lumps are the enemy of that silky texture we love.
- Fold, don’t mix: When combining whipped cream and cheese, use gentle folding motions with a spatula to keep it light and airy.
- Press that crust firmly: Really pack the biscuit crumbs—loose crusts crumble when sliced. I use a glass to compact it evenly.
- Resist the taste test: I know it’s hard, but letting it chill the full 4 hours (or overnight!) makes ALL the difference in texture.
Follow these, and you’ll be the no-bake cheesecake hero at every gathering!
Serving Suggestions
This no-bake beauty deserves a proper presentation! I love serving thick slices with fresh mint leaves tucked between the berries—that pop of green makes it look straight from a patisserie. For brunch, pair it with strong coffee to balance the sweetness. Got extra berries? Scatter them around the plate for a “berry explosion” effect that always wows guests. And if you’re feeling fancy, a dusting of powdered sugar adds that final bakery-style touch.
Storage & Reheating Instructions
This no-bake cheesecake keeps beautifully in the fridge for 3-4 days—just cover it loosely with plastic wrap to prevent fridge smells. I don’t recommend freezing it though—the texture turns grainy when thawed. Pro tip: Add fresh berries right before serving so they don’t get soggy! If you must store leftovers (who has cheesecake leftovers?!), keep them in an airtight container and enjoy within 2 days for best quality.
Nutritional Information
Here’s the scoop on what’s in each heavenly slice of this no-bake cheesecake with berry (because let’s be honest—we’re eating it anyway, might as well know what we’re enjoying!):
- Calories: About 350 per generous slice
- Sugar: 20g (mostly from the natural berries and powdered sugar)
- Fat: 25g (hey, that’s where all the creamy goodness comes from!)
- Protein: 5g (cream cheese packs a surprising punch)
- Carbs: 30g (worth every bite if you ask me)
Remember: These numbers can vary based on your exact ingredients and brands. I always say—focus on the joy it brings, not just the numbers! After all, life’s too short not to enjoy dessert.
FAQ About No-Bake Cheesecake with Berry
Got questions? I’ve got answers—here are the things people ask me most about this dreamy dessert:
Absolutely! Just thaw them completely first and pat them very dry with paper towels. Frozen berries release lots of juice that can make your topping watery (and turn your beautiful cheesecake pink!). I like to lay them on a rack over a baking sheet to drain for 30 minutes before using.
Two words: butter barrier. Make sure your biscuit crumbs are fully coated in melted butter—this creates a protective layer. Also, chill the crust thoroughly before adding filling (I do 15 minutes minimum). If you’re extra paranoid (like me), you can even brush the crust with melted chocolate first—it seals like magic!
You bet! Use vegan cream cheese and coconut cream (the thick part from chilled full-fat coconut milk). The texture will be slightly different but still delicious. For the crust, swap the butter for coconut oil. My dairy-free friends rave about this version!
Usually means: 1) cream wasn’t whipped enough, 2) cream cheese was too warm, or 3) it needed more chill time. If it’s already mixed, pop it in the freezer for 30 minutes before refrigerating—it’ll set firmer. Next time, chill your mixing bowl first and whip the cream to stiff peaks!
Final Thoughts
There you have it—my foolproof no-bake cheesecake with berry that never fails to impress. Whether it’s your first cheesecake or your fiftieth, this recipe is a guaranteed crowd-pleaser. Now go make some memories (and maybe a delicious mess) in your kitchen—I’d love to hear how yours turns out! Happy no-baking!
For more delicious recipes, follow us on Pinterest!
Print
Ultra-Creamy No-Bake Cheesecake with Berry in Just 4 Hours!
- Total Time: 4 hours 20 minutes
- Yield: 8 servings
- Diet: Vegetarian
Description
A simple no-bake cheesecake with fresh berries. It’s creamy, light, and requires no oven time.
Ingredients
- 200g digestive biscuits
- 100g unsalted butter, melted
- 500g cream cheese, softened
- 100g powdered sugar
- 1 tsp vanilla extract
- 300ml heavy cream, whipped
- 200g mixed fresh berries (strawberries, blueberries, raspberries)
- 2 tbsp berry jam (optional, for glaze)
Instructions
- Crush the digestive biscuits into fine crumbs and mix with melted butter.
- Press the mixture into the base of a springform pan and chill for 15 minutes.
- Beat cream cheese, powdered sugar, and vanilla extract until smooth.
- Fold in the whipped cream gently until fully combined.
- Spread the mixture over the chilled biscuit base and smooth the top.
- Refrigerate for at least 4 hours or until set.
- Before serving, top with fresh berries and a light glaze of berry jam if desired.
Notes
- Use full-fat cream cheese for best texture.
- Chill the mixing bowl and beaters before whipping the cream.
- Let the cheesecake set overnight for firmer results.
- Prep Time: 20 minutes
- Cook Time: 0 minutes
- Category: Dessert
- Method: No-Bake
- Cuisine: American