Skip to content
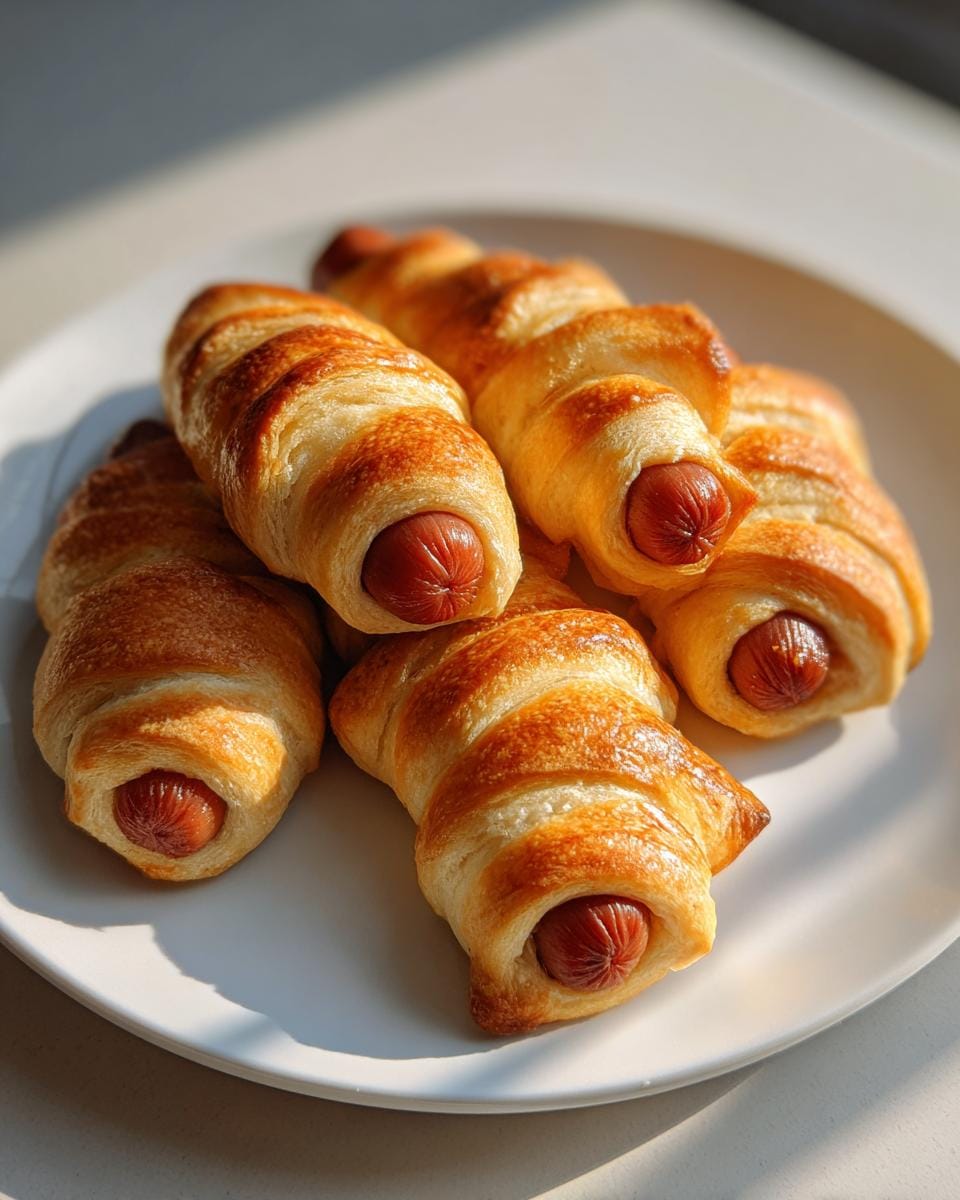
Okay, confession time: I may have started the whole “mummy hot dogs” craze in my neighborhood. Last Halloween, my kids and I were scrambling for an easy-but-fun party snack when inspiration struck – what if we turned ordinary hot dogs into adorable edible mummies? The result was pure magic! These little wrapped wonders became the hit of the party (and honestly, the adults went just as crazy for them as the kids did).
The best part? You probably already have everything you need in your fridge right now. Just grab some crescent dough and hot dogs – I promise even the most kitchen-challenged among us can pull this off. There’s something hilarious about watching kids carefully wrap those dough strips (“Mom! This one needs more bandages!”) that makes this more than just food – it’s a memory-maker. Whether you’re throwing a Halloween bash or just want to put a spooky spin on dinner, these mummy hot dogs are about to become your new favorite trick (and treat!).
Why You’ll Love These Mummy Hot Dogs
Okay, let me count the ways these little guys steal the show! First off, they’re ridiculously easy – we’re talking 3 ingredients and zero fancy skills required. Perfect for when you need a last-minute party hit!
But here’s the real magic: watching kids’ faces light up as they help wrap the “bandages” (and maybe sneak a dough strip or two). Halloween party? School potluck? Rainy day activity? These mummy dogs check all the boxes.
And don’t even get me started on customization – swap the mustard eyes for ketchup bloodshot eyes, use cheese-stuffed dogs for extra gooeyness, or go full veggie with meatless dogs. Every batch becomes your own edible art project!
Ingredients for Mummy Hot Dogs
Here’s the beautiful simplicity of mummy hot dogs – you likely have most of this in your kitchen already! The short ingredient list is part of why I make these on repeat every October (and let’s be honest, sometimes in July when the kids beg for “spooky dinner”).
- 8 pre-cooked hot dogs – I prefer all-beef for flavor, but use what your family loves (see my veggie tip later!)
- 1 can (8 oz) refrigerated crescent roll dough – The kind that comes in triangles, not sheets (trust me, I learned this the hard way)
- 1 tablespoon mustard or ketchup – For those adorable mummy eyes (pro tip: put it in a squeeze bottle for less mess!)
- Cooking spray or parchment paper – Because no one likes mummies stuck to the pan
See? Told you it was simple! Now let’s turn these basic ingredients into something magical.
How to Make Mummy Hot Dogs
Alright, let’s get wrapping! I promise this is way easier than actually mummifying something (and much tastier). Follow these simple steps, and you’ll have a tray of adorable mummy hot dogs ready to spook your guests in no time.
Step 1: Prepare the Dough
First, preheat that oven to 375°F (190°C) – we want it nice and toasty when our mummies go in! Now, unroll your crescent dough and separate those triangles. Here’s my favorite trick: use a pizza cutter or sharp knife to slice each triangle into about 4-5 thin strips. Don’t worry if they’re uneven – real mummy bandages weren’t perfect either!
Step 2: Wrap the Hot Dogs
Time to dress our hot dogs! Starting at one end, wrap the dough strips around each hot dog in a criss-cross pattern, leaving about 1 inch uncovered near the top for the eyes. Press the ends gently to seal – no glue required! If a strip breaks (it happens!), just patch it up with another piece. The messier they look, the more authentically ancient they appear!
Step 3: Bake and Decorate
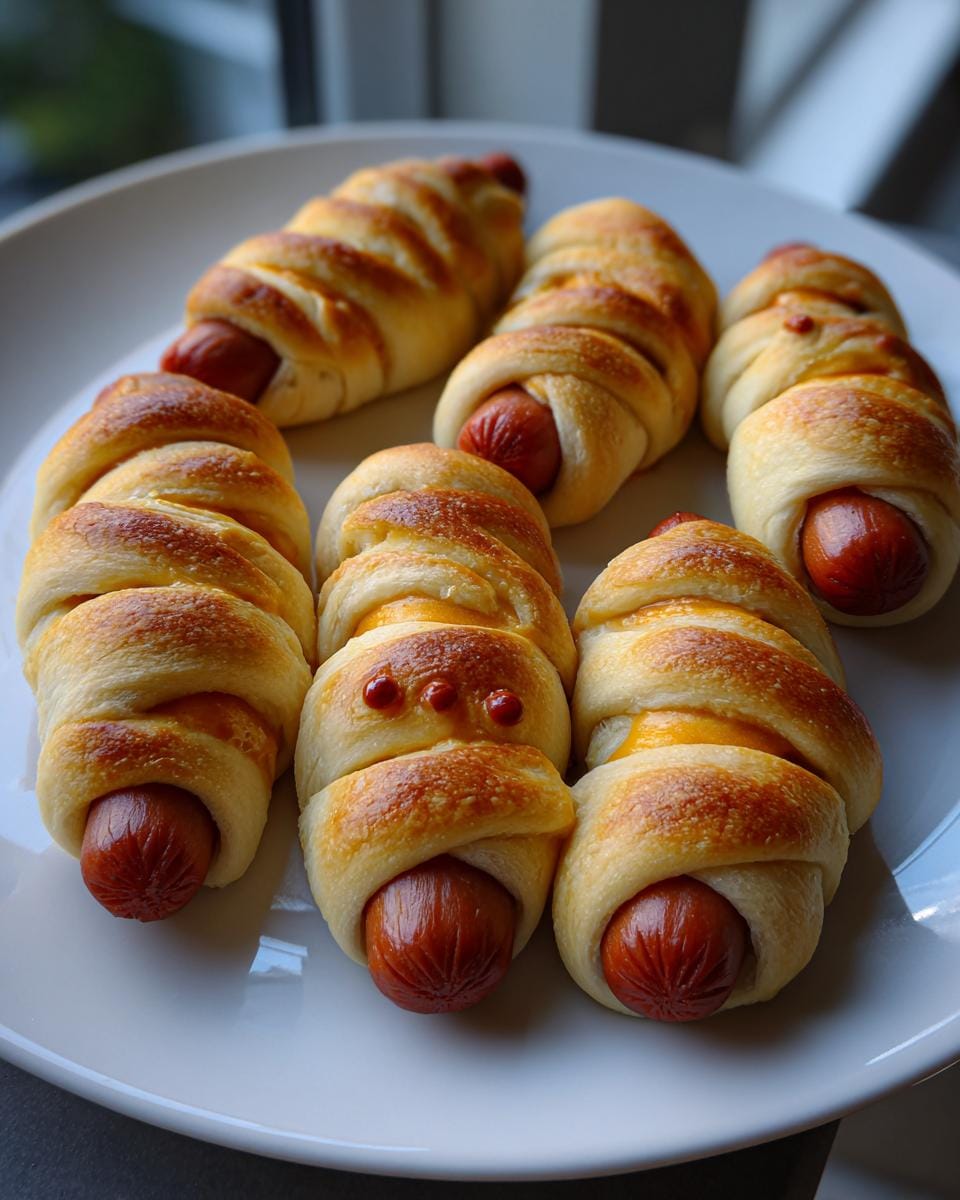
Arrange your wrapped dogs on a parchment-lined baking sheet and pop them in the oven for 12-15 minutes until golden brown. While they’re baking, prep your “eye” condiment – mustard gives classic yellow eyes, while ketchup makes spooky red ones. Once out of the oven, let them cool for just a minute before dotting on those eyes. And voila – your mummy army is ready to rise!
Pro tip: The dough puffs up beautifully in the oven, so don’t wrap too tightly – we want those bandages to look like they’re coming unraveled! Also, if you’re feeling fancy, you can brush the dough with melted butter before baking for extra golden deliciousness.
Tips for Perfect Mummy Hot Dogs
After making way too many batches of these (my kids demand “mummy practice” sessions), I’ve learned a few secrets for absolute perfection:
1. The parchment paper trick: Seriously, don’t skip this! Not only does it prevent sticking, but you can slide the whole sheet of mummies right onto your serving platter – no awkward spatula moves that might decapitate your creations.
2. Kid wrapping hack: Let little hands help with the wrapping, but keep a damp towel nearby – crescent dough gets sticky fast on warm fingers. I like to call it “mummy glue” to keep it fun!
3. Crispiness control: Want extra-crunchy bandages? Bake 2-3 minutes longer. Prefer softer wraps? Pull them out at 12 minutes. Every oven’s different, so peek through that window – golden brown means they’re ready to rise from their baking sheet tomb!
Bonus tip: Make extra! These disappear faster than a ghost in sunlight at parties. I always do at least double batches now.
Ingredient Substitutions and Variations
One of my favorite things about mummy hot dogs is how easily you can mix things up! Out of crescent dough? Try puff pastry strips or even pretzel dough for extra crunch (just reduce baking time slightly). For cheesy mummies, wrap string cheese around the hot dogs before adding dough – melty surprises inside!
Vegetarian friends? No problem! Veggie dogs work beautifully here. I’ve even made “zombie fingers” by using carrot sticks instead of hot dogs – same wrapping technique but with hummus eyes. The possibilities are endless, so have fun playing with flavors!
My kids love when I swap the eyes too – black olive slices make dramatic hollow sockets, while small dots of cream cheese create ghostly white eyes. Whatever you choose, the key is keeping that playful mummy spirit alive!
Serving and Storage for Mummy Hot Dogs
Here’s the best part – these little mummies are ready to party the moment they come out of the oven! I always serve them immediately with small bowls of ketchup and mustard for dipping (extra “mummy blood” and “bandage glue,” if you’re playing along with the theme). The dough stays crispiest when fresh, and who can resist that just-baked smell?
Leftovers? They’ll keep in the fridge for 2-3 days in an airtight container. To reheat, skip the microwave (soggy bandages = sad mummies) and pop them in a 350°F oven for about 5 minutes. They won’t be quite as perfect as fresh, but they’ll still taste delicious – if your family hasn’t already sneaked them all as midnight snacks!
Mummy Hot Dogs Nutritional Information
Okay, let’s be real – these are party food, not health food! But for those curious, here’s the scoop per mummy hot dog (based on typical ingredients): about 180 calories, 12g fat, 13g carbs, and 6g protein. Remember, nutrition varies by brands used – especially with different hot dog and dough choices!
Frequently Asked Questions
Can I use puff pastry instead of crescent dough?
Absolutely! Puff pastry makes gorgeous, flaky “bandages” – just roll it slightly thinner before cutting strips. Watch the baking time though – puff pastry might need an extra minute or two to get properly golden.
Can I make mummy hot dogs ahead of time?
You bet! Prep them up to the baking step, then cover and refrigerate for a few hours before popping in the oven. I’ve even left them overnight (though the dough gets a bit stickier to handle). The eyes are best added right before serving.
Can I freeze these little mummies?
Yes, but with a caveat – freeze them before baking. Wrap your dough-covered hot dogs tightly, then freeze on a tray before transferring to bags. When ready, bake straight from frozen, adding a few extra minutes to the cooking time.
What if my dough strips keep breaking?
No worries! Just patch them together – real mummy bandages weren’t perfect either. If the dough gets too soft, pop it in the fridge for 10 minutes to firm up.
Can I use hot dog buns with these?
Totally! For “mummy in a coffin” style, nestle each baked mummy in a bun. Kids love the dramatic reveal when they lift the top bun to see the wrapped hot dog underneath!
Share Your Spooky Creations
Okay, I need to see YOUR mummy masterpieces! Tag me on Instagram @[YourHandle] or use #MummyHotDogs so I can ooh and ahh over your creations. Did you give them zombie eyes? Wrap them extra messy? I live for these kitchen adventures – share the fun so we can all get inspired!
For more fun recipes and inspiration, check out our Pinterest page!
Print
8 Spooky Mummy Hot Dogs Kids Will Devour Instantly
- Total Time: 25 minutes
- Yield: 8 mummy hot dogs
- Diet: Low Lactose
Description
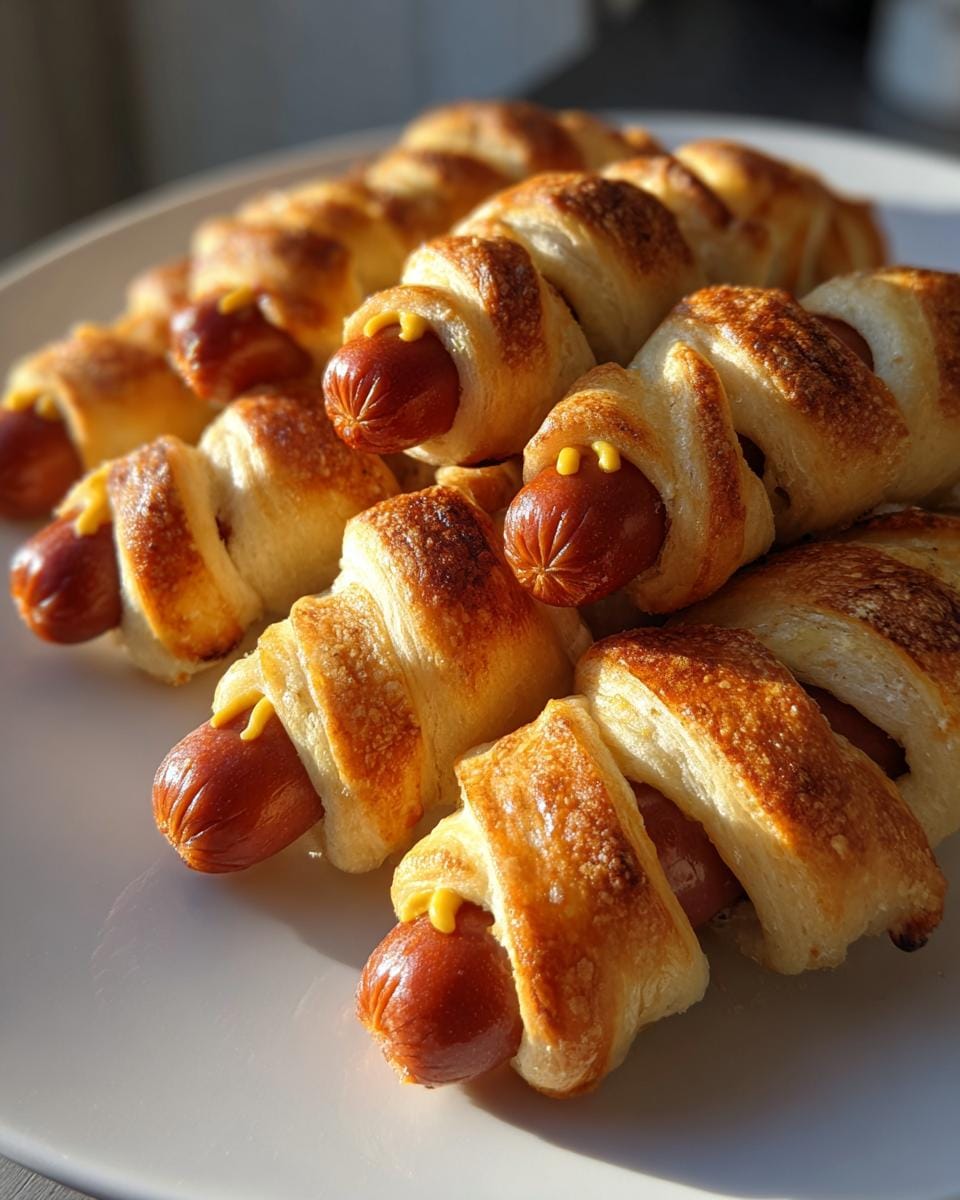
A fun and easy recipe for kids and adults alike, mummy hot dogs are a perfect Halloween treat or party snack. These spooky hot dogs are wrapped in strips of dough to look like mummies and baked until golden.
Ingredients
- 8 hot dogs
- 1 can (8 oz) refrigerated crescent roll dough
- 1 tablespoon mustard or ketchup (for eyes)
- Cooking spray
Instructions
- Preheat your oven to 375°F (190°C).
- Unroll the crescent dough and separate it into triangles.
- Cut each triangle into thin strips.
- Wrap the dough strips around each hot dog, leaving a small space uncovered for the eyes.
- Place the wrapped hot dogs on a baking sheet lined with parchment paper.
- Bake for 12-15 minutes until the dough is golden brown.
- Use mustard or ketchup to dot on eyes before serving.
Notes
- Use pre-cooked hot dogs for best results.
- Let kids help with wrapping the dough for a fun activity.
- Serve with extra ketchup or mustard for dipping.
- Prep Time: 10 minutes
- Cook Time: 15 minutes
- Category: Appetizer
- Method: Baking
- Cuisine: American