Skip to content
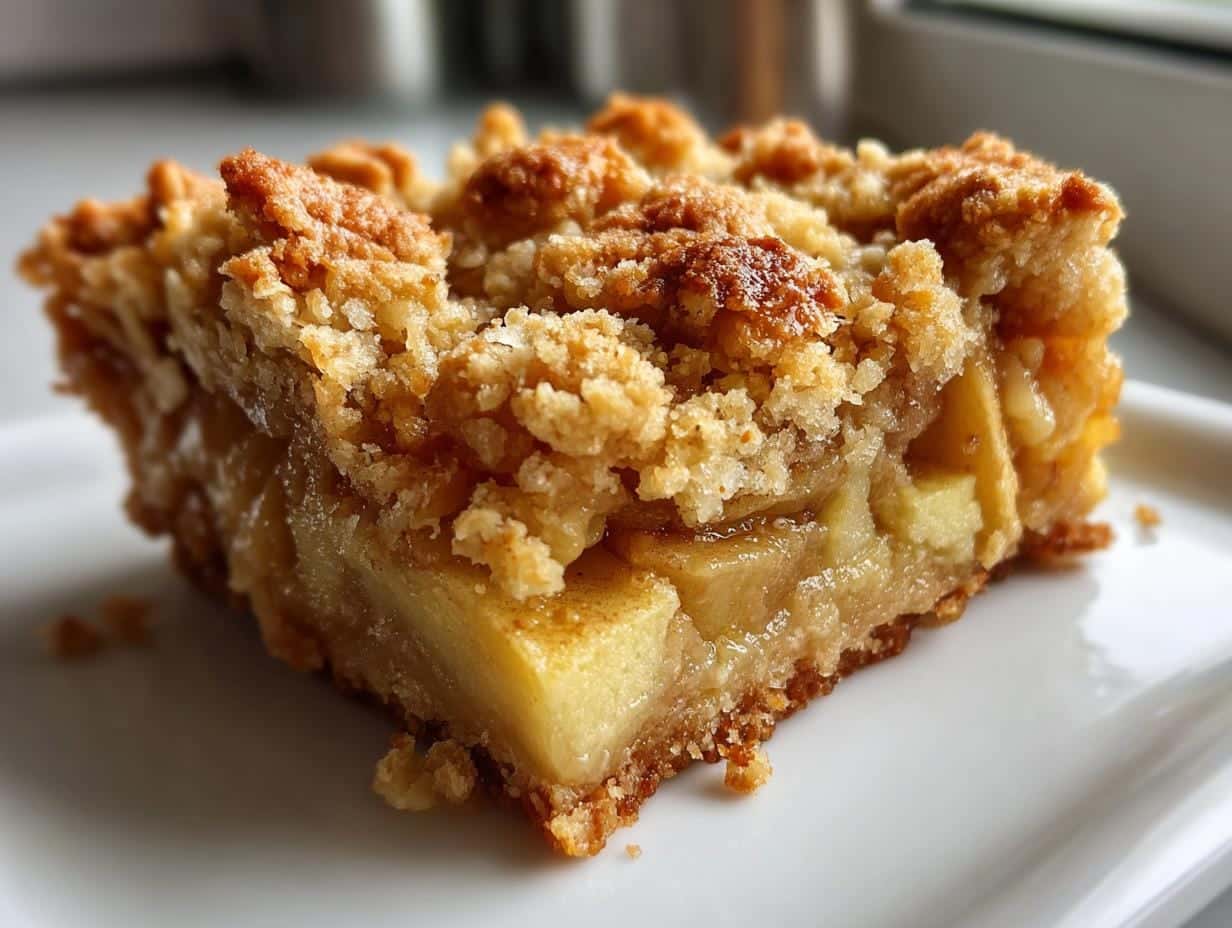
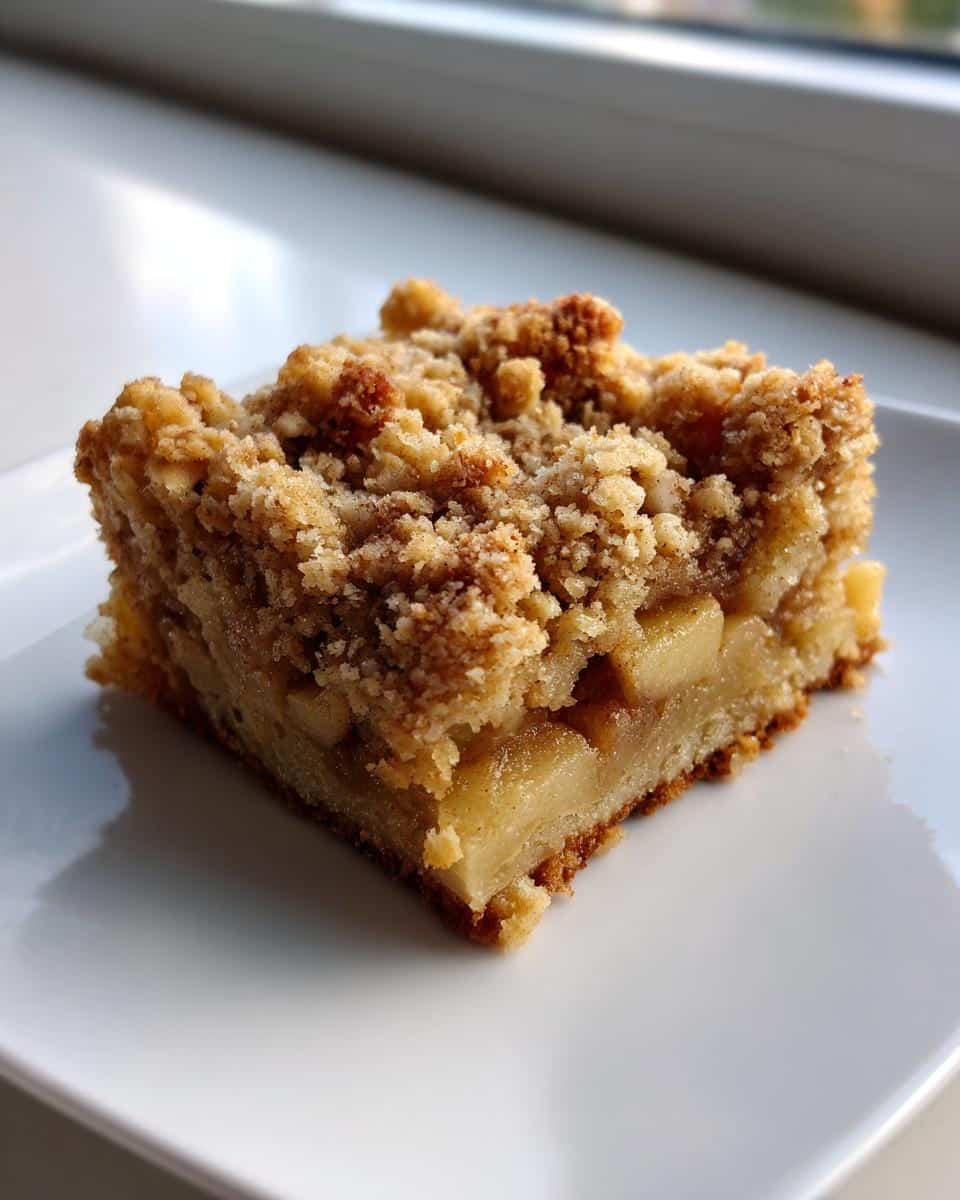
Is there anything more comforting than the smell of baking apples and cinnamon filling your kitchen? I still remember standing on a stool next to my grandmother as she taught me how to make her famous apple desserts – her wrinkled hands guiding mine as we mixed the crumb topping that would become my signature Classic Apple Crumble Bars years later.
This recipe holds a special place in my heart because it’s where my baking journey began. Those simple afternoons in Grandma’s kitchen showed me that the best desserts don’t need fancy techniques – just good ingredients handled with care. The magic happens when tart apples meet a buttery oat crust, creating that perfect contrast of tender fruit and crisp topping we all crave.
What I love most about these Classic Apple Crumble Bars is how they adapt to any occasion. Need a quick weeknight treat? Check. Looking for a portable dessert for picnics? Perfect. Want to impress guests without stress? Absolutely. They’re the kind of recipe that makes you look like a baking pro while being nearly impossible to mess up – my kind of dessert!
Why You’ll Love These Classic Apple Crumble Bars
These apple crumble bars are my go-to dessert for so many reasons, and I just know you’ll fall in love with them too:
- Easy as pie (but easier!) – No fussy crusts or special equipment needed – just mix, layer, and bake
- That perfect texture contrast – The crisp oat topping against the soft, spiced apples is pure magic in every bite
- Works year-round – I make these with fall’s fresh apples or stored winter varieties – always delicious
- Crowd-pleasing flavors – Kids love the sweetness, adults adore the nostalgia – nobody can resist seconds
- Versatile serving options – Dress them up with ice cream for dessert or grab one with coffee for breakfast (no judgment!)
Ingredients for Classic Apple Crumble Bars
Grab these simple ingredients – I promise you probably have most already! The magic happens when quality basics come together:
For the crumb crust & topping:
- 2 cups all-purpose flour (spooned & leveled)
- 1 cup old-fashioned rolled oats (not instant!)
- 1 cup packed dark brown sugar (Grandma’s secret for richer flavor)
- 1/2 tsp baking soda
- 1/2 tsp fine sea salt
- 1 cup unsalted butter, melted (and slightly cooled)
For the apple filling:
- 4 cups peeled & diced apples (about 3 medium – I use Granny Smith for tartness)
- 1/4 cup granulated sugar
- 2 tbsp fresh lemon juice (bottled works in a pinch)
- 1 tsp ground cinnamon
- 1/4 tsp freshly grated nutmeg
- 1 tbsp cornstarch (our trick against soggy bottoms!)
See? Nothing fancy – just pantry staples transformed into something extraordinary. Now let’s get baking!
How to Make Classic Apple Crumble Bars
Now for the fun part – let’s turn these simple ingredients into something magical! Don’t worry if you’re not an experienced baker – I’ll walk you through each step to ensure your crumble bars turn out perfect.
Preparing the Crust and Topping
First things first – preheat your oven to 350°F (175°C). Trust me, starting with the right oven temperature makes all the difference. While that’s heating up, grab your biggest mixing bowl and whisk together the flour, oats, brown sugar, baking soda and salt. The oats should be evenly distributed – no clumps!
Here’s my favorite trick: drizzle in the melted butter slowly while stirring with a fork. You’ll see the mixture transform from dry to crumbly, almost like wet sand. When you squeeze a handful, it should hold together slightly but still break apart easily. This perfect texture means it’ll press beautifully into the pan while still being loose enough to sprinkle later.
Making the Apple Filling
Now let’s tackle those apples! In another bowl, toss your diced apples with lemon juice first – this prevents browning and adds brightness. Then sprinkle over the sugar, cinnamon, nutmeg and cornstarch. I like to use my hands here – massaging the mixture ensures every apple piece gets coated evenly.
A word of warning – apples can release lots of juice while baking. The cornstarch helps, but if your mixture looks watery after tossing, drain off just a tablespoon or two of excess liquid. We want flavorful apples, not apple soup!
Assembling and Baking
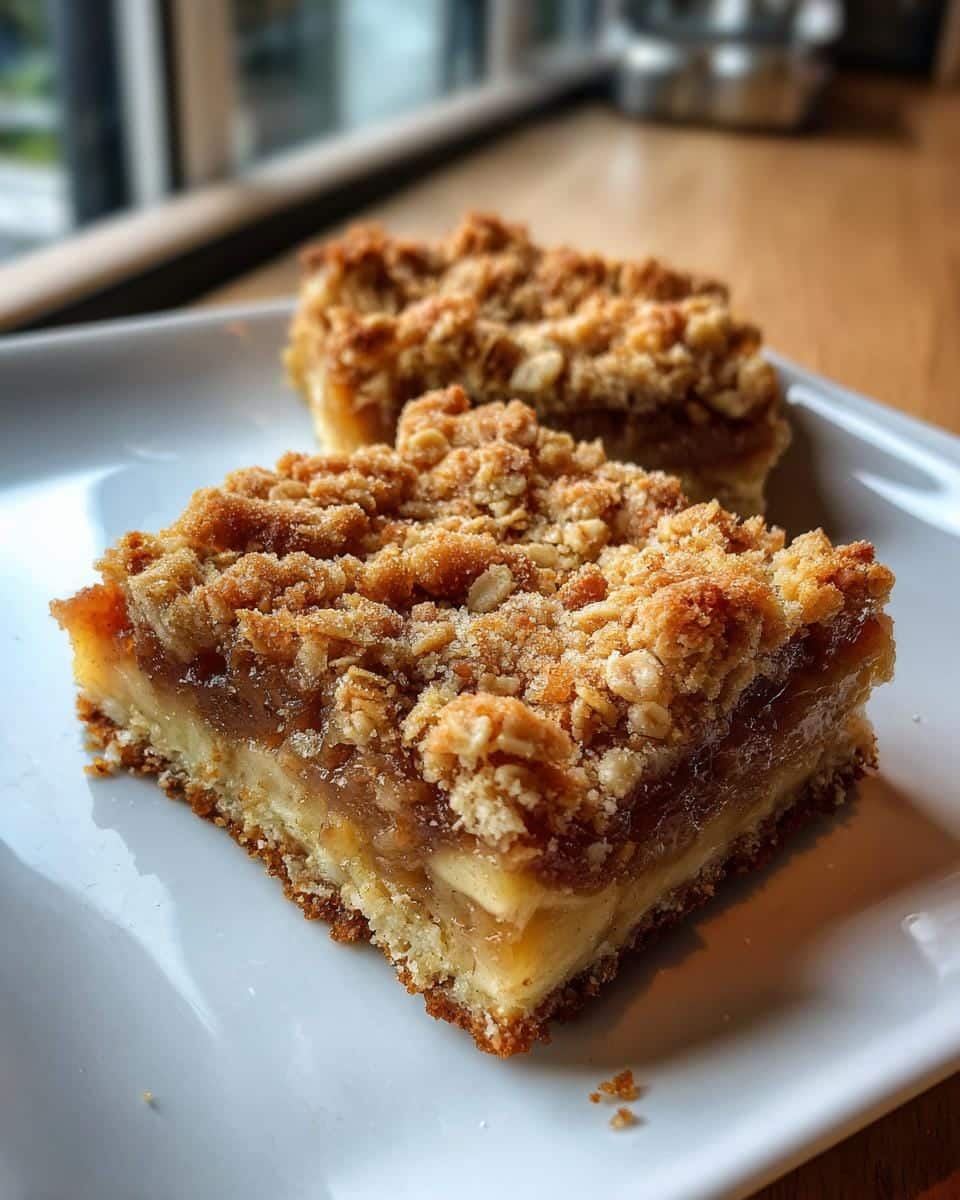
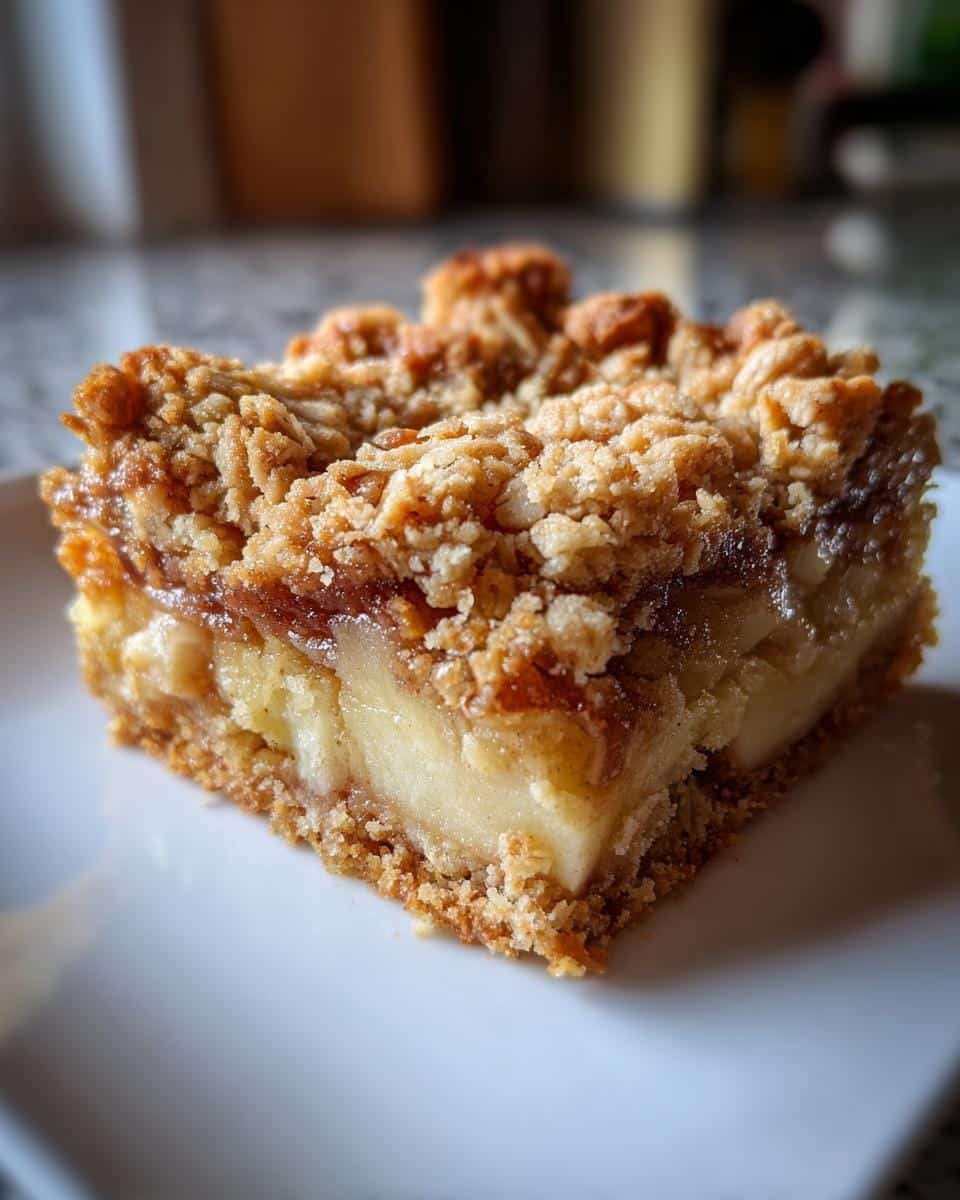
Time to layer! Press about half your crumb mixture firmly into your parchment-lined pan – really pack it down with your fingers or a measuring cup. Then spread the apple mixture evenly over the crust. Don’t press down here – let those apples stay fluffy.
Finally, sprinkle the remaining crumb mixture over the apples. No need to press – those loose crumbs will crisp up beautifully! Bake for about 45 minutes until the top is golden brown and you can see bubbling at the edges. Your kitchen will smell incredible – try not to peek too often!
The hardest part? Letting these cool completely before cutting – about 2 hours. I know it’s tempting, but trust me, patience gives you clean slices instead of crumbly messes. Worth the wait!
Expert Tips for Perfect Classic Apple Crumble Bars
After making these bars more times than I can count, here are my hard-won secrets for apple crumble perfection:
Apple wisdom: I always use a mix of Granny Smith and Honeycrisp apples—the tart and sweet combo is magic. If your apples seem extra juicy, toss in an extra teaspoon of cornstarch to prevent sogginess. And don’t skip peeling—those skins get tough when baked.
Pan prep pro-tip: That parchment paper? Let the edges hang over the sides like little handles. When the bars are cool, you can lift the whole slab out for picture-perfect cutting. No more wrestling with stuck-on crumbs!
The waiting game: I know it’s torture, but let them cool completely—at least 2 hours. Cutting warm crumble bars is like trying to slice soup. For clean squares, chill the whole pan for 30 minutes first.
Storage smarts: They keep beautifully at room temp for 3 days in an airtight container (if they last that long!). For longer storage, freeze the whole uncut slab wrapped in foil – just thaw overnight before serving.
Serving and Storing Classic Apple Crumble Bars
Oh, the joy of serving these beauties! My favorite way? Warm from the oven with a scoop of vanilla ice cream melting over the top – the contrast of hot and cold is just heavenly. For breakfast (shh, our little secret), I’ll grab one at room temperature with my morning coffee – the oats make it feel almost virtuous!
Storing is a breeze – just pop them in an airtight container at room temperature for up to 3 days. If you want to revive that fresh-baked warmth, 10 seconds in the microwave does the trick. For longer storage, freeze the whole uncut slab wrapped tightly in foil – they’ll keep beautifully for up to 2 months. Just thaw overnight on the counter when the craving strikes!
Nutritional Information
Now, I’m no nutritionist, but here’s the scoop on what’s in each of these delicious Classic Apple Crumble Bars (based on 12 servings per pan): About 280 calories with 12g fat, 40g carbs (2g fiber, 18g sugar), and 3g protein per bar. Remember, these are just estimates – and totally worth every bite in my book!
Frequently Asked Questions
Over the years, I’ve gotten so many questions about these Classic Apple Crumble Bars – here are the ones that come up most often with my tried-and-true answers:
Can I use frozen apples instead of fresh?
Absolutely! Just thaw and drain them well – I’ll even pat them dry with paper towels to remove excess moisture. You might need an extra teaspoon of cornstarch since frozen apples tend to release more liquid while baking.
How can I make these gluten-free?
Easy swap! Use a 1:1 gluten-free flour blend instead of regular flour. The oats should be certified gluten-free too. Texture might be slightly more crumbly, but the flavor will be just as amazing.
My topping isn’t browning – help!
Don’t panic! If your bars are baking but the top looks pale, just pop them under the broiler for 30-60 seconds (watch closely!). This gives that perfect golden crunch without overbaking the apples.
Can I make these ahead of time?
You bet! These bars actually taste better the next day as flavors meld. Bake them up to 2 days ahead – just store at room temperature. For longer storage, freeze the uncut slab as I mentioned earlier.
What other fruits work in this recipe?
Oh, get creative! Pears, peaches, or berries all work beautifully. Just adjust sugar to taste and add an extra tablespoon of cornstarch for juicier fruits. My summer version with peaches and raspberries is downright addictive! You can find more fruit-forward recipes here.
Check out more delicious ideas on Pinterest!
Print
Classic Apple Crumble Bars: 5 Reasons This Recipe Always Wins (or exactly 60 characters focused on emotional pull and clarity) Classic Apple Crumble Bars – Irresistible 3-Ingredient Magic
- Total Time: 1 hour 5 minutes
- Yield: 12 bars
- Diet: Vegetarian
Description
Classic apple crumble bars combine sweet apple filling with a buttery oat crust and topping. Easy to make and perfect for any occasion.
Ingredients
- 2 cups all-purpose flour
- 1 cup rolled oats
- 1 cup brown sugar
- 1/2 tsp baking soda
- 1/2 tsp salt
- 1 cup unsalted butter, melted
- 4 cups peeled and diced apples
- 1/4 cup granulated sugar
- 2 tbsp lemon juice
- 1 tsp cinnamon
- 1/4 tsp nutmeg
- 1 tbsp cornstarch
Instructions
- Preheat oven to 350°F (175°C). Line a 9×13 inch baking pan with parchment paper.
- In a large bowl, mix flour, oats, brown sugar, baking soda, and salt. Stir in melted butter until crumbly.
- Press half of the mixture into the bottom of the prepared pan.
- In another bowl, toss apples with granulated sugar, lemon juice, cinnamon, nutmeg, and cornstarch. Spread evenly over the crust.
- Sprinkle the remaining crumb mixture over the apples.
- Bake for 45 minutes or until golden brown. Cool completely before cutting into bars.
Notes
- Use firm apples like Granny Smith or Honeycrisp for best texture.
- Store in an airtight container at room temperature for up to 3 days.
- Serve warm with vanilla ice cream for extra indulgence.
- Prep Time: 20 minutes
- Cook Time: 45 minutes
- Category: Dessert
- Method: Baking
- Cuisine: American