Skip to content
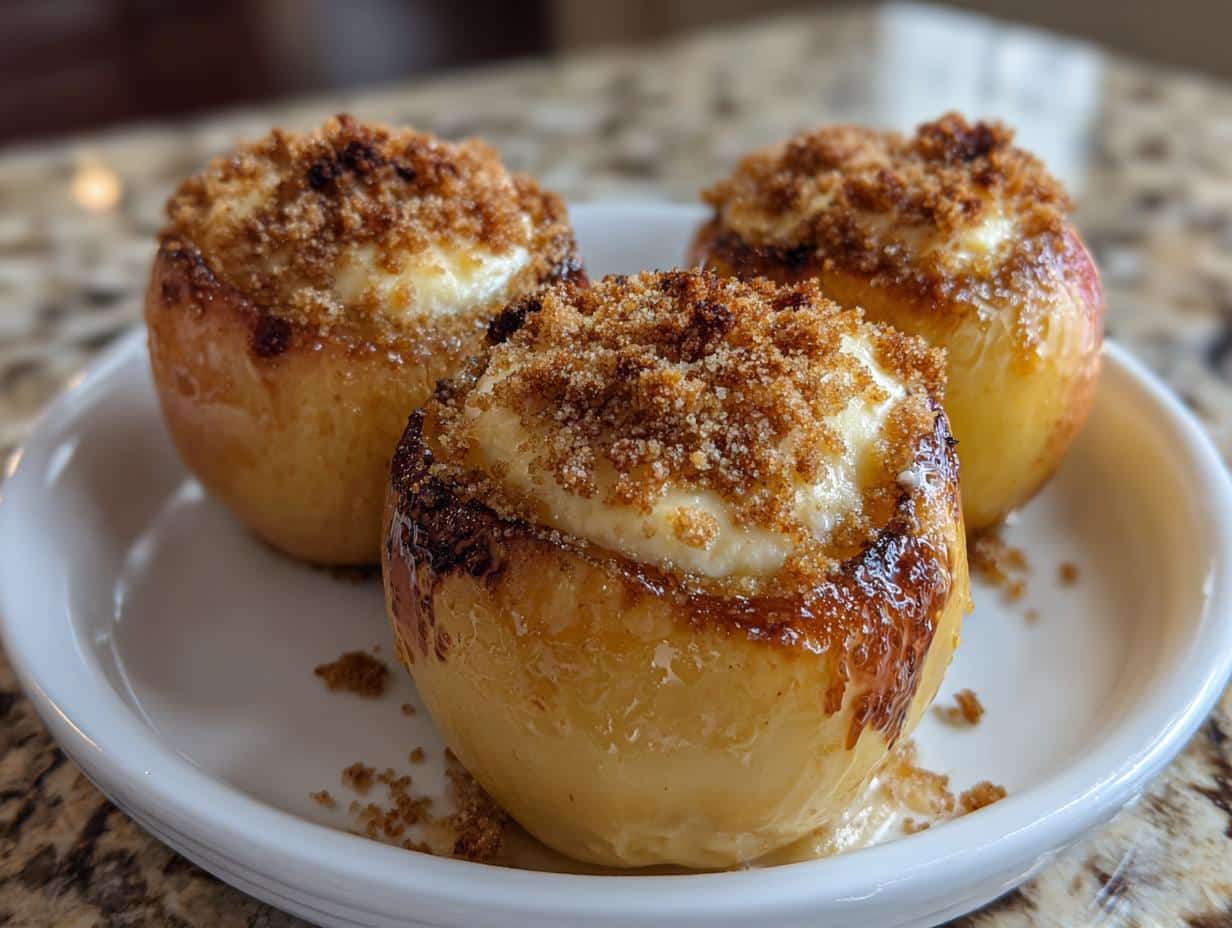
You know that moment when two amazing desserts collide and create something even more magical? That’s exactly what happened when I first tried making cheesecake stuffed baked apples – it’s like autumn’s favorite fruit met my favorite creamy dessert in one perfect bite. I’ll never forget the first time I pulled these golden beauties out of the oven, their sweet cinnamon scent filling my kitchen while the cheesecake filling peeked out temptingly from the centers.
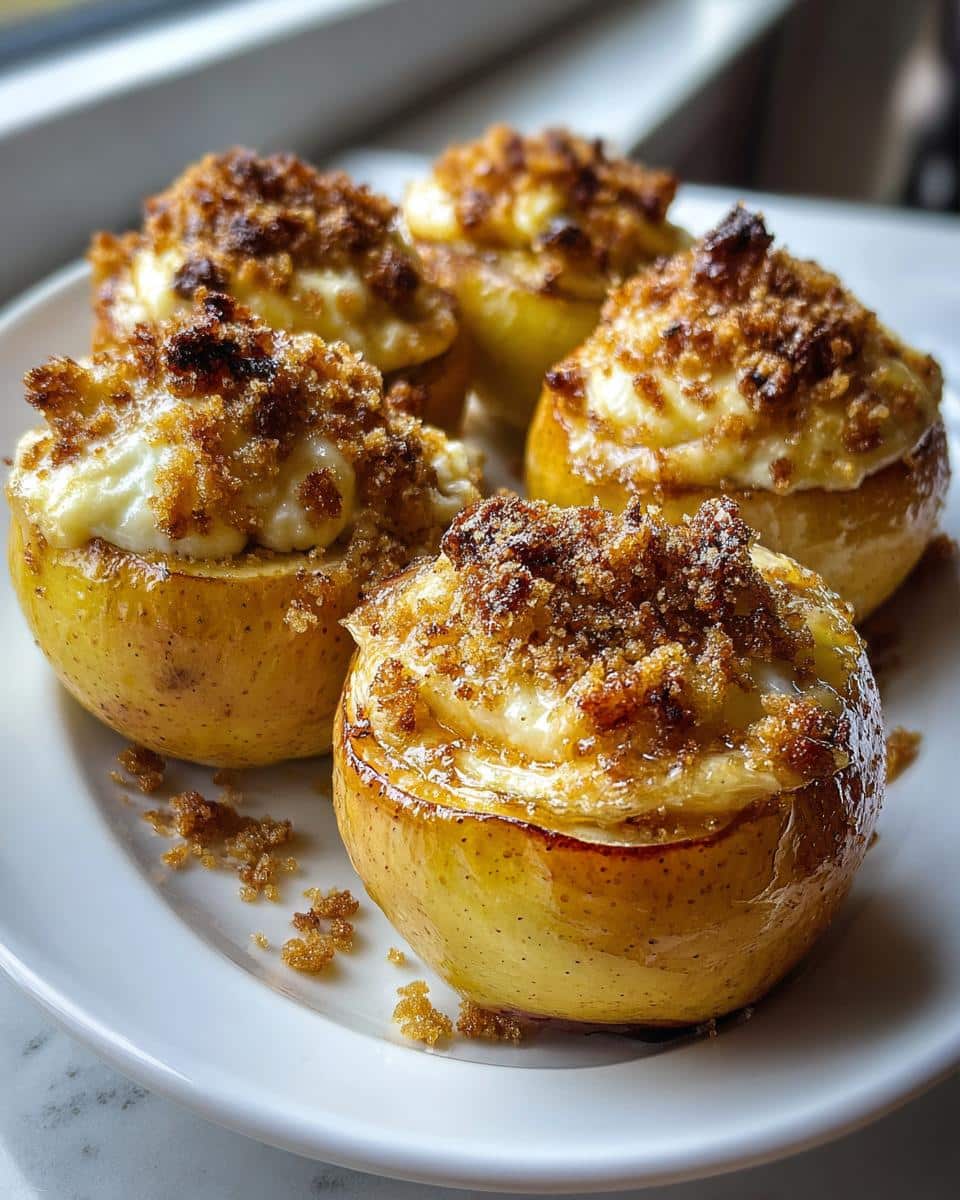
What started as a happy accident (I’d run out of pie crust but had apples and cream cheese to use up) has become my go-to dessert for everything from casual weeknights to holiday gatherings. These cheesecake stuffed baked apples give you the best of both worlds – the comforting warmth of baked apples with that luscious, velvety cheesecake center we all love. And trust me, once you see how easy they are to make, you’ll be finding excuses to bake them all season long!
Why You’ll Love These Cheesecake Stuffed Baked Apples
These little gems have stolen my heart (and my family’s dessert plates) for so many good reasons:
- Effortless elegance: They look fancy but take just 15 minutes of hands-on work – perfect when you want impressive results without the fuss
- Crowd-pleasing magic: The combination of warm spiced apples and cool, creamy cheesecake makes everyone at the table swoon
- Perfect portion control: Each apple is its own adorable single-serving dessert (though I won’t judge if you eat two!)
- Better than pie: All the cozy autumn flavors you crave, with none of the crust-making stress
Ingredients for Cheesecake Stuffed Baked Apples
Grab these simple ingredients – I promise you probably have most of them already! The magic happens when they all come together:
- 4 large firm apples (Honeycrisp or Granny Smith work best)
- 8 oz cream cheese, softened to room temperature (this is crucial!)
- 1/4 cup granulated sugar (or your favorite sweetener)
- 1 tsp vanilla extract (the real stuff makes all the difference)
- 1 egg yolk (save the white for breakfast!)
- 1/2 tsp cinnamon (feel free to add a pinch more if you’re a cinnamon lover like me)
- 1/4 cup graham cracker crumbs (or crushed vanilla wafers if that’s what you’ve got)
Ingredient Notes & Substitutions
About those apples: Firm varieties hold their shape beautifully when baked – soft apples turn to mush! If you must substitute, try Pink Lady or Fuji in a pinch. Sugar swaps: Brown sugar adds warmth, or use maple syrup (reduce other liquids slightly). For the crumbs: Any sweet cookie works – I’ve even used crushed ginger snaps for extra spice! Just avoid anything too sweet if you’re watching sugar content.
How to Make Cheesecake Stuffed Baked Apples
Okay, let’s get to the good stuff! Making these cheesecake stuffed apples is so simple, you’ll wonder why you haven’t been baking them every week. Here’s exactly how I do it:
- Heat things up: Preheat your oven to 375°F (190°C) – this gives the apples that perfect tender texture without getting mushy.
- Prep your apples: Carefully core them, leaving about 1/2 inch at the bottom intact (this keeps all that delicious filling from leaking out!). I use a melon baller – it’s my secret weapon for getting neat cores.
- Make the magic filling: Beat the cream cheese until smooth (no lumps!), then mix in sugar, vanilla, egg yolk, and cinnamon. Taste it – you should swoon a little!
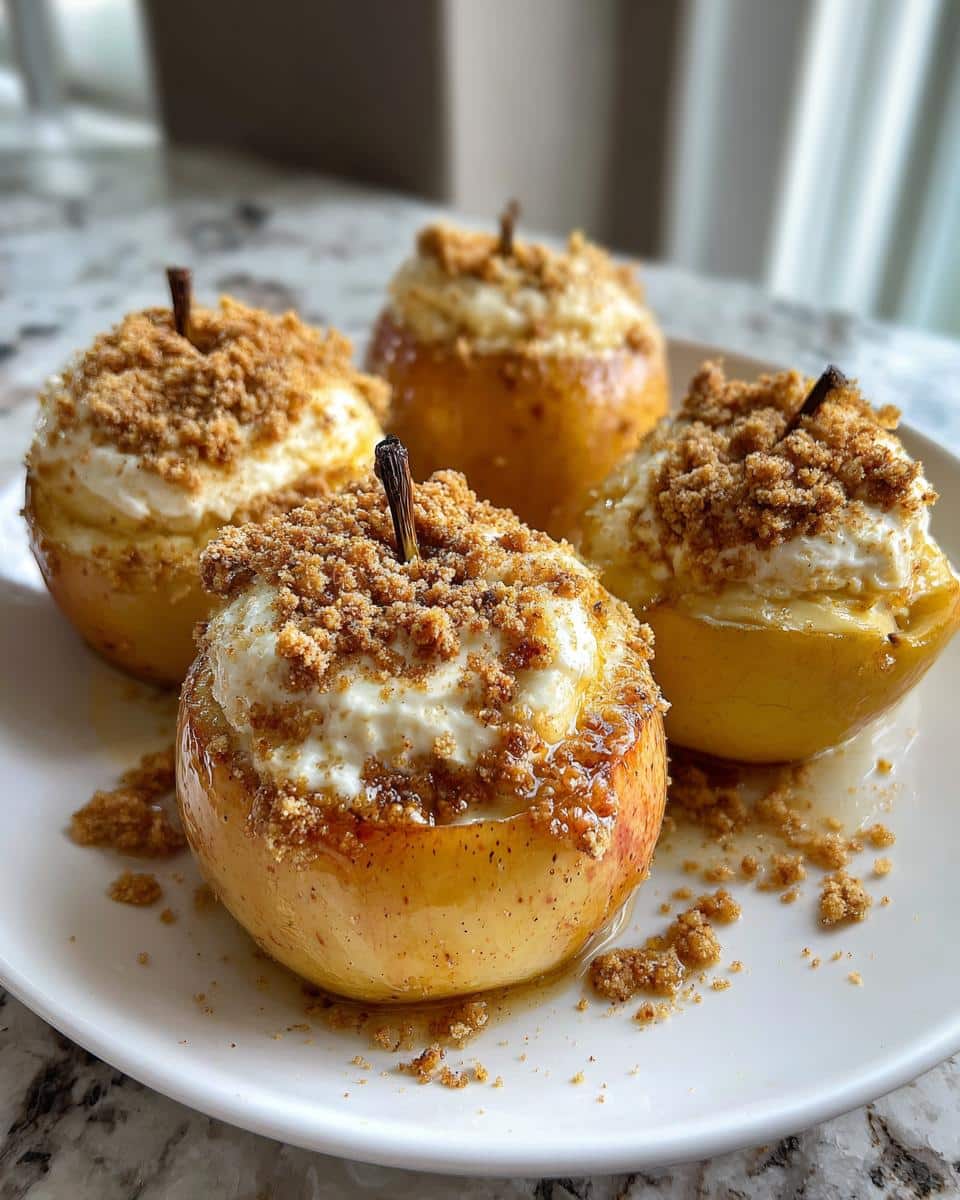
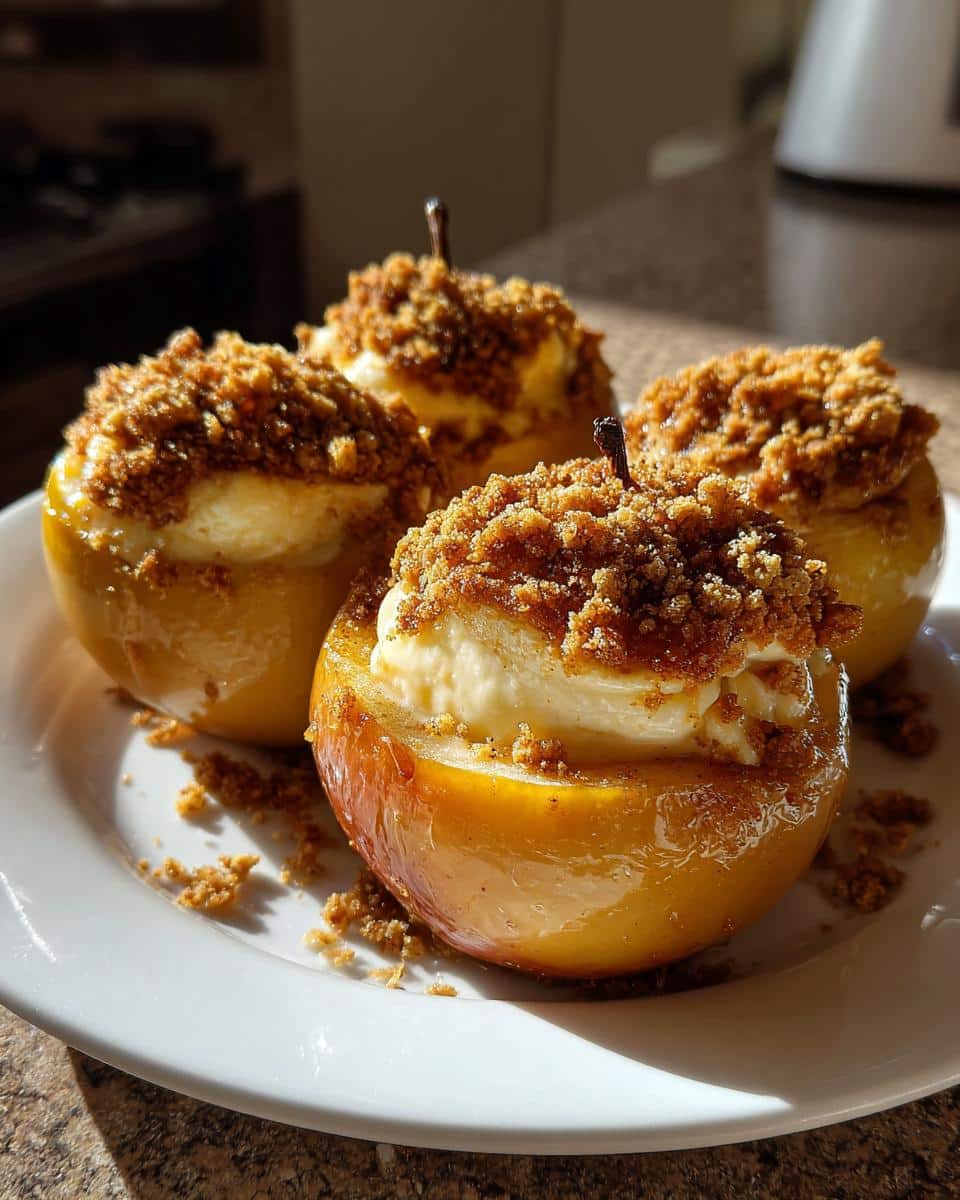
- Fill ’em up: Spoon the cheesecake mixture into your cored apples, mounding it slightly at the top. Don’t go overboard though – they’ll puff up a bit while baking.
- Add the crunch: Sprinkle graham cracker crumbs over each filled apple – this gives the perfect texture contrast.
- Bake to perfection: 25-30 minutes until the apples are tender when pierced with a knife and the filling is set. Your kitchen will smell amazing!
- Let them rest: Cool for at least 10 minutes before serving – the filling firms up beautifully as it cools.
Tips for Perfect Cheesecake Stuffed Apples
- The toothpick test: Check apple doneness by inserting a toothpick near the core – it should go in easily but the apple shouldn’t collapse.
- Don’t overfill: Leave about 1/4 inch space at the top – the cheesecake expands slightly while baking.
- Cooling is crucial: Let them sit for at least 10 minutes – the filling will set perfectly and you won’t burn your tongue!
Serving Suggestions for Cheesecake Stuffed Baked Apples
Oh, the possibilities! My favorite way to serve these is still warm with a scoop of vanilla ice cream melting over the top – the hot-and-cold contrast is heavenly. For special occasions, drizzle with caramel sauce and sprinkle chopped pecans. At brunch, I’ll add a dollop of whipped cream and cinnamon dusting. Arrange them on a rustic wooden board for that perfect “I’m a baking pro” presentation! You can find more dessert inspiration on Pinterest.
Storing and Reheating Cheesecake Stuffed Baked Apples
These beauties keep surprisingly well! Store any leftovers (if you’re lucky enough to have some) in an airtight container in the fridge for up to 3 days. When you’re ready for round two, reheat gently in a 300°F oven for about 15 minutes – the microwave works in a pinch but can make the apples a bit soft. One important note: I don’t recommend freezing them. The texture goes all wrong when thawed, turning the apples mushy and the cheesecake filling grainy. Trust me, they’re so good fresh, you probably won’t have leftovers anyway!
Cheesecake Stuffed Baked Apples Nutrition Info
Now, I’m no nutritionist, but here’s the scoop on what’s in these delicious treats! Remember, these are estimates – your exact numbers might vary based on apple size and ingredient brands. But let’s be real – when something tastes this good, who’s counting?
- Per serving (1 apple): 320 calories
- Sweet stuff: 28g sugar (mostly from the apples themselves!)
- Creamy goodness: 18g fat (10g saturated from that luscious cream cheese)
- Fiber boost: 4g (thanks to those wholesome apples)
- Protein punch: 5g (egg yolk and cream cheese team up here)
Not too shabby for a dessert that tastes like pure indulgence! Everything in moderation, right?
Frequently Asked Questions
Can I use other types of apples?
Absolutely! While Honeycrisp and Granny Smith are my go-tos for their perfect balance of tartness and firmness, any apple that holds its shape when baked will work. Try Pink Lady, Braeburn, or Fuji in a pinch. Just avoid super soft varieties like Red Delicious – they’ll turn to mush before your cheesecake filling sets.
Can I prep cheesecake stuffed apples ahead of time?
You sure can! I often prep them up to 4 hours before baking. Core the apples and mix the filling, then store them separately in the fridge. When you’re ready, fill and bake – easy as pie (but better!). The unbaked apples might brown slightly, but the baking process hides this beautifully.
How do I keep the bottoms from getting soggy?
Two tricks: First, make sure to leave that 1/2 inch base when coring – it creates a natural barrier. Second, bake them on a wire rack set over a baking sheet. This allows air to circulate underneath, keeping bottoms nicely firm while the tops get golden and delicious.
Can kids help make these?
Oh my goodness, yes! My nieces love helping with this recipe – scooping filling, sprinkling crumbs, and of course, taste-testing the cheesecake mixture. Just supervise the apple coring step. It’s the perfect intro to baking that gets them excited about fruits and desserts! For more kid-friendly recipes, check out our breakfast section.

Irresistible Cheesecake Stuffed Baked Apples: 4 Simple Steps
- Total Time: 45 minutes
- Yield: 4 servings
- Diet: Vegetarian
Description
A delicious dessert combining the creaminess of cheesecake with the natural sweetness of baked apples.
Ingredients
- 4 large apples
- 8 oz cream cheese, softened
- 1/4 cup granulated sugar
- 1 tsp vanilla extract
- 1 egg yolk
- 1/2 tsp cinnamon
- 1/4 cup graham cracker crumbs
Instructions
- Preheat oven to 375°F (190°C)
- Core apples, leaving bottom intact
- Mix cream cheese, sugar, vanilla, egg yolk, and cinnamon
- Fill apples with cheesecake mixture
- Sprinkle graham cracker crumbs on top
- Bake for 25-30 minutes until apples soften
- Let cool slightly before serving
Notes
- Use firm apples like Honeycrisp or Granny Smith
- Adjust sweetness to taste
- Serve warm with caramel sauce if desired
- Prep Time: 15 minutes
- Cook Time: 30 minutes
- Category: Dessert
- Method: Baking
- Cuisine: American