Skip to content
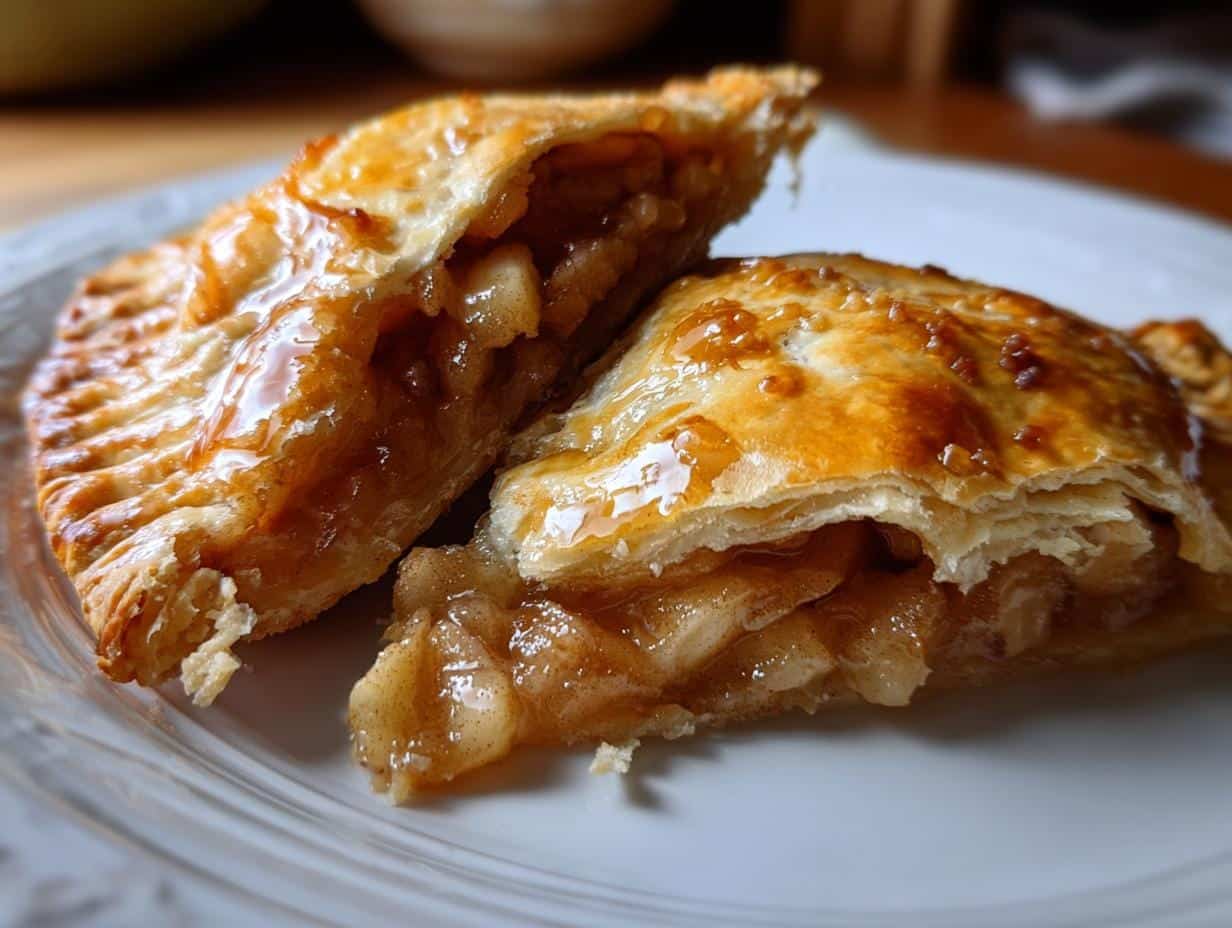
Oh, you’re going to love these little pockets of joy! Apple hand pies are my go-to when I need a portable dessert that feels special. That flaky, buttery crust hugging a sweet-tart apple filling? Absolute perfection. I started making these years ago for school bake sales (my kids always begged me to sign up), and now they’re my secret weapon for picnics, potlucks, and those “I need something sweet NOW” moments. The best part? They’re smaller than a full pie but pack all that cozy spiced-apple goodness in every bite. Trust me, once you try homemade apple hand pies, those store-bought versions will never compare.
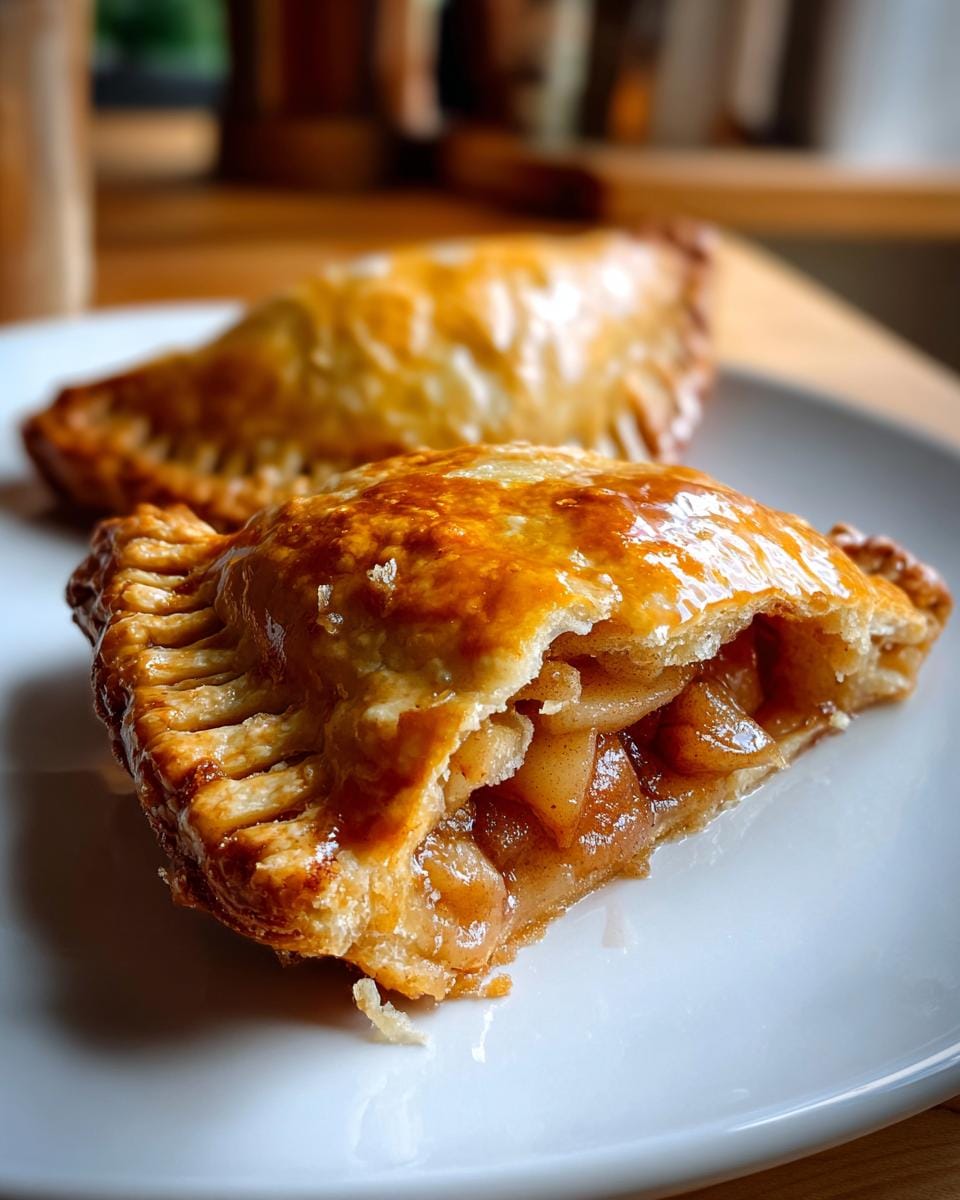
Table of contents:
Why You’ll Love These Apple Hand Pies
Seriously, what’s not to love? These little pies are:
- Perfectly portable – No plates or forks needed, just grab and go
- Surprisingly simple – Easier than a full pie but just as delicious
- Endlessly customizable – Add nuts, caramel, or different spices to make them yours
- Great for any occasion – From school lunches to fancy dinner parties
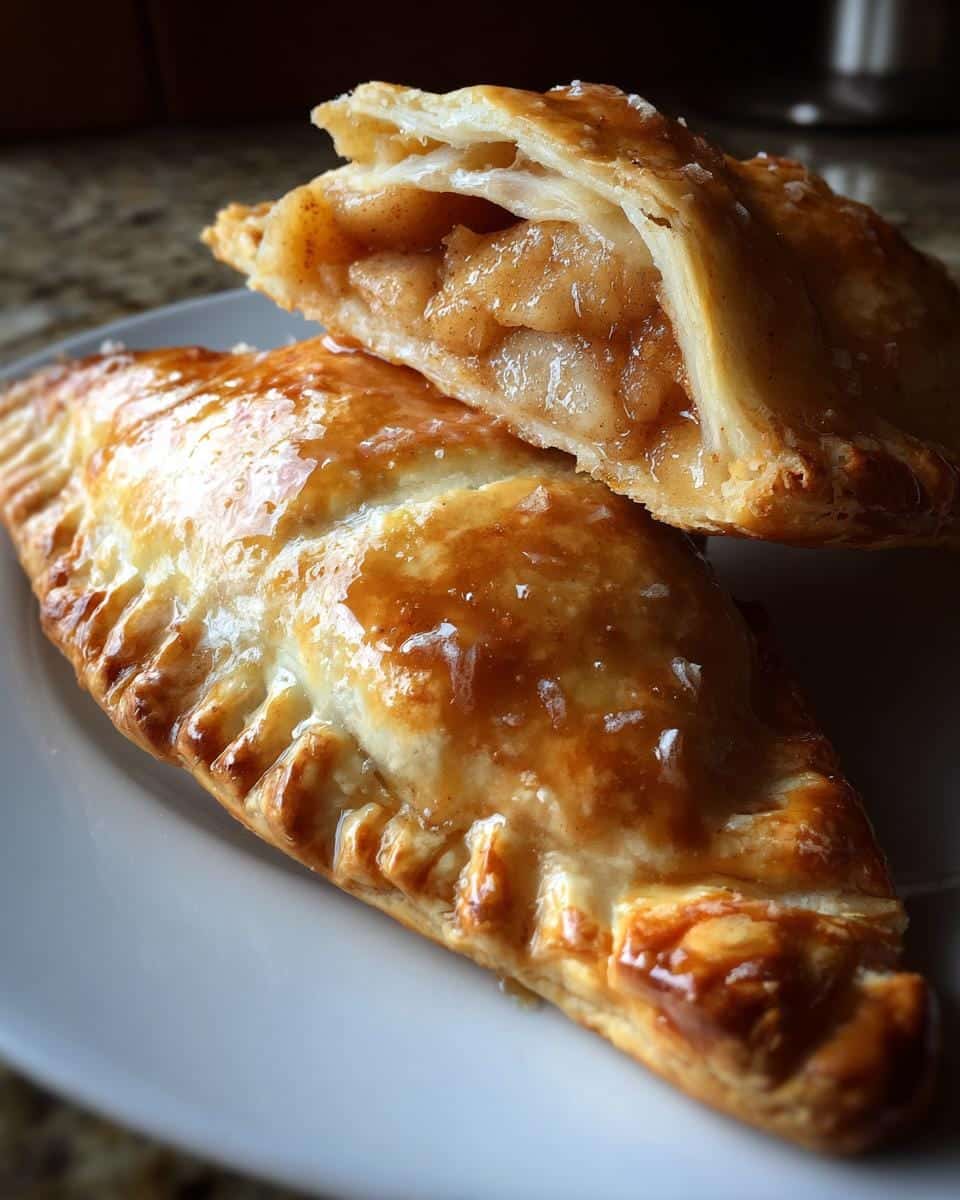
And that golden, flaky crust? It’s basically edible happiness. You’ll see!
Ingredients for Apple Hand Pies
Here’s everything you’ll need to make these irresistible little pies – and trust me, using the right ingredients makes all the difference!
- 2 cups all-purpose flour – Spoon it into measuring cups and level off for accuracy
- 1/2 teaspoon salt – Just enough to balance the sweetness
- 2/3 cup cold unsalted butter, cubed – I keep mine in the freezer for 10 minutes before using
- 4-6 tablespoons ice water – Keep it icy cold in a bowl nearby
- 2 medium apples, peeled and diced – Granny Smith are my favorite for that perfect tartness
- 1/4 cup granulated sugar – For that classic apple pie sweetness
- 1 teaspoon cinnamon – The spice that makes it smell like home
- 1 tablespoon lemon juice – Keeps the apples bright and prevents browning
- 1 egg (for egg wash) – Gives that beautiful golden-brown shine
See? Nothing fancy – just good, honest ingredients that work magic together. Now let’s get baking!
How to Make Apple Hand Pies
Alright, let’s dive into making these adorable little pies! The process is simple but has a few key steps you don’t want to rush. I’ve learned (the hard way!) that patience with the dough makes all the difference between good and amazing hand pies.
Preparing the Dough
First things first – that flaky crust starts with cold ingredients! Whisk together your flour and salt in a large bowl. Now grab those icy butter cubes and start cutting them into the flour using a pastry cutter or two forks. You want the mixture to look like coarse crumbs with some pea-sized butter bits remaining – those pockets of butter are what create layers of flakiness. Drizzle in the ice water tablespoon by tablespoon, mixing just until the dough comes together. Overworking it makes tough pastry, so stop when you can press it into a ball!
Making the Apple Filling
While that dough chills (30 minutes minimum!), toss together your apple filling. Peel and dice those Granny Smiths – their tartness balances the sugar beautifully. Combine them with sugar, cinnamon, and lemon juice in a bowl, stirring until everything’s evenly coated. The lemon keeps the apples from browning and adds a nice little zing. Let this sit while the dough chills – the apples will release some juices, creating that saucy texture we love!
Assembling and Baking
Preheat your oven to 375°F (190°C) and line a baking sheet with parchment. Roll out your chilled dough to about 1/8-inch thickness on a lightly floured surface. Use a 5-inch round cutter (or an overturned bowl!) to cut circles. Spoon about 2 tablespoons of filling onto one half of each circle, leaving a border. Brush the edges with water, fold over, and crimp with a fork to seal tight. Poke a few steam vents in the tops with a toothpick – this prevents explosions! Give them a golden glow by brushing with beaten egg wash. Bake for 20-25 minutes until beautifully browned. That heavenly smell will have everyone hovering around your oven!
Pro tip: Let them cool slightly before biting in – that filling gets piping hot! But seriously, good luck resisting…
Tips for Perfect Apple Hand Pies
After making hundreds (okay, maybe thousands) of these over the years, I’ve picked up some foolproof tricks:
- Keep everything cold – From butter to dough to your hands (run them under cold water if needed). Warm dough = sad, tough crust.
- Don’t overfill – That tempting extra spoonful of apples will burst right out during baking. Stick to 2 tablespoons max per pie.
- Vent like your life depends on it – Those little steam holes prevent apple explosions. I use a toothpick for dainty dots or a sharp knife for decorative slits.
- Egg wash is magic – Skip it and your pies will look pale and sad. That golden glow makes all the difference!
Follow these, and your hand pies will be bakery-worthy every single time.
Apple Hand Pies Variations
Ooh, let’s get creative! Once you’ve mastered the basic recipe, try these fun twists:
- Toss in chopped walnuts or pecans for crunch
- Drizzle with warm caramel sauce after baking
- Swap cinnamon for pumpkin pie spice in autumn
- Add a sharp cheddar cheese to the dough for that classic sweet-salty combo
The possibilities are endless – make them your own signature treat!
Storing and Reheating Apple Hand Pies
Here’s the beautiful thing about these little pies – they keep like a dream! Store cooled hand pies in an airtight container at room temperature for up to 2 days, or in the fridge for 3-4 days. Want to freeze them? No problem! Just wrap each pie individually in plastic wrap, then pop them in a freezer bag for up to 3 months. When you’re ready to enjoy, reheat them in a 350°F (175°C) oven for 10 minutes to bring back that glorious flaky texture. Microwaving works in a pinch, but trust me – the oven method gives you that fresh-from-the-bakery crispness every time!
Apple Hand Pies Nutritional Information
Let’s be real – we’re not eating hand pies for their health benefits! But in case you’re curious, here’s the scoop per pie (based on 8 servings):
- 220 calories – A perfect little indulgence
- 10g fat (6g saturated) – Thank that glorious butter in the crust
- 30g carbs – Mostly from the apples and crust
- 12g sugar – Naturally sweet with that touch of added sugar
- 2g fiber – Thanks to those apple peels!
Remember, these numbers can vary based on your exact ingredients and size variations. Want to lighten them up? Try reducing the sugar or using whole wheat pastry flour – but honestly, sometimes you just need that buttery original!
Common Questions About Apple Hand Pies
I get asked about these little pies ALL the time – here are the answers to the most common questions that pop up in my kitchen:
What are the best apples to use for hand pies?
Granny Smith is my go-to for that perfect sweet-tart balance, but Honeycrisp or Braeburn work great too! Just avoid super soft varieties – you want apples that hold their shape when baked.
Can I make the dough ahead of time?
Absolutely! The dough keeps beautifully wrapped in plastic for 2 days in the fridge or 3 months in the freezer. Just thaw overnight in the fridge if frozen.
How do I prevent my pies from leaking?
Don’t overfill (I know, it’s tempting!), make sure your edges are well-sealed, and always poke those steam vents. A little cornstarch in the filling helps thicken juices too.
Can I freeze baked hand pies?
You bet! Freeze them on a baking sheet first, then transfer to bags. Reheat straight from frozen at 350°F for about 15 minutes – they’ll taste freshly baked!
Tried this recipe? I’d love to hear how your apple hand pies turned out – leave a rating or tag me in your photos! You can also find more delicious recipes on Pinterest.
Print
2-Apple Hand Pies Recipe with Irresistible Flaky Crust
- Total Time: 55 minutes
- Yield: 8 hand pies
- Diet: Vegetarian
Description
Delicious handheld apple pies with a flaky crust and sweet filling.
Ingredients
- 2 cups all-purpose flour
- 1/2 teaspoon salt
- 2/3 cup cold unsalted butter, cubed
- 4–6 tablespoons ice water
- 2 medium apples, peeled and diced
- 1/4 cup granulated sugar
- 1 teaspoon cinnamon
- 1 tablespoon lemon juice
- 1 egg (for egg wash)
Instructions
- Mix flour and salt in a bowl. Cut in butter until crumbly.
- Add water gradually, mixing until dough forms.
- Chill dough for 30 minutes.
- Preheat oven to 375°F (190°C).
- Combine apples, sugar, cinnamon, and lemon juice in a bowl.
- Roll out dough and cut into circles.
- Spoon filling onto half of each circle, fold, and seal edges.
- Brush with egg wash and bake for 20-25 minutes.
Notes
- Use Granny Smith apples for a tart flavor.
- Dough should be cold for easier handling.
- Poke small holes on top to vent steam.
- Prep Time: 30 minutes
- Cook Time: 25 minutes
- Category: Dessert
- Method: Baking
- Cuisine: American