Skip to content
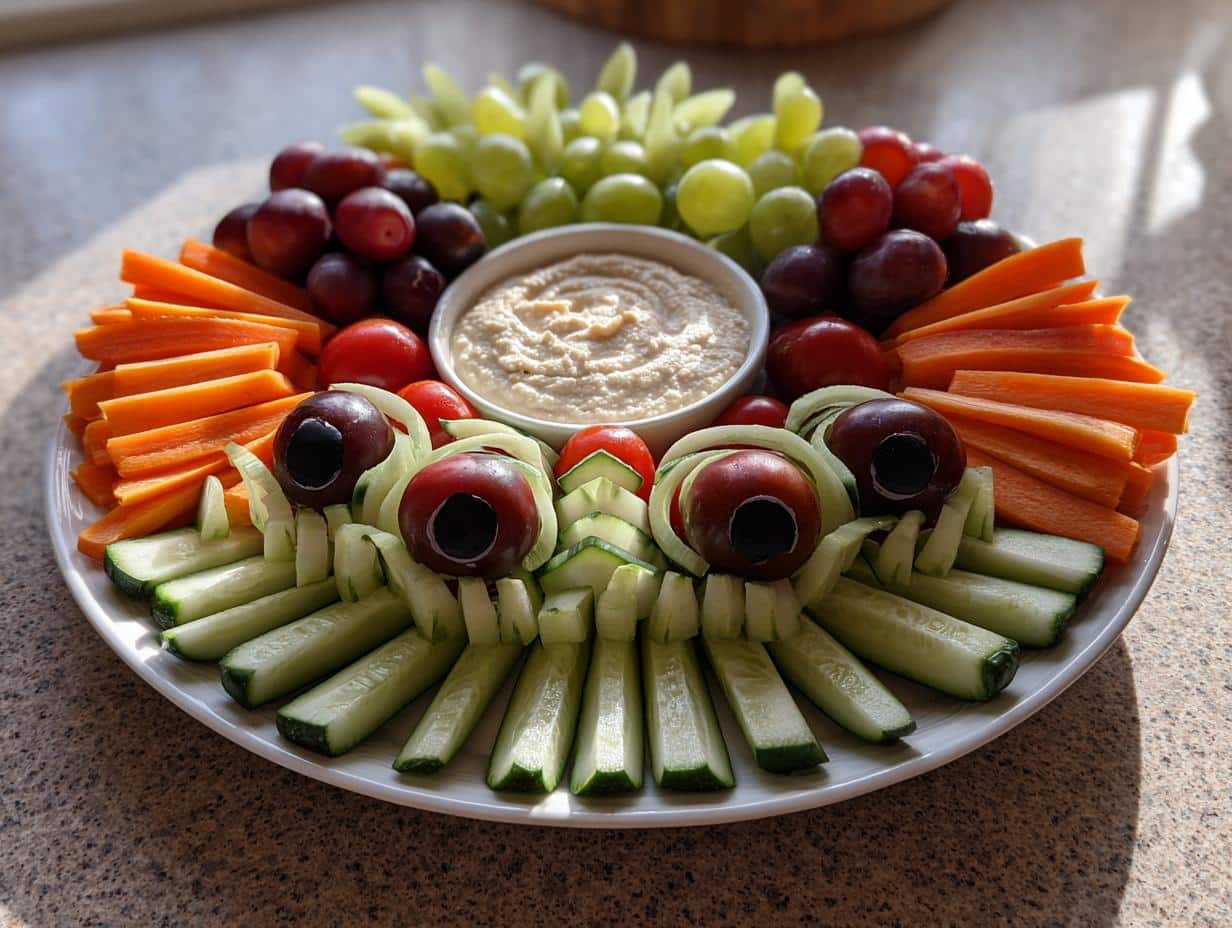
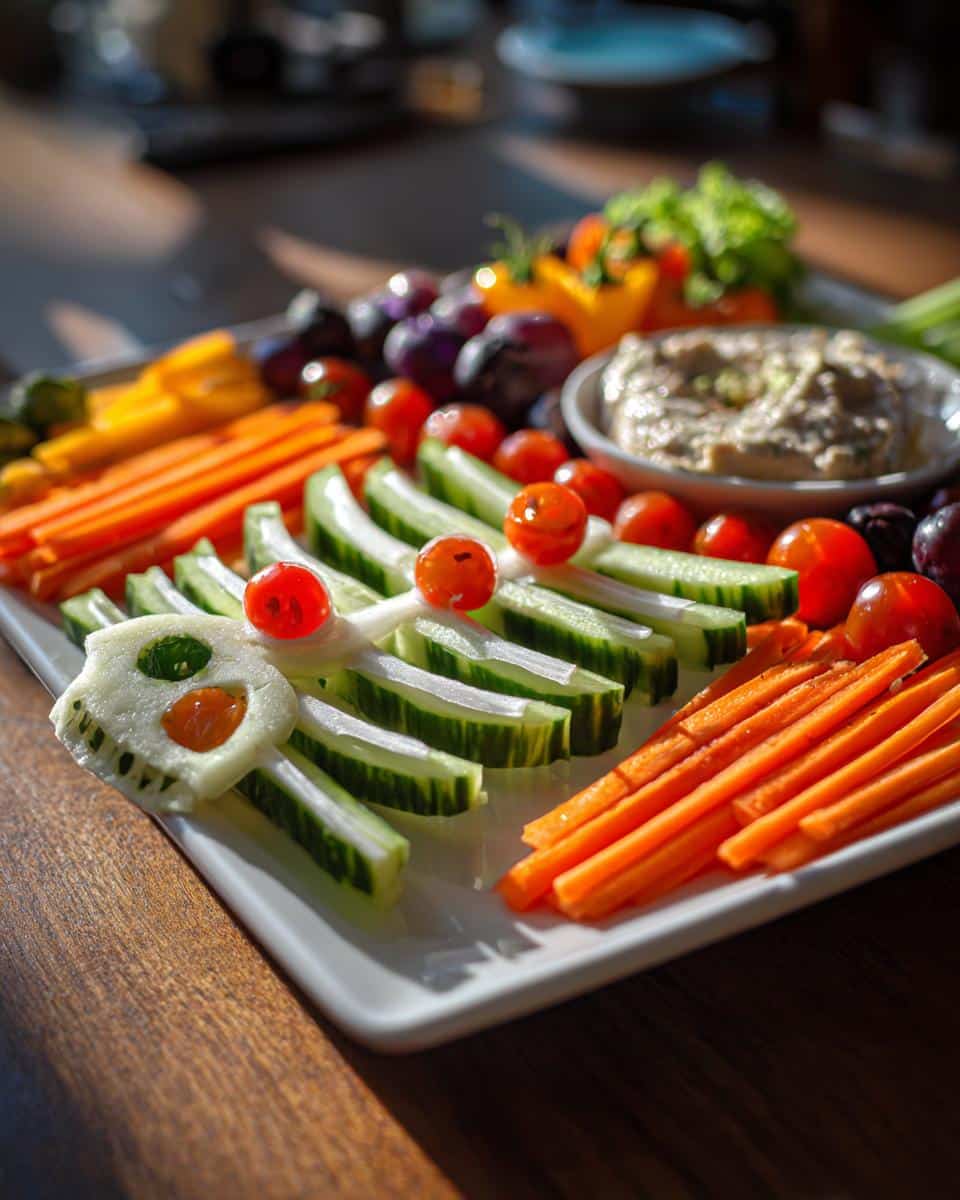
Oh my gosh, you HAVE to try this Veggie Skeleton Platter! It’s the perfect mix of spooky and healthy—plus, it’s ridiculously easy to throw together. I first made this for my nephew’s Halloween party last year, and let me tell you, it was the star of the snack table. The kids went wild for it (especially the olive eyeballs!), and the parents loved that it wasn’t just another sugar bomb. The best part? You can whip it up in 15 minutes flat—no cooking, no fuss, just fresh veggies arranged into the coolest little skeleton. Trust me, once you try this, it’ll become your go-to party trick!
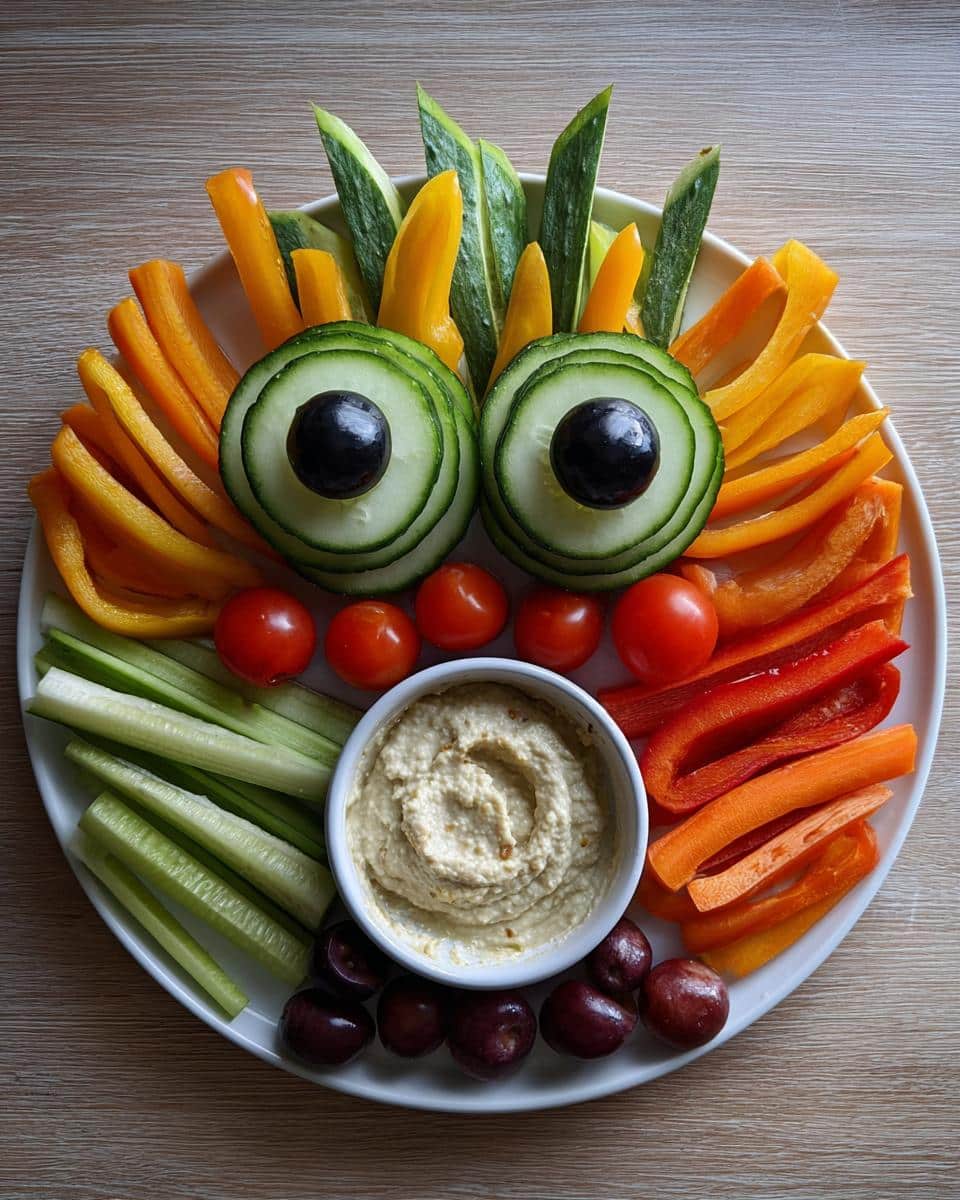
Table of contents:
Veggie Skeleton Platter Ingredients
Here’s what you’ll need to bring this spooky snack to life—trust me, every piece plays a crucial role in creating our veggie skeleton masterpiece!
- 1 large cucumber, thinly sliced (these become our skeleton’s delicate ribs)
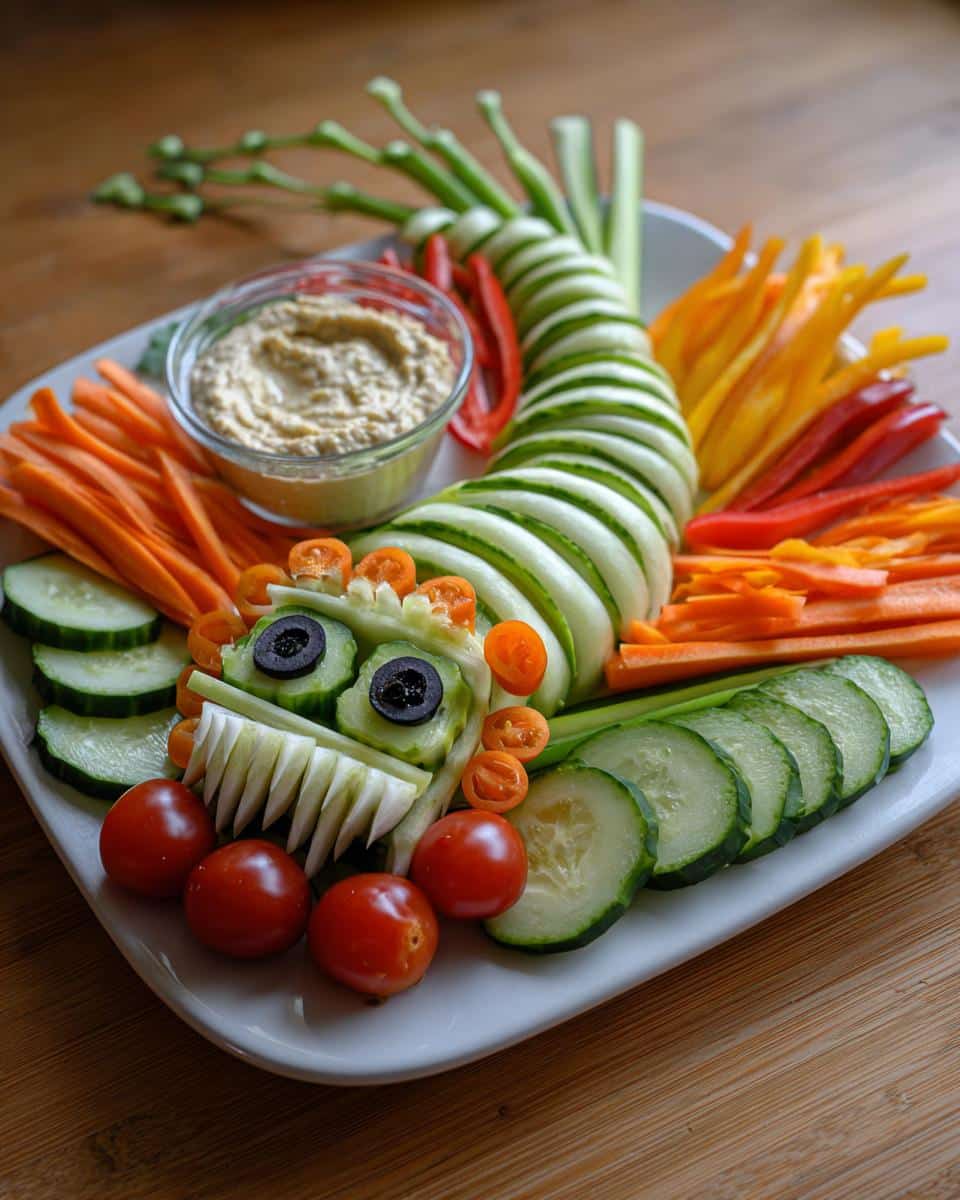
- 2 bell peppers (any color you like!), cut into long strips (perfect for arms and legs)
- 1 cup cherry tomatoes (the plump ones work best for those creepy eyeballs)
- 1 carrot, julienned into thin matchsticks (this forms our sturdy spine)
- 1 celery stalk, sliced into small bone-shaped pieces (great for finger and toe bones!)
- ½ cup black olives (pitted—we’ll use these for the skeleton’s haunting pupils)
- ¼ cup hummus (for dipping—or go wild with ranch if you prefer)
Pro tip: I always grab an extra cucumber just in case—sometimes those slices disappear while I’m arranging (oops!). And don’t stress about perfect cuts; slightly uneven veggies give our skeleton that wonderfully “undead” look.
How to Make the Veggie Skeleton Platter
Okay, let’s bring this veggie skeleton to life! The key is working from the ground up—just like building a real skeleton (but way more delicious). Follow these steps, and in no time, you’ll have a spooky snack that’ll make everyone at your party do a double-take.
Arranging the Skeleton Base
First, grab your largest platter—this skeleton needs room to sprawl! Start with the julienned carrots, arranging them in a slightly wavy line down the center to form the spine. Don’t make it too perfect; a little curve makes it look more “alive” (or should I say… undead?).
Now for the ribs: Take those beautiful cucumber slices and place them in gentle arches along both sides of the carrot spine. Space them about half an inch apart—close enough to look connected, but with gaps so you can still see each individual rib. Pro tip: overlap some slices at angles to create that 3D skeletal effect we’re going for.
Adding the Limbs and Features
Time for arms and legs! Use your bell pepper strips to create the limbs—I like to bend them at “joints” for extra realism. Place two strips angling up from the ribs for arms, and two angling down for legs. Snap a few in half if you want to make bendy elbows or knees.
For the head, place two cherry tomatoes at the top of your spine for eyes. Here’s my favorite part: take black olive slices (or whole pitted olives if you’re lazy like me sometimes) and press them into the tomatoes to make pupils. Instant spooky stare! If you want to get fancy, use a tiny celery round with an olive piece for a nose.
Finish by scattering those cute celery “bones” around the hands and feet. I always sneak a few extra at the wrists and ankles—it makes our veggie skeleton look like it’s mid-dance!
Pop the whole platter in the fridge until party time (up to 2 hours is perfect). The crisp veggies stay fresh, and the cold makes the hummus dip extra refreshing. Now step back and admire your edible masterpiece—you’ve just created the life (er… afterlife?) of the party!
Why You’ll Love This Veggie Skeleton Platter
Honestly, this platter checks ALL the boxes—it’s the kind of recipe that makes you wonder why you haven’t been making it year-round! Here’s why it’s become my absolute go-to:
- Zero cooking required – Just chop, arrange, and serve. No oven, no stove, no stress. Perfect for when you’re juggling costumes, decorations, and hyper kids!
- Kid-approved (and parent-relieved) – The playful design gets even picky eaters munching on veggies. I’ve seen broccoli-haters gobble up “bone” celery sticks without realizing!
- Endlessly customizable – Swap in whatever veggies you have! Zucchini ribs? Radish eyes? Purple carrot spine? Your skeleton, your rules. I once used cauliflower florets as a ghostly skull—total hit.
- The ultimate conversation starter – Whether it’s Halloween, a science party, or just a Tuesday, this platter steals the show. Last year mine got more Instagram attention than my pumpkin carvings!
Seriously, this isn’t just another veggie tray—it’s edible magic that disappears faster than a ghost in the night!
Tips for the Best Veggie Skeleton Platter
After making this platter more times than I can count (seriously, my friends now demand it at every gathering), I’ve picked up some foolproof tricks to make your veggie skeleton truly spine-tingling—in the best way possible!
- Chill your veggies first – Nothing beats that satisfying CRUNCH when veggies are ice-cold. I pop everything in the fridge for at least 30 minutes before arranging—it keeps them extra crisp and makes slicing easier too. Bonus: cold tomatoes won’t squish when you add the olive pupils!
- Anchor your platter with a damp towel – That beautiful ceramic platter? Yeah, it’ll slide around like a ghost on rollerskates while you’re arranging. Fold a damp paper towel underneath to keep it steady. Life—er, death—saver!
- Pre-cut everything before assembling – Trust me, you don’t want to be julienning carrots while trying to balance bell pepper arms. I prep all veggies first and keep them in separate bowls. It turns assembly into a fun puzzle rather than a chopping marathon.
- Use hummus as “glue” – For stubborn pieces that won’t stay put (looking at you, carrot spine!), dab a tiny bit of hummus underneath like edible adhesive. Just don’t overdo it—we’re building a skeleton, not a veggie lasagna!
- Bring backup olives – Those little black olive pupils tend to “disappear” (okay, get eaten) first. I always have extra olives on hand to refresh the eyes right before serving. Pro tip: slice a few extra olives in half and scatter them around like creepy crawling bugs!
Oh! And my golden rule? Have fun with it! Wonky ribs? Call them “zombie fractures.” Broken pepper arm? Instant “mummy injury.” The imperfections make your veggie skeleton uniquely spooktacular—just like my first attempt that looked more like a veggie abstract art piece than anatomy. But hey, the kids still devoured it!
Veggie Skeleton Platter Variations
Here’s the beautiful thing about this recipe—it’s more like a creative playground than a strict set of rules! Over the years, I’ve discovered so many fun twists that keep this platter fresh (literally and figuratively). Whether you’re out of ingredients or just feeling extra creative, these variations always save the day.
Swap the base veggies: Ran out of cucumbers? No problem! Zucchini slices make gorgeous green ribs, and jicama sticks give that perfect bone-white look. For a colorful twist, try rainbow carrots as the spine—the purple ones look especially eerie!
Switch up the dip: While hummus is my go-to, ranch dressing transforms this into classic party fare. For Halloween, I sometimes dye it orange with a pinch of turmeric. Want something lighter? Greek yogurt with dill works wonders. My foodie friend even used black bean dip last year—spooky AND delicious!
Add edible accessories: Take your skeleton to the next level with cheese skulls (just cut slices with a cookie cutter) or broccoli “hair.” Radish slices make creepy cracked bones, and snap peas can form a ribcage cage. Once, I arranged roasted red pepper strips into a little bowtie—my dapper skeleton was the talk of the potluck!
Go beyond Halloween: This platter isn’t just for October! For science parties, arrange the veggies like a museum skeleton. Valentine’s Day? Heart-shaped pepper pieces and beet-dyed hummus make it “anatomically correct romance.” My personal favorite was using golden beets for a “pirate skeleton” at my nephew’s birthday—complete with a bell pepper eyepatch!
Really, the only limit is your imagination (and maybe how many vegetables you can fit on one platter). The best part? Even your “mistakes” turn into new ideas. That time I accidentally used purple cauliflower for the skull? Total happy accident that everyone loved. So play around—your veggie skeleton will thank you!
Serving and Storing the Veggie Skeleton Platter
Here’s the beautiful thing about this platter—it’s practically foolproof when it comes to serving! I like to set mine out right before guests arrive so those veggies stay crisp and fresh-looking. The hummus dip goes in a small bowl right next to the skeleton’s hand (get it? Like he’s offering it—okay, maybe I’ve thought about this too much!).
Now, if you must prep ahead (hey, we’ve all been there), here’s my trick: cover the entire platter with lightly dampened paper towels before popping it in the fridge. This keeps everything from drying out—just make sure the towels don’t actually touch the hummus. Two hours is your sweet spot; any longer and the cucumbers might start getting sad.
A word to the wise: no reheating required (obviously!) and please don’t try to freeze this masterpiece. I learned that lesson the hard way when my “frozen skeleton” turned into a veggie mush puddle—not exactly the haunting effect I was going for!
Leftovers? Ha! Just kidding—but seriously, if by some miracle you have veggies remaining, simply disassemble your skeleton and store the pieces in separate airtight containers. The hummus keeps for about 4 days refrigerated. Though in my experience, the only “remains” you’ll find are a few stray olive eyes staring up at you from an otherwise empty platter!
Veggie Skeleton Platter Nutrition
Now, let’s talk about what makes this platter truly spooktacular—it’s not just cute, it’s actually good for you too! Just remember, these numbers are estimates (your olive eyeballs might be bigger than mine!), but here’s the nutritional breakdown per serving (about ¼ of the platter):
- Calories: 80 – Basically the same as two mini candy bars, but with actual nutrients!
- Fat: 3g – Mostly from the good stuff in hummus and those luscious olives
- Carbs: 12g – Nature’s candy, baby! All from fresh vegetables
- Fiber: 4g – That’s about 15% of your daily needs—your gut will thank you
- Protein: 3g – Not bad for something that looks like it crawled out of a graveyard!
- Sugar: 5g – All natural sugars from the veggies, no added nasties
- Sodium: 100mg – Much lower than most party snacks (looking at you, chips!)
Here’s the real magic—you’re getting a full serving of vegetables in every portion without even trying. The vitamin A from those carrots could make a vampire blush! Of course, your exact numbers might dance up or down depending on your veggie sizes and how generous you are with the hummus (no judgment—I’ve been known to create “hummus quicksand” for my skeleton).
Pro tip: If you’re watching certain nutrients, you can easily tweak this. Use low-sodium olives, swap in a light dressing instead of hummus, or load up on extra cucumber for an even lighter bite. But personally? I say enjoy every creepy, crunchy, nutritious bite—it’s Halloween, after all!
Frequently Asked Questions
Can I make the veggie skeleton platter ahead of time?
Absolutely! Prep all your veggies up to 4 hours in advance—just keep them in separate airtight containers in the fridge. Hold off on assembling until about 30 minutes before serving so nothing gets soggy. The hummus can hang out in its bowl with plastic wrap pressed directly on the surface (prevents that weird skin from forming). My trick? I’ll even label my containers “ribs,” “spine,” and “eyeballs” so assembly is a breeze when guests arrive!
How do I prevent my veggie skeleton from looking wilted?
Three words: cold, damp, and quick! First, chill your platter in the freezer for 10 minutes before arranging—it’s like a mini fridge for your skeleton. Then, as I mentioned earlier, that damp paper towel trick under the platter works wonders. If you notice any veggies looking tired (usually the cucumber ribs first), spritz them with ice water and pat dry. Bonus: this also gives them that fresh-from-the-grave dewy look!
Can I use other dips besides hummus?
Oh honey, the dip world is your oyster! Ranch is always a crowd-pleaser, or mix Greek yogurt with herbs for something lighter. For Halloween parties, I love making “bloody” beet hummus or orange turmeric yogurt dip. Just keep your dip in a separate bowl—if you spread it directly on the platter, your skeleton might end up looking more like a veggie crime scene!
What’s the best way to transport this to a party?
After one tragic “skeleton pile-up” in my backseat, I perfected my method: place non-slip shelf liner under the platter in a shallow box (those bakery cake boxes are perfect). Keep the hummus in a small jar with the lid barely on to prevent spills. If it’s a long drive, I’ll assemble just the “bones” and add the tomato eyes and olive pupils when I arrive—nothing sadder than a skeleton that lost its eyes in transit!
Can I make this nut-free for school parties?
You’re in luck—this recipe is naturally nut-free as written! Just double-check your hummus ingredients (some brands process nuts in the same facility). For super strict nut-free zones, swap the hummus for a yogurt-based dip or guacamole. The teachers will love you, and the kids will be too busy playing with their food to notice the difference!

Spooky Veggie Skeleton Platter That Kids Devour in 15 Minutes
- Total Time: 15 minutes
- Yield: 1 platter
- Diet: Vegetarian
Description
A fun and healthy platter featuring vegetables arranged like a skeleton, perfect for Halloween or themed parties.
Ingredients
- 1 large cucumber (sliced)
- 2 bell peppers (sliced)
- 1 cup cherry tomatoes
- 1 carrot (julienned)
- 1 celery stalk (sliced)
- 1/2 cup black olives
- 1/4 cup hummus (for dipping)
Instructions
- Arrange cucumber slices to form the skeleton’s ribs.
- Use bell pepper slices for the arms and legs.
- Place cherry tomatoes as the eyes and olives as the pupils.
- Add julienned carrot for the spine and celery for bones.
- Serve with hummus on the side.
Notes
- Use a large platter for better arrangement.
- Customize with other veggies like radishes or zucchini.
- Prepare ahead and refrigerate until serving.
- Prep Time: 15 minutes
- Cook Time: 0 minutes
- Category: Appetizer
- Method: No-Cook
- Cuisine: American