Skip to content
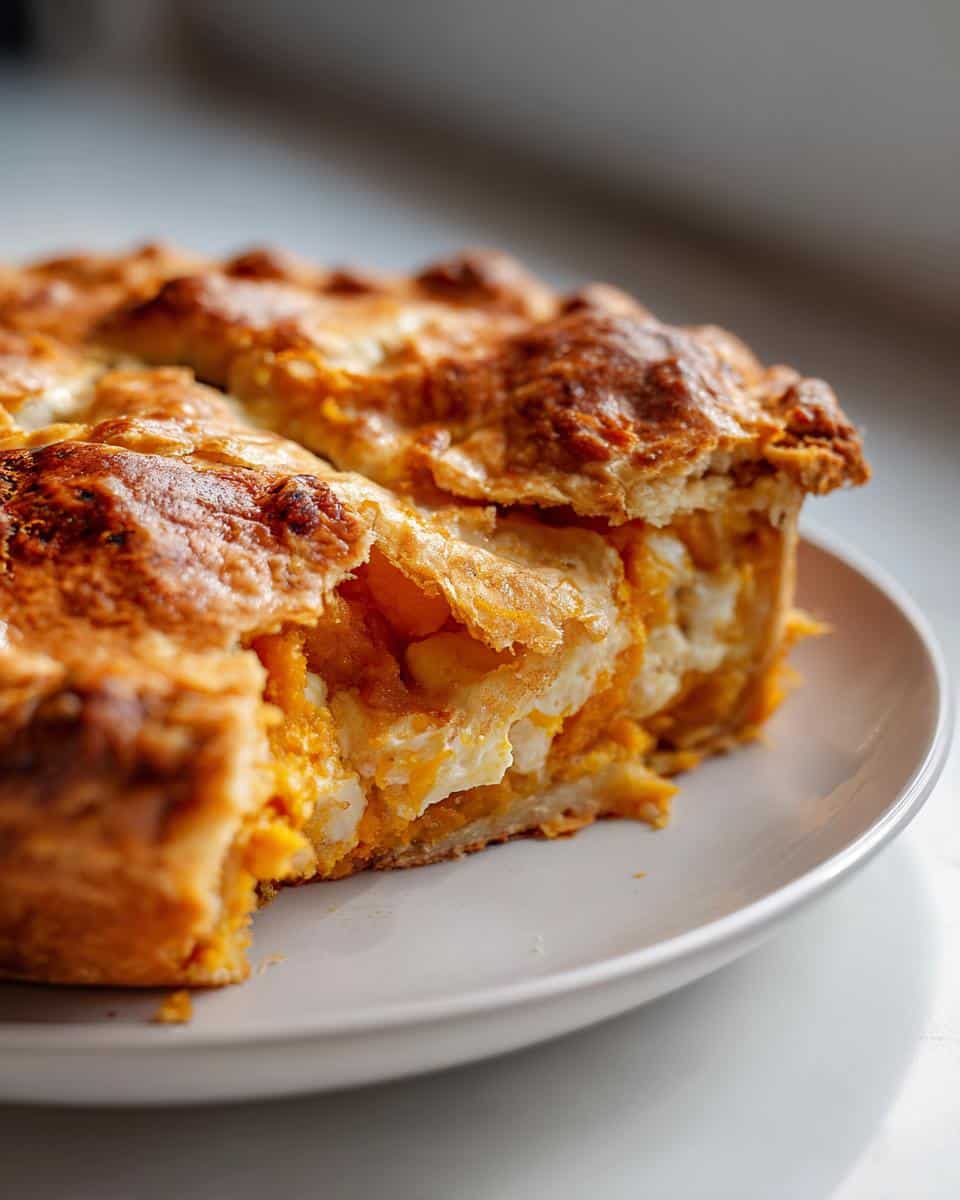
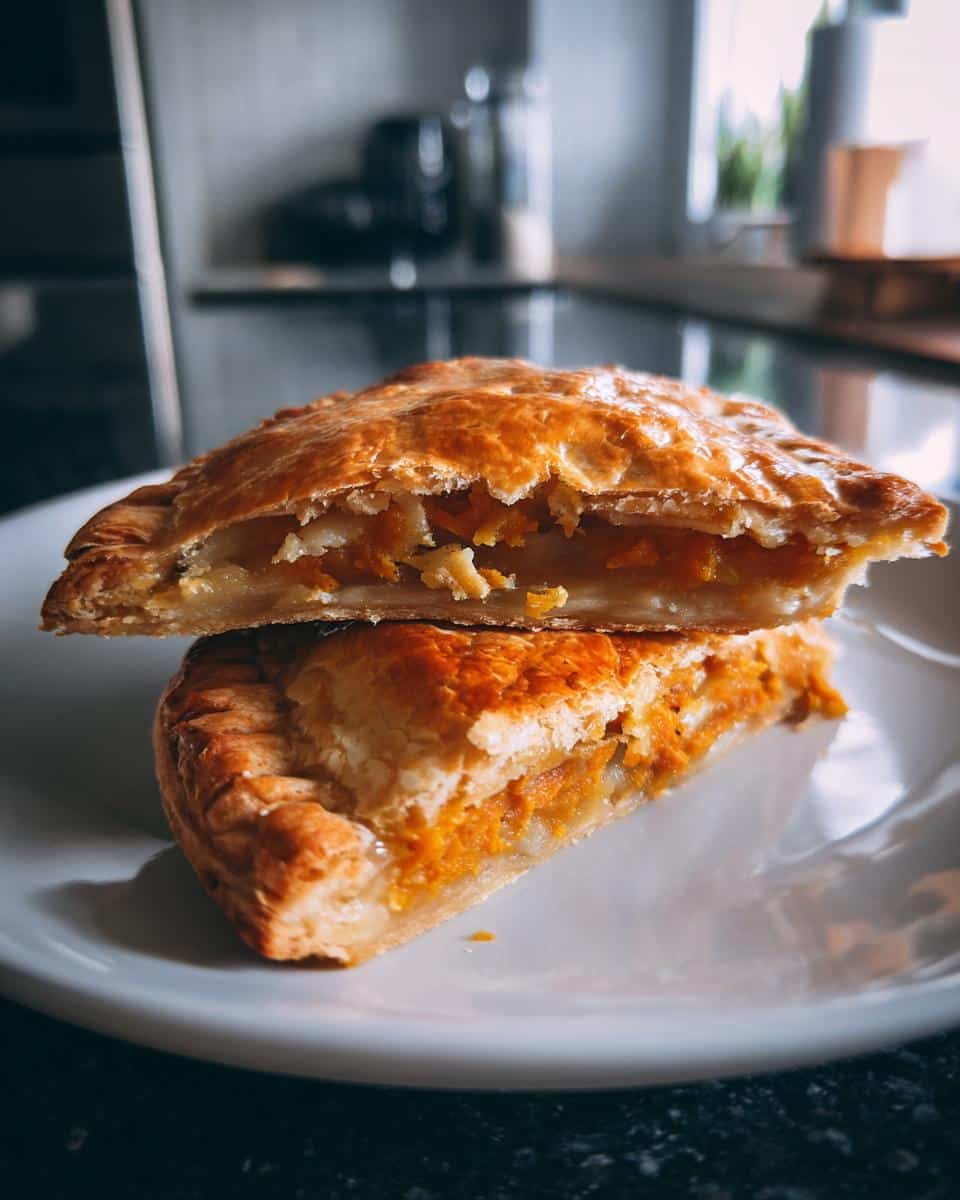
Is there anything better than that first bite of warm, spiced sweet potato on a crisp fall day? As a professional baker, I’ve spent years perfecting portable desserts that capture those cozy autumn flavors, and these Sweet Potato Hand Pies are my absolute favorite creation. Picture this: flaky, buttery crust hugging a sweet cinnamon-spiced filling that practically melts in your mouth. They’re the perfect little packages of comfort – easy to grab for breakfast on-the-go, pack in lunchboxes, or serve at holiday gatherings. Trust me, once you try these golden-brown pockets of happiness, you’ll understand why my customers go crazy for them every fall!
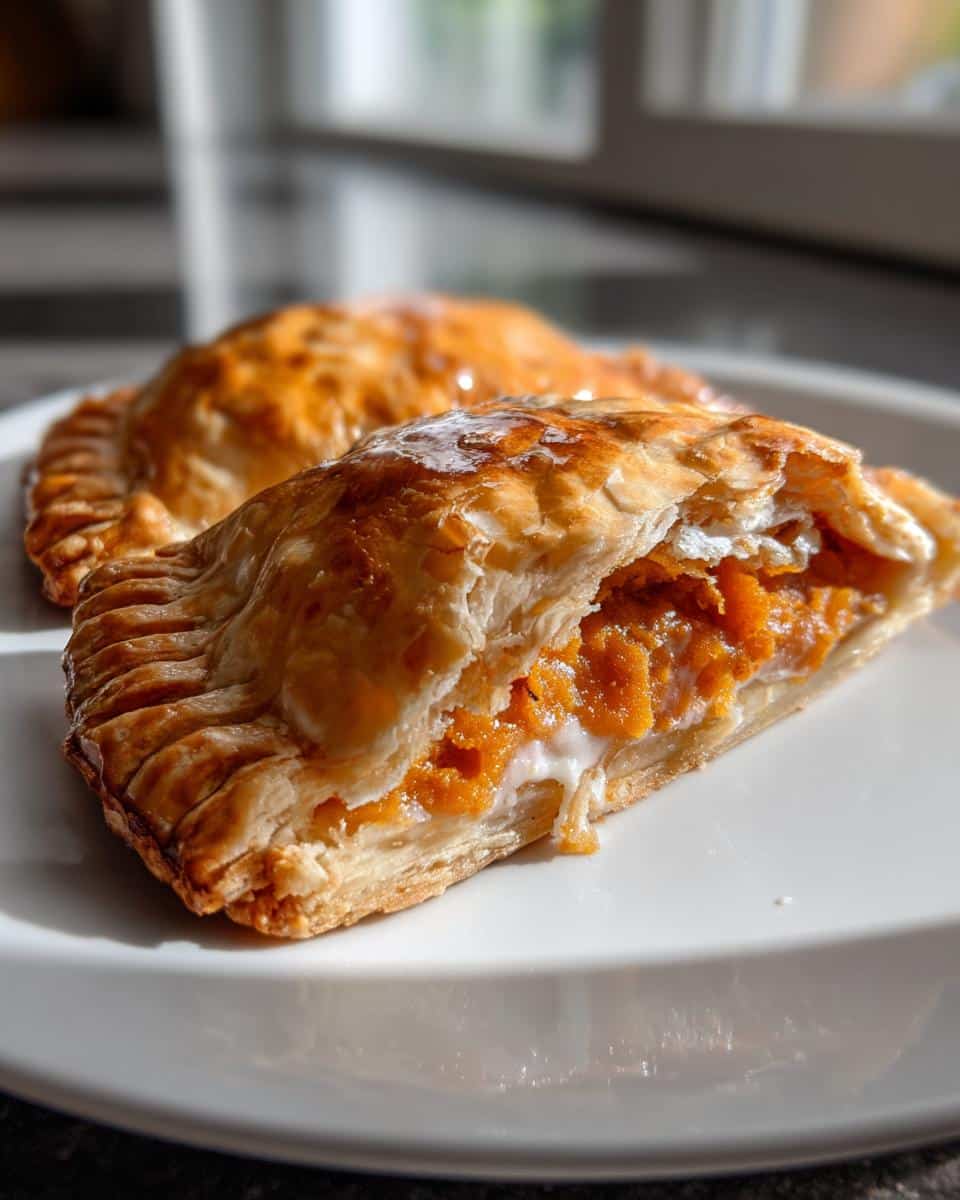
Table of contents:
Why You’ll Love These Sweet Potato Hand Pies
Let me tell you why these little pies are about to become your new obsession:
- So easy to make – No fancy pie skills needed! Even if you’re all thumbs with dough, you can nail these.
- Perfect for sharing – They’re like edible name tags at parties (just watch how fast they disappear!).
- Customizable fillings – Add pecans, swap in maple syrup, or go wild with a pinch of cardamom.
- Portable perfection – Toss them in your bag for a sweet treat that won’t crumble everywhere.
- That flaky crust – I still do a happy dance when I pull these golden beauties from the oven.
Sweet Potato Hand Pies Ingredients
Okay, let’s gather our goodies! Here’s what you’ll need to make these little pockets of joy:
- 2 cups mashed sweet potatoes (about 2 medium, roasted and peeled – trust me, it makes all the difference)
- 1/4 cup packed dark brown sugar (that molasses-y depth is everything)
- 1 tsp cinnamon (freshly ground if you’re feeling fancy)
- 1/2 tsp nutmeg (just a whisper – too much can bully the other flavors)
- 2 cups all-purpose flour (spoon and level it, don’t scoop!)
- 1/2 tsp salt (balances all that sweetness perfectly)
- 1/2 cup cold butter, cubed (I pop mine in the freezer for 10 minutes first)
- 4-6 tbsp ice water (keep those ice cubes handy)
- 1 egg, beaten (for that gorgeous golden shine on top)
See? Nothing weird or hard-to-find – just simple ingredients that work magic together!
Equipment You’ll Need for Sweet Potato Hand Pies
Don’t worry – you won’t need any fancy gadgets for these! Just gather these kitchen basics:
- Rolling pin (or an empty wine bottle in a pinch – I’ve been there!)
- Baking sheet lined with parchment paper (trust me, cleanup’s a breeze this way)
- Pastry brush for that glossy egg wash (a folded paper towel works too)
- 2 mixing bowls (one for the filling, one for the dough – no cross-contaminating!)
- 4-inch round cutter (or a drinking glass if you’re improvising)
- Fork for crimping those edges (makes ’em look professional!)
See? Nothing you don’t already have clattering in your kitchen drawers!
How to Make Sweet Potato Hand Pies
Alright, let’s get these beauties rolling! I’ll walk you through each step – from that dreamy filling to golden-brown perfection. Don’t be intimidated – we’re taking it one delicious layer at a time.
Preparing the Sweet Potato Filling
First, let’s make that spiced sweet potato magic happen! Grab your roasted and peeled sweet potatoes – you want them nice and smooth, so mash them well with a fork or potato masher. Now, stir in the brown sugar (I usually taste and add a pinch more if I’m feeling extra sweet-toothy), cinnamon, and nutmeg. The mix should be thick but spreadable – think pumpkin pie filling consistency. Pro tip: Let it cool completely if your potatoes were still warm – we don’t want melty dough later!
Making the Flaky Pie Crust
Here’s where the magic happens! Whisk together your flour and salt, then add those ice-cold butter cubes. Now, work quickly – you want to “cut in” the butter using a pastry cutter or two knives until the mixture looks like coarse crumbs with some pea-sized butter bits remaining. This is KEY for flakiness! Gradually drizzle in ice water, 1 tablespoon at a time, just until the dough starts to clump when pressed. Don’t overmix – we want tender layers, not tough pastry!
Assembling and Baking the Hand Pies
Roll out your dough to about 1/8-inch thickness on a lightly floured surface. Use your 4-inch cutter (or that drinking glass!) to cut out circles. Spoon about 1.5 tablespoons of filling onto one side of each circle, leaving a 1/2-inch border. Fold the dough over to create a half-moon, then crimp the edges with a fork to seal. Brush each pie with beaten egg (this gives them that gorgeous shine), make a few steam vents with a toothpick, and bake at 375°F for 20-25 minutes until golden brown. Oh, that first whiff of cinnamon and buttery crust – pure heaven!
Pro Tips for Perfect Sweet Potato Hand Pies
After making hundreds of these hand pies, I’ve learned all the tricks to guarantee bakery-quality results every time. First – keep that butter COLD! If your dough starts getting warm while rolling, pop it in the fridge for 10 minutes. To prevent soggy bottoms (the worst!), make sure your sweet potato filling isn’t too wet and bake on parchment paper. Want that perfect golden shine? Add a pinch of sugar to your egg wash. And here’s my favorite doneness test – the pies should sound slightly hollow when tapped on the bottom. One last secret: let them cool just 5 minutes before devouring – that’s when the filling sets but the crust stays gloriously flaky!
Variations for Your Sweet Potato Hand Pies
Oh, the possibilities! Once you’ve mastered the classic, try these fun twists: Stir in chopped toasted pecans for crunch, swap cinnamon for pumpkin pie spice, or drizzle with a maple glaze after baking. Feeling adventurous? Add a pinch of cayenne to the filling for sweet heat – my customers go wild for that surprise kick! For more sweet ideas, check out our Pinterest.
Storing and Reheating Sweet Potato Hand Pies
Here’s how to keep these little treasures tasting fresh! Store cooled hand pies in an airtight container at room temperature for 2 days, or refrigerate for up to 5 days. For longer storage, freeze them (unbaked or baked) between parchment layers – they’ll keep beautifully for 3 months. When reheating, pop them in a 350°F oven for 10 minutes to revive that flaky crust – microwaving makes them soggy (trust me, I learned the hard way!). Pro tip: If freezing unbaked, add the egg wash right before baking for maximum golden perfection.
Sweet Potato Hand Pies Nutritional Information
Now, I’m no nutritionist (just a pie enthusiast!), but here’s the scoop on what’s in these sweet little packages. Remember, these are estimates – your exact numbers might vary depending on size and ingredients:
- Serving Size: 1 hand pie
- Calories: 280
- Sugar: 12g
- Sodium: 180mg
- Fat: 12g (7g saturated, 4g unsaturated)
- Carbohydrates: 38g
- Fiber: 3g
- Protein: 4g
- Cholesterol: 45mg
Not too shabby for something that tastes like pure comfort, right? Enjoy in moderation… or don’t – I won’t judge!
Frequently Asked Questions About Sweet Potato Hand Pies
I get asked about these little pies all the time – here are the answers to the questions that pop up most often in my bakery!
Can I use canned sweet potatoes?
You sure can in a pinch! Just drain them VERY well and pat dry with paper towels. But between us? Roasting fresh sweet potatoes makes the flavor so much richer. If you do use canned, pick the ones packed in water (not syrup) or you’ll end up with pie filling soup!
What’s the best way to freeze these?
My favorite trick: Flash freeze unbaked pies on a tray for 1 hour first, then transfer to freezer bags. They’ll keep for 3 months! When ready, bake straight from frozen – just add 5 extra minutes. Already baked? Thaw at room temp, then crisp up in a 350°F oven for 5 minutes.
Any good crust substitutes?
Puff pastry works beautifully if you’re short on time (just don’t tell my grandma I said that!). For gluten-free, my test kitchen swears by a 1:1 GF flour blend with 1/2 tsp xanthan gum added. The dough will be stickier – chill it well before rolling. For more baking inspiration, explore our recipes.
Help – my pies keep leaking!
Been there! Two fixes: 1) Don’t overfill – stick to 1.5 tbsp max. 2) Make sure your edges are SEALED – run a wet finger along the edge before crimping. If you see any filling peeking out, patch with extra dough.
Can I make these vegan?
Absolutely! Swap butter for vegan butter sticks (the frozen kind works best), use maple syrup instead of egg wash, and replace the egg in the dough with 1 tbsp ground flaxseed + 3 tbsp water. The texture changes slightly, but they’re still delicious!

Irresistible Sweet Potato Hand Pies You’ll Crave Every Day
- Total Time: 55 mins
- Yield: 8 hand pies
- Diet: Vegetarian
Description
Delicious sweet potato hand pies with a flaky crust and sweet filling.
Ingredients
- 2 cups mashed sweet potatoes
- 1/4 cup brown sugar
- 1 tsp cinnamon
- 1/2 tsp nutmeg
- 2 cups all-purpose flour
- 1/2 tsp salt
- 1/2 cup cold butter, cubed
- 4–6 tbsp ice water
- 1 egg, beaten (for glaze)
Instructions
- Preheat oven to 375°F (190°C).
- Mix sweet potatoes, brown sugar, cinnamon, and nutmeg in a bowl.
- Combine flour and salt in another bowl. Cut in butter until mixture resembles coarse crumbs.
- Add ice water, 1 tbsp at a time, until dough comes together.
- Roll out dough and cut into circles.
- Place sweet potato filling on half of each circle. Fold dough over and seal edges.
- Brush with beaten egg and bake for 20-25 minutes until golden brown.
Notes
- Use cold butter for flaky crust.
- Adjust sugar to taste.
- Let pies cool before serving.
- Prep Time: 30 mins
- Cook Time: 25 mins
- Category: Dessert
- Method: Baking
- Cuisine: American