Skip to content
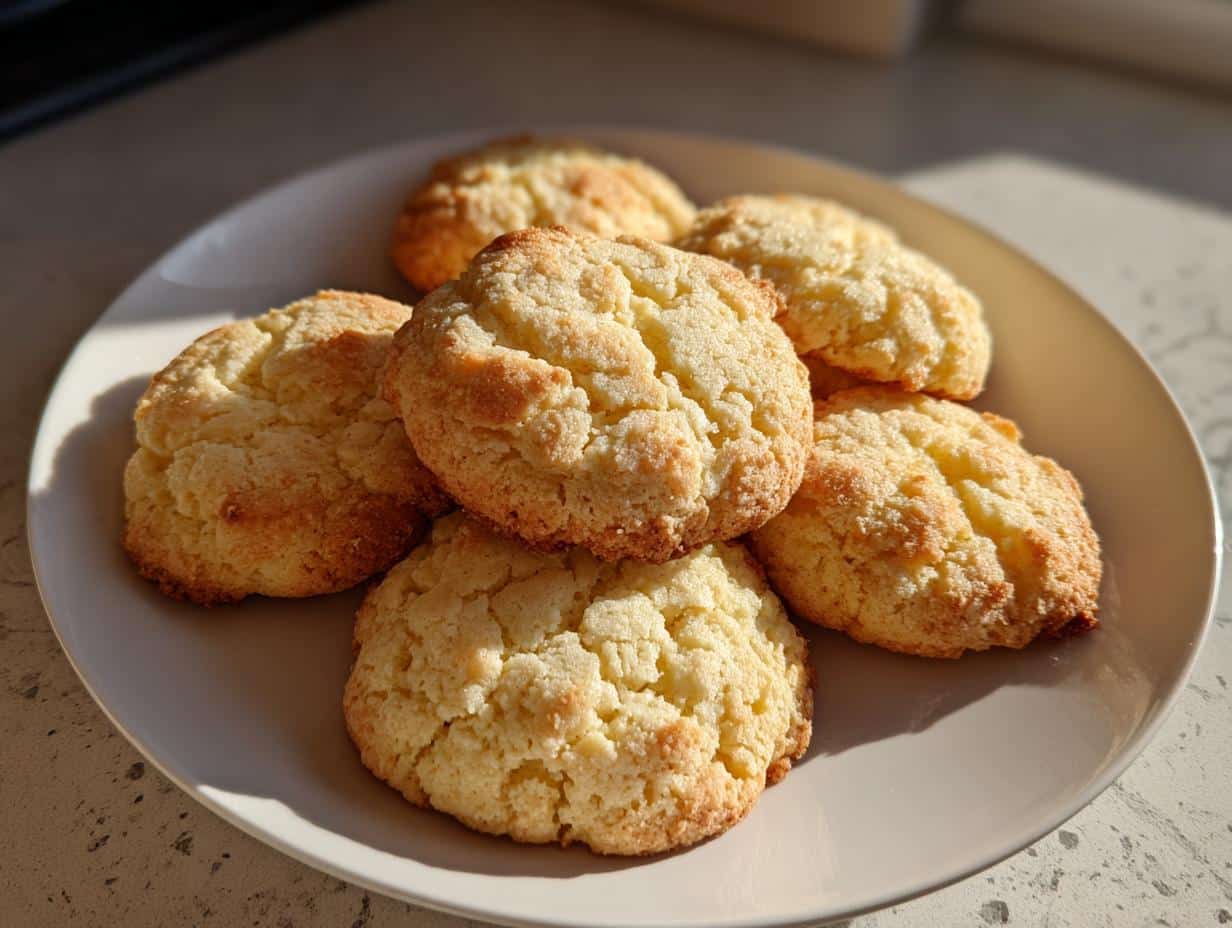
There’s nothing quite like the scent of soft butter cookies wafting through the house – that warm, buttery aroma that instantly makes everyone gather in the kitchen. I still remember sneaking bites of dough when my mom wasn’t looking, the sweet vanilla flavor melting on my tongue. These cookies were our family’s go-to for every occasion, from holiday parties to school bake sales. What makes them so special? It’s that perfect balance – crisp edges giving way to a melt-in-your-mouth center, with just enough sweetness to satisfy without overwhelming. After years of tweaking, I’ve landed on a foolproof version that delivers that same nostalgic magic every time.
Why You’ll Love These Soft Butter Cookies
These cookies have been my secret weapon for years, and here’s why they’ll become yours too:
- Buttery perfection: That rich, melt-in-your-mouth texture comes from using real butter (none of that margarine nonsense!)
- Foolproof easy: Just seven simple ingredients you probably have in your pantry right now
- Versatile star: Dress them up with sprinkles for holidays or keep them classic for everyday treats
- Crowd-pleaser: Kids go crazy for them, but trust me – adults sneak seconds when no one’s looking
The best part? They stay soft for days – if they last that long in your cookie jar!
The Magic Behind Perfect Soft Butter Cookies
Every great cookie starts with quality ingredients – and these soft butter cookies are no exception. Here’s what you’ll need to create that irresistible texture and flavor:
- 1 cup unsalted butter, softened (this is crucial! Cold butter won’t cream properly)
- 1 cup granulated sugar (measured by scooping and leveling, not packing)
- 1 large egg at room temperature (trust me, it makes a difference)
- 2 teaspoons pure vanilla extract (the good stuff – no imitation here)
- 3 cups all-purpose flour (spooned and leveled to avoid dense cookies)
- 1/2 teaspoon baking powder (the secret lift for that perfect texture)
- 1/4 teaspoon fine sea salt (to balance all that sweetness)
See? Nothing fancy – just pantry staples transformed into something magical. Now let’s get mixing!
Equipment You’ll Need
You won’t need any fancy gadgets for these cookies – just the basics every baker should have:
- A sturdy mixing bowl (I swear by my grandma’s old ceramic one)
- Baking sheets (two is perfect for rotating batches)
- Parchment paper (trust me, it’s worth it for easy cleanup)
- A wooden spoon or hand mixer (I alternate depending on my mood)
- A fork or glass for flattening (the fork gives those classic criss-cross marks)
That’s it! Now let’s make some magic happen.
How to Make Soft Butter Cookies
Alright, let’s get to the fun part – making these dreamy cookies! I’ve made this recipe so many times I could probably do it in my sleep, but I’ll walk you through each step carefully. The secret is in the creaming process – get that right, and you’re golden!
Step 1: Prep Your Workspace
First things first – preheat your oven to 350°F (175°C). While that’s heating up, line your baking sheets with parchment paper. This prevents sticking AND makes cleanup a breeze. Smart bakers always prep first!
Step 2: Cream Butter and Sugar Like a Pro
Now for the magic! In your mixing bowl, beat the softened butter and sugar together until light and fluffy. This should take about 2-3 minutes with a hand mixer. You’ll know it’s ready when the mixture turns pale yellow and looks almost whipped. Don’t rush this step – proper creaming creates those tiny air pockets that make your cookies tender.
Step 3: Add Egg and Vanilla
Crack in that room-temperature egg (cold eggs can make the batter separate – learned that the hard way!) and pour in the vanilla. Mix just until combined. The batter should smell heavenly already!
Step 4: Combine Dry Ingredients
In a separate bowl, whisk together the flour, baking powder, and salt. This ensures even distribution so you don’t get pockets of baking powder in your cookies. Nobody wants that!
Step 5: Bring It All Together
Now gradually add the dry ingredients to the wet mixture, mixing just until combined after each addition. Here’s my golden rule: stop mixing the second you no longer see flour streaks. Overmixing = tough cookies, and we want melt-in-your-mouth softness!
Step 6: Shape Your Cookies
Roll tablespoon-sized portions of dough between your palms to form smooth balls. Place them about 2 inches apart on your prepared baking sheets. Then gently flatten each ball with a fork (for that classic criss-cross pattern) or the bottom of a glass. Want uniform cookies? Use a small cookie scoop!
Step 7: Bake to Perfection
Slide those beauties into your preheated oven and bake for 10-12 minutes. They’re done when the edges just start turning golden but the centers still look slightly underdone. They’ll firm up as they cool – promise!
Step 8: The Waiting Game
Let the cookies cool on the baking sheet for 5 minutes (this helps them set), then transfer to a wire rack to cool completely. I know it’s tempting, but resist eating them right away – they’re fragile when hot!
Step 9: Enjoy Your Masterpiece
Once cooled, these soft butter cookies are ready to devour! Store any leftovers (yeah right) in an airtight container at room temperature. They’ll stay fresh for up to 5 days… if they last that long!
Nothing brings back childhood memories like the smell of soft butter cookies baking in the oven. That heavenly aroma of melted butter and vanilla would pull me into the kitchen before the timer even went off. My grandmother always kept a tin of these tender treats on her counter – “for emergencies,” she’d say with a wink. After years of testing (and eating!), I’ve perfected her recipe. These soft butter cookies strike that magical balance between delicate crumb and rich flavor. They’re simple enough for weeknight baking yet special enough for holiday cookie trays. One bite of that buttery goodness, and you’ll understand why this recipe has been passed down through three generations of cookie lovers in my family.
Why These Soft Butter Cookies Will Become Your Favorite
Once you try these cookies, you’ll understand why they’ve been my go-to recipe for every occasion since I was a kid:
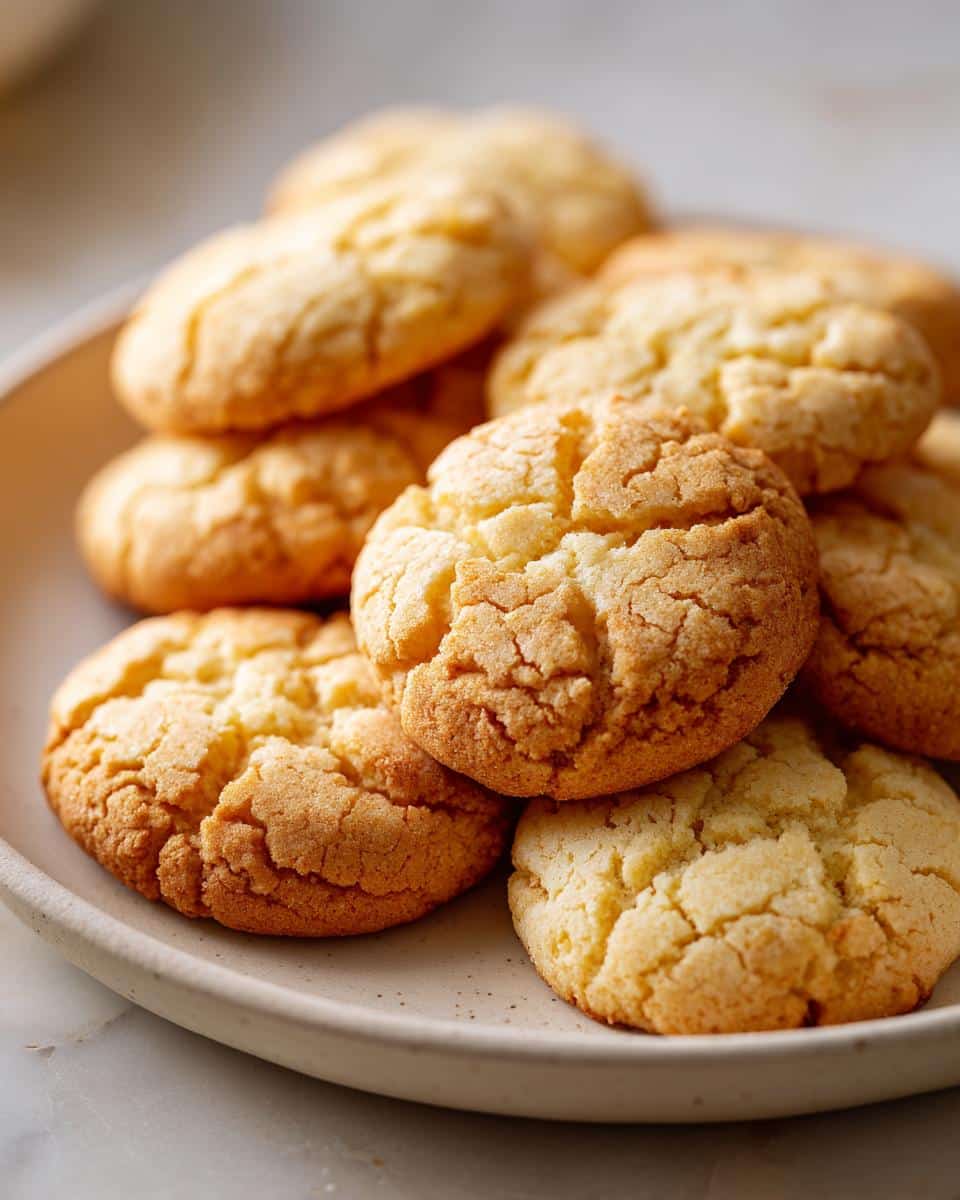
- That perfect texture: Crisp edges give way to centers so tender they practically melt on your tongue
- Pantry-friendly ingredients: Just butter, sugar, flour and a few other basics – no fancy shopping required
- Endless possibilities: Leave them classic or jazz them up with sprinkles, drizzles, or sandwiching with jam
- Universal appeal: Kids beg for them, adults sneak extras, and they disappear fast at every potluck
The best part? They’re nearly impossible to mess up – even my first batch turned out delicious!
Soft Butter Cookies Ingredients
Let me tell you about the dream team of ingredients that make these cookies so special. Each one plays a crucial role – mess with them, and you’ll lose that magical texture we’re after!
- 1 cup unsalted butter, softened (this means cool to the touch but leaves an indent when pressed – not melted and greasy!)
- 1 cup granulated sugar (measured by spooning into the cup and leveling off – no packing!)
- 1 large egg at room temperature (take it out of the fridge an hour before – cold eggs make the batter separate)
- 2 teaspoons pure vanilla extract (splurge on the good stuff – imitation just won’t give that depth of flavor)
- 3 cups all-purpose flour (spoon it lightly into your measuring cup – no scooping or you’ll end up with dry cookies)
- 1/2 teaspoon baking powder (fresh is best – check your expiration date!)
- 1/4 teaspoon fine sea salt (balances all that sweetness perfectly)
Possible Ingredient Substitutions
In a pinch? Here’s what works (and what doesn’t):
- Butter: Margarine can substitute, but expect less rich flavor and slightly different texture
- Flour: Gluten-free 1:1 blends work, but cookies may spread more and be more delicate
- Egg: For vegan cookies, try 1/4 cup applesauce – they’ll be cakier but still tasty
My advice? Stick to the original ingredients if you can – they’re worth it!
Step-by-Step Soft Butter Cookies Instructions
Okay, let’s dive into making these dreamy cookies! I’ve made this recipe so many times I could probably do it with my eyes closed, but I’ll walk you through each step carefully. The secret is in the creaming process – get that right, and you’re golden!
Step 1: Prep Your Workspace
First things first – preheat your oven to 350°F (175°C). While that’s heating up, line your baking sheets with parchment paper. This prevents sticking AND makes cleanup a breeze. Smart bakers always prep first!
Step 2: Cream Butter and Sugar Like a Pro
Now for the magic! In your mixing bowl, beat the softened butter and sugar together until light and fluffy. This should take about 2-3 minutes with a hand mixer. You’ll know it’s ready when the mixture turns pale yellow and looks almost whipped. Don’t rush this step – proper creaming creates those tiny air pockets that make your cookies tender.
Step 3: Add Egg and Vanilla
Crack in that room-temperature egg (cold eggs can make the batter separate – learned that the hard way!) and pour in the vanilla. Mix just until combined. The batter should smell heavenly already!
Step 4: Combine Dry Ingredients
In a separate bowl, whisk together the flour, baking powder, and salt. This ensures even distribution so you don’t get pockets of baking powder in your cookies. Nobody wants that!
Step 5: Bring It All Together
Now gradually add the dry ingredients to the wet mixture, mixing just until combined after each addition. Here’s my golden rule: stop mixing the second you no longer see flour streaks. Overmixing = tough cookies, and we want melt-in-your-mouth softness!
Step 6: Shape Your Cookies
Roll tablespoon-sized portions of dough between your palms to form smooth balls. Place them about 2 inches apart on your prepared baking sheets. Then gently flatten each ball with a fork (for that classic criss-cross pattern) or the bottom of a glass. Want uniform cookies? Use a small cookie scoop!
Step 7: Bake to Perfection
Slide those beauties into your preheated oven and bake for 10-12 minutes. They’re done when the edges just start turning golden but the centers still look slightly underdone. They’ll firm up as they cool – promise!
Step 8: The Waiting Game
Let the cookies cool on the baking sheet for 5 minutes (this helps them set), then transfer to a wire rack to cool completely. I know it’s tempting, but resist eating them right away – they’re fragile when hot!
Step 9: Enjoy Your Masterpiece
Once cooled, these soft butter cookies are ready to devour! Store any leftovers (yeah right) in an airtight container at room temperature. They’ll stay fresh for up to 5 days… if they last that long!
Pro Tips for Perfect Soft Butter Cookies
Here are my hard-earned secrets for cookie success:
- Don’t overmix! Stop as soon as ingredients combine – overworked dough makes tough cookies
- Size matters: Use a cookie scoop or tablespoon measure for uniform baking
- Parchment is non-negotiable: It prevents sticking and ensures even browning
- Watch the clock: Pull cookies out when edges are golden but centers still look soft
- Cool completely: They’ll firm up as they cool – resist the urge to eat them hot!
Keeping Your Soft Butter Cookies Fresh
Here’s how to keep these cookies tasting like they just came out of the oven:
- Room temperature: Store in an airtight container with parchment between layers for up to 5 days (if they last that long!)
- Freezer magic: Freeze baked cookies in a single layer first, then transfer to freezer bags for up to 3 months
- Reviving frozen cookies: Just pop them in a 300°F oven for 5 minutes – they’ll taste freshly baked!
Pro tip: I always stash a few in the freezer for surprise cookie emergencies!
Serving Suggestions for Soft Butter Cookies
Oh, the possibilities with these soft butter cookies! Here are my favorite ways to enjoy them:
- Classic combo: Dunk them in cold milk – just like when you were a kid
- Adult upgrade: Pair with a strong cup of coffee – the bitterness balances the sweetness perfectly
- Next-level treat: Sandwich vanilla ice cream between two cookies for the ultimate homemade ice cream sandwich
- Fancy twist: Drizzle with melted chocolate or dust with powdered sugar for special occasions
Honestly? They’re magical all on their own too – no embellishments needed!
Soft Butter Cookies FAQs
After years of baking these cookies (and fielding countless questions from friends), here are the answers to everything you might wonder:
Can I chill the dough overnight?
Absolutely! In fact, I often make the dough the night before. Just wrap it tightly in plastic wrap – the chilled dough holds its shape beautifully when baking. Let it sit at room temperature for 15 minutes before rolling into balls though.
Why did my cookies turn out hard?
Oh no! Usually this means either the butter wasn’t properly softened before creaming, or the cookies baked too long. Next time, pull them out when the edges are just golden – they’ll firm up as they cool.
Can I freeze baked cookies?
You bet! These freeze like a dream. Just cool completely first, then layer between parchment in an airtight container. They’ll keep for 3 months – not that they’ll last that long!
How do I get uniform thickness?
My secret? A small cookie scoop for portioning, then gently flatten with the bottom of a glass dipped in sugar. Works like a charm every time!
Nutritional Information
Okay, let’s be real – we’re not eating soft butter cookies for their health benefits! But since you asked, here’s the nutritional breakdown per cookie (based on standard ingredients and making about 24 cookies):
- Calories: About 120 per cookie (worth every single one!)
- Fat: 6g (that rich butter flavor has to come from somewhere)
- Carbs: 15g (mostly from that perfect sugar-flour balance)
- Protein: 1g (hey, there’s an egg in there!)
Important note: These values are estimates based on standard ingredients. Your exact numbers might vary slightly depending on your specific brands and measurements. But let’s be honest – when you’re biting into one of these melt-in-your-mouth delights, nutrition facts are probably the last thing on your mind!
Print
Irresistible Soft Butter Cookies Recipe You Must Try Today
- Total Time: 27 minutes
- Yield: 24 cookies
- Diet: Vegetarian
Description
Soft butter cookies are a classic treat with a tender texture and rich buttery flavor. Perfect for any occasion.
Ingredients
- 1 cup unsalted butter, softened
- 1 cup granulated sugar
- 1 large egg
- 2 teaspoons vanilla extract
- 3 cups all-purpose flour
- 1/2 teaspoon baking powder
- 1/4 teaspoon salt
Instructions
- Preheat oven to 350°F (175°C). Line baking sheets with parchment paper.
- Cream butter and sugar until light and fluffy.
- Beat in egg and vanilla extract.
- Whisk flour, baking powder, and salt in a separate bowl.
- Gradually mix dry ingredients into wet ingredients.
- Roll dough into 1-inch balls and place on baking sheets.
- Flatten slightly with a fork or the bottom of a glass.
- Bake for 10-12 minutes or until edges are lightly golden.
- Cool on wire racks before serving.
Notes
- Use room-temperature butter for best results.
- Do not overmix the dough to keep cookies soft.
- Store in an airtight container for up to 5 days.
- Prep Time: 15 minutes
- Cook Time: 12 minutes
- Category: Dessert
- Method: Baking
- Cuisine: American