Skip to content
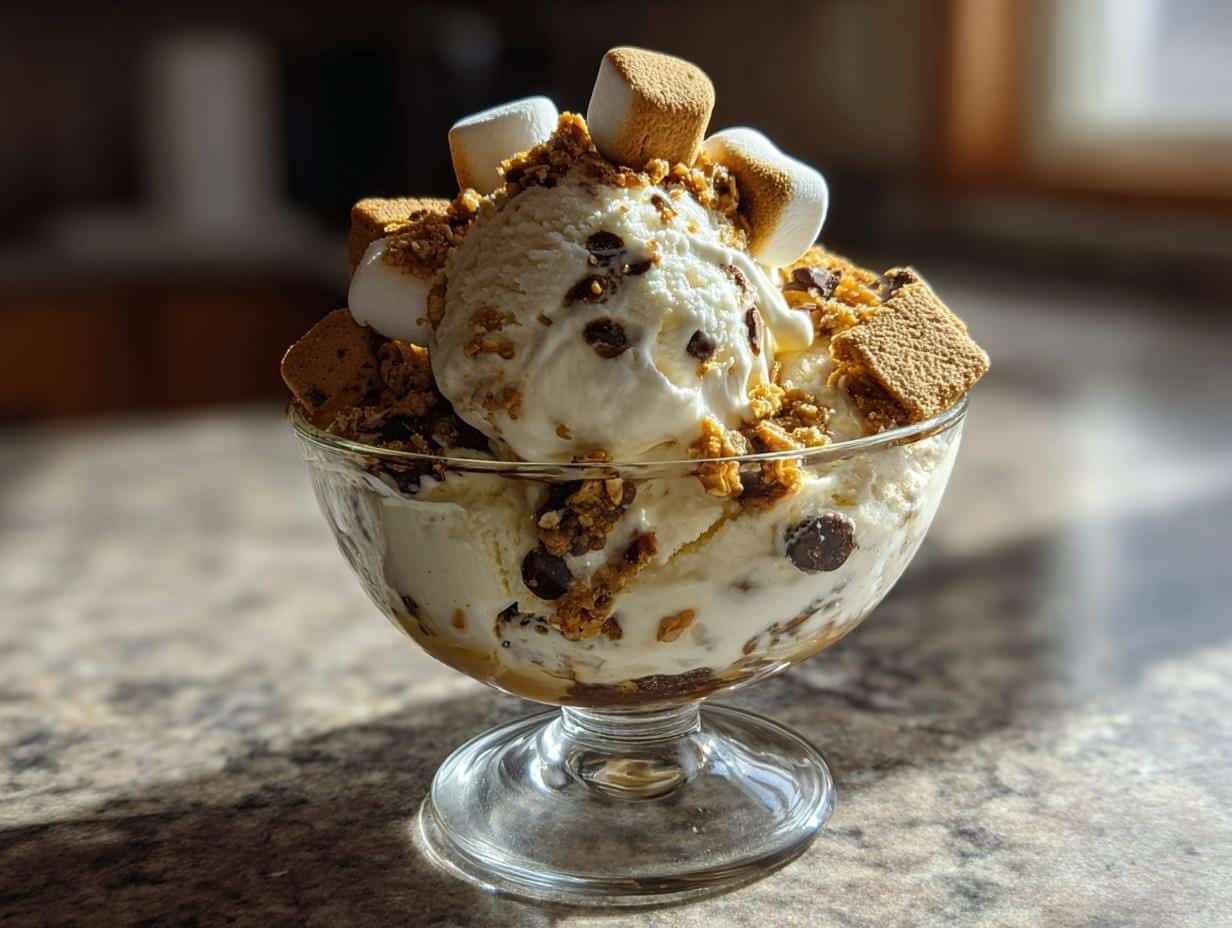
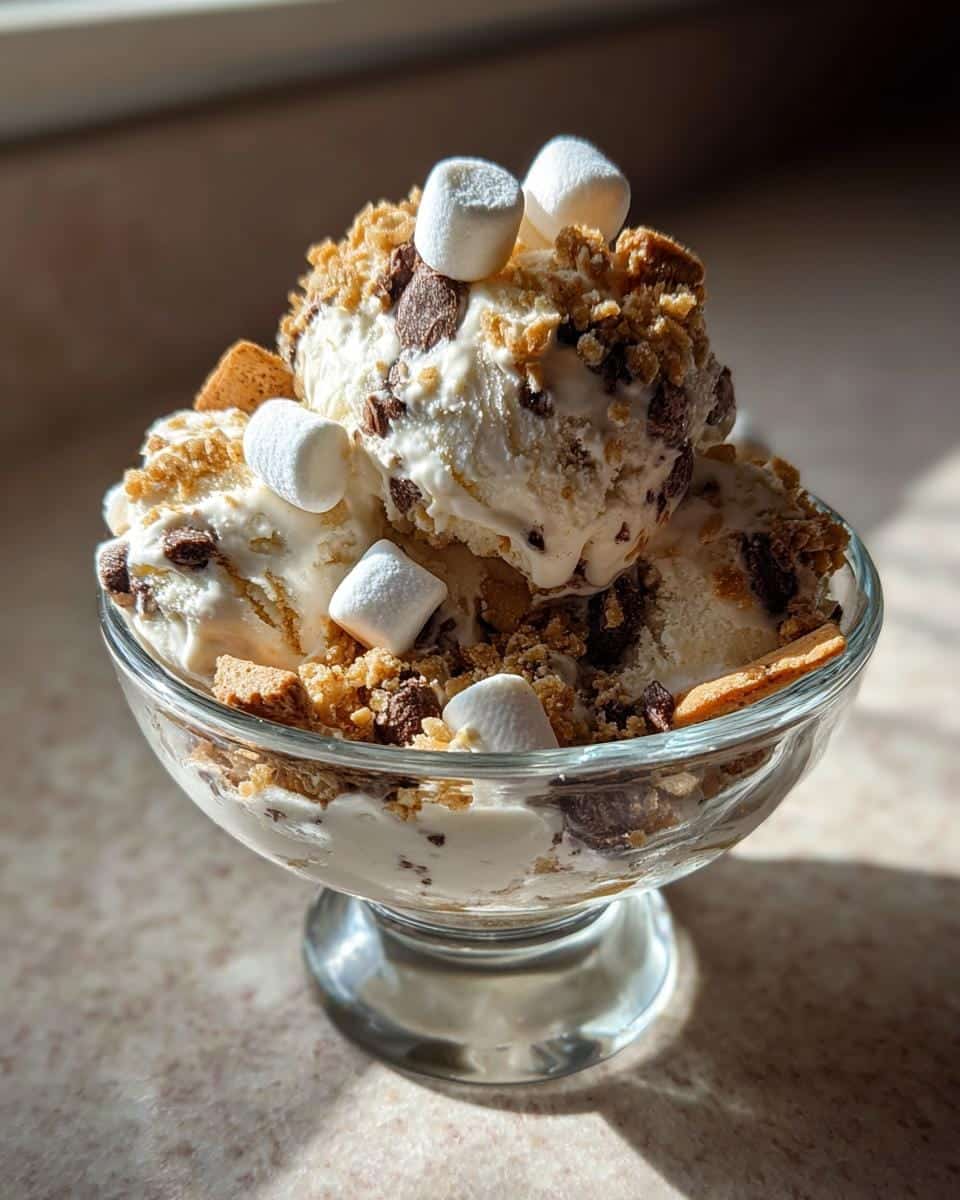
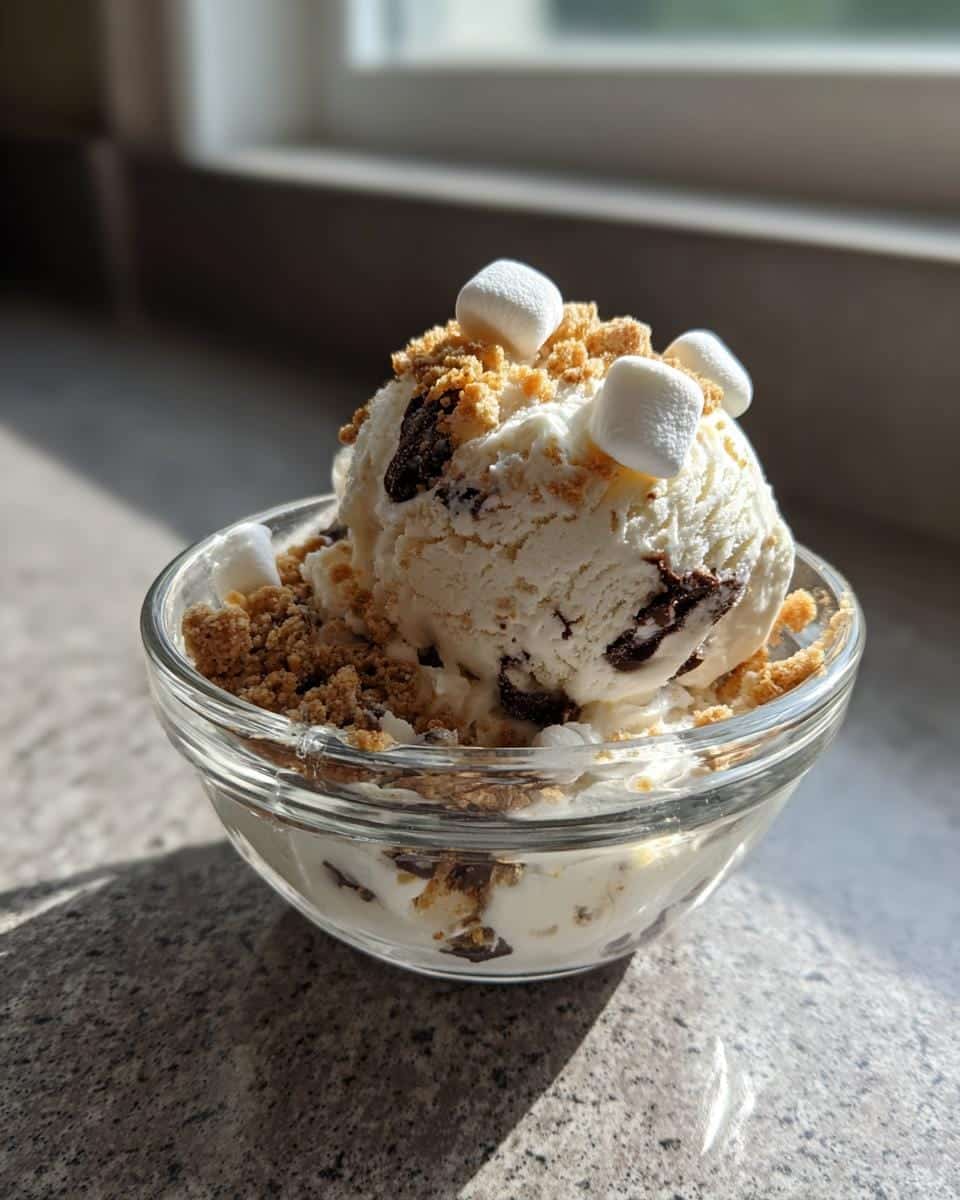
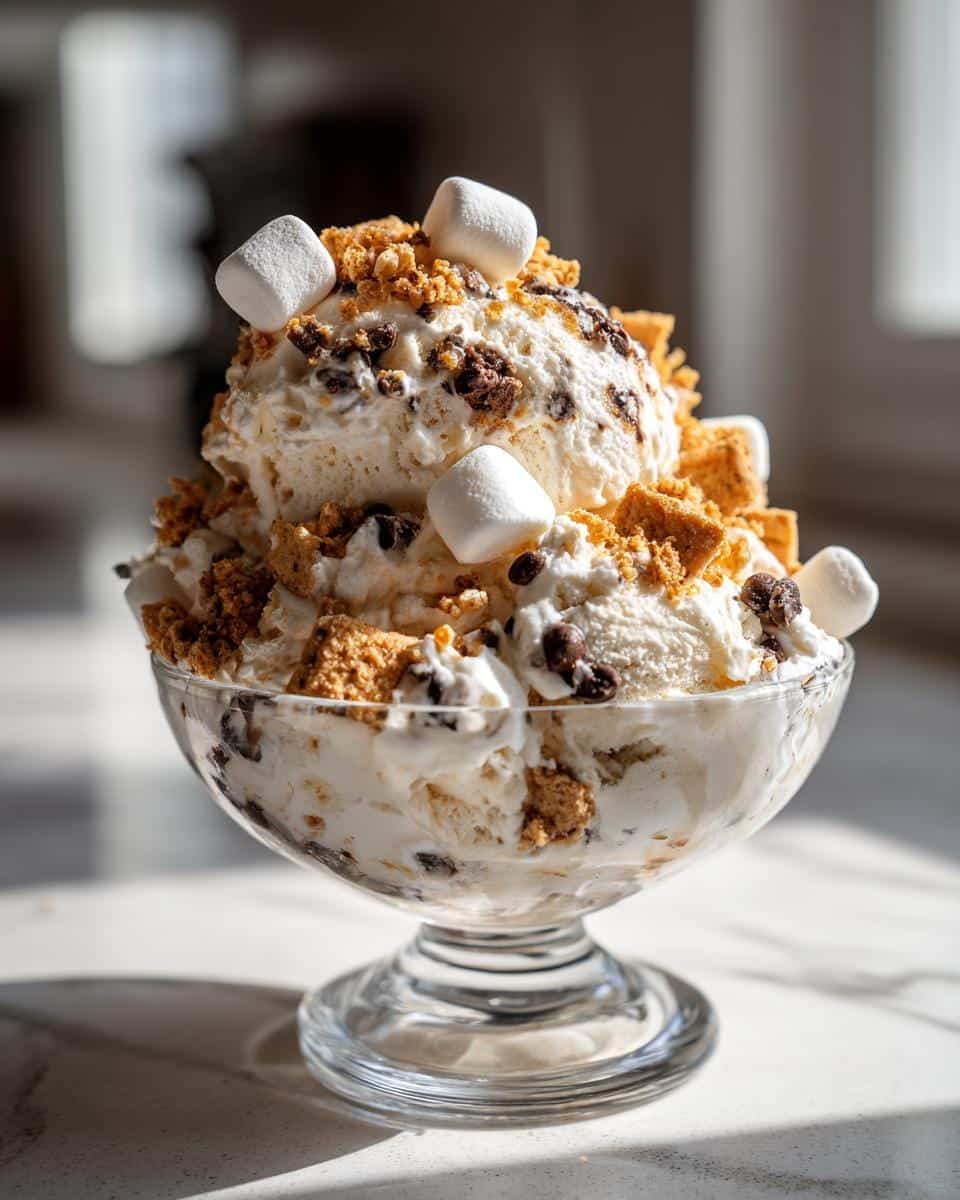
There’s something magical about that first bite of a gooey, melty s’more by the campfire—the crunch of graham cracker, the ooze of chocolate, and that perfect charred marshmallow. My Smores Ice Cream Recipe captures all that nostalgia in a creamy, dreamy scoop that’ll have you coming back for more. And the best part? No campfire required! Just a few simple ingredients and your ice cream maker can whip up this crowd-pleasing summer treat in no time.
I’ve been perfecting this recipe for years because, let’s be honest, who doesn’t love the classic combo of chocolate, marshmallow, and graham cracker? But here’s my little secret—it’s actually one of the easiest homemade ice creams you’ll ever make. The base comes together in minutes, and while the machine does the churning, you get to enjoy that amazing childhood campfire flavor without any of the sticky fingers. Trust me, this is the ice cream that’ll disappear fastest at your next barbecue or family gathering!
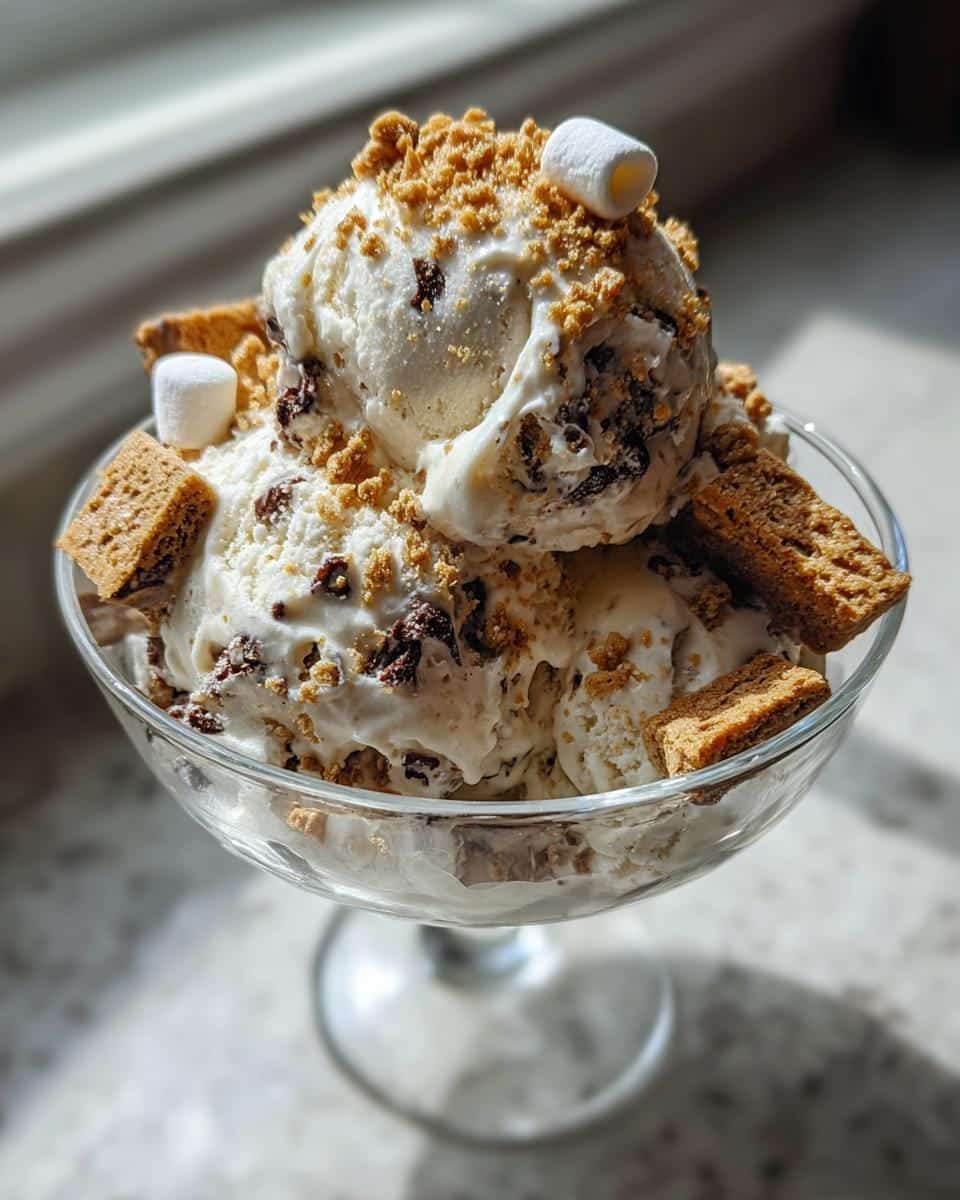
Table of contents:
Why You’ll Love This Smores Ice Cream Recipe
Okay, let me tell you why this recipe is about to become your new summer obsession:
- No campfire needed – All that classic s’mores flavor without the smoke in your eyes or sticky marshmallow fingers
- Seriously easy – Just mix, churn, and freeze (I promise even first-timers can nail this)
- Creamy dreamy texture – That rich ice cream base makes the perfect canvas for all the mix-ins
- Totally customizable – Want more chocolate? More crunch? More toasted marshmallow? You’re the boss
- Instant crowd-pleaser – Kids go wild for it, and adults get all nostalgic after one bite
Honestly, the hardest part is waiting those four hours for it to freeze – but oh boy, is it worth it!
Ingredients for Smores Ice Cream
Here’s everything you’ll need to make this dreamy frozen treat – I swear, you probably have most of this in your kitchen already!
- 2 cups heavy cream – This is what gives our ice cream that luxurious, velvety texture. Don’t skimp here – the high fat content makes all the difference.
- 1 cup whole milk – It balances the richness of the cream while keeping everything scoopable.
- 3/4 cup granulated sugar – Just the right amount to sweeten without overpowering the other flavors.
- 1 tsp vanilla extract – My secret weapon for rounding out all the flavors. Use the good stuff if you’ve got it!
- 1/2 cup graham cracker crumbs – You can buy these pre-crumbled or smash up about 4 full sheets yourself (more fun, if you ask me).
- 1/2 cup mini chocolate chips – These stay perfectly distributed in the ice cream. If you’re feeling fancy, chop up a good chocolate bar instead.
- 1 cup mini marshmallows – The star of the show! I like minis because they mix in evenly, but we’ll talk about toasting big ones later if you want that campfire effect.
See? Told you it was simple! Now let’s talk about the fun part – actually making this magical ice cream happen.
Equipment You’ll Need
Gather these trusty tools before you start – most are probably already in your kitchen:
- Ice cream maker – The real MVP here (I use my 15-year-old Cuisinart that still works like a charm)
- Mixing bowls & whisk – For combining that creamy dreamy base
- Airtight freezer container – To store your masterpiece
- Kitchen torch (optional) – If you want those marshmallows extra toasty
That’s it! No fancy gadgets required – just these basics and you’re golden.
How to Make Smores Ice Cream
Alright, let’s dive into the fun part! Making this ice cream is easier than roasting the perfect marshmallow (and way less messy). Follow these steps for that dreamy, creamy texture with all the s’mores goodness mixed in just right.
Preparing the Ice Cream Base
First, grab your largest mixing bowl – we’re going big here! Whisk together the heavy cream, whole milk, and sugar until the sugar completely dissolves. This might take a minute or two – you shouldn’t feel any graininess when you rub the mixture between your fingers. Then stir in that vanilla extract. Pro tip: If your kitchen’s warm, pop this mixture in the fridge for 30 minutes before churning – it’ll help the ice cream freeze faster and smoother.
Churning and Adding Mix-Ins
Now pour your creamy base into the ice cream maker and let it work its magic. After about 20 minutes (depending on your machine), when the mixture looks like soft-serve, that’s your cue! Add the graham cracker crumbs and chocolate chips during those last glorious 5 minutes of churning. The motion will distribute them perfectly throughout.
Once churning’s done, gently fold in the mini marshmallows by hand – don’t let the machine do it or they’ll get pulverized! I like to reserve a handful to sprinkle on top too.
Freezing for Perfect Texture
Transfer your masterpiece to an airtight container and tuck it into the freezer. Here’s where patience comes in – give it at least 4 hours to set properly. I know, the wait is torture, but rushing it means icy disappointment instead of creamy perfection. Set a timer if you must, but trust me – good things come to those who wait (especially when those good things involve chocolate and marshmallows).
Tips for the Best Smores Ice Cream
After making this recipe more times than I can count, here are my can’t-live-without tips for s’mores ice cream perfection:
- Toast those marshmallows! A quick pass with a kitchen torch adds that authentic campfire flavor. Just let them cool slightly before folding in.
- Fat is your friend – Stick with full-fat dairy. That extra richness prevents ice crystals and gives that dreamy mouthfeel.
- Press plastic wrap directly on the surface before freezing to prevent freezer burn and ice formation.
- Let it breathe – Take the ice cream out of the freezer 10 minutes before scooping for perfect consistency.
- Layer flavors – For extra decadence, swirl in some chocolate sauce between scoops when serving.
Follow these simple tricks, and you’ll be the s’mores ice cream hero at every summer gathering! You can find more delicious recipes like this on Pinterest.
Variations and Substitutions
One of my favorite things about this recipe? How easily you can mix it up! Here are some tasty twists to try:
- Dark chocolate lovers – Swap the chips for chopped dark chocolate bars (70% cacao is divine)
- Gluten-free option – Use gluten-free graham crackers or even crumbled gluten-free cookies
- Dairy-free version – Coconut milk works beautifully in place of cream and milk
- Extra crunch – Add chopped toasted pecans or walnuts with the graham crackers
- Adult upgrade – A tablespoon of bourbon in the base adds lovely depth (and keeps it scoopable!)
The possibilities are endless – make it yours and enjoy every delicious variation!
Serving and Storage Tips
Oh, the fun part – serving up this frozen masterpiece! For that extra s’mores magic, I love sprinkling fresh graham cracker crumbs on top and drizzling with warm chocolate sauce right before serving. If you’re feeling fancy, torch a few extra marshmallows to crown each scoop – the kids (and let’s be honest, adults too) go wild for that campfire effect.
Store leftovers (if there are any!) in an airtight container with parchment pressed right against the surface to prevent ice crystals. It’ll keep its dreamy texture for up to 2 weeks in the freezer – though in my house, it never lasts more than 2 days!
Smores Ice Cream Nutrition Information
Okay, let’s be real – we’re not eating s’mores ice cream because it’s health food! But I know some folks like to keep track, so here’s the nutritional scoop (pun totally intended):
Disclaimer: Nutritional values are estimates and will vary based on your specific ingredients and portion sizes.
- Serving size: 1/2 cup
- Calories: 320
- Total fat: 18g (11g saturated)
- Sugar: 28g
- Protein: 4g
- Sodium: 85mg
Now, before you panic about those numbers, remember this is a special treat meant to be enjoyed in moderation. That rich cream and all those marshmallows and chocolate chips are what make it taste SO GOOD! My philosophy? If you’re going to indulge, make it count with something absolutely delicious like this homemade s’mores ice cream. Just balance it out with some extra veggies at dinner – problem solved!
Frequently Asked Questions
Over the years, I’ve gotten some great questions about this recipe – here are the answers to the ones that pop up most often:
Can I make this without an ice cream maker?
Absolutely! Just pour your base into a shallow dish and freeze, stirring vigorously every 30 minutes for the first 2 hours to break up ice crystals. It’s more work, but still delicious.
How do I prevent marshmallows from freezing rock hard?
The mini ones stay surprisingly soft! If using larger marshmallows, chop them small and toss with a teaspoon of cornstarch before adding – it creates a protective barrier against freezer shock.
Can I use regular-sized marshmallows?
You bet – just chop them into mini-marshmallow-sized pieces first. Whole large marshmallows get too chewy when frozen.
How long does homemade ice cream last?
Stored properly in an airtight container, it keeps its best texture for about 2 weeks – though it’s usually gone long before that in my house!
Can I make this dairy-free?
Totally! Swap the cream and milk for full-fat coconut milk – the rich texture stays amazing, and you still get all that s’mores flavor.

Magical Smores Ice Cream Recipe in Just 4 Hours
- Total Time: 4 hours 40 minutes
- Yield: 1 quart
- Diet: Vegetarian
Description
A delicious homemade smores ice cream recipe combining graham crackers, chocolate, and marshmallows for a sweet summer treat.
Ingredients
- 2 cups heavy cream
- 1 cup whole milk
- 3/4 cup granulated sugar
- 1 tsp vanilla extract
- 1/2 cup graham cracker crumbs
- 1/2 cup mini chocolate chips
- 1 cup mini marshmallows
Instructions
- Whisk cream, milk, sugar, and vanilla until sugar dissolves
- Pour mixture into ice cream maker and churn according to manufacturer’s instructions
- During last 5 minutes of churning, add graham cracker crumbs and chocolate chips
- Transfer ice cream to freezer container and fold in marshmallows
- Freeze for at least 4 hours before serving
Notes
- For extra marshmallow flavor, toast marshmallows before adding
- Can substitute chocolate chunks for chips
- Store in airtight container for up to 2 weeks
- Prep Time: 15 minutes
- Cook Time: 25 minutes
- Category: Dessert
- Method: Churned
- Cuisine: American