Skip to content
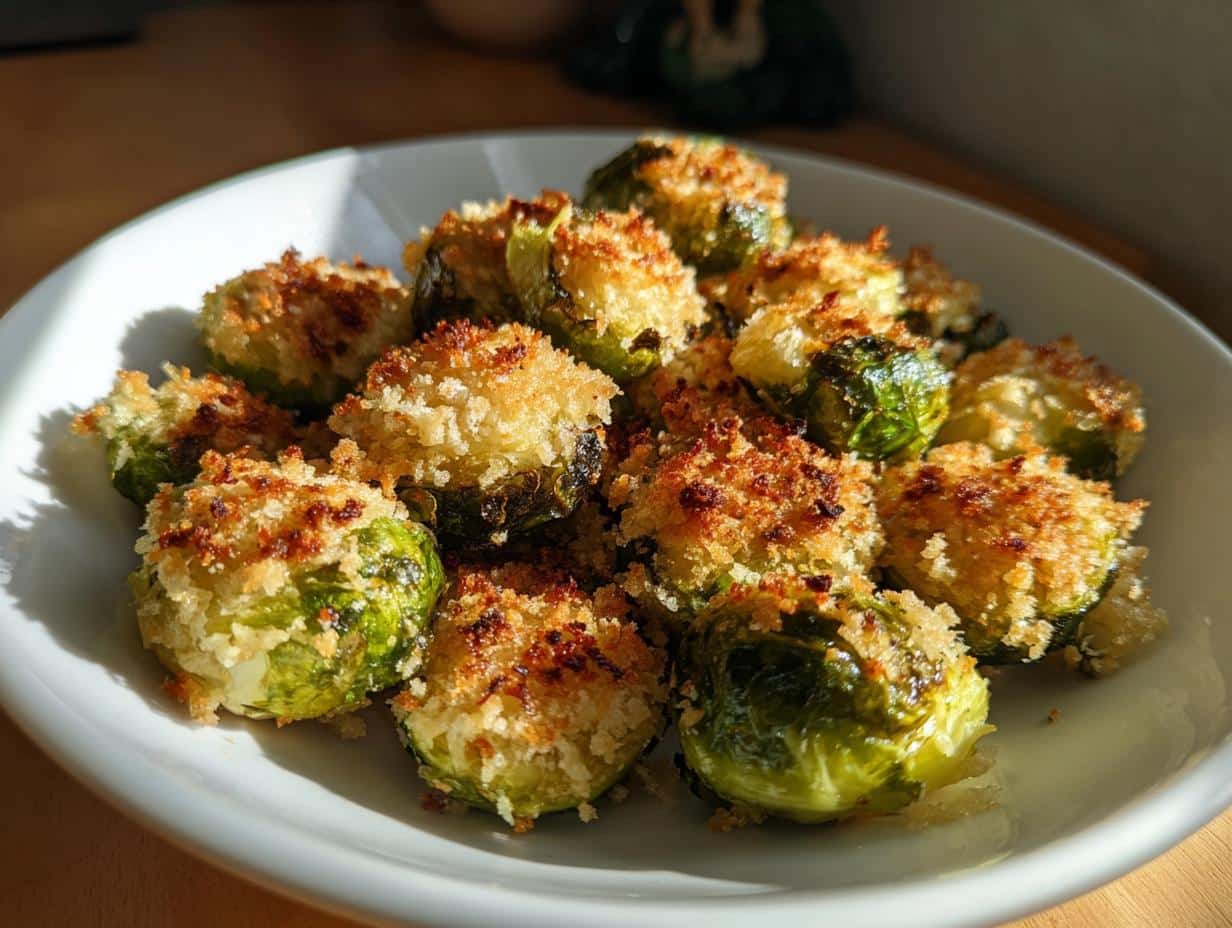
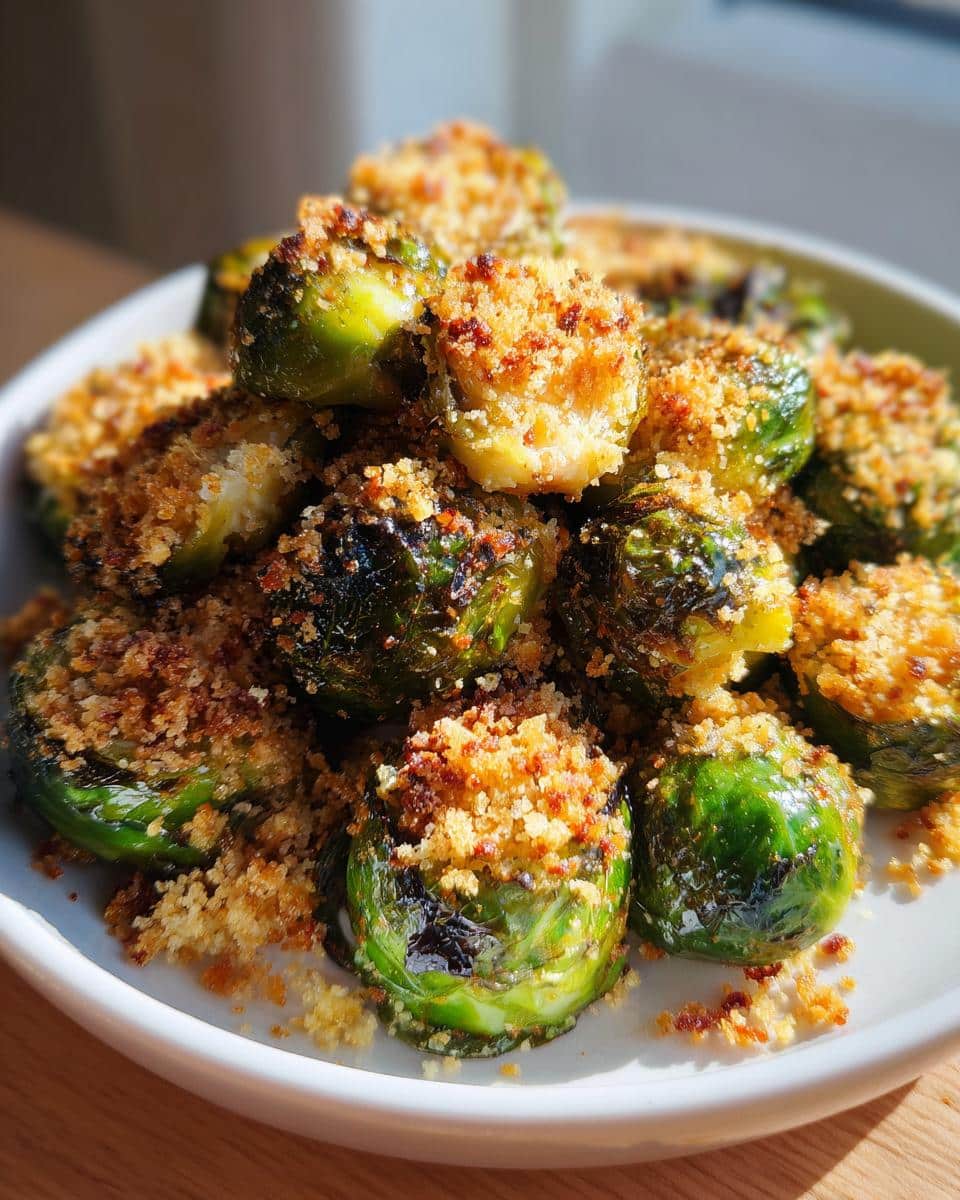
Okay, I’ll confess—I used to be one of those people who turned up their nose at Brussels sprouts. That is, until I discovered the magic of roasting them until they’re caramelized and crispy on the edges. My Roasted Brussels Sprouts with Bacon-Less Crunch recipe changed everything! The secret? A smoky, crunchy topping that gives you all the satisfaction of bacon bits without any meat. Trust me, even the pickiest eaters in my family go back for seconds when I make these. The sprouts get perfectly tender inside while that golden panko-nutritional yeast crust adds irresistible texture. It’s become my go-to side dish for everything from weeknight dinners to holiday feasts—simple enough for Tuesday, fancy enough for Thanksgiving.
Why You’ll Love These Roasted Brussels Sprouts with Bacon-Less Crunch
Let me tell you why this recipe has become my absolute favorite way to eat Brussels sprouts—and why it’ll be yours too:
- Quick & easy: Just 10 minutes of prep, then the oven does the work while you relax (or stir the pot on the stove—no babysitting required!).
- Vegan magic: That smoky, crunchy topping? No bacon needed! Nutritional yeast and smoked paprika give that umami punch everyone craves.
- Texture heaven: Crispy edges, tender centers, and that golden panko crust—every bite has the perfect contrast.
- Flavor bomb: Garlic powder, smoked paprika, and a hint of salt make these sprouts anything but boring.
- Crowd-pleaser: Even my “I-hate-veggies” nephew asked for seconds last Thanksgiving. True story.
Seriously, once you try this method, you’ll never look at Brussels sprouts the same way again.
Ingredients for Roasted Brussels Sprouts with Bacon-Less Crunch
Here’s everything you’ll need to make these addictive sprouts—I promise it’s all simple stuff you might already have in your pantry! The key is using fresh Brussels sprouts (none of that frozen business) and getting that panko mixture just right for maximum crunch.
- 1 pound Brussels sprouts – trimmed and halved (look for bright green, firm ones about the size of a walnut)
- 2 tablespoons olive oil – the good stuff! This helps them caramelize beautifully
- 1/2 teaspoon salt – I use kosher, but any will do
- 1/4 teaspoon black pepper – freshly ground if you can
- 1/4 cup panko breadcrumbs – the Japanese-style ones for extra crispiness
- 1 tablespoon nutritional yeast – trust me, this is the “bacon” magic!
- 1/2 teaspoon smoked paprika – gives that irresistible smoky flavor
- 1/2 teaspoon garlic powder – not fresh garlic, which burns too easily
See? Nothing fancy—just smart combinations that make ordinary veggies extraordinary. Now let’s get roasting!
How to Make Roasted Brussels Sprouts with Bacon-Less Crunch
Alright, let’s get down to business—this is where the magic happens! I’ll walk you through each step so your Brussels sprouts turn out perfectly caramelized with that irresistible crunch every single time. Don’t worry, it’s foolproof—just follow along and you’ll have golden, crispy deliciousness in no time.
Preparing the Brussels Sprouts
First things first—grab those Brussels sprouts! Trim off the dry ends, then slice each one in half from top to bottom. If you find any loose outer leaves, keep them—they’ll get extra crispy! Toss those halved sprouts in a big bowl with olive oil, salt, and pepper. Get your hands in there and massage it all together—you want every nook and cranny coated for maximum flavor.
Roasting the Brussels Sprouts
Spread your sprouts out on a baking sheet in a single layer—this is crucial! Crowd them and they’ll steam instead of roast. Pop them into your preheated 400°F oven for 20 minutes, giving them a good stir halfway through. You’ll know they’re ready when the edges start getting those beautiful brown caramelized spots.
Adding the Bacon-Less Crunch
While the sprouts roast, mix together your panko, nutritional yeast, smoked paprika, and garlic powder in a small bowl. When the sprouts have roasted for 20 minutes, pull them out and sprinkle this magical mixture evenly over the top. Return to the oven for just 5 more minutes—watch closely as the topping turns golden brown and wonderfully crispy.
Serving Suggestions
Serve these beauties warm—they’re incredible straight from the oven! I love them alongside roasted chicken or tofu, or even tossed into a grain bowl. For special occasions, drizzle with a little balsamic glaze. Leftovers? (As if!) They’re fantastic cold the next day tossed in salads—that crunch holds up surprisingly well!
Tips for Perfect Roasted Brussels Sprouts with Bacon-Less Crunch
Want to take these sprouts from great to absolutely incredible? Here are my tried-and-true tips for nailing them every time:
- Don’t overcrowd the pan: Spread those sprouts out in a single layer—trust me, this is the secret to getting them crispy instead of soggy.
- Broil for the final touch: If you’re after next-level crunch, pop them under the broiler for 1-2 minutes after roasting. Just keep an eye on them—they can go from golden to burnt in seconds!
- Use fresh sprouts: Look for bright green, firm ones. If they’re soft or yellowing, they won’t roast as nicely.
- Stir halfway: Don’t skip this step! It ensures even browning on all sides.
- Double the topping: If you’re a crunch fanatic (like me), feel free to make extra panko mixture—you won’t regret it!
Follow these tips, and you’ll have Brussels sprouts so good, they’ll steal the show at any meal!
Ingredient Notes and Substitutions for Roasted Brussels Sprouts with Bacon-Less Crunch
Don’t stress if you’re missing an ingredient—I’ve tested plenty of swaps that still give amazing results! Here’s my cheat sheet for adapting this recipe:
- Panko breadcrumbs: Gluten-free breadcrumbs work great here, or try crushed cornflakes for extra crisp. Regular breadcrumbs work in a pinch but won’t be as light.
- Nutritional yeast: If you don’t have it, try a teaspoon of soy sauce mixed into the oil—it won’t taste the same, but adds umami depth.
- Smoked paprika: Regular paprika plus a tiny pinch of chipotle powder makes a decent substitute.
- Olive oil: Avocado oil works beautifully if that’s what you’ve got—just don’t use butter (it burns at high heat).
The beauty is, even with substitutions, you’ll still end up with deliciously crispy sprouts!
Storing and Reheating Roasted Brussels Sprouts with Bacon-Less Crunch
Here’s the good news—these sprouts keep surprisingly well! Store any leftovers (ha, as if!) in an airtight container in the fridge for up to 3 days. When you’re ready to revive them, pop them in a 350°F oven for 5-7 minutes to bring back that perfect crunch. The microwave works in a pinch, but it’ll soften the topping—still tasty, just not as magical!
Nutritional Information for Roasted Brussels Sprouts with Bacon-Less Crunch
Now, I’m no nutritionist, but here’s the general scoop on these tasty sprouts! Each serving packs fiber, vitamin C, and plant-based protein from that magical nutritional yeast. Remember—nutrition can vary based on your exact ingredients and brands. The olive oil adds healthy fats, while keeping it completely cholesterol-free. Not bad for something this delicious!
Frequently Asked Questions About Roasted Brussels Sprouts with Bacon-Less Crunch
I get so many questions about this recipe—here are the answers to the ones that pop up most often! Trust me, I’ve tested all these variations myself.
Can I use fresh breadcrumbs instead of panko?
You can, but they won’t be quite as crispy! Panko’s light, airy texture is what gives that perfect crunch. If you must use fresh breadcrumbs, toast them in a dry pan first to remove moisture.
How do I make this dish gluten-free?
Super easy! Just swap the panko for gluten-free breadcrumbs. I’ve had great results with crushed gluten-free cornflakes too—they add fantastic texture.
Do I have to halve the Brussels sprouts?
Technically no, but I highly recommend it! The flat sides caramelize beautifully. If you leave them whole, just add 5-10 minutes to the roasting time.
Can I make these ahead of time?
For the crispiest results, I recommend roasting fresh. But you can prep the sprouts and mix the topping separately up to a day in advance—just store them in the fridge until ready to roast.
My topping burned—help!
Oops! Next time, try putting the topping on after 15 minutes of roasting instead of 20. All ovens vary—mine runs hot, so I know this struggle!