Skip to content
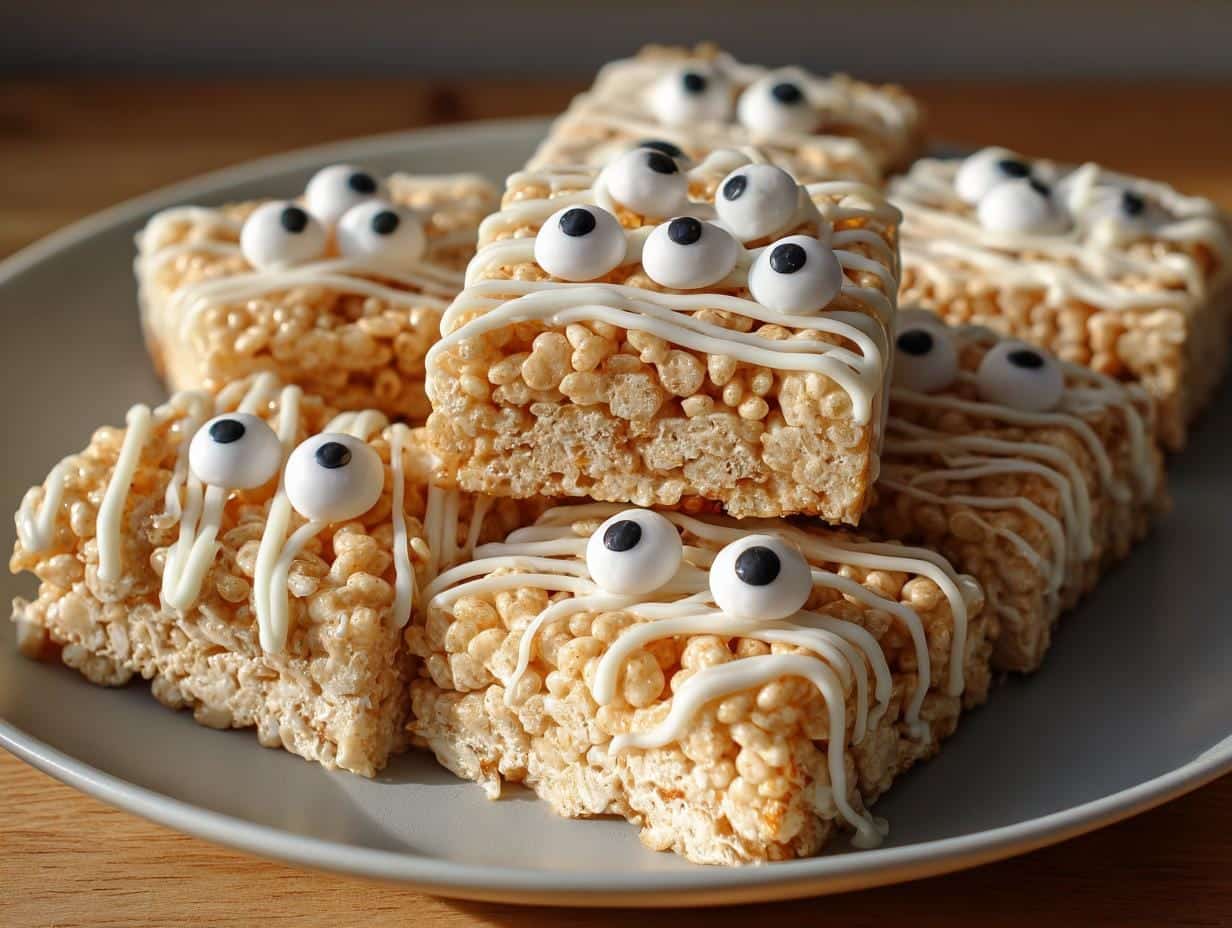
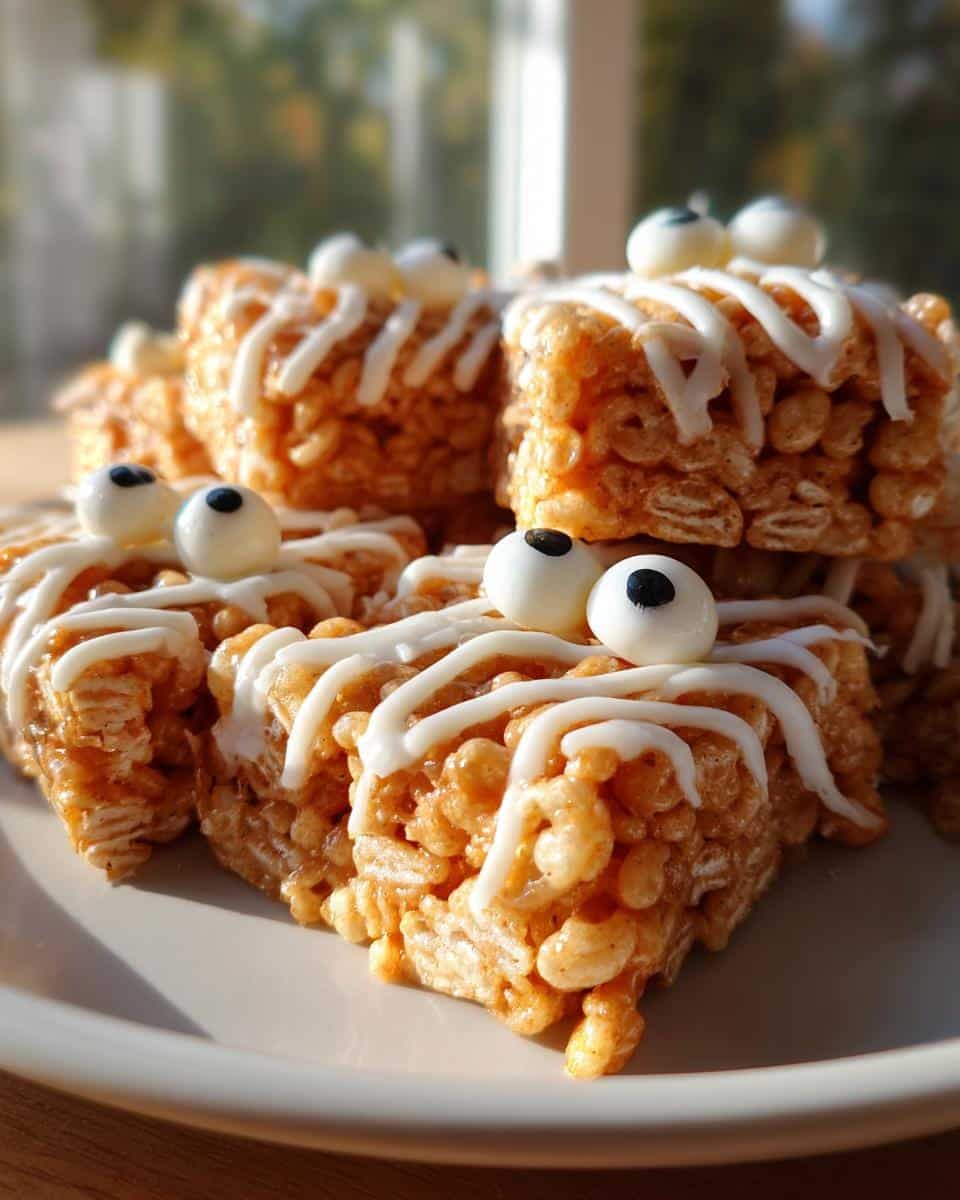
Halloween baking should be simple, spooky, and seriously fun – that’s why I’m obsessed with these Mummy Rice Krispie Treats! They were an absolute lifesaver last year when my niece begged to make “something creepy” for her school party with only an hour to spare. These adorable mummies come together faster than you can say “Boo!” with just a few pantry staples and some playful decorating.
What I love most (besides how delicious they are!) is how forgiving this recipe is. Even when I accidentally let the marshmallow mixture bubble a little too long (oops!), the treats still turned out perfectly gooey inside with that satisfying crispy crunch. The kids went wild for the candy eyeballs peeking through the messy “bandage” icing – we had to make a second batch immediately because the first disappeared in minutes!
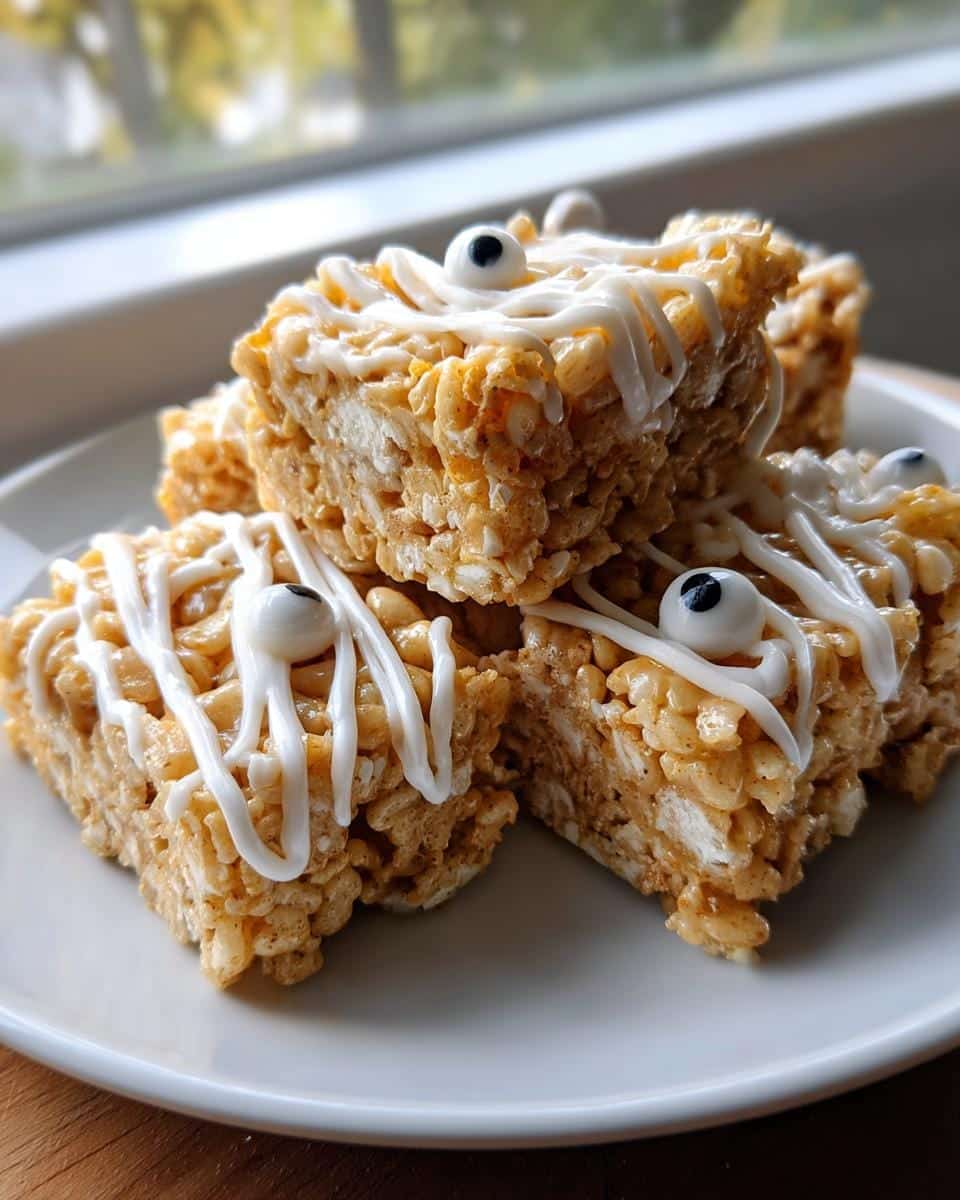
Table of contents:
Trust me, these Mummy Rice Krispie Treats will steal the show at any Halloween gathering. They’re impossible to resist when arranged on a platter like a little mummy army marching across your dessert table. The best part? No fancy baking skills required – just lots of marshmallow-y fun!
Why You’ll Love These Mummy Rice Krispie Treats
These adorable little mummies aren’t just cute – they’re downright irresistible! Here’s why they’ve become my go-to Halloween treat year after year:
- 15 minutes from start to finish – Seriously, that’s all it takes! Perfect for last-minute party prep or when the kids suddenly remember they need a class treat tomorrow (we’ve all been there).
- No oven required – Just one saucepan and some stirring. No worrying about burnt edges or underbaked centers!
- Kid-approved decorating – The messier the “bandages,” the better they look. Even little hands can create spooky masterpieces.
- Playful Halloween vibes – Those candy eyeballs peeking through the icing always get laughs and make these the hit of any party.
- Customizable fun – Add food coloring to the marshmallow mix for green monster versions or drizzle with chocolate “dirt” for grave-themed treats!
Believe me, once you make these once, you’ll be wrapping up mummies every October!
Ingredients for Mummy Rice Krispie Treats
Here’s what you’ll need to bring these adorable mummies to life – I promise you probably have most of this in your pantry already! Every ingredient plays a special role in creating that perfect chewy-crispy texture and spooky look we’re after.
- 3 tablespoons butter (unsalted) – I always use unsalted so I can control the sweetness. Plus, that rich buttery flavor makes all the difference!
- 10 oz marshmallows (about 40 regular or 4 cups mini) – Mini marshmallows melt faster, but either works. Pro tip: Fresh marshmallows work best – stale ones won’t melt as smoothly.
- 6 cups Rice Krispies cereal – Measure this right after pouring from the box for maximum crunch. The cereal should be fresh and crispy, not stale.
- 1 cup white icing (gel works best) – The gel kind holds its shape beautifully for those perfect “bandage” stripes. If you’re in a pinch, regular icing works too – just thicken it with extra powdered sugar.
- 10 candy eyeballs – Find these at any craft store baking aisle. The bigger ones (about 1/4 inch) make the best “spooky” effect!

See? Nothing crazy! Just simple ingredients that magically transform into the cutest Halloween treats. Now let’s get those ghosts (I mean marshmallows) melting!
Equipment You’ll Need
No fancy gadgets required here – just a few basic kitchen tools that you probably already own! Here’s what you’ll want to grab:
- Large saucepan – Big enough to hold all that gooey marshmallow goodness without overflowing
- Wooden spoon or silicone spatula – For stirring (and scraping every last bit of that sticky mixture!)
- 9×13 inch baking pan – Lightly greased so your mummies don’t get stuck
- Piping bag or ziplock bag – For those perfect “bandage” icing stripes (snip a tiny corner if using a baggie)
- Sharp knife – To cut your treats into mummy-sized rectangles
That’s it! Now let’s make some magic (and maybe a little mess) happen.
How to Make Mummy Rice Krispie Treats
Alright, let’s get our mummy-making magic started! These treats come together in just three simple steps – melting, mixing, and decorating. Follow along and you’ll have a whole squad of adorable mummies ready to haunt your dessert table in no time.
Step 1: Melt the Butter and Marshmallows
First things first – grab that large saucepan and melt your butter over low heat (this takes about 2 minutes). Resist the urge to turn up the heat – we want gentle melting, not sizzling! Once the butter’s all liquid, pour in those marshmallows.
Now comes the therapeutic part – stirring! Keep that heat low and stir constantly for about 3 minutes until you’ve got a smooth, glossy white lava. You’ll know it’s ready when no lumps remain and the mixture pulls away from the sides of the pan. Smell that sweet vanilla-y goodness? That’s your cue to move to the next step!
Step 2: Mix in the Cereal
Take the pan off the heat and immediately dump in your Rice Krispies. Here’s my secret: fold gently with a silicone spatula instead of stirring aggressively. We want to coat every crispy piece without crushing them into sad little crumbs!
Work quickly before the marshmallow mixture starts to set. The perfect consistency looks like sticky snow clinging to tree branches – you should be able to see individual cereal pieces coated in shiny marshmallow, not a homogeneous blob. If it seems too dry, add another tablespoon of melted butter; too wet? Sprinkle in a bit more cereal.
Step 3: Shape and Decorate
Pour your mixture into the greased pan and press it down evenly with slightly wet hands (trust me, this prevents sticking!). Let it cool for about 10 minutes – just enough to handle but still slightly warm.
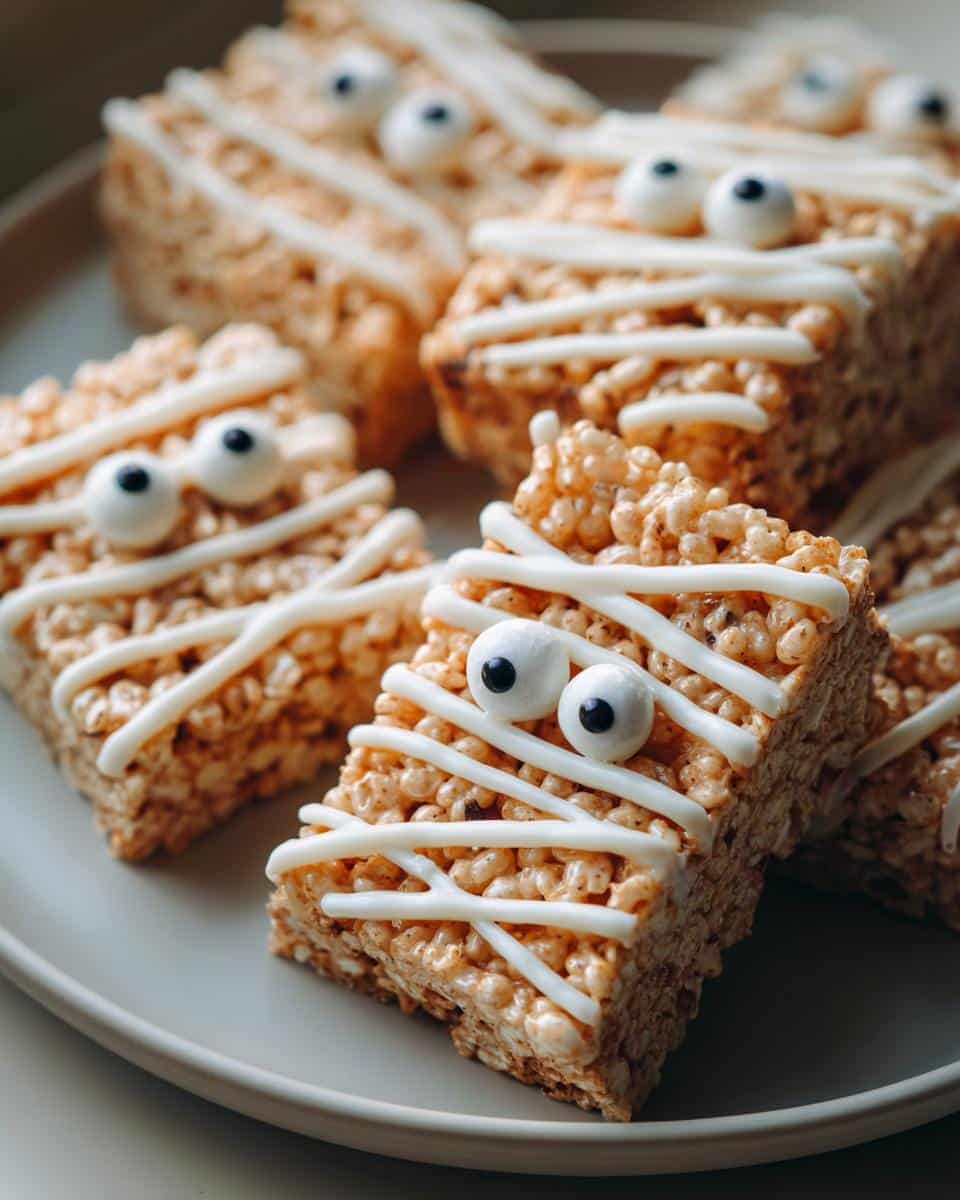
Now for the fun part – mummy-fying! Cut into rectangles (about 2×3 inches), then pipe or drizzle your white icing in crazy zig-zags across each treat. Immediately press on those adorable candy eyeballs before the icing dries. For extra creepy effect, leave some “bandages” dangling loose!
Pro tip: If your icing is too thick, microwave it for 5 seconds to make drizzling easier. Too thin? Let it sit for a few minutes to thicken up. The messier your “bandages” look, the more authentically mummy-like they become!
Tips for Perfect Mummy Rice Krispie Treats
After making dozens of these little mummies (some more successful than others!), I’ve picked up some foolproof tricks to ensure yours turn out picture-perfect every time:
- Grease those hands! Lightly coat your palms with butter or cooking spray before pressing the mixture into the pan – no more sticky fingers ruining your masterpiece.
- Work fast with warm icing – The icing sets quickly, so decorate one treat at a time and add eyeballs while it’s still wet so they stick properly.
- Go for gel icing – The thicker consistency gives you way more control for those perfect messy “bandage” lines compared to runny icing.
- Keep cereal crispy – Store your Rice Krispies in an airtight container before using, and don’t overmix once they’re added to the marshmallow.
- Embrace imperfections – Crooked eyeballs and lopsided bandages just make your mummies more charmingly spooky!
Follow these simple tricks, and you’ll have a graveyard full of adorable mummy treats in no time!
Variations for Mummy Rice Krispie Treats
One of my favorite things about this recipe is how easily you can change it up! Once you’ve mastered the basic mummy version, try these fun twists that keep things fresh and exciting. My kids love voting on which variation we’ll make each Halloween!
Chocolate Lovers’ Mummy
For a darker, spookier look, swap the white icing for melted chocolate “bandages.” Just melt some chocolate chips and drizzle away! You can even use cocoa-flavored cereal instead of regular Rice Krispies for an extra chocolatey treat. The contrast of dark chocolate against those googly candy eyes is seriously creepy-cute.
Monster Mash-Up
Feeling adventurous? Toss in a few drops of green food coloring when melting the marshmallows for Frankenstein-inspired treats. Red makes great zombie versions too! I like to give these “monsters” uneven eyes and crazy icing hair for extra personality.
Vegan-Friendly Ghosts
No problem making these for plant-based pals! Just use vegan marshmallows (they melt just like regular ones) and coconut oil instead of butter. For decorating, powdered sugar mixed with a touch of water makes a great vegan “bandage” alternative.
Spooky Sprinkle Edition
Mix in some Halloween sprinkles with your cereal for a surprise pop of color inside each mummy. The sprinkles peek through the icing “bandages” for a fun, festive look. Black and orange sprinkles work great for this!
The beauty of these variations? They all start with the same simple base recipe, so you can’t go wrong. Whether you stick with classic white bandages or get creative with chocolate and colors, these mummies are always a scream!
How to Store Mummy Rice Krispie Treats
Okay, confession time – these adorable mummies rarely last long enough to need storing in my house! But when they do (or when you want to make them ahead), here’s how to keep them fresh and delicious:
The golden rule? Airtight is everything. I stash mine in a plastic container with a tight-fitting lid or wrap them individually in plastic wrap if I’m packing them for school lunches. Room temperature is perfect – no fridge needed! The cold actually makes the marshmallows weep and the cereal lose its crunch.
They’ll stay perfect at room temp for about 3 days, though truthfully, they’re best enjoyed within 24 hours when the contrast between crispy cereal and gooey marshmallow is at its peak. One sneaky trick I’ve learned? Place a piece of bread in the container with them – it absorbs any excess moisture!
Pro tip: If your decorated mummies need to travel, pack them in a single layer with parchment paper between layers so the icing “bandages” don’t smudge. Those candy eyeballs will stay put as long as your icing has fully set!
Nutritional Information
Now, I’m no nutritionist, but I know we all like to keep an eye on what we’re munching – especially when Halloween treats seem to multiply overnight! Here’s the scoop on these little mummies (figuratively speaking – no actual mummies were harmed in the making of these treats).
Nutritional values are estimates and vary based on ingredients used. Per mummy treat (about 2×3 inches):
- 150 calories – Perfect for a sweet little bite without going overboard
- 12g sugar – Mostly from those marshmallows (but hey, it’s Halloween!)
- 4g fat – Mostly from the butter – that’s what makes them so deliciously rich
- 28g carbs – Hello, crispy cereal goodness!
- 1g protein – Not exactly a protein bar, but who cares when they’re this cute?
Now, if you’re making these for a crowd (or sneaking extras for yourself – no judgment here!), just remember they’re treats meant to be enjoyed in mummy-sized portions. I like to balance them out with some apple slices or carrot sticks – you know, to keep things “healthy” between all the Halloween fun!
Frequently Asked Questions
Over the years, I’ve gotten tons of questions about these adorable mummy treats – here are the answers to the ones I hear most often!
Can I use homemade icing instead of store-bought?
Absolutely! My favorite homemade version is just 1 cup powdered sugar mixed with 1-2 tablespoons milk until it’s thick but pipeable. The key is getting the consistency right – you want it to hold its shape when drizzled. Add milk slowly to avoid making it too runny!
Help! My treats hardened too fast – how do I keep them soft?
This usually happens if the marshmallow mixture gets too hot or sits too long before pressing. Try these tricks: 1) Work quickly once you remove from heat 2) Keep the pan over very low warmth while mixing if needed 3) Press the mixture while it’s still warm and pliable.
Can I make these gluten-free?
Yes! Just swap regular Rice Krispies for a gluten-free crispy rice cereal (they make great versions now). All other ingredients are naturally gluten-free – just double check your marshmallows as some brands contain wheat starch.
Why do my mummies keep falling apart?
Two common culprits: 1) Not enough marshmallow “glue” – measure carefully! 2) Pressing too lightly into the pan. Really pack that mixture down firmly with slightly wet hands so it holds together when cutting.
Can I make these ahead and decorate later?
For best results, decorate the same day. The icing sticks best to fresh treats, and the cereal stays crisper. If you must prep ahead, make the undecorated base up to 24 hours early, stored airtight at room temp, then add icing and eyeballs before serving.
Share Your Spooky Creations
Making these mummies is just the beginning – now I want to see what creepy-cute creations you come up with! There’s something so fun about how every batch turns out just a little different – some mummies peek shyly through neat bandages while others look like they’ve been unraveling for centuries!
I can’t tell you how much joy it brings me when folks tag me in their photos (@SpookyTreatsSarah is where to find me). Last year, one creative parent made a whole mummy army with different expressions – grumpy mummies, surprised mummies, even one with an icing “boa” that looked like it was screaming! Another sent me a shot of their kiddo carefully arranging the candy eyeballs while wearing a miniature chef’s hat. Seriously, these moments make my day.
Pro tip for Instagram-worthy shots: Natural light makes those white “bandages” pop, and a simple black plate or slate board creates the perfect eerie backdrop. Don’t forget to zoom in on those adorable little faces! The more personality your mummies have, the better.
So go ahead – get creative, make a mess, and most importantly, have fun with it! Tag your photos #MummyKrispieMagic so we can all admire your handiwork. Who knows – your creation might just inspire someone else’s Halloween baking adventure!
For more fun recipes and inspiration, check out our Pinterest page!
Print
15-Minute Mummy Rice Krispie Treats That Steal Halloween
- Total Time: 20 minutes
- Yield: 10 treats
- Diet: Vegetarian
Description
Mummy Rice Krispie Treats are a fun and easy-to-make Halloween dessert. These treats are shaped like mummies and decorated with icing to create a spooky yet delicious snack.
Ingredients
- 3 tablespoons butter
- 10 oz marshmallows
- 6 cups Rice Krispies cereal
- 1 cup white icing
- 10 candy eyeballs
Instructions
- Melt butter in a large saucepan over low heat.
- Add marshmallows and stir until fully melted.
- Remove from heat and mix in Rice Krispies cereal.
- Press the mixture into a greased baking pan and let cool.
- Cut into rectangles and drizzle white icing in a crisscross pattern to resemble bandages.
- Add candy eyeballs to complete the mummy look.
Notes
- Store in an airtight container for up to 3 days.
- Use gel icing for better control when decorating.
- Prep Time: 15 minutes
- Cook Time: 5 minutes
- Category: Dessert
- Method: No-Bake
- Cuisine: American