Skip to content
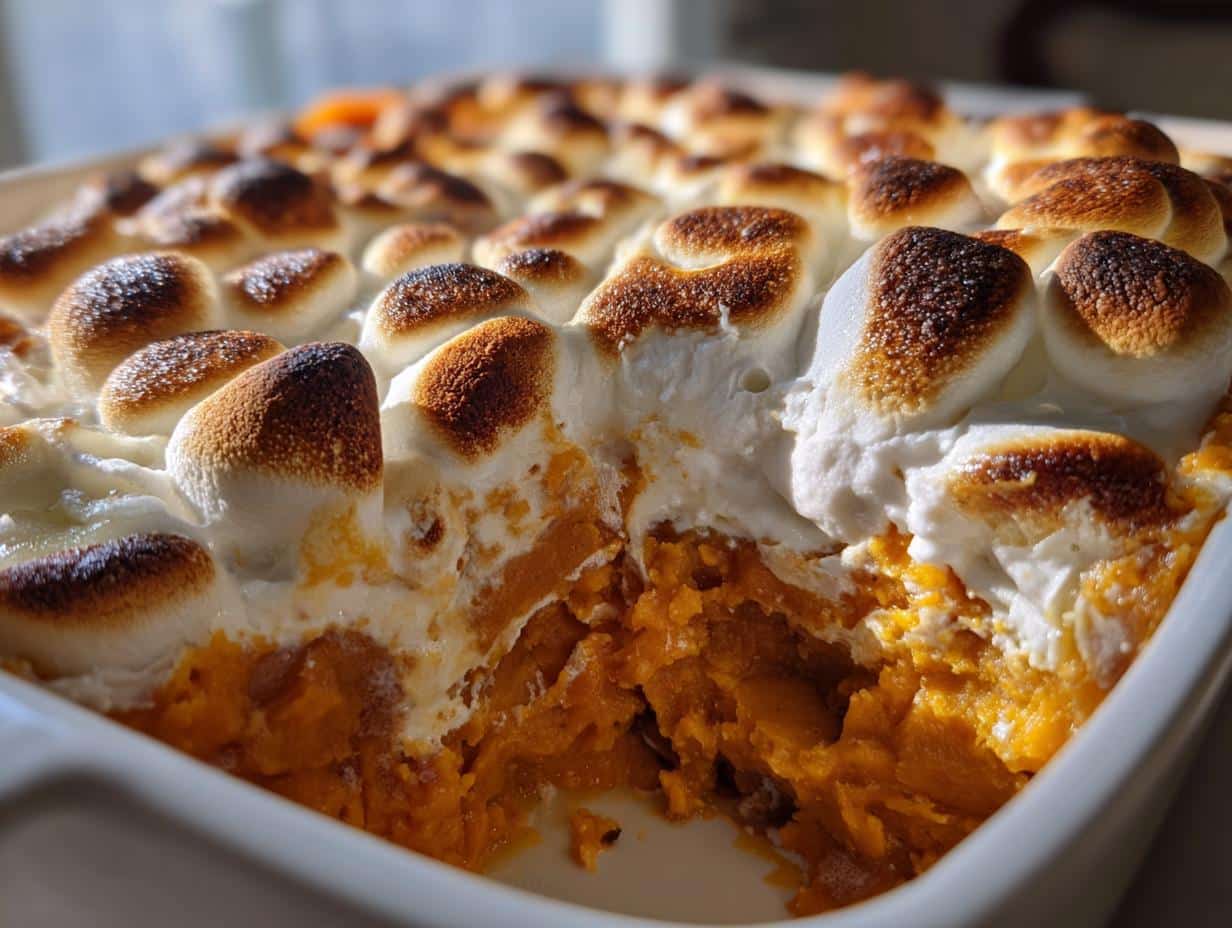
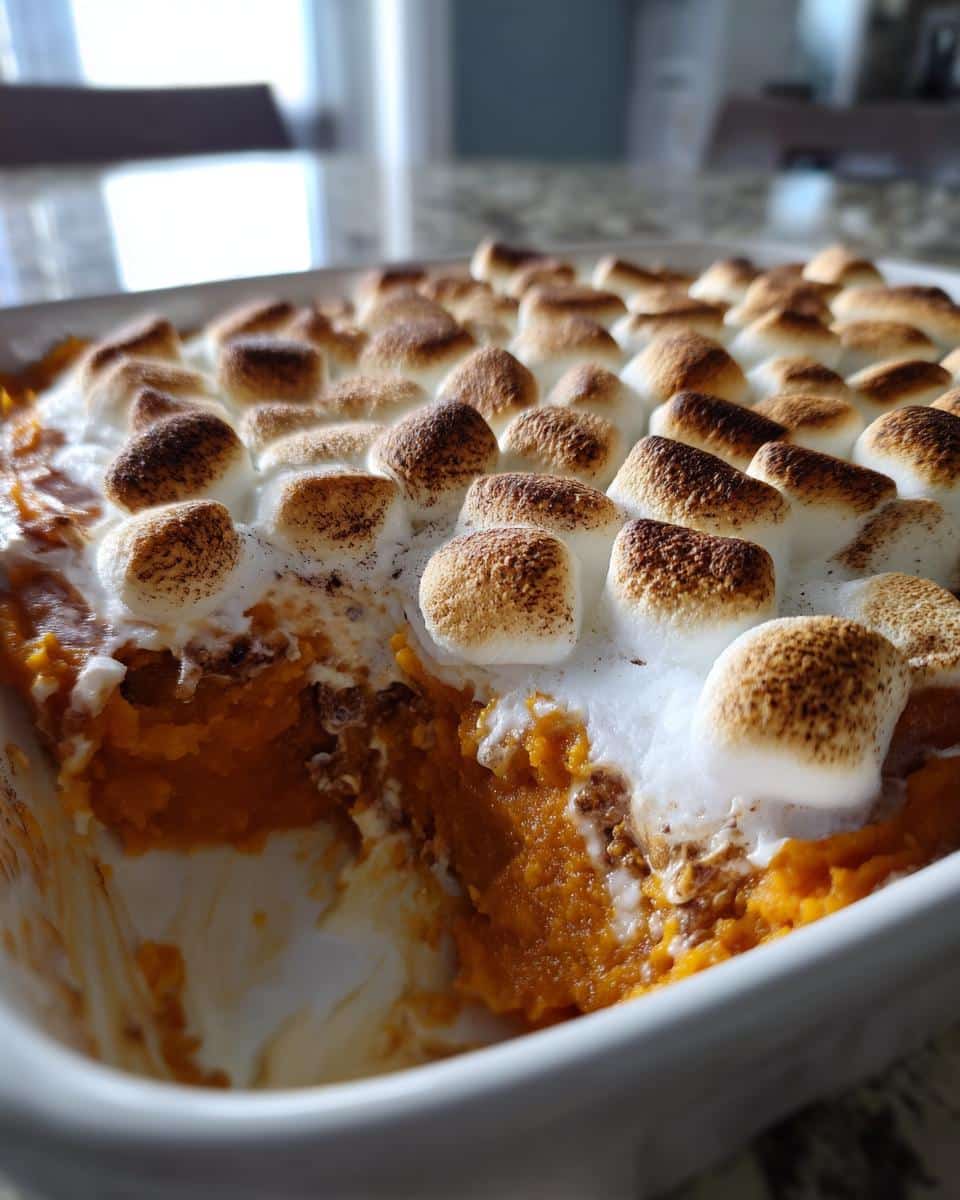
Nothing says “holiday table” quite like my Loaded Sweet Potato Casserole with Marshmallows – that perfect mix of creamy, spiced sweet potatoes and gooey toasted marshmallows that always disappears first at family gatherings. I’ve been tweaking this recipe for years (ever since my aunt snuck me the basics at Thanksgiving 2010!), and trust me, it’s the one side dish that gets requested year after year.
The magic happens when the caramelized edges of the marshmallows meet that velvety sweet potato base – it’s like dessert masquerading as a vegetable. I’ve made this for everything from Friendsgiving potlucks to Christmas brunch, and every time, someone inevitably asks for the recipe. After dozens of test batches, I finally landed on the ideal balance of spices, sweetness, and that irresistible marshmallow pull. Pro tip: Make extra. There are never leftovers, but the pan always looks suspiciously finger-swipe clean…
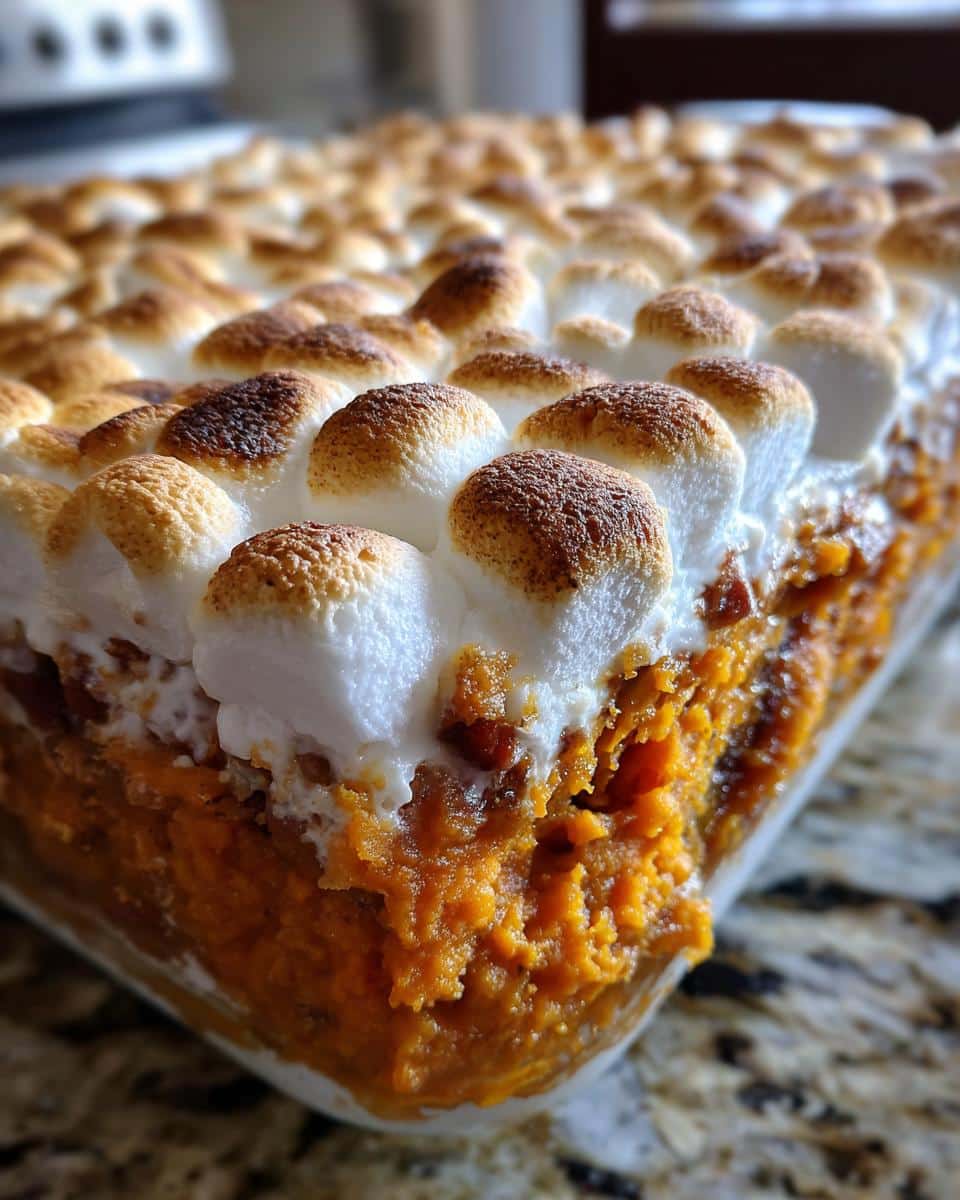
Table of contents:
Why You’ll Love This Loaded Sweet Potato Casserole with Marshmallows
This isn’t just another side dish – it’s the star of every holiday table I’ve ever brought it to. Here’s why it’s become my go-to recipe:
- That perfect sweet-salty balance – The brown sugar and butter caramelize slightly while baking, playing beautifully against the cinnamon and nutmeg. Then those toasted marshmallows? Absolute magic.
- Easier than pie (literally) – While everyone’s stressing over pastry dough, you’re just boiling, mashing, and baking. The hardest part is not eating all the marshmallows straight from the bag.
- Total crowd-pleaser – Kids go wild for the marshmallow topping, adults appreciate the grown-up spice notes, and honestly? The pan always gets scraped clean.
- Make-ahead friendly – You can prep the sweet potato base up to 2 days early, then just add marshmallows before baking. Holiday hosting stress? Solved.
What started as my aunt’s Thanksgiving staple has become my signature dish for every cozy gathering. There’s just something about that first bubbling, golden-brown bite that feels like a hug in food form. For more delicious inspiration, check out our full recipe collection.
Ingredients for Loaded Sweet Potato Casserole with Marshmallows
Gather these simple ingredients – I promise you probably have most in your pantry already! The magic is in how they come together.
- 3 large sweet potatoes, peeled and cubed (about 6 cups)
- 1/2 cup unsalted butter, melted (that’s 1 stick)
- 1/4 cup packed brown sugar – pack it like you mean it!
- 1/4 cup granulated sugar
- 1/2 tsp ground cinnamon
- 1/4 tsp ground nutmeg
- 1/4 tsp salt
- 1 tsp vanilla extract
- 2 large eggs, beaten (room temp works best)
- 1 cup mini marshmallows (trust me, minis melt perfectly!)

Ingredient Substitutions & Notes
Don’t stress if you’re missing something – here are my tried-and-true swaps:
- Sweetener swap: Replace both sugars with 1/3 cup pure maple syrup for deeper flavor (reduce other liquids slightly).
- Butter options: Dairy-free butter works great! Coconut oil can sub in a pinch but lacks that rich flavor.
- Extra crunch: Mix 1/2 cup chopped pecans or walnuts into the sweet potato base before baking.
- Spice variations: Add a pinch of ginger or allspice if you love warm spices. My aunt sometimes adds orange zest too!
- Marshmallow alert: If you only have large marshmallows, cut them into quarters for even melting.
Pro tip: The sweet potatoes should be very soft when boiled – test with a fork like you would for mashed potatoes. Underdone potatoes make for lumpy casserole (not that I’d know from experience… ahem).
How to Make Loaded Sweet Potato Casserole with Marshmallows
Okay, let’s get to the fun part! This recipe comes together in just a few simple steps, and I’ll walk you through each one. The key is nailing that perfect sweet potato texture and timing the marshmallows just right (because nobody wants burnt marshmallows, am I right?).
Step-by-Step Instructions
1. Preheat and prep: Crank that oven to 375°F (190°C) and grab your favorite 9×13 baking dish – give it a quick butter spray or rub. Trust me, you’ll thank me later when serving is a breeze.
2. Cook those sweet potatoes: While the oven heats, toss your peeled and cubed sweet potatoes into a large pot of boiling water. Let them bubble away for 15-20 minutes until they’re fork-tender – they should mash easily like perfect baked potatoes. Drain well in a colander (I give mine a little shake to remove extra water).
3. Mix up the magic: In a big bowl, mash those warm sweet potatoes until mostly smooth (a few small lumps are totally fine!). Stir in the melted butter, both sugars, cinnamon, nutmeg, salt, and vanilla. Once that’s all combined, gently mix in the beaten eggs until everything is beautifully incorporated.
4. Bake the base: Spread your sweet potato mixture evenly in the prepared baking dish. Pop it in the oven for 25 minutes – you’re looking for the edges to just start pulling away from the pan.
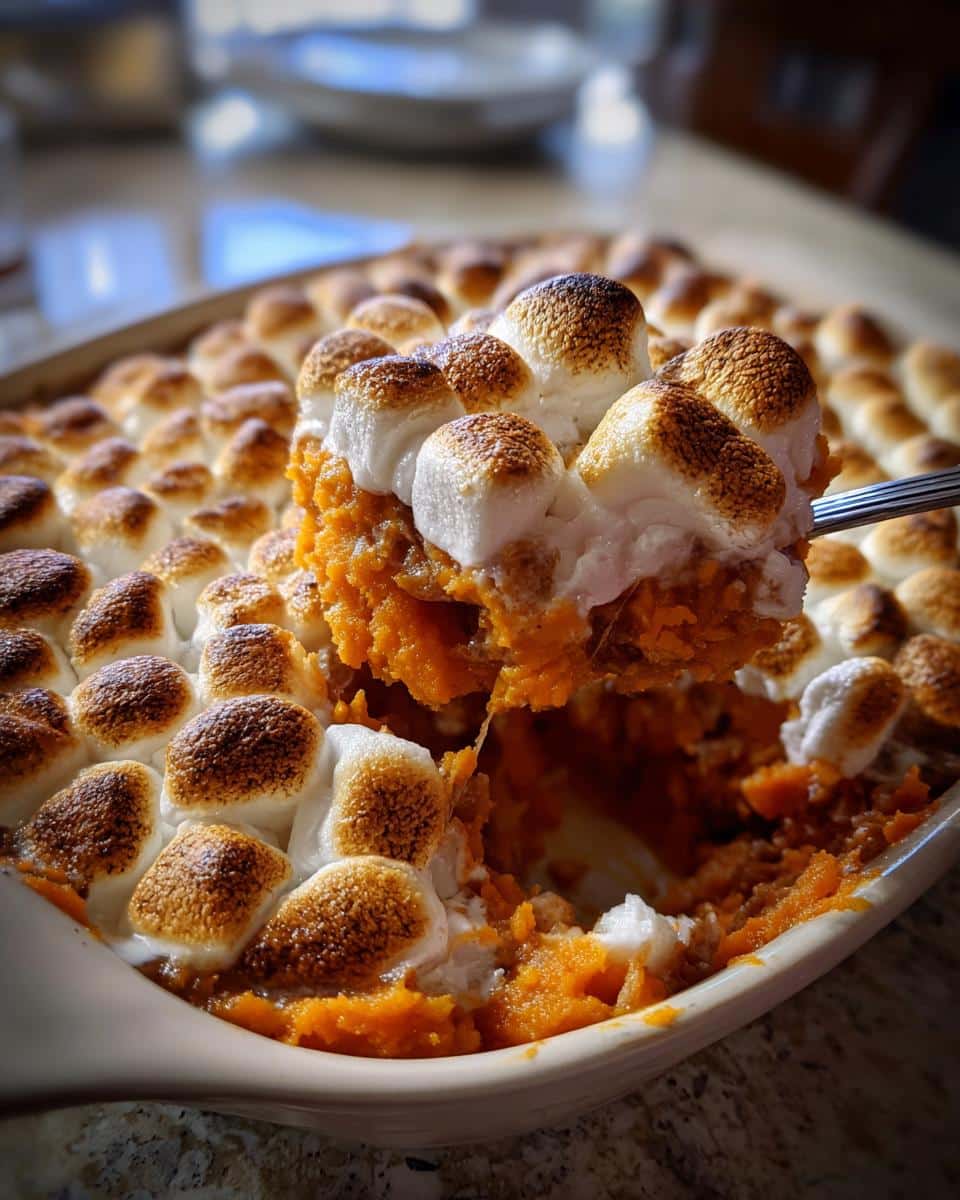
5. Marshmallow time! Here’s where the magic happens. Pull the casserole out and quickly top with those mini marshmallows (work fast so the dish stays hot). Return to the oven for just 5 more minutes – watch closely as the marshmallows puff up and turn golden. If they’re not quite brown enough, I sometimes broil for 30 seconds at the end (but stand guard – they burn fast!).
Let it cool for about 5-10 minutes before serving – those marshmallows are lava-hot at first! The wait is torture, but it’s worth it for that perfect gooey-but-not-messy texture.
Tips for Perfect Loaded Sweet Potato Casserole with Marshmallows
After making this casserole more times than I can count (and, okay, maybe a few marshmallow-related kitchen disasters), I’ve nailed down the secrets to absolute perfection every time. Here’s what I’ve learned the hard way so you don’t have to!
The sweet potato texture is everything: When mashing, stop when you still have a few small lumps – think rustic, not baby food. Overmashing makes the casserole gummy rather than luxuriously creamy. I use a potato masher instead of a mixer for better control (plus it’s oddly satisfying).
Timing is key with marshmallows: Let the baked sweet potato base cool for about 5 minutes before adding marshmallows. Too hot, and they’ll melt into a puddle; too cool, and they won’t toast properly. You want that sweet spot (pun intended) where they puff up golden with those perfect caramelized spots.
Broiler magic: If your marshmallows aren’t quite browned enough after the final bake, pop the casserole under the broiler for 30-60 seconds – but don’t blink! Stay close and rotate the pan for even color. I once got distracted by a phone call and created marshmallow charcoal – not my finest culinary moment.
Bonus tip from my aunt: For extra flavor, sprinkle a pinch of flaky salt over the marshmallows right when they come out of the oven. The salty-sweet combo will make people lose their minds (in the best way).
Serving Suggestions for Loaded Sweet Potato Casserole with Marshmallows
This casserole isn’t just a side dish – it’s practically the centerpiece of my holiday table! Here’s how I love to serve it (and when it disappears fastest):
The classic holiday trio: It’s absolute magic paired with roast turkey and garlicky green beans. The creamy sweetness balances the savory main perfectly. Add some tangy cranberry sauce on the side, and you’ve got Thanksgiving perfection on a plate.
Brunch superstar: Don’t save this just for dinner! It’s incredible alongside baked ham at Christmas brunch or with fluffy scrambled eggs the morning after. Pro tip: Leftovers (if you somehow have any) make killer French toast when sandwiched between bread slices.
Potluck hero: When I bring this to Friendsgiving, I always pair it with something crisp like roasted Brussels sprouts to balance the richness. The marshmallows make it look fancy, but that scoopable texture means everyone goes back for seconds.
My favorite occasions for this casserole? Obviously Thanksgiving, but honestly, I make it anytime I need some comfort food magic. It’s perfect for:
- Christmas dinner (especially with prime rib!)
- Easter brunch alongside honey-glazed ham
- Fall potlucks when you want to wow people
- Cozy Sunday dinners with roast chicken
One warning though – wherever you bring it, be prepared to share the recipe. I’ve had more requests for this than anything else I’ve ever cooked! You can also find more dinner recipes here.
Storage & Reheating
Okay, confession time: I almost never have leftovers of this casserole – it’s that good! But on the rare occasions when we manage to save some, here’s how to keep it tasting fresh:
Fridge smart: Let the casserole cool completely (those marshmallows will be molten at first!), then cover tightly with foil or transfer to an airtight container. It’ll keep beautifully in the fridge for up to 3 days. Pro tip: If the marshmallows have absorbed moisture, sprinkle a few fresh minis on top before reheating.
Reheat like a pro: The oven is your friend here! Pop it in at 350°F (175°C) for about 10 minutes until warmed through. If the marshmallows need a refresh, add a handful of fresh ones for the last 2 minutes of reheating. The microwave works in a pinch, but it’ll make the marshmallows rubbery – not ideal.
Freezer hack: You can freeze just the sweet potato base (without marshmallows) for up to 2 months in an airtight container. Thaw overnight in the fridge, then bake as directed with fresh marshmallows added at the end. Texture stays perfect this way!
One last tip from my trial-and-error: Never store leftover casserole with plastic wrap directly touching the marshmallows – they’ll stick like glue. Always use foil or parchment first. (Yes, I learned this the messy way.)
Nutritional Information
Okay, let’s talk numbers – but remember, these are just estimates since we all tweak recipes in our own kitchens! Based on my exact ingredient list (and let’s be real, who actually measures marshmallows perfectly?), here’s the breakdown per serving:
- Serving Size: 1/6 of recipe (about 1 generous scoop)
- Calories: 320
- Total Fat: 14g (Saturated: 9g)
- Cholesterol: 90mg
- Sodium: 180mg
- Total Carbs: 45g (Fiber: 4g, Sugars: 22g)
- Protein: 4g
A little sugar shock? Don’t worry – this is holiday food, people! That said, if you’re watching sugar intake, you can easily:
- Use half the marshmallows (still delicious!)
- Swap in sugar-free marshmallows
- Reduce both sugars by 1-2 tablespoons
Full disclosure: My aunt always told me “Nutrition labels don’t count between Thanksgiving and New Year’s” – but I’m including this info because some folks (like my carb-counting sister-in-law) appreciate it. Just promise me you’ll enjoy every gooey bite guilt-free!
Note: Values calculated using standard ingredients. Your results may vary based on specific brands and modifications.
Common Questions About Loaded Sweet Potato Casserole with Marshmallows
I’ve gotten so many questions about this recipe over the years – here are the ones that pop up most often, along with my hard-won kitchen wisdom!
Can I prep this casserole ahead of time? Absolutely! The sweet potato base actually tastes better after the flavors mingle. Prepare everything through step 4 (before adding marshmallows), then cover and refrigerate for up to 2 days. When you’re ready, let it sit at room temp for 30 minutes, add fresh marshmallows, and bake as directed – you might need an extra 5 minutes in the oven.
Help! I only have large marshmallows – will they work? Been there! Large marshmallows can totally work if you cut them into quarters first (kitchen shears make this easy). The mini ones melt more evenly, but halved or quartered large marshmallows will give you those gorgeous toasted peaks with gooey centers. Just watch them closely under the broiler – they brown faster!
Does this freeze well? Here’s my freezer trick: Make and bake just the sweet potato portion (no marshmallows), then cool completely. Wrap tightly in plastic and foil, and freeze for up to 2 months. Thaw overnight in the fridge, then top with fresh marshmallows and bake until heated through (about 25-30 minutes at 375°F). The texture stays perfect – no one will guess it was frozen! Just never freeze after adding marshmallows… I learned that lesson the hard way with a sticky, crystallized mess.
Bonus question I get every Thanksgiving: “Why is yours so much better than my mom’s?” That’s between you and me – but the secret’s in letting the sweet potato mixture cool slightly before adding marshmallows. Shhh!
For more sweet potato inspiration, try our Twice Baked Sweet Potatoes or Sweet Potato Hand Pies. You can also follow us on Pinterest for daily recipe ideas!
Print
Ultimate 6-Ingredient Loaded Sweet Potato Casserole with Marshmallows Recipe
- Total Time: 50 minutes
- Yield: 6 servings
- Diet: Vegetarian
Description
A rich and comforting sweet potato casserole topped with gooey marshmallows. Perfect for holidays or a cozy family dinner.
Ingredients
- 3 large sweet potatoes, peeled and cubed
- 1/2 cup unsalted butter, melted
- 1/4 cup brown sugar
- 1/4 cup granulated sugar
- 1/2 tsp ground cinnamon
- 1/4 tsp ground nutmeg
- 1/4 tsp salt
- 1 tsp vanilla extract
- 2 large eggs, beaten
- 1 cup mini marshmallows
Instructions
- Preheat oven to 375°F (190°C).
- Boil sweet potatoes until tender, about 15–20 minutes. Drain and mash.
- Mix in melted butter, sugars, cinnamon, nutmeg, salt, and vanilla.
- Stir in beaten eggs until fully combined.
- Spread mixture into a greased baking dish.
- Bake for 25 minutes.
- Remove from oven and top with marshmallows.
- Bake for 5 more minutes until marshmallows are golden.
- Let cool slightly before serving.
Notes
- For extra flavor, add chopped pecans to the topping.
- Store leftovers in the fridge for up to 3 days.
- Reheat in the oven for best texture.
- Prep Time: 20 minutes
- Cook Time: 30 minutes
- Category: Side Dish
- Method: Baked
- Cuisine: American