Skip to content
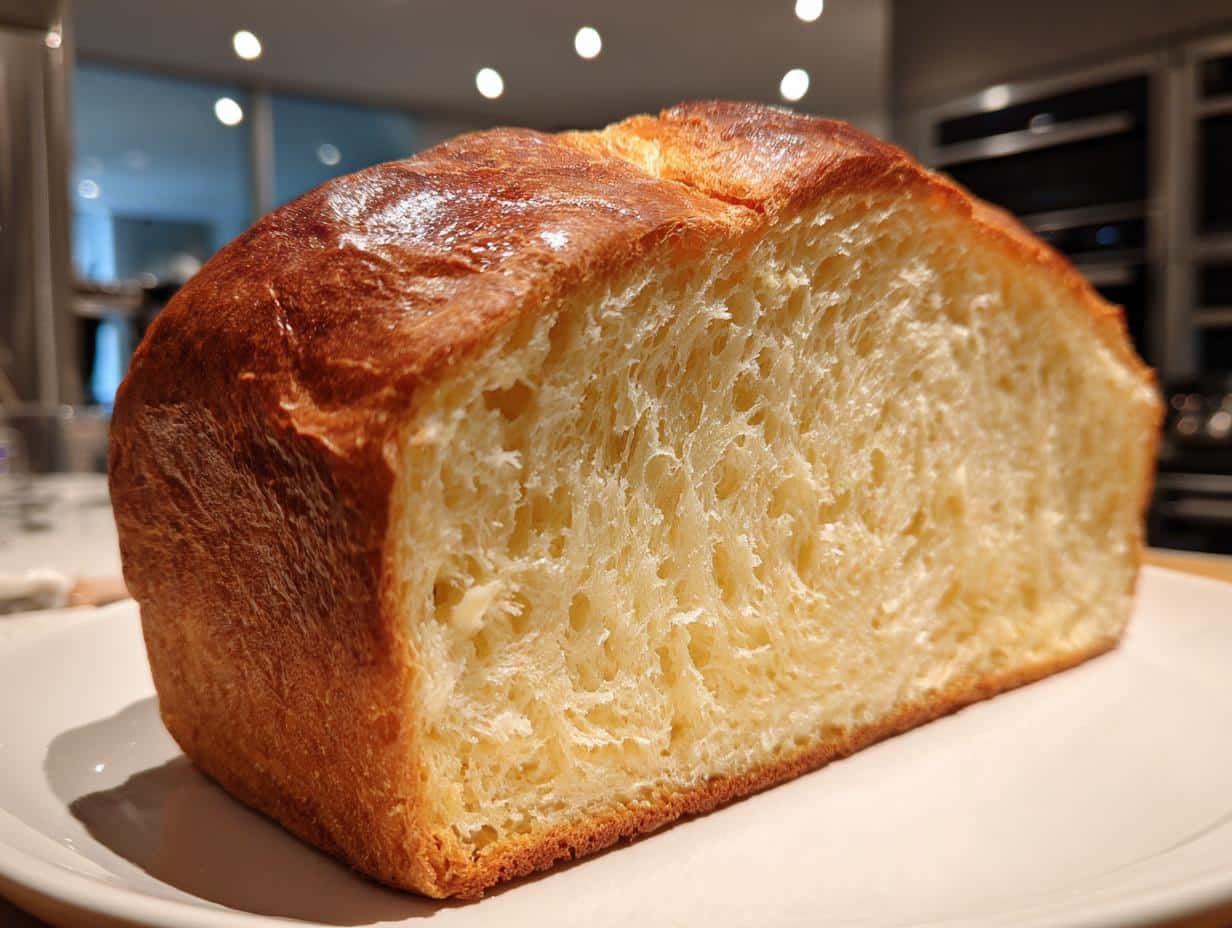
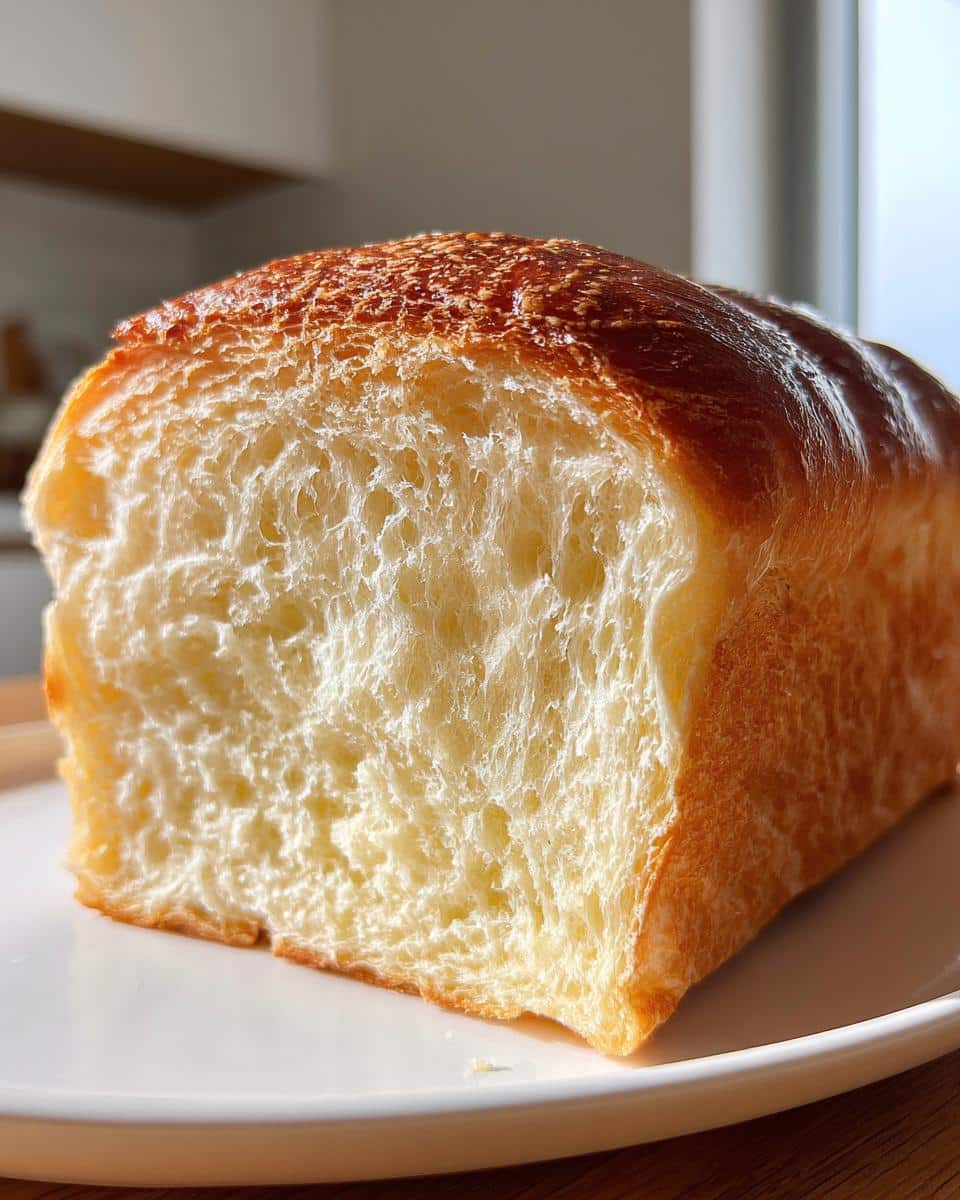
There’s something magical about pulling a loaf of Japanese Shokupan from the oven – that first whiff of sweet, milky goodness, the way it practically floats out of the pan because it’s so impossibly light. I still remember my first bite of proper Shokupan in Tokyo, how the pillowy slices practically melted on my tongue. Now, after countless test batches (and a few hilarious failures), I’ve nailed down this Japanese bread Shokupan recipe that gives you that signature cloud-like texture at home. It’s the same fluffy milk bread you’d find in bakeries across Japan, with just the right touch of sweetness to make it irresistible whether you’re making toast or sandwiches.
Why You’ll Love This Japanese Bread Shokupan Recipe
This isn’t just any white bread – it’s the stuff of breakfast dreams and afternoon snack cravings. Here’s why it’s become my go-to recipe:
- The texture is unreal – like biting into a sweet, milky cloud that springs right back when you press it
- Uses pantry staples you probably already have (no fancy ingredients required!)
- Makes the most amazing toast that actually stays soft inside while getting crispy outside
- Perfect blank canvas – equally happy slathered with jam or used for next-level sandwiches
- That heavenly aroma while baking will make your kitchen smell like a Tokyo bakery
Ingredients for Japanese Bread Shokupan Recipe
Here’s everything you’ll need to create that perfect cloud-like Shokupan. I’ve learned through trial and error that precision matters with this bread – no eyeballing measurements if you want that signature texture!
- 300g bread flour (high-protein) – This isn’t the time for all-purpose flour! The extra gluten makes all the difference in getting that stretchy, airy crumb.
- 30g granulated sugar – Just enough to give it that subtle sweetness without turning it into dessert bread.
- 5g fine sea salt – I always weigh my salt for consistency – it balances the sweetness perfectly.
- 6g active dry yeast – That golden packet amount works great, but check the expiration date!
- 180ml whole milk (room temperature) – Cold milk straight from the fridge will slow down your yeast – trust me, I learned this the hard way.
- 20g unsalted butter, softened – Not melted, not cold – you should be able to press your finger into it easily. This gives the bread its rich, tender crumb.
Pro tip from my many test batches: Have all your ingredients measured and ready before starting. When I first tried making Shokupan, I wasted precious minutes scrambling for ingredients while my yeast waited impatiently!
Equipment Needed for Japanese Bread Shokupan
Don’t worry – you don’t need fancy bakery equipment to make incredible Shokupan at home! Here’s what I use every time:
- Stand mixer with dough hook – My trusty KitchenAid makes kneading effortless, but…
- Alternative: Your hands! Yes, you can absolutely knead by hand (I did for years!). Just be ready for about 15-20 minutes of serious arm workout – the dough should become smooth and pass the windowpane test.
- Digital kitchen scale – Non-negotiable for me. Measuring by weight gives perfect results every time.
- Pullman loaf pan (13.5x4x4 inches) – That iconic square shape is traditional, but any standard loaf pan works.
- Dough scraper – My secret weapon for clean handling and portioning that sticky dough.
- Plastic wrap or damp towel – To keep the dough from drying out during rises.
- Instant-read thermometer (optional but helpful) – Takes the guesswork out of checking doneness.
Pro tip: If you’re using a regular loaf pan instead of Pullman, no worries! Your Shokupan will just have a rounded top instead of perfectly square slices – still delicious!
How to Make Japanese Bread Shokupan Recipe
Okay, let’s get to the fun part – turning those simple ingredients into that dreamy, cloud-like bread! I’ll walk you through each step just like my Japanese baking mentor taught me, with all the little tricks I’ve picked up along the way.
Mixing and Kneading the Dough
First things first – in your mixer bowl (or large mixing bowl if going manual), whisk together the bread flour, sugar, salt, and yeast. This dry team needs to be well acquainted before the wet ingredients join the party. Now, with the mixer on low (or a wooden spoon ready), slowly pour in that room temperature milk.
Here’s where the magic starts – keep mixing until a shaggy dough forms, then let it rest for 5 minutes. This autolyse period lets the flour fully hydrate. After the break, it’s time for the butter! Add it in small pieces while the mixer runs on medium (or knead it in by hand). The dough will look like a mess at first – sticky, slippery chaos – but don’t panic! After about 8-10 minutes of kneading, it transforms into this smooth, elastic wonder that stretches beautifully without tearing (that’s the windowpane test!).
First Rise and Shaping
Form your gorgeous dough into a ball and place it in a lightly oiled bowl. Cover with plastic wrap or a damp towel and let it rise in a warm spot (about 75-80°F is perfect) until doubled – usually 1 to 1.5 hours. I always do the finger test – poke it gently, and if the indentation stays, it’s ready!
Now for shaping – gently deflate the dough (no aggressive punching!) and divide it into 2-3 equal portions (I weigh them for precision). Roll each piece into a smooth ball, cover, and let rest for 15 minutes. This bench rest makes the dough more cooperative. Then comes the signature Shokupan shaping – roll each piece into an oval, fold the sides toward the center like a letter, then roll tightly from the short end to create that perfect spiral structure.
Second Rise and Baking
Place your shaped dough pieces seam-side down in the prepared loaf pan, cover again, and let rise until the dough just crests the pan rim (about 45-60 minutes). Meanwhile, preheat your oven to 350°F – crucial for that perfect oven spring!
When it’s bake time, I like to brush the top with a little milk or egg wash for extra shine. Bake for 25-30 minutes until the top is a deep golden brown and the loaf sounds hollow when tapped on the bottom. If you have a thermometer, the internal temp should read 190°F. Resist the urge to slice immediately! Let it cool in the pan for 10 minutes, then transfer to a wire rack to cool completely (the hardest wait of all, I know!).

Pro tip: That first rise is your best friend – don’t rush it! I once tried to speed things up by putting the dough in an overly warm spot, and my Shokupan came out dense and sad. Patience rewards you with those perfect, airy slices!
Tips for Perfect Japanese Bread Shokupan
After burning through more flour than I’d care to admit (and a few loaves that could’ve doubled as doorstops), I’ve gathered all my hard-won wisdom to help you nail this Shokupan every single time:
- Flour is everything – I can’t stress this enough. That high-protein bread flour (12-14% protein) makes or breaks your Shokupan. I tried once with all-purpose in a pinch, and the bread was disappointingly dense. Look for brands labeled “bread flour” or “strong flour” – my current favorite is King Arthur.
- The butter sweet spot – Too cold and it won’t incorporate properly; too warm and your dough turns greasy. I leave mine out for about 30 minutes before starting – you want it pliable but not shiny or oily. If you forgot (I’ve been there!), cut it into tiny cubes to help it blend faster.
- Kneading is therapy – Whether using a mixer or your hands, don’t skimp on kneading time! That perfect windowpane test (when you can stretch a small piece thin enough to see light through without tearing) is your golden ticket to fluffy bread. My first few attempts failed because I stopped too soon at the “it looks smooth” stage.
- Temperature matters – Yeast is picky! If your kitchen’s chilly, create a warm rising spot by placing the bowl in the oven with just the light on (no heat!). Too hot, and you’ll kill the yeast – I learned this when my dough smelled like alcohol after rising next to a radiator!
- The poke test never lies – During rises, gently press a floured finger about 1/2 inch into the dough. If the indentation stays, it’s ready. If it springs back immediately, give it more time. If it collapses, you’ve overproofed – don’t panic! Just reshape and let it rise again (though the texture might be slightly denser).
- Resist the slice – I know, that fresh-baked aroma is torture, but cutting into hot Shokupan is a one-way ticket to gummy bread city. Let it cool completely on a wire rack (about 2 hours) for perfect slices that don’t squish.
- Storage secrets – To keep your Shokupan fresh, store it in a bread box or paper bag for the first day, then transfer to an airtight container. For longer storage, slice and freeze – I pop frozen slices straight into the toaster, and they taste freshly baked!
My biggest tip? Don’t get discouraged if your first loaf isn’t bakery-perfect. Even my Japanese friend’s grandmother – who’s been making Shokupan for 50 years – admits her early attempts were… let’s say “character-building.” Every batch teaches you something new!
Variations for Japanese Bread Shokupan Recipe
Once you’ve mastered the classic Shokupan, the fun really begins! Here are my favorite twists that still honor that fluffy, milky essence while adding new dimensions of flavor and texture:
- Honey instead of sugar – Swap the granulated sugar for 45g of mild honey (reduce milk by 15ml to compensate). This gives the bread a delicate floral sweetness that’s absolutely heavenly in French toast. Just add the honey with the milk since it’s a liquid.
- Tangzhong method – My Japanese baker friend swears by this technique for next-level softness! Cook 20g bread flour with 100ml milk to make a roux, let it cool, then add to your dough (reduce main recipe’s milk to 80ml). The pre-gelatinized starch keeps the bread moist for days.
- Matcha Shokupan – For that gorgeous green hue, sift 10g matcha powder into the flour. The earthy bitterness balances beautifully with the bread’s natural sweetness – perfect with red bean paste!
- Hokkaido milk bread style – Replace half the milk with heavy cream for an ultra-rich, buttery crumb that’s almost cake-like. Warning: This version disappears suspiciously fast in my house!
- Savory twist – Reduce sugar to 15g and add 20g grated Parmesan or 1 tbsp dried herbs to the flour. Makes incredible grilled cheese sandwiches with a subtle Japanese flair.
Pro tip: When experimenting, change just one variable at a time. My first “everything but the kitchen sink” attempt with matcha, honey, AND tangzhong was… let’s call it a learning experience!
Serving and Storing Japanese Bread Shokupan
Now comes the best part – enjoying that perfect loaf you worked so hard to create! Here’s how I like to serve and store my Shokupan to keep it tasting fresh and fabulous:
Slicing: Use a sharp serrated knife and gentle sawing motion – no squishing this delicate bread! For sandwiches, I prefer 3/4-inch slices that hold fillings without falling apart. For toast or tea sandwiches, go thinner (about 1/2 inch). My Japanese friend’s grandmother taught me to slightly angle the knife for elegant diagonal slices when serving with afternoon tea.
Serving ideas:
- Plain perfection: Sometimes I can’t resist tearing off hunks straight from the loaf – that milky sweetness needs no accompaniment!
- Toast magic: Lightly toasted Shokupan develops this incredible crisp exterior while staying cloud-soft inside. My current obsession? A swipe of salted butter and drizzle of honey.
- Jam session: Strawberry or apricot jam highlights the bread’s subtle sweetness. For a Japanese twist, try sweet red bean paste or yuzu marmalade.
- Sandwich superstar:
Makes the dreamiest egg salad sandwiches or crispy-edge grilled cheese. The tight crumb means no fillings leak through!
Storing: To keep your Shokupan fresh:
- Day 1: Store in a bread box or paper bag at room temperature – this maintains the perfect crust texture.
- Days 2-3: Transfer to an airtight container or plastic bag to prevent drying out.
- Longer storage: Slice and freeze in a freezer bag for up to 2 months. I pop frozen slices straight into the toaster – they come out tasting freshly baked!
Pro tip: Never refrigerate Shokupan! The cold makes the starch recrystallize, turning your fluffy bread disappointingly dry and crumbly. I learned this the hard way with my first loaf – such a tragic waste!
One more thing – if your loaf starts getting slightly stale (it happens to the best of us!), don’t toss it! Shokupan makes incredible French toast, bread pudding, or croutons. My favorite rescue? Cutting it into cubes, toasting lightly with butter and sugar for the most addictive sweet croutons over ice cream!
Nutritional Information for Japanese Bread Shokupan
Here’s the nutritional breakdown per slice (based on cutting the loaf into 12 equal pieces) for this heavenly milk bread. Keep in mind these are estimates – your exact numbers might vary slightly depending on specific ingredients and slice thickness (I won’t judge if you cut yours extra thick!).
- Calories: 150 per slice
- Carbohydrates: 25g
- Protein: 5g
- Sugar: 5g
- Fat: 3g (1.5g saturated)
- Fiber: 1g
- Sodium: 150mg
A quick note – if you’re watching your sugar intake, you can reduce the sugar to 20g without sacrificing too much of that signature Shokupan sweetness. And if you try any of the variations (like the Hokkaido milk version with cream), those numbers will obviously change – that rich version adds about 20 extra calories per slice, but oh my, is it worth it!
Pro tip: For the most accurate nutritional info based on your exact ingredients, I recommend using an online calculator where you can input your specific brands and measurements. I discovered my favorite butter actually has slightly less saturated fat than generic brands, which was a happy little bonus!
FAQs About Japanese Bread Shokupan Recipe
I’ve gotten so many great questions about this Shokupan recipe over the years – here are the ones that pop up most often with my tried-and-true answers:
Can I use all-purpose flour instead of bread flour?
Oh, I wish I could say yes, but that high-protein bread flour really is the secret to Shokupan’s magical texture! All-purpose flour just doesn’t develop enough gluten to give you that signature stretchy, airy crumb. In a pinch, you can add 1 tablespoon of vital wheat gluten per cup of all-purpose flour to boost the protein content.
Why did my bread turn out dense?
I feel your pain – my first few loaves could’ve doubled as paperweights! Usually, density comes from one of these culprits: under-kneading (didn’t pass the windowpane test), old yeast (check that expiration date!), or rushing the rises (impatient bakers get dense bread – trust me, I know!). Also, slicing into it while still warm is a common mistake that smashes all those precious air pockets.
Can I make this without a stand mixer?
Absolutely! Some of my best Shokupan came from my pre-mixer days. Just be ready for a 15-20 minute arm workout – knead until the dough transforms from sticky mess to smooth, elastic perfection. Pro tip: Use the “slap and fold” technique – it’s messy but super effective for developing gluten by hand.
How do I know when the bread is fully baked?
That golden brown color is your first clue, but the real test is tapping the bottom – it should sound hollow. If you’re a gadget person like me, an instant-read thermometer should register 190°F in the center. Underbaked Shokupan tends to feel heavy for its size and may sink slightly after coming out of the oven.
Can I freeze the dough to bake later?
Yes! After the first rise, punch down the dough, shape into a ball, wrap tightly in plastic, and freeze for up to a month. When ready to use, thaw overnight in the fridge, then proceed with shaping and second rise. The texture might be slightly denser, but it’s a great time-saver!
Got more questions? I’d love to hear them – and see your beautiful loaves! Tag me #MyShokupanAdventure so I can cheer you on. Happy baking!
For more baking inspiration and recipes, check out our recipes section or follow us on Pinterest!
Print
Fluffy Japanese Bread Shokupan Recipe with 5 Secret Tips
- Total Time: 2 hours 50 minutes (includes rising time)
- Yield: 1 loaf
- Diet: Vegetarian
Description
A simple recipe for Japanese Shokupan, a soft and fluffy milk bread with a slightly sweet taste.
Ingredients
- 300g bread flour
- 30g sugar
- 5g salt
- 6g dry yeast
- 180ml milk
- 20g unsalted butter, softened
Instructions
- Mix flour, sugar, salt, and yeast in a bowl.
- Add milk and knead until a dough forms.
- Add softened butter and knead until smooth and elastic.
- Let the dough rise until doubled in size.
- Divide the dough into portions and shape into loaves.
- Place in a loaf pan and let rise again.
- Bake at 180°C (350°F) for 25-30 minutes until golden.
- Cool before slicing.
Notes
- Use high-protein bread flour for best texture.
- Knead thoroughly for a soft crumb.
- Let the bread cool completely before slicing.
- Prep Time: 20 minutes
- Cook Time: 30 minutes
- Category: Bread
- Method: Baking
- Cuisine: Japanese