Skip to content
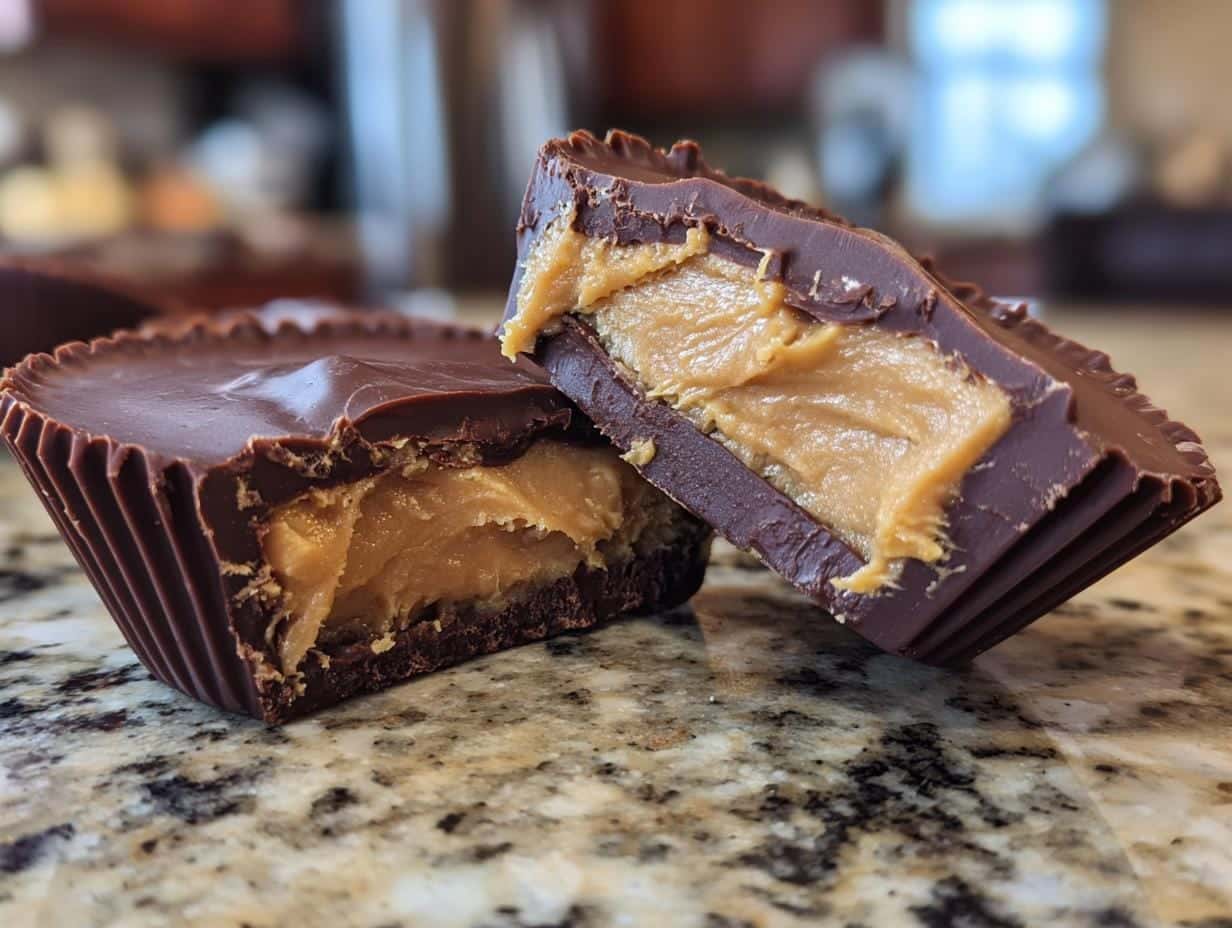
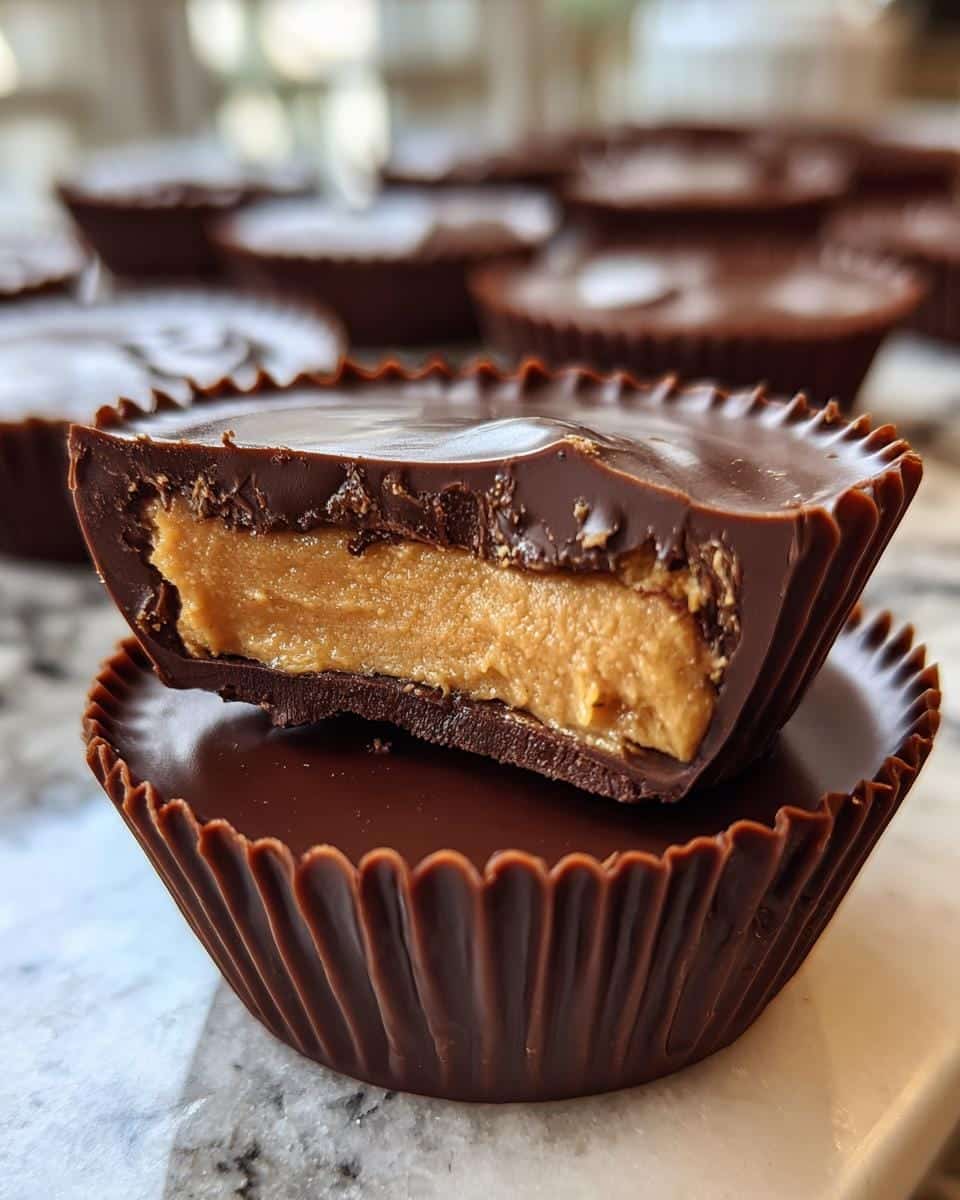
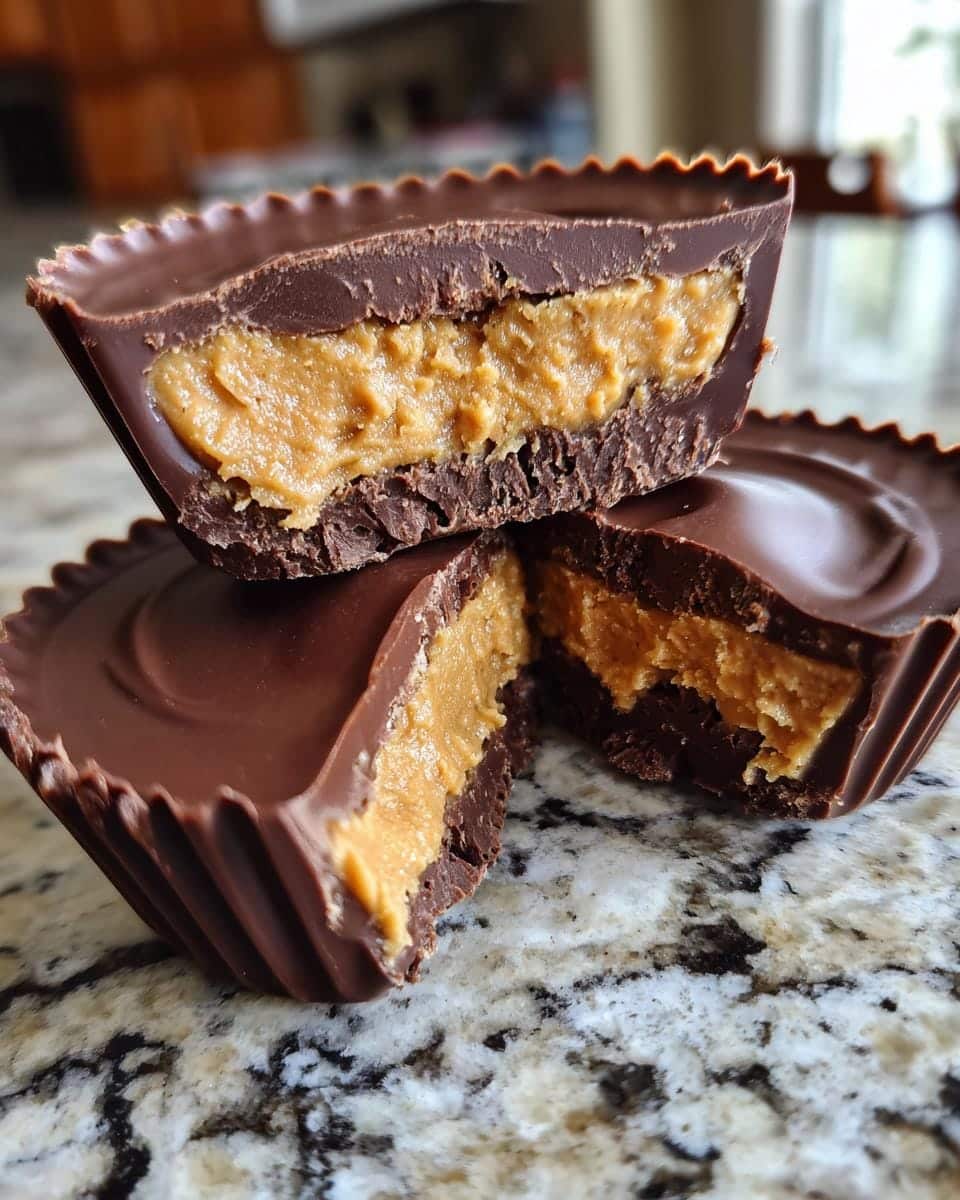
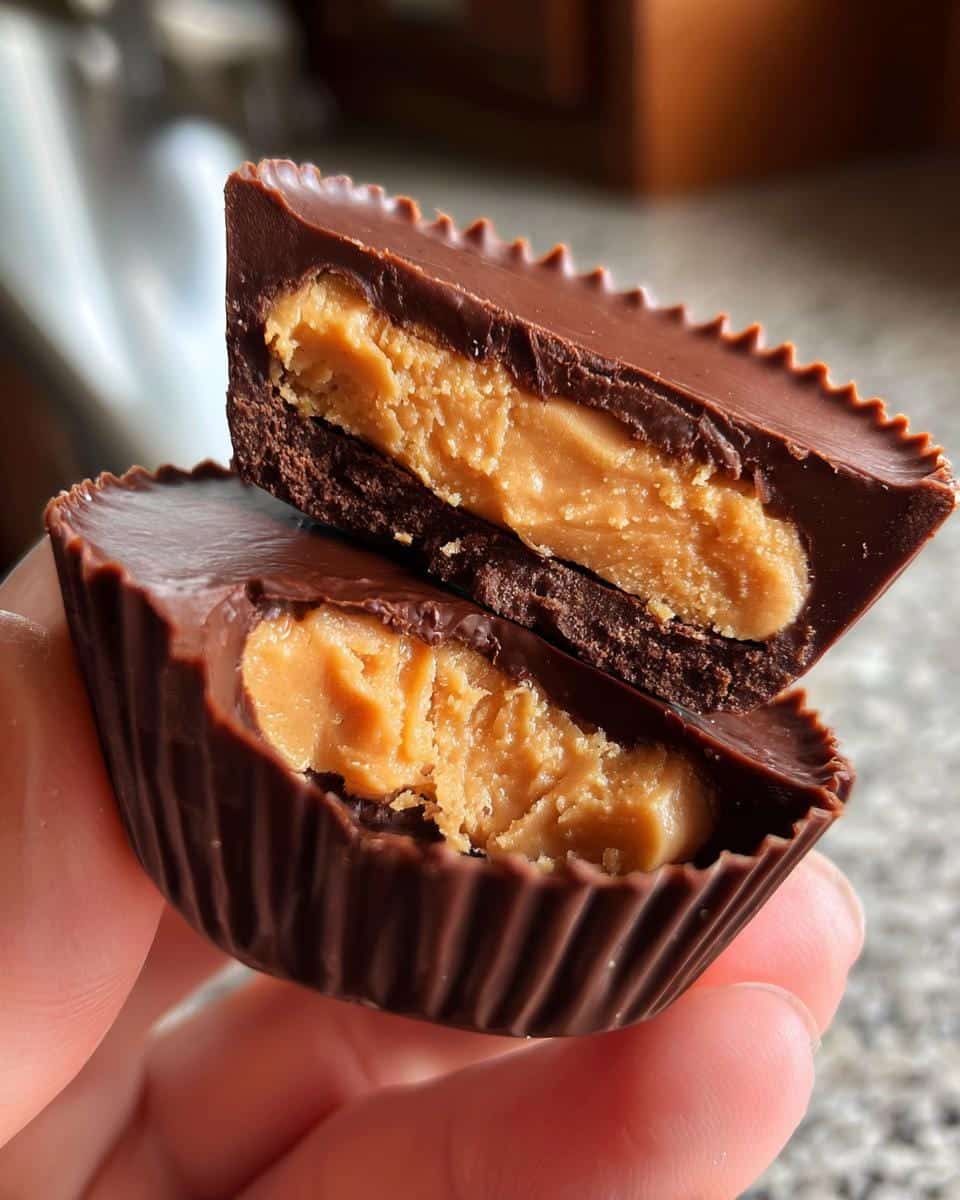
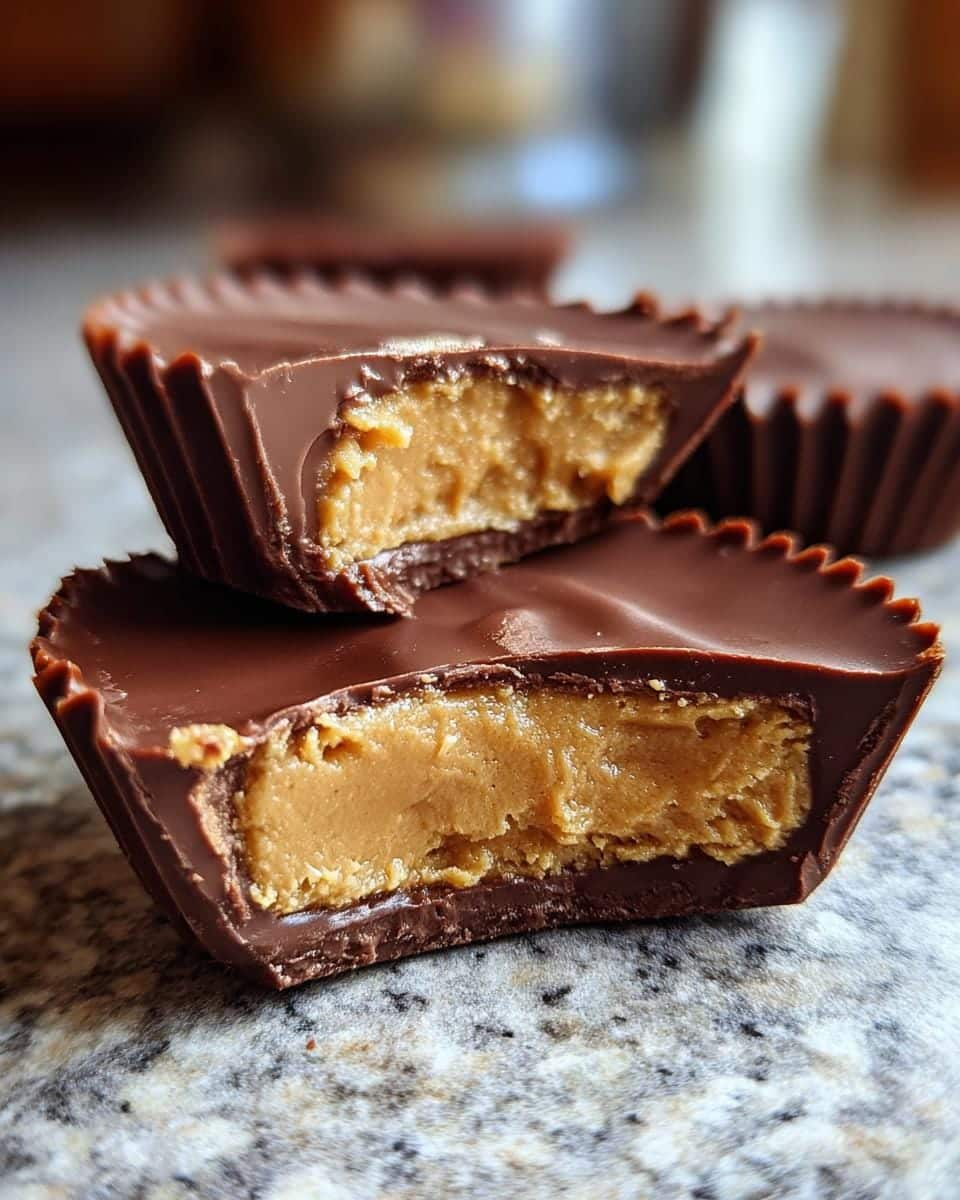
Oh my gosh, you guys—let me tell you about my ultimate weakness: Reeses Peanut Butter Cups. Those little chocolatey, peanut buttery gems from childhood? Turns out Reeses Peanut Butter Cups are shockingly easy to make at home—and they taste even better than the store-bought ones. I still remember making them for my niece’s birthday. She took one bite, her eyes lit up, and she whispered, “Aunt Sarah, these taste like magic!”
What makes homemade Reeses Peanut Butter Cups so irresistible? It’s that dreamy balance of smooth peanut butter and rich chocolate, but with the freshness and texture only homemade treats can deliver. No special tools required—just a muffin tin, a few pantry staples, and an hour of mostly hands-off time. Once you make your first batch of Reeses Peanut Butter Cups, you’ll wonder why you ever bought them pre-packaged.
The best part about making your own Reeses Peanut Butter Cups? You can tailor them to your cravings. Love more peanut butter? Add an extra scoop. Want thicker chocolate? Pour with confidence. I like to top mine with a little sea salt—it brings out the flavor and makes every bite pop. Whether you like them chilled or room temp, these Reeses Peanut Butter Cups are pure magic in candy form.
So grab your bowl and let’s make it happen. One bite into these homemade Reeses Peanut Butter Cups, and you’ll be hooked for life.
Table of contents:
Why You’ll Love This Reeses Peanut Butter Cup Recipe
Okay, let me count the ways you’re going to adore these homemade reeses peanut butter cups! First off, they’re so easy – we’re talking 20 minutes of active prep, tops. No oven required means no sweating over a hot stove (perfect for summer!). But here’s what really makes them special:
- Customizable sweetness – control the sugar level by using natural peanut butter or adjusting the powdered sugar
- Better texture – that fresh peanut butter center stays creamy instead of getting waxy like store-bought versions
- Endless variations – add sea salt, crushed pretzels, or swap in dark chocolate for grown-up twists
- Instant nostalgia – one bite transports you right back to childhood lunchboxes
Seriously, these disappear faster than you can make them. Last time I brought them to a potluck? Let’s just say I had to hide a few in my purse for the ride home!
Ingredients for Homemade Reeses Peanut Butter Cups
Gathering your ingredients is the first step to peanut butter cup heaven! Here’s what you’ll need for that perfect balance of creamy and chocolatey goodness:
- 1 cup creamy peanut butter – Skippy or Jif work great, but natural peanut butter gives a less sweet option
- 1/2 cup powdered sugar – This helps firm up the filling just right
- 2 tbsp unsalted butter, softened – Leave it out for 30 minutes first!
- 1/4 tsp salt – Just a pinch makes all the flavors pop
- 2 cups semi-sweet chocolate chips – Guittard or Ghirardelli melt beautifully
- 1 tbsp coconut oil (optional) – Makes the chocolate super smooth and glossy
See? Simple stuff you probably already have in your pantry. Now let’s turn these into magic!
Equipment You’ll Need
Don’t worry – you won’t need any fancy gadgets for these peanut butter cups! Just grab:
- A mini muffin tin (standard 24-cup works perfectly)
- Paper liners – the cute mini ones make them look professional
- A microwave-safe bowl for melting chocolate
- Basic mixing tools: spoon, spatula, and measuring cups
That’s it! Now you’re ready to create candy shop magic with minimal cleanup.
How to Make Reeses Peanut Butter Cups Step-by-Step
Alright, let’s get to the fun part – creating these irresistible peanut butter cups! I promise it’s easier than you think, and the results will make you feel like a candy-making pro.
Preparing the Peanut Butter Filling
First, let’s make that dreamy reeses peanut butter center. In a medium bowl, mix together the peanut butter, powdered sugar, softened butter, and salt until it’s completely smooth – no lumps! The mixture should hold together when you pinch it. Roll tablespoon-sized portions into balls, then gently flatten them into little discs about the size of a quarter. These will nestle perfectly in your chocolate cups.
Melting the Chocolate
Now for the chocolate magic! Combine chocolate chips and coconut oil (if using) in a microwave-safe bowl. Microwave in 30-second bursts, stirring well after each one. Stop when it’s almost completely melted – the residual heat will finish the job. This prevents that awful burnt chocolate taste. Pro tip: Give it one final vigorous stir to make it extra glossy!
Assembling and Chilling
Time to build our masterpiece! Spoon about 1 teaspoon melted chocolate into each liner, then gently press a peanut butter disc on top. Cover completely with more chocolate – I like to tap the tin lightly to remove air bubbles. Pop them in the fridge for at least 30 minutes until firm. The hardest part? Waiting before you devour them!
Tips for Perfect Reeses Peanut Butter Cups
After making dozens (okay, hundreds!) of these peanut butter cups, I’ve picked up some game-changing tricks:
- Natural peanut butter alert! It gives a deeper peanut flavor and lets you control sweetness. Just stir it well first – that oil separation is normal.
- Crunchy texture hack: Mix in crushed graham crackers or pretzels with the peanut butter filling for that satisfying bite.
- Chocolate too thick? Add a tiny bit more coconut oil (1/2 tsp at a time) until it pours like liquid silk.
- Storage secret: Keep them in the fridge in an airtight container with parchment between layers. They’ll stay fresh for 2 weeks… if they last that long!
Trust me, these little tweaks take your peanut butter cups from good to “OMG I need this recipe!” level.
Variations and Substitutions
Oh, the possibilities with these reeses peanut butter cups! Once you’ve mastered the basic recipe, try these fun twists:
- Dark chocolate lovers – swap semi-sweet for 70% cacao chips (heavenly with a sprinkle of flaky salt!)
- Nut butter alternatives – almond butter or sunflower seed butter work beautifully for allergies
- Vegan version – use dairy-free chocolate and coconut oil instead of butter
- Crunch factor – press a whole peanut or almond into the top before the chocolate sets
The best part? No matter which version you try, they’ll still have that magical peanut butter cup charm. Go wild and make them your own!
Serving and Storage Suggestions
Let me tell you how to keep your Reeses Peanut Butter Cups at their absolute best! For that perfect bite, serve them straight from the fridge—the cool, firm texture is what makes homemade Reeses Peanut Butter Cups so magical. If you have leftovers (doubtful!), store your Reeses Peanut Butter Cups in an airtight container with parchment paper between the layers to prevent sticking. Kept chilled, these Reeses Peanut Butter Cups will stay fresh and delicious for up to 2 weeks… though in my house, they rarely make it past day three!
Frequently Asked Questions
Absolutely! Crunchy peanut butter gives a wonderful texture contrast. Just know the filling won’t be quite as smooth when you shape it. I sometimes do half-and-half for the best of both worlds!
At least 30 minutes in the fridge, but if you can resist, an hour makes them perfectly firm. Once I got impatient after 20 minutes – let’s just say I ended up with chocolate fingerprints everywhere!
Yes! They freeze beautifully for up to 3 months. Just thaw in the fridge overnight. Bonus: frozen ones taste like peanut butter cup ice cream bites straight from the freezer!
This usually means the chocolate got too hot while melting. Next time, stop microwaving when there are still a few unmelted chips – they’ll dissolve with stirring. And always use the coconut oil!
Nutritional Information
Nutritional values are estimates and vary based on ingredients used. These homemade peanut butter cups contain peanut butter, chocolate, and sugar – enjoy them as an occasional treat!
Print
Irresistible Homemade Reeses Peanut Butter Cups in 20 Minutes
- Total Time: 55 minutes (includes chilling)
- Yield: 24 peanut butter cups
- Diet: Vegetarian
Description
A simple and delicious homemade version of the classic Reeses Peanut Butter Cup. These treats combine creamy peanut butter and rich chocolate for a perfect bite-sized dessert.
Ingredients
- 1 cup creamy peanut butter
- 1/2 cup powdered sugar
- 2 tbsp unsalted butter, softened
- 1/4 tsp salt
- 2 cups semi-sweet chocolate chips
- 1 tbsp coconut oil (optional, for smoother melting)
Instructions
- Line a mini muffin tin with paper liners.
- In a bowl, mix peanut butter, powdered sugar, butter, and salt until smooth.
- Roll the peanut butter mixture into small balls and flatten slightly.
- Melt chocolate chips and coconut oil in a microwave-safe bowl, stirring every 30 seconds until smooth.
- Pour a small amount of melted chocolate into each liner, covering the bottom.
- Place a peanut butter disc on top of the chocolate in each liner.
- Cover the peanut butter with more melted chocolate.
- Refrigerate for 30 minutes or until set.
Notes
- Use natural peanut butter for a less sweet filling.
- Store in an airtight container in the fridge for up to 2 weeks.
- For a crunchier texture, add crushed graham crackers to the peanut butter mixture.
- Prep Time: 20 minutes
- Cook Time: 5 minutes
- Category: Dessert
- Method: No-Bake
- Cuisine: American