Skip to content
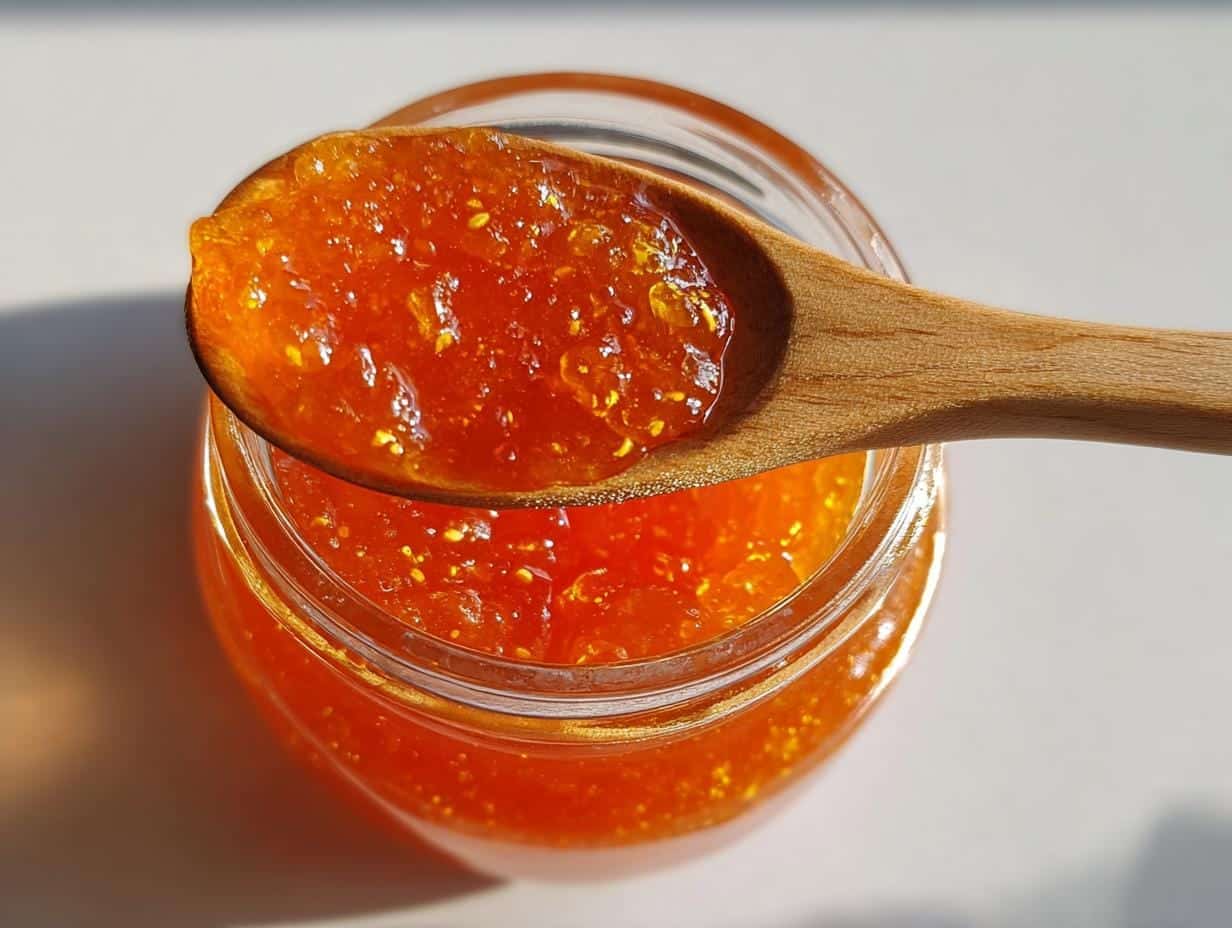
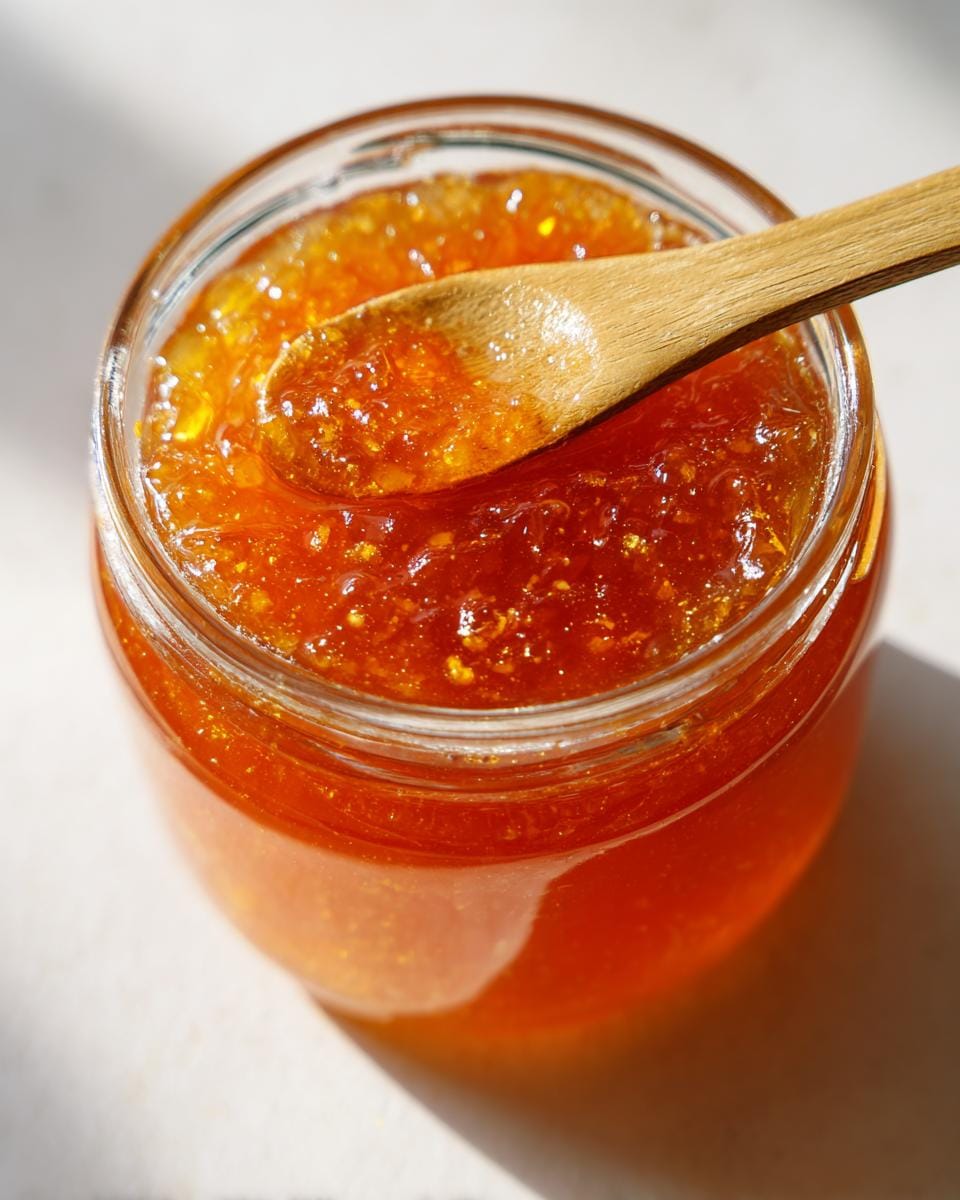
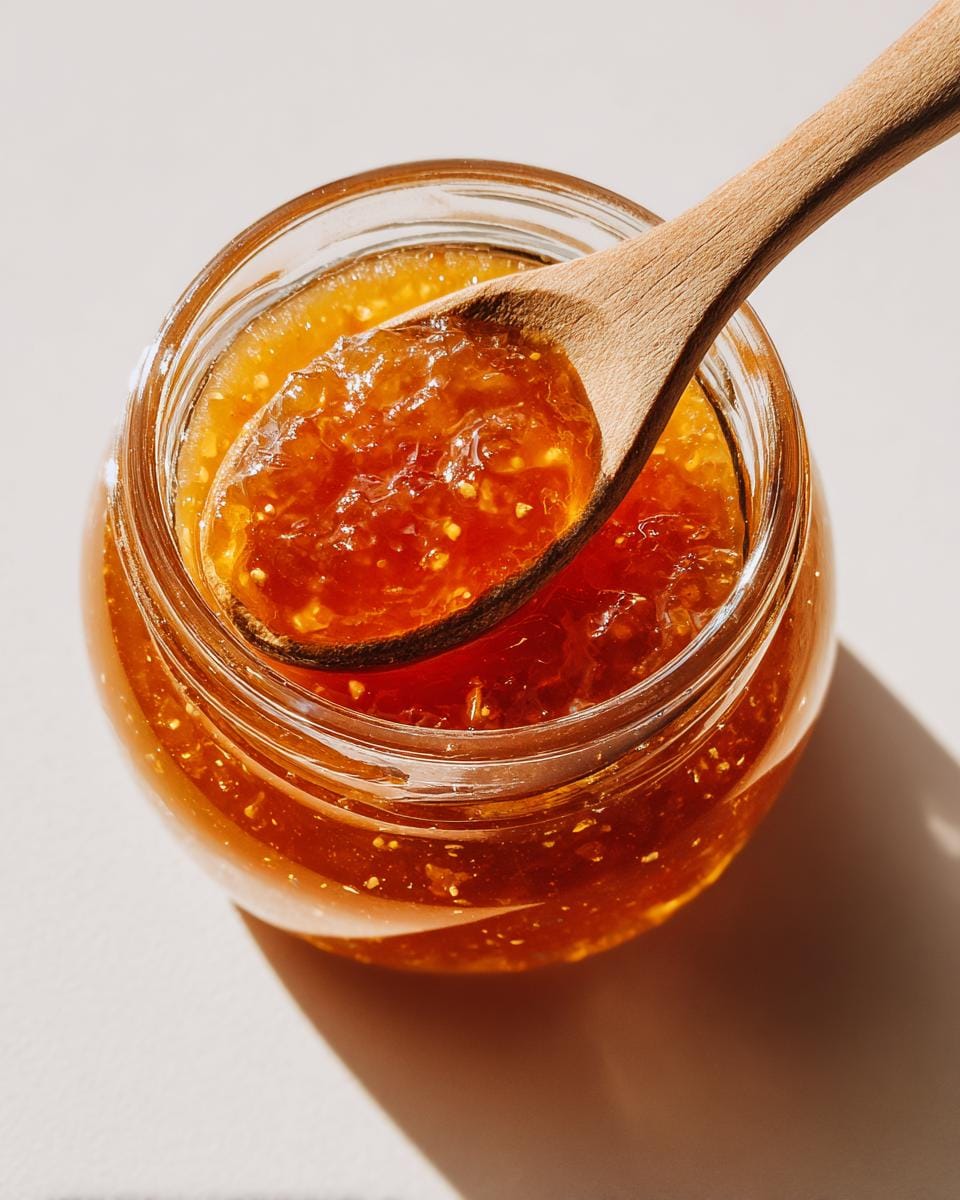
There’s nothing quite like the taste of summer captured in a jar of homemade peach jam. I still remember standing on a stool in my grandmother’s kitchen, watching her stir a bubbling pot of golden peaches—the sweet, sticky scent filling the air. That’s the magic of making your own preserves: it’s equal parts nostalgia and practicality. This simple homemade peach jam recipe turns just four ingredients into spoonfuls of sunshine that taste amazing on toast, swirled into yogurt, or even as a glaze for meats. Trust me, once you taste jam made with ripe peaches and real vanilla, you’ll never go back to store-bought.
Table of contents:
Why You’ll Love This Homemade Peach Jam
This isn’t just any jam—it’s sunshine in a jar, and here’s why you’ll adore it:
- No weird stuff: Just peaches, sugar, and a splash of lemon—no artificial preservatives or unpronounceable ingredients
- Sweetness you control: Like it tart? Use less sugar. Got a sweet tooth? Add an extra spoonful
- Gift-worthy magic: Pour into pretty jars with ribbon for the most heartfelt homemade present
- Summer in winter: One taste instantly transports you back to peach season
Seriously, your morning toast will never be the same.
Ingredients for Homemade Peach Jam
Gather these simple ingredients – quality matters here!
- 4 cups peeled, pitted, and chopped peaches (about 6-8 medium ripe peaches – freestone varieties work best)
- 2 cups granulated sugar (the white stuff dissolves easiest)
- 1/4 cup freshly squeezed lemon juice (about 2 lemons – no bottled stuff!)
- 1 teaspoon pure vanilla extract (the good kind makes all the difference)
- 1/2 teaspoon cinnamon (optional, but adds cozy warmth)
Pro tip: Taste your peaches first – if they’re super sweet, you might reduce the sugar by 1/4 cup.
Equipment You’ll Need
You probably have most of these jam-making essentials already—no fancy gadgets required!
- A large, heavy-bottomed pot (trust me, you don’t want sticky sugar bubbling over)
- Wooden spoon (perfect for stirring without scratching)
- Clean canning jars with lids (I save pretty jars all year for this)
- Ladle (for pouring without the mess)
- Kitchen timer (because time flies when jam’s bubbling away)
That’s it—now let’s make some magic!
How to Make Homemade Peach Jam
Making peach jam is like conducting a sweet, sticky symphony—follow these steps for perfect timing and harmony:
Preparing the Peaches
Start with ripe peaches that yield slightly when gently pressed—underripe fruit won’t give you that luscious jam texture. To peel them easily, I blanch the peaches for 30 seconds in boiling water, then shock them in ice water. The skins slip right off! Remove pits and chop the peaches into 1/2-inch pieces—you want some texture, not mush.
Cooking the Jam
In your heavy-bottomed pot, combine the peaches, sugar, and lemon juice. Stir over medium heat until the sugar completely dissolves—this takes about 5 minutes of patient stirring. Once the mixture starts bubbling, things get exciting! Reduce heat to maintain a lively simmer (not a rolling boil) and cook for 30-40 minutes, stirring occasionally. Watch out—hot jam bubbles can splatter like tiny lava! When the mixture darkens to a deep amber and thickens slightly, you’re getting close.
Testing for Doneness
Here’s my grandma’s trick: Place a small plate in the freezer beforehand. Drop a teaspoon of jam on the cold plate—if it wrinkles when nudged with your finger, it’s ready. Alternatively, use a candy thermometer—jam sets perfectly at 220°F. Remember, it will thicken more as it cools!
The whole kitchen will smell like summer peaches and vanilla at this point—that’s how you know you’ve done it right. Resist eating it straight from the pot (though I won’t judge if you sneak a taste)!
Tips for Perfect Homemade Peach Jam
Want that perfect jam every time? Here are my hard-earned secrets:
- Skim the foam: Use a spoon to remove the white foam that forms on top—your jam will look clearer and prettier in jars
- Adjust as you go: Add more lemon juice if it’s too sweet, or a tablespoon of honey if it needs rounding out
- Peak ripeness matters: Overripe peaches give the deepest flavor—mushy is good here!
- Don’t rush the boil: That slow simmer develops the most incredible caramelized peach flavor
- Sterilize properly: Boil jars and lids for 10 minutes if canning—no one wants spoiled jam!
Follow these, and you’ll be the peach jam hero of your friend group!
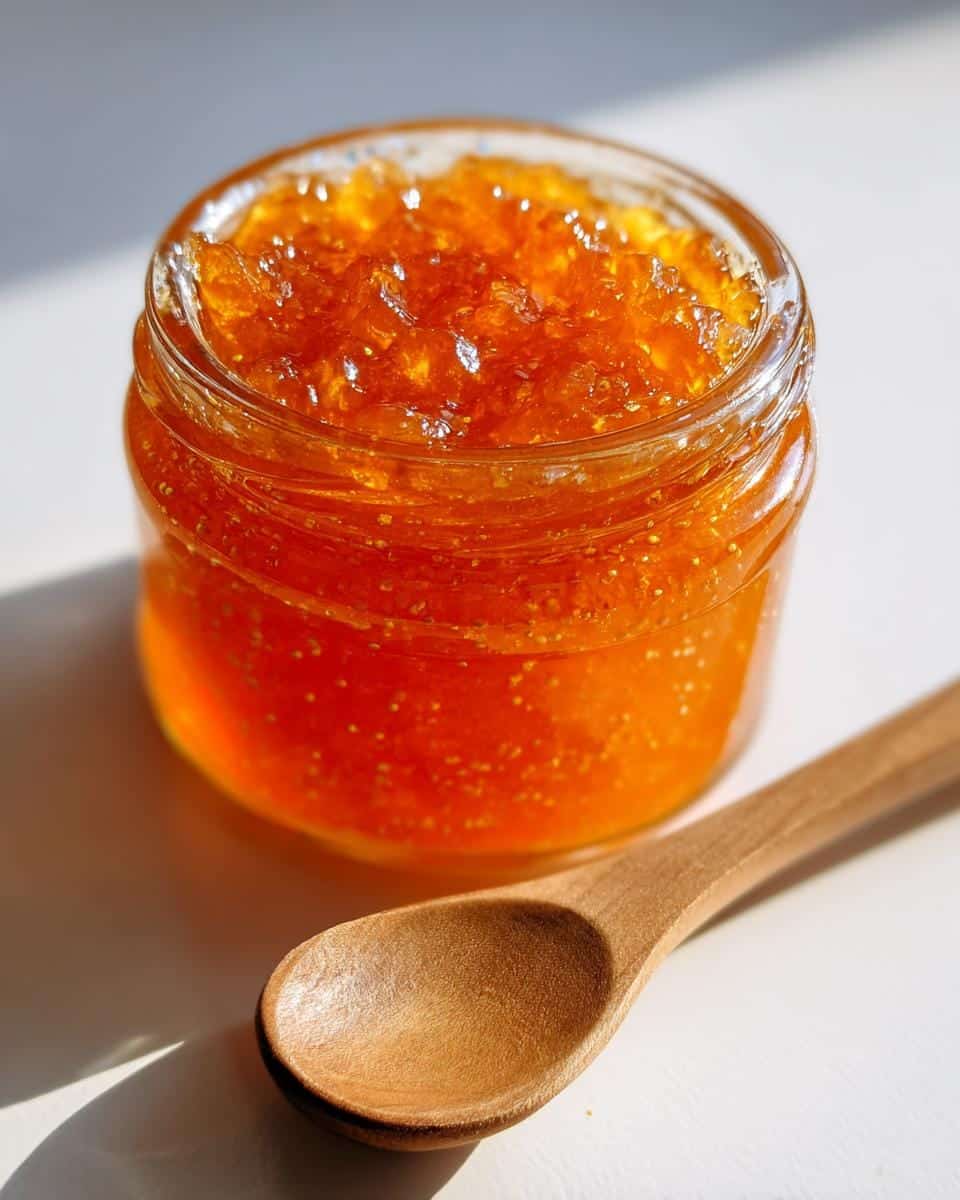
Storing and Preserving Homemade Peach Jam
Now that you’ve made this glorious peach jam, let’s talk storage! For immediate enjoyment, simply pour into clean jars, cool completely, and refrigerate—it’ll stay perfect for about 3 weeks (if it lasts that long!). For long-term storage, process filled jars in a water bath for 10 minutes—just be sure to sterilize everything first! I always make extra jars to give away or squirrel away for winter mornings when I need a taste of summer.
Homemade Peach Jam Variations
Once you’ve mastered the basic recipe, it’s time to play! Try these fun twists:
- Spicy kick: Add 1 finely diced jalapeño (seeds removed) for a sweet-heat combo that’s amazing on biscuits
- Boozy delight: Stir in 2 tablespoons bourbon during the last 5 minutes of cooking—hello, grown-up jam!
- Ginger zing: Grate in 1 tablespoon fresh ginger for a bright, warming flavor
- Vanilla bean: Swap extract for the seeds of 1 vanilla bean pod—those little black specks make it extra special
My personal favorite? A pinch of cardamom—it makes the peaches sing!
Serving Suggestions for Homemade Peach Jam
Oh, the possibilities! This homemade peach jam shines way beyond toast (though it’s heavenly on a warm biscuit). Try swirling into Greek yogurt, dolloping over vanilla ice cream, or pairing with sharp cheddar on a cheese board. My secret? Brush it on grilled chicken—trust me, it’s magic!
Nutritional Information
Remember, nutrition varies based on your exact ingredients, but here’s the general scoop per tablespoon of this homemade peach jam (we know you’ll eat more than one spoonful!):
- Calories: About 50
- Sugar: 12g (it’s fruit sugar, we swear!)
- Fat: 0g
- Protein: 0g
Worth every sweet bite if you ask me—this is real food made with love!
Print
Irresistible Homemade Peach Jam in Just 4 Ingredients
- Total Time: 55 minutes
- Yield: 2 cups
- Diet: Vegetarian
Description
A simple and delicious homemade peach jam recipe that’s perfect for spreading on toast or using in desserts.
Ingredients
- 4 cups peeled, pitted, and chopped peaches
- 2 cups granulated sugar
- 1/4 cup lemon juice
- 1 teaspoon vanilla extract
- 1/2 teaspoon cinnamon (optional)
Instructions
- Combine peaches, sugar, and lemon juice in a large pot.
- Cook over medium heat, stirring frequently, until sugar dissolves.
- Bring to a boil, then reduce heat and simmer for 30-40 minutes, stirring occasionally.
- Add vanilla extract and cinnamon (if using) and stir well.
- Remove from heat and let cool slightly before transferring to sterilized jars.
Notes
- Use ripe peaches for the best flavor.
- Store in the refrigerator for up to 3 weeks or process in a water bath for longer storage.
- Prep Time: 15 minutes
- Cook Time: 40 minutes
- Category: Preserves
- Method: Stovetop
- Cuisine: American
Frequently Asked Questions
Let’s tackle those jam-making questions I get asked all the time!
Absolutely! Thaw them first and drain any excess liquid—you might need to cook the jam a bit longer since frozen peaches tend to release more water. The flavor will still be fantastic.
Don’t panic! Return it to the pot with another tablespoon of lemon juice and simmer longer. If really thin, a pinch of pectin (about 1/2 teaspoon) will help thicken it up..
After processing, press the center of each lid—if it doesn’t pop back, you’ve got a good seal! Any unsealed jars should go straight to the fridge.
You can, but sugar helps preserve the jam. For less sugar, I’d recommend refrigerating and using within 2 weeks rather than canning.