Skip to content
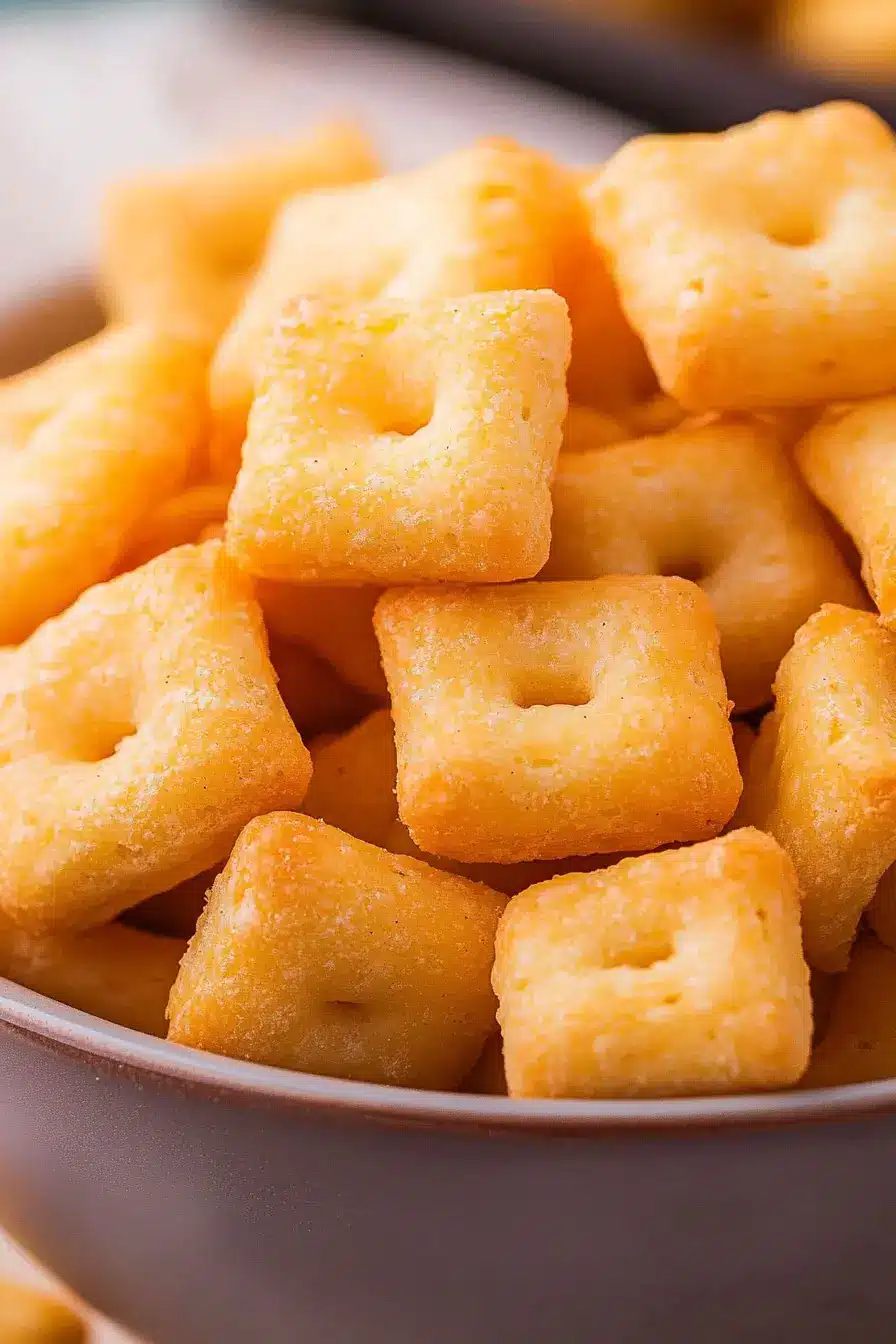
If you’ve ever found yourself digging through a Cheez-It box for the crispiest squares, you’re not alone. Now imagine making a homemade version that’s even cheesier, flakier, and shockingly simple to whip up. In this article, we’ll dive into the joy of baking your own Homemade Cheez-Its, with flavor variations, storage tips, and even ideas to make them fun for kids. Whether you’re snacking solo or packing a lunchbox, this cheesy recipe is about to become your go-to crunchy fix. And with just a handful of ingredients and one bowl, the only thing you’ll need is willpower not to eat them all at once.
Table of Contents
Homemade Cheez-Its and My Cheesy Journey
Hi, friend. I’m Sarah a flavor-chaser and snack fanatic who never quite grew out of my childhood obsession with Cheez-Its. One summer afternoon, I found myself elbow-deep in my pantry, scouring for something crunchy, salty, and cheesy but nothing quite hit that nostalgic note. So, I pulled out a block of sharp cheddar, flour, and butter, and just like that, my journey to Homemade Cheez-Its began.
Let me be honest I used to be the kind of cook who got nervous reading the back of a mac-and-cheese box. But something about homemade crackers gave me permission to be messy and curious. They reminded me that recipes can be both playful and precise. The first batch? Delicious chaos. But once I nailed the dough texture and found the perfect bake time, I never looked back. I’ve even started experimenting with flavors like the cottage cheese ranch dip I made the same day and used it as a pairing. Absolute magic.
The best part? These little crackers bring joy in the simplest form. They’ve become a staple snack in our house, loved equally by my picky eater and my teen who swears he hates “anything homemade.” They’re crispy, flavorful, and packed with sharp cheddar in every bite everything a Cheez-It should be and more.
Why Make Homemade Cheez-Its Instead of Buying?
Beyond the flavor (which, trust me, blows store-bought out of the water), homemade gives you total control. Want low-sodium? Swap your salt. Gluten-free? Use a flour blend. No preservatives, no artificial dyes, just pure comfort. And it’s not just a snack it’s a fun afternoon activity with your kids or a savory sidekick to that next bowl of tomato soup.
If you’re into cheese-heavy ideas like these, you’ll also love the Cottage Cheese Pizza Bowls for another bold take on bite-sized comfort. And if you’re still craving more cheesy goodness, try the Creamy Cottage Cheese Pasta, a dinner recipe that might just become a weekly regular.
Easy Homemade Cheez-Its Recipe Guide
Simple Ingredients, Big Flavor
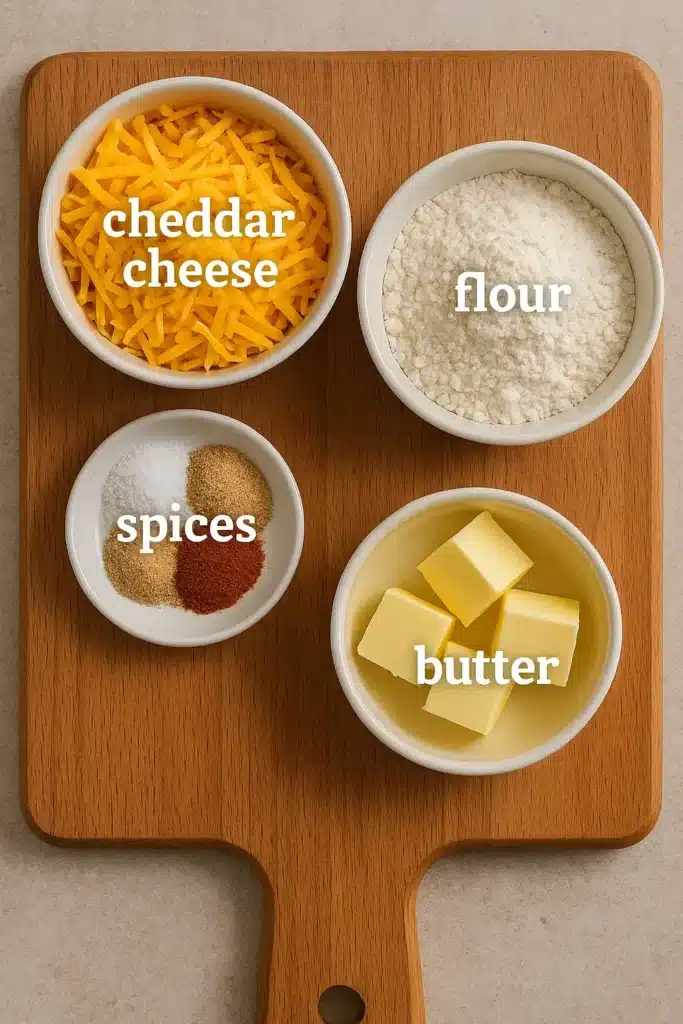
Making Homemade Cheez-Its doesn’t require fancy ingredients. In fact, you likely have everything you need in your fridge or pantry right now. The flavor punch comes from sharp cheddar, and a little seasoning brings it to life. Here’s the full breakdown:
Ingredients:
- 8 ounces shredded sharp cheddar cheese
- 4 tablespoons salted butter, softened
- ½ teaspoon seasoning salt
- ½ teaspoon garlic powder
- 1 cup all-purpose flour (spooned and leveled)
- 2–3 tablespoons ice water
This recipe is endlessly customizable. Swap sharp cheddar for white cheddar or pepper jack to switch up the vibe. If you’re feeling adventurous, adding a dash of paprika or crushed rosemary can elevate the flavor even more. You could even sprinkle parmesan on top before baking just like the twist used in our Cinnamon Apple Cottage Cheese Bites where simple toppings changed everything.
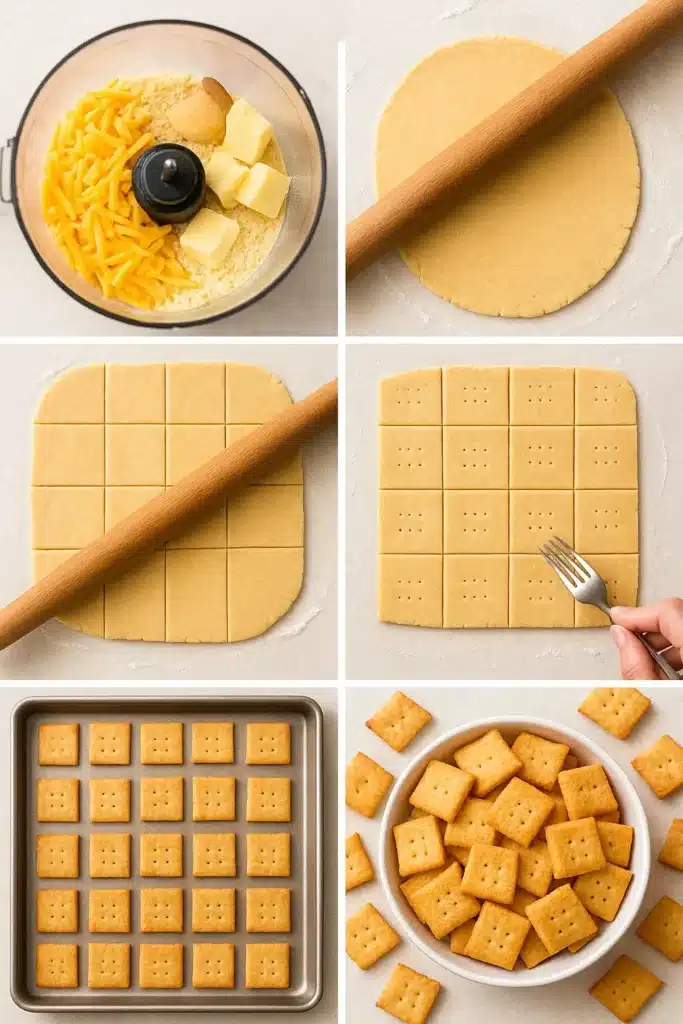
Step-by-Step Instructions for Cheesy Crunch
Here’s how to bring your Cheez-Its to life crispy, golden, and full of personality.
- Mix the base: In a food processor, combine the shredded cheddar, softened butter, seasoning salt, and garlic powder. Blend until smooth.
- Add flour: Add in the flour and pulse until crumbly.
- Add water slowly: Add ice water 1 tablespoon at a time just until the dough comes together. You want it slightly tacky, but not sticky.
- Chill the dough: Flatten into a disk, wrap in plastic, and refrigerate for at least 30 minutes.
- Roll and cut: On a floured surface, roll out the dough to about 1/8 inch thick. Cut into small squares using a pastry wheel or knife. Prick each square with a toothpick (classic Cheez-It hole!).
- Bake: Transfer to a parchment-lined baking sheet and bake at 350°F (175°C) for 14–16 minutes, or until golden at the edges.
These steps are super easy for kids to help with especially cutting and poking the dough. If you’re looking for more family-friendly kitchen fun, you might also enjoy these Breakfast Enchiladas that are both make-ahead and freezer-friendly.
As you try new flavor combos, remember you can go bold like we did in our Cottage Cheese Ranch Dip, which inspired our garlic-forward Cheez-It remix!
Homemade Cheez-Its Flavor Twists & Storage Tips
Can You Add Other Flavors to Homemade Cheez-Its? Absolutely.
One of the best perks of making Homemade Cheez-Its is the total flavor freedom. Want spicy? Mix in cayenne pepper or a pinch of chipotle. Craving herbs? Try rosemary and thyme. Even nutritional yeast adds a cheesy umami twist for those who love bold snacks.
A favorite in our house? Smoked paprika cheddar with sea salt on top. I even crumbled some over a bowl of Cottage Cheese Flatbread for a savory upgrade. If you’re more into sweet-savory balance, pair your flavored crackers with a dip like this Cinnamon Apple Cottage Cheese creation unexpected but totally addictive.
Here’s a simple table of flavor add-ins to inspire your next batch:
| Flavor Add-In | Effect |
|---|---|
| Paprika + Garlic | Smoky & bold |
| Parmesan + Black Pepper | Savory & sharp |
| Rosemary + Sea Salt | Earthy & fragrant |
No matter which route you go, homemade means you’re in charge. And that’s what makes Homemade Cheez-Its special—they reflect your taste buds, not just the grocery store shelf.
How Do I Keep Homemade Cheez-Its Crispy?
Crispy crackers depend on two things: moisture control and thin rolling. Here’s what works:
- Roll dough thin—1/8 inch max
- Prick each square with a toothpick
- Bake until deep golden, not just light brown
- Cool completely before storing
- Store in airtight glass jars or containers
You’ll want to avoid plastic bags which trap humidity. I learned this the hard way during a humid Nashville week our crackers went soft in hours. Now, I use mason jars with tight lids. Stored properly, your Homemade Cheez-Its will stay crisp for up to 5 days. Want them to last longer? Pop them back in the oven at 300°F for 3–4 minutes to re-crisp.
Pair with a spread like the Cottage Cheese Ranch Dip or try them alongside creamy meals like Creamy Cottage Cheese Pasta for a contrast in textures.
Kid-Friendly Fun & Make-Ahead Snack Tips
Are These Crackers Kid-Friendly? You Bet.
If you’ve ever struggled to find a wholesome snack your kids will actually eat (without bribes or bargaining), Homemade Cheez-Its are your solution. These golden little bites are full of cheesy flavor, fun to make, and easy to pack for school lunches or soccer practices. My youngest calls them “cheese chips” and proudly announces when she’s “helped make them” even if all she did was poke the center hole.
We even turned our baking into a Saturday activity: I prep the dough, and the kids roll, cut, and arrange. Sometimes, we shape them into stars or hearts. Want to sneak in a little extra nutrition? Add finely grated carrots or spinach. They’ll never notice.
Plus, the customizable flavors make them easy to rotate weekly. Pair these with a dip like our Cottage Cheese Ranch Dip or serve them with Cottage Cheese Pizza Bowls for a full-on cheese-fest that your family won’t stop talking about.
How to Serve & Make Ahead Like a Pro
These crackers shine beyond snacking. Try them on a cheese board with grapes, nuts, and aged gouda. Or crush and sprinkle over a casserole for a cheesy topping. I love serving them alongside a tomato bisque or creamy chicken soup especially during fall brunch with friends. When I host casual Sunday brunches, I often serve a big salad, soup, and bowls of Homemade Cheez-Its as an easy, elegant side. They’re the crunchy surprise no one expects but everyone finishes.
Here’s my make-ahead secret: I double the batch, bake one tray right away, and freeze the second batch of cut dough squares. That way, fresh crackers are just 15 minutes away, even on a busy weeknight. I learned this trick when prepping for my daughter’s birthday baking the night before let me stay calm (and out of the kitchen) during party chaos.
When stored correctly like in airtight tins or glass jars with silica packets they stay crisp up to 5 days. Want to bring them back to life after a few days? Pop them in a 300°F oven for a quick re-crisp.
Want more brunch pairings? Try these flaky Breakfast Enchiladas or a playful batch of Chocolate Cake Mix Waffles for sweet-savory balance.
Print
Homemade Cheez-Its: The Crunchy, Cheesy Snack You Didn’t Know You Needed
- Total Time: 25 min
- Yield: 60 crackers
- Diet: Vegetarian
Description
Homemade Cheez-Its are crispy, cheesy, and incredibly easy to make with pantry staples. Perfect for snacking, school lunches, or party boards.
Ingredients
8 ounces shredded sharp cheddar cheese
4 tablespoons salted butter softened
½ teaspoon seasoning salt
½ teaspoon garlic powder
1 cup all-purpose flour spooned and leveled
2–3 tablespoons ice water
Instructions
1. In a food processor, blend shredded cheddar, butter, seasoning salt, and garlic powder until smooth.
2. Add flour and pulse until crumbly.
3. Drizzle in ice water 1 tablespoon at a time until dough forms.
4. Flatten into a disk, wrap, and refrigerate for 30 minutes.
5. Roll out dough to 1/8 inch and cut into squares.
6. Poke center holes, transfer to parchment-lined tray.
7. Bake at 350°F for 14–16 minutes until golden brown.
Notes
You can freeze unbaked dough squares for up to 2 months.
Sprinkle with parmesan or paprika before baking for variation.
Let crackers cool fully to stay crisp.
- Prep Time: 10 min
- Cook Time: 15 min
- Category: Snacks
- Method: Baking
- Cuisine: American
Frequently Asked Questions About Homemade Cheez-Its
Absolutely. Try mixing in spices like paprika or herbs like rosemary to change the flavor. You can even use different cheeses like pepper jack, parmesan, or gouda for a fun twist.
Let them cool completely, then store them in airtight containers—preferably glass jars or tins. To re-crisp, bake at 300°F for 3–4 minutes if they soften.
Yes! You can chill the dough in the fridge for up to 48 hours or freeze cut dough squares for up to two months. Bake directly from frozen with a few extra minutes.
Totally. Kids love the cheesy flavor and can help with cutting shapes or poking the center holes. They’re great for lunchboxes or after-school snacks.
Conclusion: The Cheesiest Little Victory in Your Kitchen
Making Homemade Cheez-Its isn’t just about creating a crunchy, cheesy snack it’s about reclaiming the joy of cooking something simple, nostalgic, and deeply satisfying. Whether you’re prepping for your child’s lunchbox, looking for a fun weekend project, or building the perfect brunch board, these crackers bring flavor, fun, and flexibility to the table.
From personal experience, I’ve found that no store-bought version compares to that first warm bite out of the oven especially when it’s something you made yourself. So grab that block of cheddar, dust off your rolling pin, and turn your kitchen into a crunchy, cheesy wonderland.
Thanks for cooking with me. See you back here soon with flour in your hair and flavor on your mind.
With love and plenty of garlic,
Sarah