Skip to content
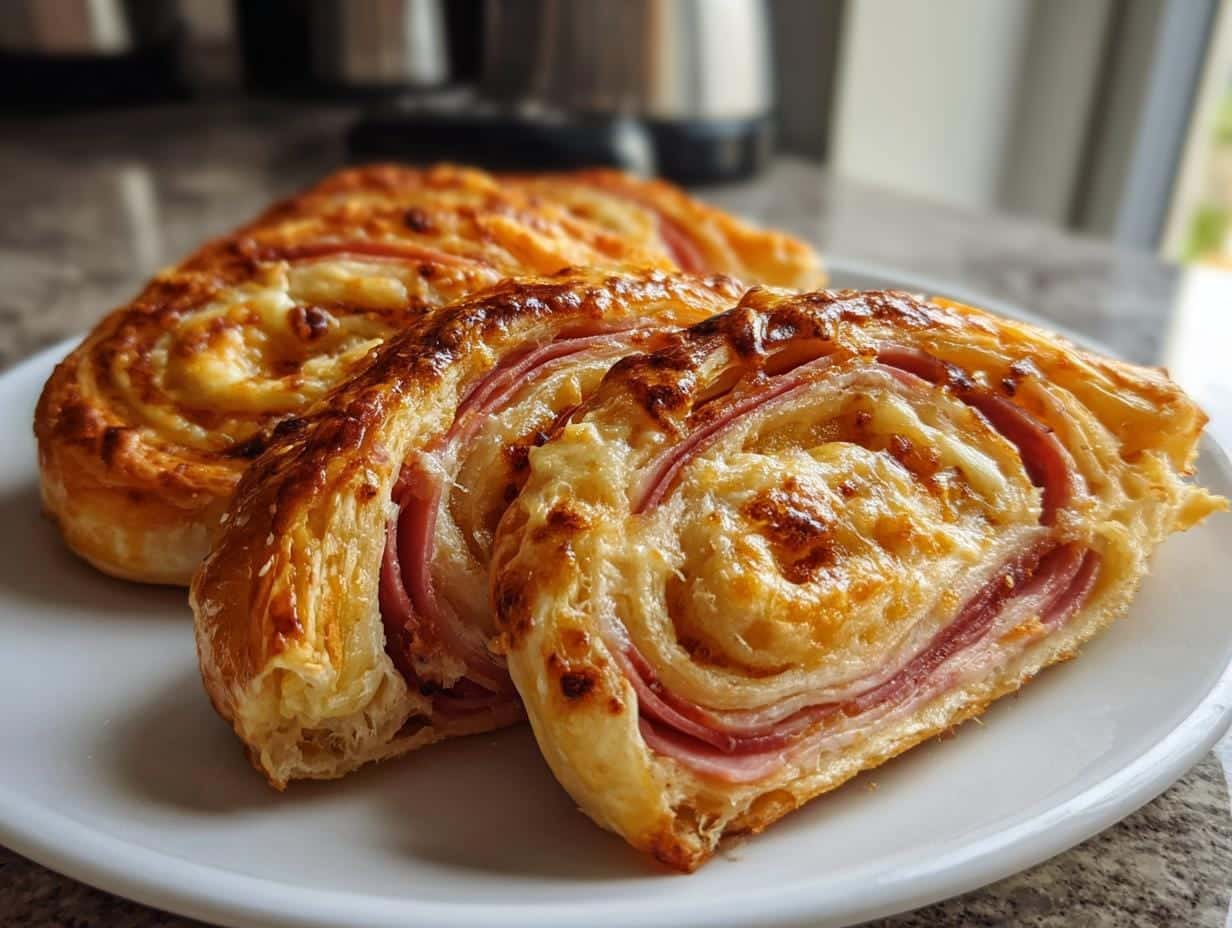
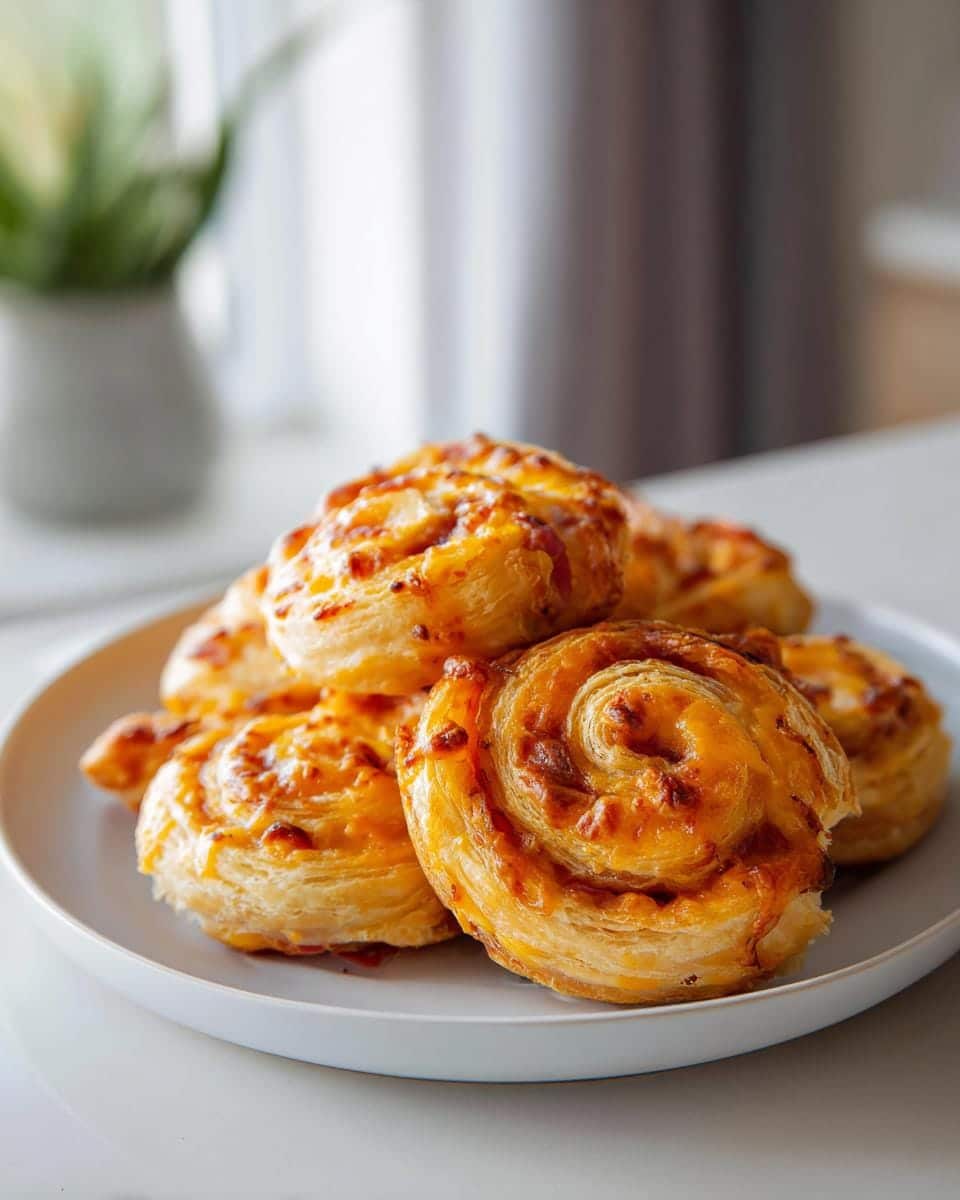
Oh my gosh, you have to try these ham and cheese pinwheels! They’re my go-to lifesaver when I need something quick, delicious, and guaranteed to disappear at parties. I discovered them years ago when I completely forgot about bringing an appetizer to my friend’s baby shower—total panic! But puff pastry, some leftover ham, and cheese saved the day. Now they’re my signature party food because honestly, who can resist that golden, flaky pastry wrapped around melty cheese and savory ham? Best part? They take barely any effort but look and taste like you spent hours in the kitchen.

Table of contents:
Why You’ll Love These Ham and Cheese Pinwheels
Listen, I’m not exaggerating when I say these pinwheels are about to become your new kitchen BFF. Here’s why everyone (including my picky nephew) goes crazy for them:
- 15-minute prep magic: Seriously, from fridge to oven in less time than it takes to argue about what to watch on Netflix. Thaw the pastry while your coffee brews, and you’re halfway done.
- Five-ingredient wonder: Puff pastry does all the heavy lifting here. Just add ham, cheese, mustard, and an egg wash – stuff you probably have right now!
- Kid-approved (and adult-loved): My friend’s toddler once ate three at a playdate while proclaiming “More wheels, please!” Meanwhile, my book club ladies think they’re fancy enough for wine night.
- Party superstar: They disappear faster than you can say “appetizer” at gatherings. I once brought 50 to a potluck – gone in 10 minutes flat. (Yes, I counted.)
- Endlessly adaptable: Swap in turkey, add pesto, go spicy with pepper jack – they’re like the little black dress of snacks that work for any occasion.
Trust me, once you see how easy these are and hear that first crunch of flaky pastry, you’ll be hooked. I keep extra puff pastry in my freezer just for emergency pinwheel situations!
Ingredients for Ham and Cheese Pinwheels
Here’s the beautiful part – you only need a handful of simple ingredients to make magic happen. I’ve made these so many times I could probably do it in my sleep, but let me walk you through exactly what you’ll need:
- 1 sheet puff pastry, thawed – That’s right, just one! I always keep a box in my freezer for last-minute cravings. Let it thaw in the fridge overnight or on the counter for about 40 minutes until it’s pliable but still cool. Pro tip: if it gets too soft while working, pop it back in the fridge for 10 minutes.
- ½ cup thinly sliced ham – I use the deli-sliced kind (black forest is my favorite), but leftover holiday ham works great too! Just make sure to chop it into small pieces so it rolls easily. Too thick and your pinwheels might unroll in the oven – we’ve all been there!
- ½ cup shredded cheddar cheese (packed) – Sharp cheddar gives that perfect ooey-gooey factor, but don’t stress if you only have mild. And yes, the pre-shredded stuff works fine here (my little secret when I’m in a hurry).
- 2 tablespoons Dijon mustard – This adds that special zing! If you only have yellow mustard, that’s fine, but use just 1½ tablespoons since it’s stronger. My sister swears by honey mustard for a sweeter twist – try it!
- 1 egg, beaten – Just for that gorgeous golden shine. If you’re in a real pinch, you can skip it, but that egg wash makes them look bakery-level fancy. I like to add a tiny splash of water to thin it slightly for easier brushing.
- Flour for dusting – About a tablespoon to keep your pastry from sticking to the counter. Trust me, nothing’s sadder than perfectly rolled pinwheels stuck to your cutting board!
See? Told you it was simple! Now grab those ingredients and let’s make some magic happen.
How to Make Ham and Cheese Pinwheels
Okay, let’s get rolling – literally! These steps are so simple you’ll be shocked at how professional your pinwheels look. I’ve made these for years, and these are the exact techniques my grandma taught me when I was barely tall enough to see over the counter.
Step 1: Prep the Pastry
First, crank your oven to 400°F (200°C) – no shortcuts here, we want that pastry to puff up beautifully! Now grab your thawed puff pastry (it should bend easily but still feel cool) and sprinkle a light dusting of flour on your clean counter. Unfold the pastry gently – if it cracks a bit at the seams, just press them together with your fingers. Roll it out slightly to even the surface (about 9×12 inches) with a rolling pin. Don’t go crazy thin though – we’re not making crackers!
Step 2: Add Fillings
Here’s where the magic starts! Using the back of a spoon, spread that Dijon mustard all the way to the edges – this acts like “glue” for our fillings. Now layer on your ham slices in a single layer (overlapping slightly is fine), then sprinkle that glorious cheddar evenly across the whole surface. Pro tip: leave about ½ inch at one long edge clean – this helps seal the roll later. I may or may not have learned this the hard way when cheese oozed out everywhere during my first attempt!
Step 3: Roll and Slice
Starting from the opposite long edge (the one with fillings all the way to the edge), roll that pastry up snugly like a yoga mat. Use both hands and roll slowly but firmly – we want those pretty spirals to hold their shape! When you reach the clean edge, dab a little water along it with your finger and press to seal. Now for the fun part: grab a sharp knife and slice into 1-inch rounds. I count 12 slices per roll, but no pressure if you get 11 or 13 – they’ll taste just as amazing!
Step 4: Bake to Perfection
Line a baking sheet with parchment paper (no sticking disasters today!) and arrange your pinwheels about 2 inches apart. Give them a quick brush with that beaten egg – this is what gives them that gorgeous golden glow. Pop them in the oven for 15-20 minutes until they’re puffed up and beautifully bronzed. Resist the urge to open the oven too early – that blast of cold air makes puff pastry sad! Let them cool for about 5 minutes before serving (if you can wait that long – the cheese smell is irresistible).
See? Just four easy steps to flaky, cheesy perfection. Now try not to eat them all before your guests arrive – I dare you!
Tips for Perfect Ham and Cheese Pinwheels
After making these pinwheels more times than I can count (and yes, learning from a few disasters along the way), I’ve picked up some foolproof tricks to make yours turn out absolutely perfect every single time.
Chill before slicing for picture-perfect edges
If you’ve got an extra 15 minutes, pop your rolled-up log in the fridge before slicing. Cold pastry holds its shape better when cut, giving you those Instagram-worthy clean spirals. I learned this after my first batch looked more like abstract art than pinwheels! Bonus: chilled dough also bakes up flakier.
Parchment paper is your best friend
Don’t even think about skipping the parchment paper – I once tried buttering the pan instead and ended up with pinwheels that stuck like cement. The parchment lets you lift them off in one piece, golden bottoms intact. Plus, cleanup is a breeze!
Use a serrated knife for clean slices
My grandma’s secret weapon? A bread knife! That gentle sawing motion cuts through the layers without squashing your beautiful roll. If you press straight down with a regular knife, you might flatten all those lovely layers you worked so hard to create.
Rotate your baking sheet halfway through
Ovens have hot spots – mine is notorious for browning things unevenly. About 8 minutes in, I give the pan a quick 180-degree turn. This ensures every pinwheel gets evenly golden, not just the ones near the back where my oven runs hottest.
Freeze extras before baking for instant appetizers
Here’s my party prep lifesaver: slice your pinwheels, then freeze them raw on a tray before transferring to a bag. When unexpected guests arrive, just pop however many you need straight into a hot oven (add 2-3 extra minutes to the bake time). They’ll think you spent hours when it was really just freezer magic!
Trust me, these little tricks make all the difference between “pretty good” and “OMG what’s your secret?” level pinwheels. Now go forth and impress everyone with your newfound pastry prowess!
Ingredient Substitutions & Variations
One of my favorite things about these pinwheels is how easily you can mix things up! Whether you’re cleaning out the fridge or catering to different diets, here are all my favorite twists that still deliver that magical flaky-cheesy goodness:
Cheese swaps for every taste
While cheddar is classic, don’t be afraid to play matchmaker with other cheeses! Swiss gives a lovely mild nuttiness (my husband’s favorite), while pepper jack adds a spicy kick perfect for game day. Mozzarella makes them extra stringy – just pat it dry first so it doesn’t weep moisture. And for a fancy touch? Gruyère transforms them into something worthy of a wine and cheese night!
Beyond ham: protein options
Last Thanksgiving, I used leftover turkey with cranberry sauce instead of mustard – absolute revelation! Turkey bacon works great too (crisp it first). For vegetarian friends, I’ll sometimes do roasted red peppers with goat cheese, or even thin slices of grilled zucchini. My neighbor swears by prosciutto – just one layer since it’s so flavorful!
Veggie boosters
Want to sneak in some greens? A handful of baby spinach (patted super dry!) or very finely chopped broccoli works wonders. Sun-dried tomatoes add a sweet-tart punch, and sautéed mushrooms give an umami boost. Just remember: drier veggies work best so your pastry stays crisp!
Gluten-free & dairy-free options
For gluten-free friends, most stores carry GF puff pastry now (just check the thaw time – some brands need longer). Dairy-free? Violife or Daiya cheese melts surprisingly well here. I’ve even used hummus instead of cheese for a protein-packed vegan version – not traditional, but delicious in its own way!
The beauty is there are no wrong answers – just roll with what you love (pun totally intended)! My only rule? Whatever you put in, make sure it’s not too wet so your pastry stays beautifully flaky.
Serving and Storing Ham and Cheese Pinwheels
Okay, confession time – I once ate an entire batch of these pinwheels straight off the baking sheet before they even had a chance to cool properly (no regrets!). But if you’re actually planning to share with others like a civilized person, here’s how to serve and store them like a pro:
Serving suggestions that’ll impress
These babies are absolute showstoppers served warm when the cheese is still gloriously gooey. I arrange them on a wooden board with little bowls of dipping sauces – honey mustard is classic, but ranch or marinara work great too. For fancy gatherings, I’ll drizzle them with a balsamic glaze right before serving. Kids? They’ll demolish them plain! Pro tip: toothpicks make them easier to grab at parties and prevent double-dipping disasters.
Storing leftovers (if you have any!)
Let’s be real – these rarely last long enough to store! But when they do (maybe you got overexcited and made a triple batch like I sometimes do), here’s how to keep them tasting fresh:
- Room temp: Fine for about 2 hours if you’re serving at a party – just cover loosely with foil to keep them from drying out.
- Fridge: Let them cool completely first, then store in an airtight container with parchment between layers. They’ll keep for 3 days, though the pastry loses some crispness.
- Freezer: My secret weapon! Freeze baked pinwheels on a tray first, then transfer to freezer bags. They’ll stay perfect for a month – ideal for unexpected guests or snack emergencies.
Reheating for that just-baked magic
Here’s how to bring back that fresh-from-the-oven perfection:
- Oven method: 350°F for 5-8 minutes (10 if frozen) – this restores the crispness beautifully.
- Air fryer: 320°F for 3-4 minutes works wonders if you’re reheating just a few.
Avoid the microwave unless you love soggy pastry – trust me, I learned this the hard way during a midnight snack craving!
One last tip? These actually taste amazing cold straight from the fridge too – perfect for sneaky kitchen snacks while no one’s looking. Not that I’d know anything about that…
Ham and Cheese Pinwheels Nutrition
Now, I’m no nutritionist, but I know we all like to have at least a rough idea of what we’re eating (especially when we’ve “accidentally” eaten three in a row – not that I’ve ever done that…). Here’s the scoop on these tasty little spirals:
- Calories: About 120 per pinwheel (but who stops at one?)
- Fat: 8g – remember, we’re using real butter in that puff pastry!
- Protein: 5g – thanks to our ham and cheese dream team
- Carbs: 8g – just enough to satisfy that pastry craving
- Sodium: 250mg – easy to reduce with low-sodium ham if needed
Important note: These numbers are estimates based on standard ingredients – your exact nutrition will vary depending on the specific brands of puff pastry, cheese, and ham you use. Swap in turkey bacon or low-fat cheese, and those numbers change!
Honestly though? When that golden, flaky pastry hits your tongue and that melty cheese oozes out, I think we can all agree it’s worth every delicious bite. Everything in moderation, right? (Says the woman who may or may not have eaten an entire batch while “testing” the recipe…)
FAQs About Ham and Cheese Pinwheels
Over the years, I’ve gotten so many questions about these pinwheels – and I’ve probably asked most of them myself at some point! Here are the answers to everything you might be wondering:
Can I make these ahead of time?
Absolutely! These are my secret weapon for stress-free entertaining. You’ve got two great options:
- Same-day: Assemble and slice them in the morning, keep refrigerated on the tray, then bake when needed (add 2 extra minutes to baking time).
- Freeze for later: Roll, slice, and freeze raw pinwheels for up to a month – bake straight from frozen, adding about 5 extra minutes. Perfect for last-minute guests!
Just don’t assemble them more than 12 hours ahead if refrigerating – the pastry can get soggy.
Can I use tortillas instead of puff pastry?
While tortilla pinwheels are delicious (I make them too!), they’re a totally different experience. Puff pastry gives that incredible flaky, buttery lift that makes these special. Tortilla versions won’t puff up – they’re more like rolled sandwiches. Still tasty, but don’t expect that bakery-style magic!
Why did my pinwheels unroll in the oven?
Oh honey, we’ve all been there! Usually it’s one of three things:
- You overfilled them (leave that ½ inch clean edge!)
- The pastry was too warm when rolling (chill it if it gets sticky)
- You didn’t seal the edge properly (that water dab is crucial!)
Pro tip: chilling the rolled log for 15 minutes before slicing helps prevent unrolling disasters.
Can I make these without mustard?
Of course! The mustard adds nice zing, but isn’t mandatory. Try:
- Pesto (my favorite swap!)
- Cream cheese (let it soften first)
- Fig jam for a sweet-savory twist
- Or just skip it entirely – they’ll still be delicious
Just avoid anything too watery that might make the pastry soggy.
Are these okay for kids’ lunchboxes?
They’re perfect! Just let them cool completely first so they don’t steam the lunchbox. At room temp, they stay good for about 4 hours. My kids love them with a little container of ketchup for dipping – though they usually just gobble them up plain!
Final Thoughts
Well, there you have it – my foolproof, always-impressive ham and cheese pinwheels that have saved me from countless “Oh no, I forgot to bring an appetizer!” moments. I can’t wait for you to experience that magical moment when you pull these golden spirals out of the oven and hear that first satisfying crunch. Trust me, once you see how easy they are and how people’s eyes light up when they take that first bite, you’ll be hooked just like I am!
Now go forth and roll with confidence, my friend. And remember – even if they’re not picture-perfect on your first try (mine certainly weren’t!), they’ll still taste absolutely amazing. Because let’s be real – flaky pastry, melty cheese, and savory ham? That’s a combination that simply can’t fail. Happy baking!


15-Minute Ham and Cheese Pinwheels That Wow Every Time
- Total Time: 35 minutes
- Yield: 12 pinwheels
- Diet: Low Lactose
Description
Easy-to-make ham and cheese pinwheels perfect for snacks or parties.
Ingredients
- 1 sheet puff pastry, thawed
- 1/2 cup ham, thinly sliced
- 1/2 cup shredded cheddar cheese
- 2 tbsp Dijon mustard
- 1 egg, beaten (for egg wash)
Instructions
- Preheat oven to 400°F (200°C).
- Roll out the puff pastry on a floured surface.
- Spread Dijon mustard evenly over the pastry.
- Layer ham and cheese on top.
- Roll the pastry tightly into a log.
- Slice into 1-inch pieces.
- Place on a baking sheet lined with parchment paper.
- Brush with egg wash.
- Bake for 15-20 minutes until golden brown.
- Let cool slightly before serving.
Notes
- Use pre-sliced ham for convenience.
- Substitute cheddar with Swiss or mozzarella if preferred.
- Serve warm for best taste.
- Prep Time: 15 minutes
- Cook Time: 20 minutes
- Category: Appetizer
- Method: Baking
- Cuisine: American