Skip to content
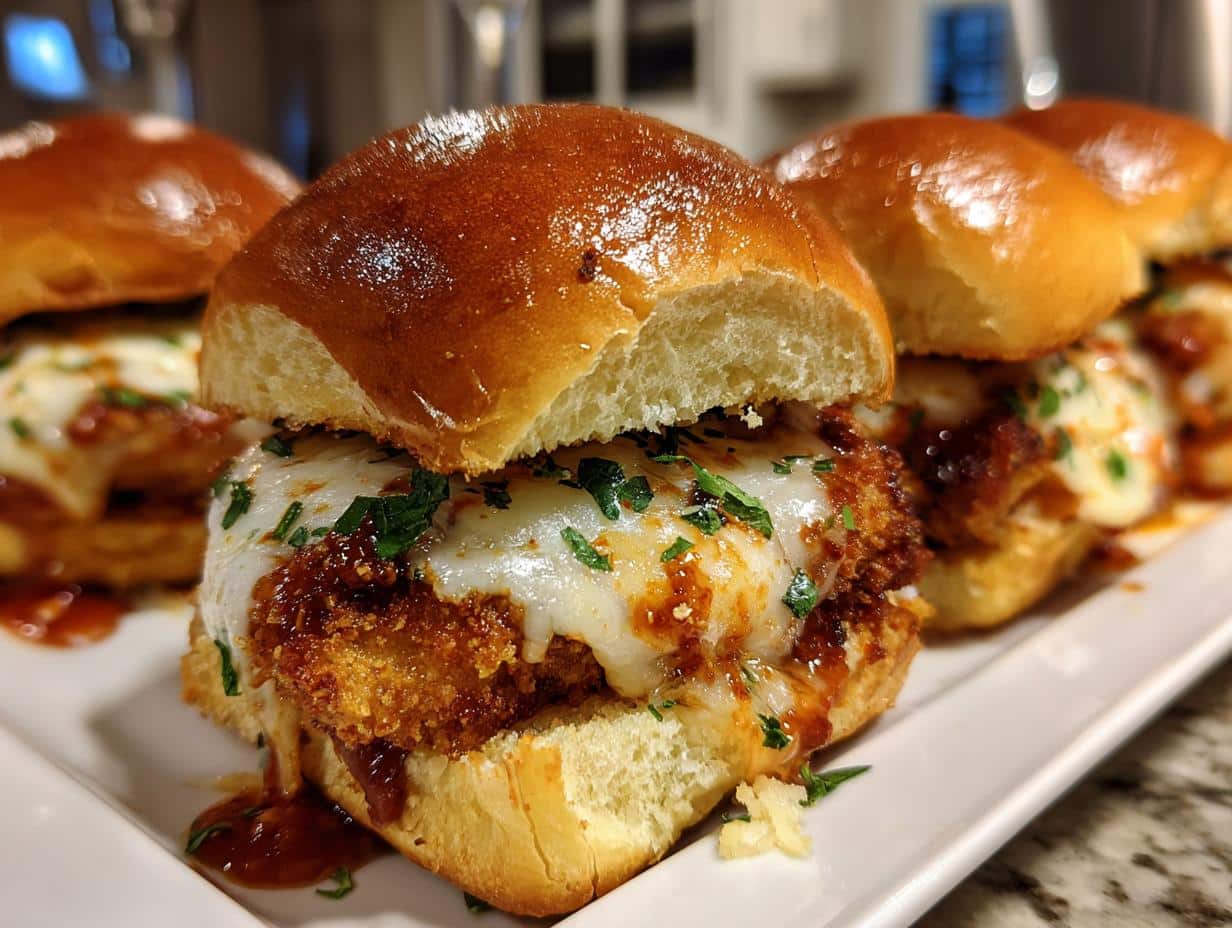
Picture this: it’s Halloween night, your house is packed with little monsters and mummies, and you need a crowd-pleasing snack that disappears faster than a ghost in the night. Enter these Halloween chicken parm sliders – my go-to lifesaver for every spooky gathering! Last year, I whipped up a batch for my neighbor’s costume party, and let me tell you, they vanished before I could even say “boo.” The best part? You probably have most ingredients in your pantry already. These crispy, cheesy bites combine all the comfort of classic chicken parmesan with the fun, shareable vibe of sliders – perfect for when you’re too busy decorating cobwebs to fuss with complicated recipes.
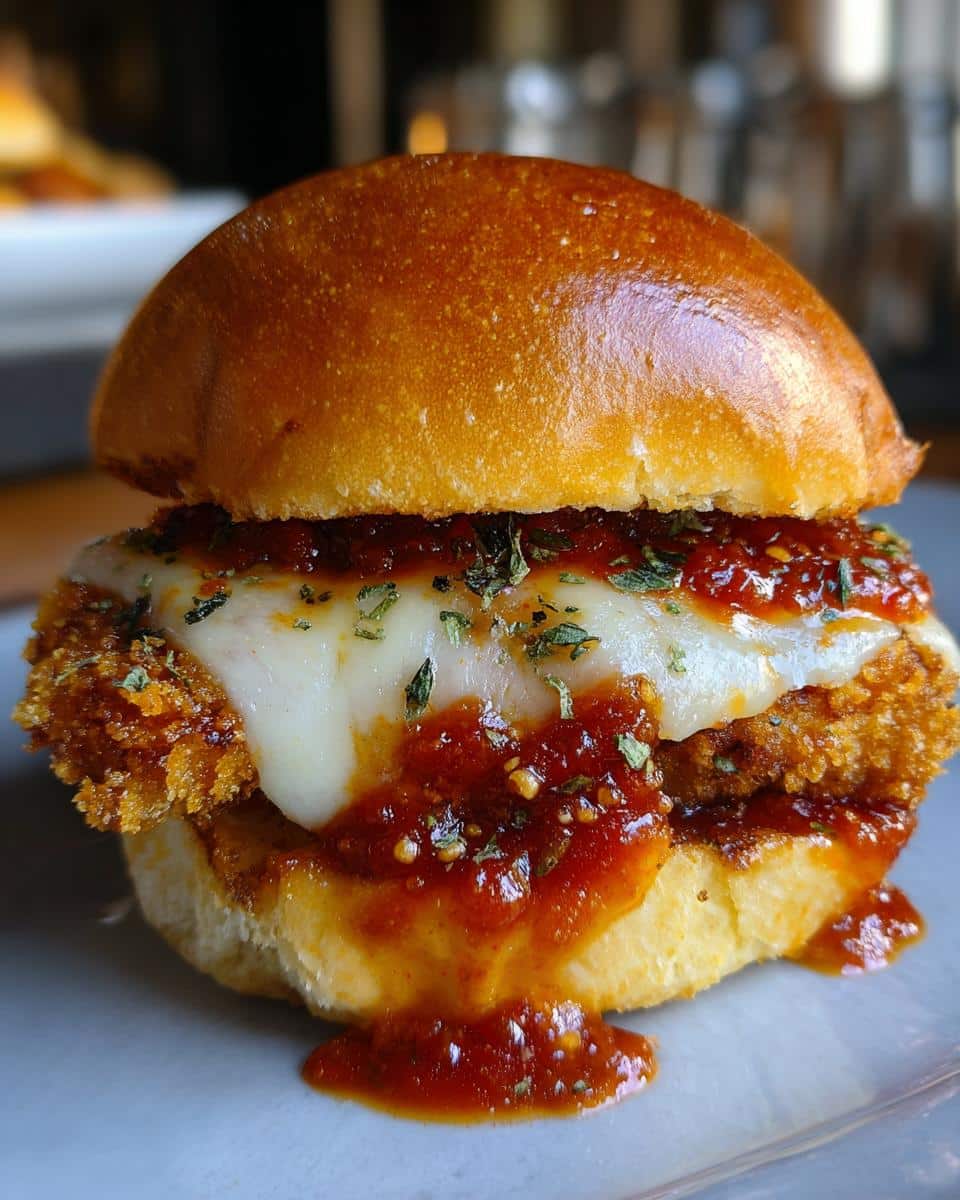
Table of contents:
Why You’ll Love These Halloween Chicken Parm Sliders
Trust me, these sliders are about to become your new Halloween party MVP. Here’s why:
- Super quick – From fridge to table in just 30 minutes, even with last-minute costume emergencies!
- Crowd-pleasing magic – Who can resist crispy chicken, melty cheese, and tangy marinara?
- Fun presentation – Arrange them like a spooky slider graveyard or add olive “spider” legs!
- Easy to customize – Make them mild for kids or add some heat for grown-up ghosts.
- Perfect finger food – No forks needed when you’re busy bobbing for apples.
Seriously, these disappear faster than candy corn at a trick-or-treat party!
Ingredients for Halloween Chicken Parm Sliders
Okay, let’s raid your pantry and fridge – here’s everything you’ll need for these spooktacular sliders. I’ll tell you my little secrets for each ingredient too!
- 12 slider buns – Hawaiian rolls work great if you want them slightly sweet (my personal fave!)
- 1 lb chicken tenders – or slice chicken breasts into tender-sized strips (much cheaper!)
- 1 cup breadcrumbs – plain or Italian-seasoned (I always use Italian for extra flavor)
- 1/2 cup grated parmesan cheese – the powdery kind blends best with breadcrumbs
- 1 tsp garlic powder – trust me, fresh garlic burns too easily here
- 1 tsp dried oregano – crush it between your fingers to wake up the flavor
- 1 egg – beaten with a splash of water to help it stretch further
- 1 cup marinara sauce – jarred is fine, but warm it slightly so it spreads easy
- 1 cup shredded mozzarella cheese – pre-shredded works, but block cheese melts smoother
- 1 tbsp olive oil – just enough for that golden crispiness
- Salt and pepper to taste – I’m generous with both!
See? Mostly stuff you probably have already. Now let’s make some magic!
Equipment You’ll Need
Don’t worry – you don’t need a witch’s cauldron or any fancy gadgets for these sliders! Just grab these basic kitchen tools (chances are, you already have them):
- Baking sheet – A regular half-sheet pan is perfect for fitting all 12 sliders
- Mixing bowls – One for the breadcrumb mixture, one for the egg wash (I use my favorite chipped green one every time!)
- Skillet – Any medium-sized frying pan will do for getting that golden crunch on the chicken
- Tongs or fork – For flipping those chicken tenders without burning your fingers
- Brush or spoon – To spread that marinara sauce with messy Halloween enthusiasm
That’s it! No stand mixers, no special equipment – just good old-fashioned tools that won’t haunt your kitchen cabinets. Now let’s get cooking!
How to Make Halloween Chicken Parm Sliders
Okay, let’s get spooky with these sliders! I’ve made this recipe so many times I could do it in my sleep (or while wearing a witch costume with limited vision). Follow these steps and you’ll have golden, cheesy perfection in no time.
Step 1: Prep the Chicken Coating
First things first – crank that oven to 375°F (190°C) so it’s nice and hot when we need it. Now, let’s make that magical crispy coating that makes these sliders so addictive!
In your favorite mixing bowl (mine’s that chipped green one I mentioned earlier), combine the breadcrumbs, parmesan, garlic powder, oregano, and a good pinch of salt and pepper. Mix it all up with your fingers – this is when I always take a big sniff because it smells AMAZING already.
In another bowl, beat the egg with a tablespoon of water. This little trick makes the egg go further and helps the coating stick better. Now, take each chicken tender and give it a quick dip in the egg, then really press it into the breadcrumb mixture. I like to use one hand for wet ingredients and one for dry to avoid “breadcrumb fingers” – my kids call this the “spooky chicken mummy wrap” step!
Step 2: Cook the Chicken
Heat the olive oil in your skillet over medium heat. You’ll know it’s ready when a breadcrumb sizzles if you drop it in. Now, carefully add your coated chicken tenders – don’t crowd them! I usually do 3-4 at a time.
Cook for about 3-4 minutes per side until they’re beautifully golden brown. Listen for that satisfying sizzle! The chicken doesn’t need to be fully cooked through yet – we’ll finish it in the oven. Just get that gorgeous crispy exterior. Transfer them to a paper towel-lined plate to catch any excess oil.
Pro tip: If your breadcrumbs start getting too dark, just lower the heat a bit. Burnt crumbs are the real Halloween horror here!
Step 3: Assemble the Sliders
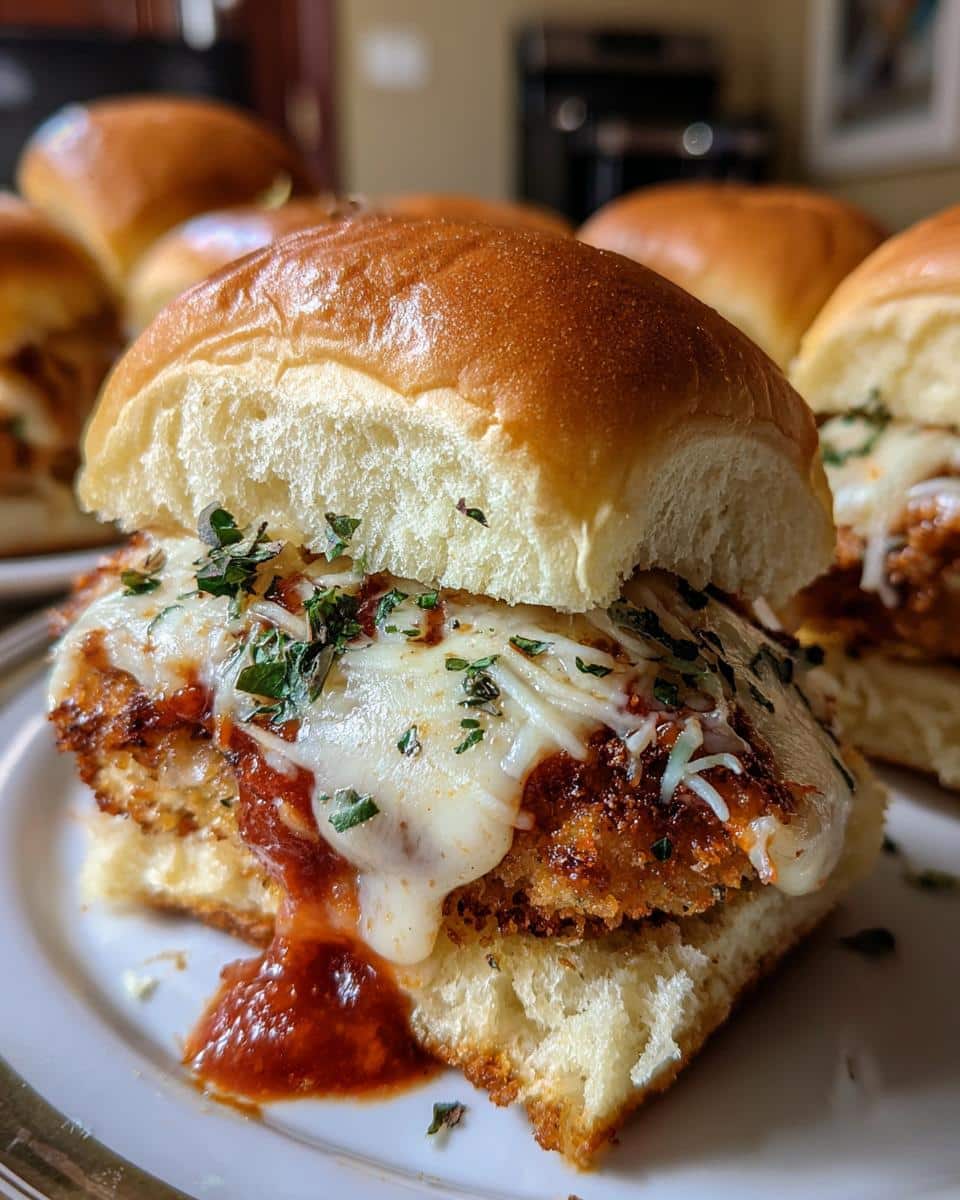
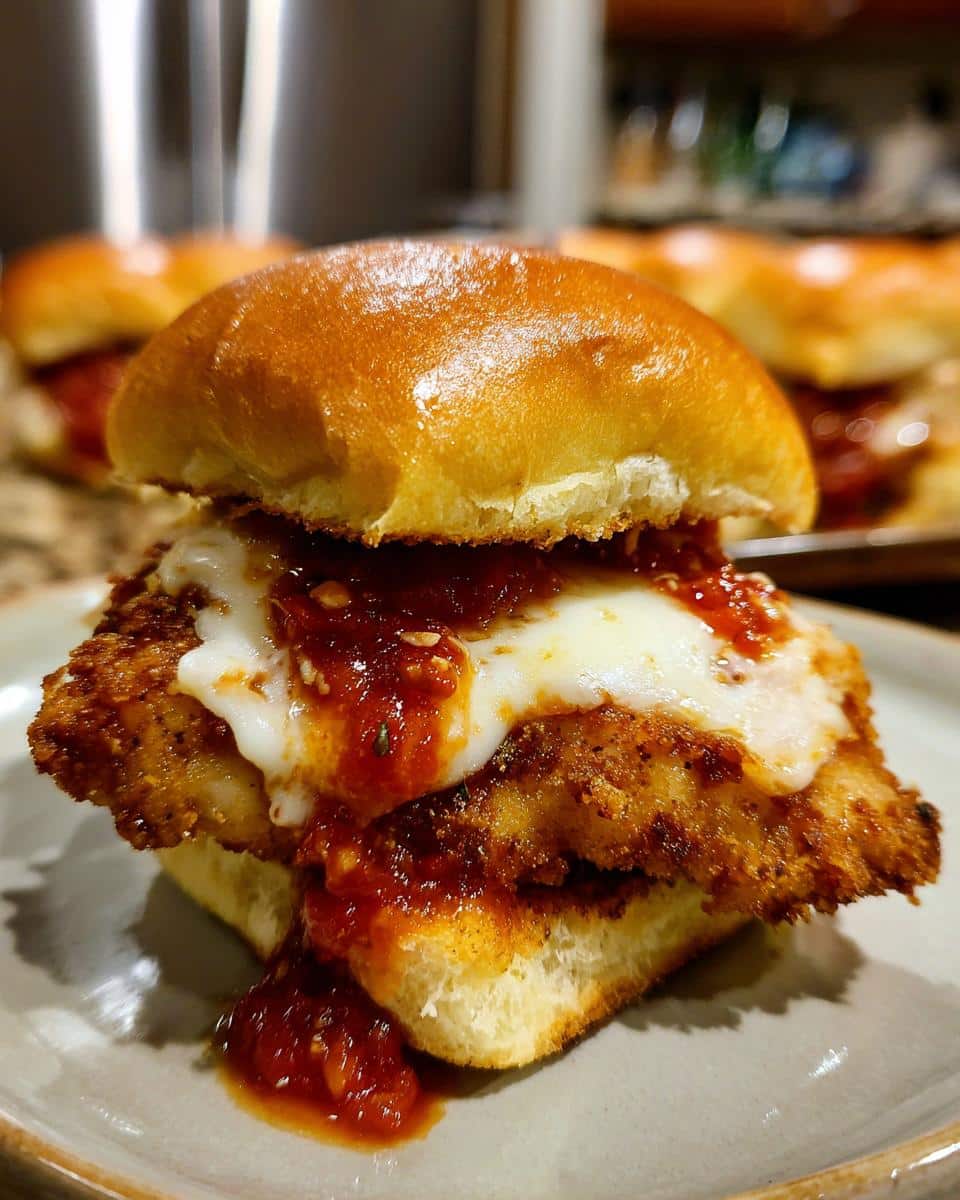
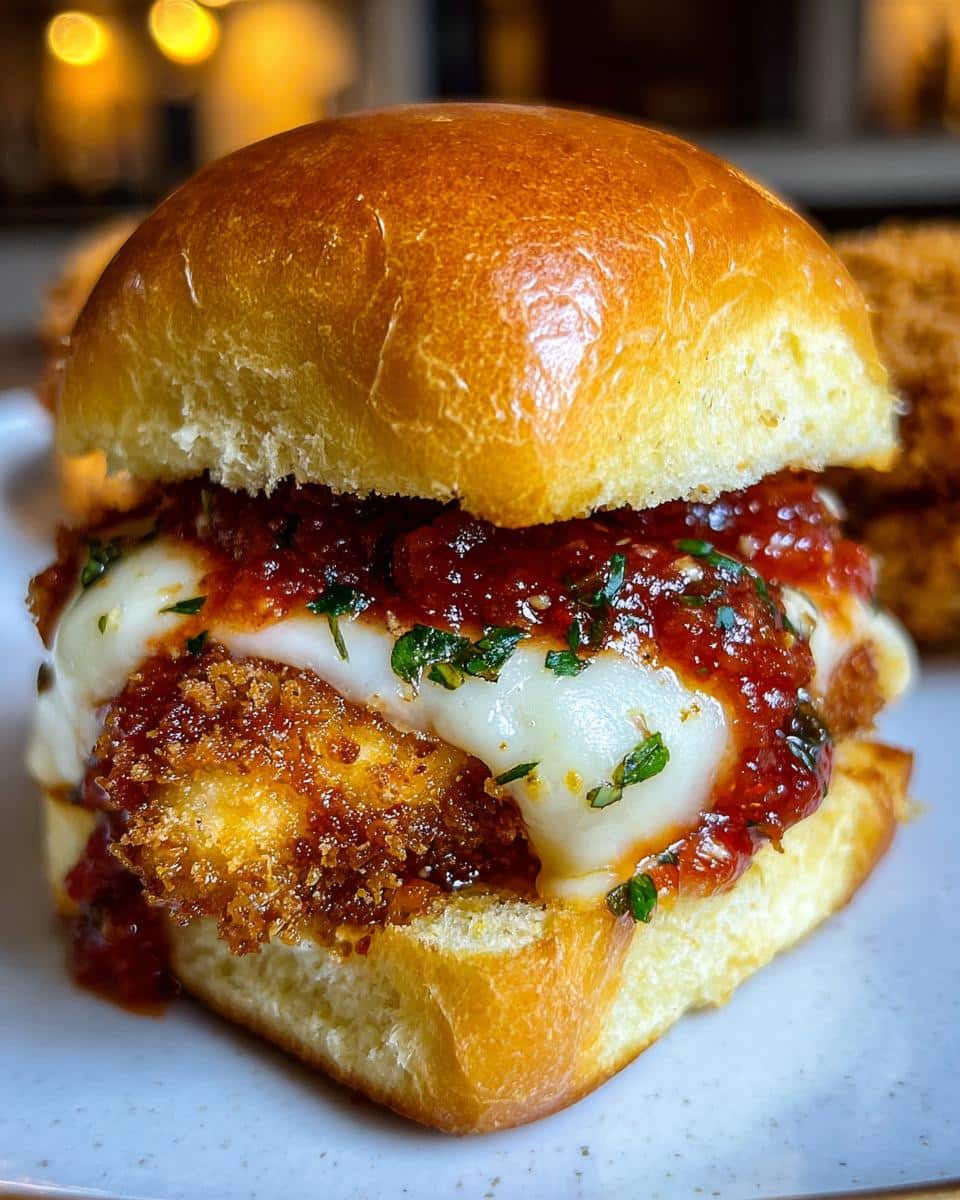
Here’s where the magic happens! Take your slider buns and slice the whole package in half horizontally (keep them connected – it makes assembly so much easier). Place the bottom halves on your baking sheet.
Now, layer on your crispy chicken tenders – one per bun. Spoon about a tablespoon of warmed marinara over each piece of chicken. Don’t be shy with it! Then, pile on that mozzarella cheese – I like to really mound it up so it gets all melty and amazing.
Pop them in the oven for 5-7 minutes until the cheese is bubbly and slightly golden. If you want extra color, you can broil for the last minute – but watch closely! Those last 60 seconds can mean the difference between perfect and “oh no!”
Finally, place the top buns on and press gently. Let them sit for just a minute so the cheese sets a bit before serving – this keeps everything from sliding apart when your little monsters grab them!
Tips for the Best Halloween Chicken Parm Sliders
After making these sliders more times than I can count (and surviving many Halloween parties!), I’ve picked up some tricks that’ll make yours even better. Here are my can’t-live-without tips:
- Shortcut alert: Use pre-cooked chicken tenders or rotisserie chicken to save 15 minutes! Just coat with breadcrumbs and pop under the broiler for 2 minutes to crisp up.
- Extra flavor boost: Tuck a slice of pepperoni under the cheese before baking – it adds a spicy little surprise that adults love!
- Sauce on the side: Always serve extra warmed marinara for dipping. I put mine in a small cauldron for Halloween flair!
- Bun protection: Lightly toast the bottom buns before assembling to prevent sogginess – especially important if making ahead.
- Cheese secrets: Mix mozzarella with a bit of provolone for extra stretch, or add a sprinkle of smoked gouda for depth.
- Make-ahead magic: Assemble everything except the sauce up to 4 hours ahead. Add sauce right before baking.
- Crispy trick: For extra crunch, mix panko breadcrumbs with regular breadcrumbs 50/50.
- Kid-friendly: Cut sliders into “fingers” and arrange with marinara “blood” for gross-out fun!
Remember – the best Halloween recipes are the ones that taste great AND let you enjoy the party too!
Variations for Halloween Chicken Parm Sliders
Want to mix things up? These sliders are like a costume party for your taste buds! Try:
- Gluten-free: Swap regular buns for GF versions and use almond flour breadcrumbs
- Vegan: Eggplant slices instead of chicken, vegan cheese, and flax egg wash
- Spooky spicy: Add red pepper flakes to the breadcrumbs or use arrabbiata sauce
- Monster mash: Mix mozzarella with orange cheddar for creepy color
- Bat wings: Use chicken wings instead of tenders for a ghoulish presentation
See? Endless ways to haunt your Halloween table!
Serving and Storing Halloween Chicken Parm Sliders
These sliders scream “eat me warm!” – that melty cheese and crispy chicken are at their absolute best fresh from the oven. If you must store them (maybe you’ve got zombie leftovers?), pop them in an airtight container in the fridge for up to 3 days. When reheating, skip the microwave – it turns the buns to mush. Instead, warm them in a 350°F oven for about 10 minutes to bring back that crispy magic. Pro tip: Store any extra marinara separately so your sliders don’t get soggy overnight!
Halloween Chicken Parm Sliders Nutrition
Okay, let’s talk numbers – but don’t let this spook you! These nutrition facts are estimates since we all tweak recipes differently (I know I always add extra cheese!). Here’s the breakdown per slider when made exactly as written:
- Calories: 220
- Fat: 9g (3g saturated)
- Protein: 14g
- Carbs: 22g
- Sugar: 3g
- Sodium: 380mg
Remember – using Hawaiian rolls instead of plain? That’ll add a bit more sugar. Going heavy on the cheese (no judgment!)? Fat content climbs. But hey, it’s Halloween – save the strict diets for January! My philosophy? One scary-good slider won’t haunt your nutrition goals.
FAQs About Halloween Chicken Parm Sliders
I’ve fielded SO many questions about these sliders over the years – especially when party panic sets in! Here are the most common ones I get, along with my tried-and-true answers:
Can I make these Halloween sliders ahead of time?
Absolutely! You can bread and cook the chicken up to 2 days ahead – just store it in the fridge. Assemble everything except the sauce up to 4 hours before your party. When guests arrive, add sauce and cheese, then pop them in the oven. The smell alone will make you the Halloween party hero!
How do I keep the buns from getting soggy?
My two golden rules: 1) Lightly toast the bottom buns before assembling (just 2 minutes in the oven does wonders), and 2) Don’t drown them in sauce! A tablespoon per slider is plenty. If making ahead, store sauce separately and add it last minute.
Can I use frozen chicken tenders?
You bet! Thaw them completely first, then pat them SUPER dry with paper towels – moisture is the enemy of crispy coating. I actually keep a bag of frozen tenders in my freezer for last-minute Halloween emergencies. Just season them well before breading!
What’s the best way to transport these to a party?
After baking, let them cool for 10 minutes, then wrap the whole tray tightly in foil. They’ll stay warm for about an hour. Bring extra sauce in a jar to reheat at the party. For longer trips, use an insulated bag with a hot pack underneath.
Any tips for making them spookier?
Oh, I’ve got you covered! Use black sesame buns if you can find them, or make “spiderwebs” with sour cream. For real drama, arrange them in a coffin shape on a platter with olive “spiders” crawling over them. Last year I dyed the mozzarella orange with food coloring – the kids went wild!
For more delicious recipes and entertaining ideas, be sure to check out our recipes section. You might also enjoy our Halloween charcuterie board for more spooky treats!
Follow us on Pinterest for daily inspiration!
Print
30-Minute Halloween Chicken Parm Sliders – Spooky & Scrumptious
- Total Time: 30 minutes
- Yield: 12 sliders
- Diet: Vegetarian
Description
A fun and tasty twist on classic chicken parm, these sliders are perfect for Halloween parties or any gathering. They’re easy to make and packed with flavor.
Ingredients
- 12 slider buns
- 1 lb chicken tenders
- 1 cup breadcrumbs
- 1/2 cup grated parmesan cheese
- 1 tsp garlic powder
- 1 tsp dried oregano
- 1 egg
- 1 cup marinara sauce
- 1 cup shredded mozzarella cheese
- 1 tbsp olive oil
- Salt and pepper to taste
Instructions
- Preheat oven to 375°F (190°C).
- In a bowl, mix breadcrumbs, parmesan, garlic powder, oregano, salt, and pepper.
- Dip chicken tenders in beaten egg, then coat with breadcrumb mixture.
- Heat olive oil in a pan and cook chicken until golden, about 3-4 minutes per side.
- Slice slider buns in half and place the bottom halves on a baking sheet.
- Top each bun with a chicken tender, a spoonful of marinara, and mozzarella cheese.
- Bake for 5-7 minutes until cheese melts.
- Place the top buns on and serve warm.
Notes
- Use pre-cooked chicken tenders for a quicker option.
- Add sliced pepperoni for extra flavor.
- Serve with extra marinara for dipping.
- Prep Time: 15 minutes
- Cook Time: 15 minutes
- Category: Appetizer
- Method: Baking
- Cuisine: Italian-American