Skip to content
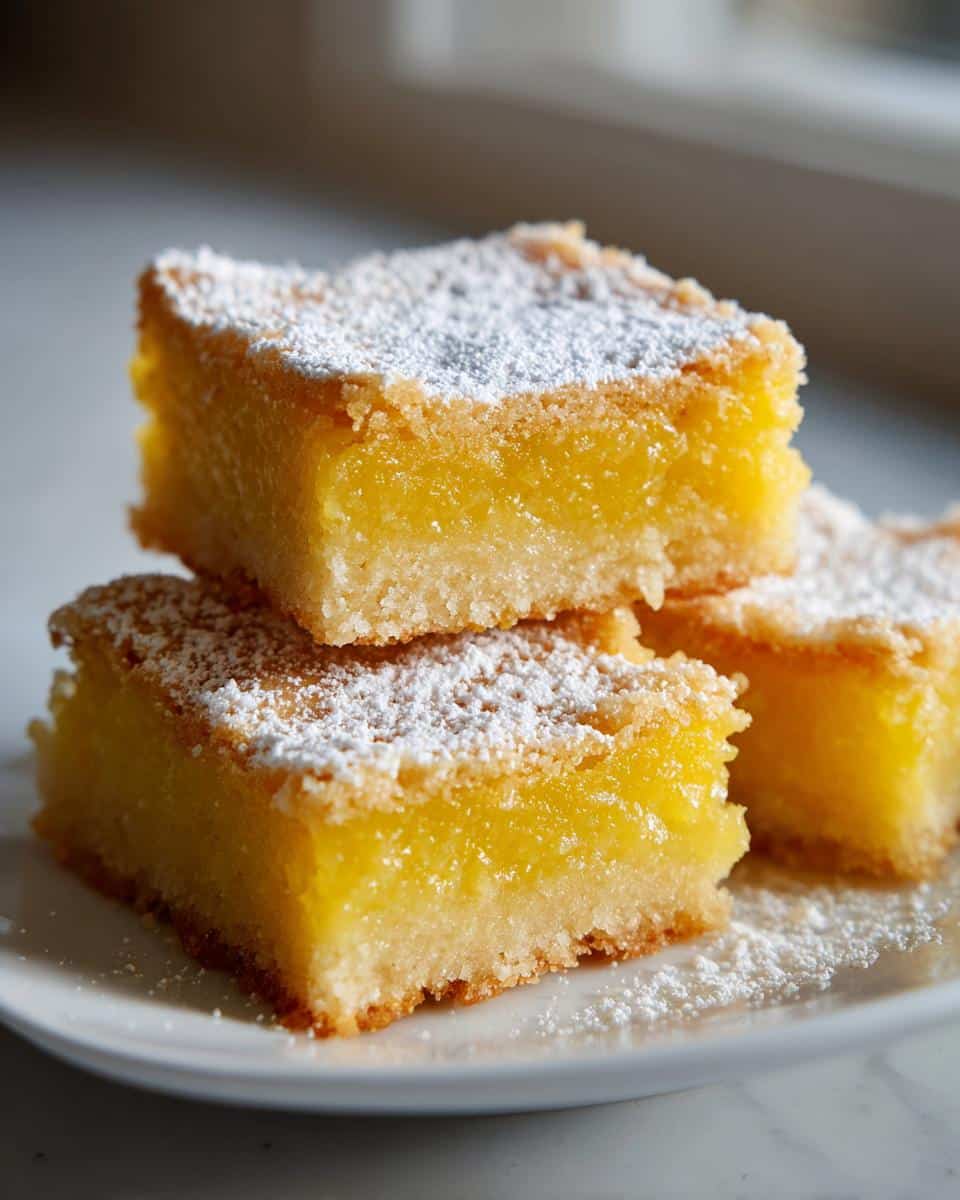
You know that moment when you bite into a perfect lemon bar—the buttery crust crumbles just right, and the tangy-sweet filling makes your taste buds dance? That’s exactly what these gluten-free lemon bars deliver, without a single compromise. I first fell in love with them when my friend Sarah, who’s celiac, brought a batch to our book club. One bite and I was hooked! Now, they’re my go-to when I need a bright, sunshiney treat that’s as easy to make as it is delicious. No one will guess they’re gluten-free—they’re just that good.
Why You’ll Love These Gluten-Free Lemon Bars
Trust me, these aren’t your average lemon bars. They’re the kind of dessert that makes people ask, “Wait, these are gluten-free?” Here’s why they’ve become my absolute favorite:
- That perfect tangy-sweet balance – The fresh lemon juice and zest give you that bright, punchy flavor without being too sour, while the buttery crust keeps everything grounded.
- No weird gluten-free textures – The crust bakes up crisp and tender, not crumbly or gritty like some gluten-free treats can be.
- Seriously simple to make – You probably have most ingredients in your pantry already, and the whole thing comes together in under an hour.
- Always a crowd-pleaser – I’ve served these to gluten-lovers and gluten-free folks alike, and everyone goes back for seconds (sometimes thirds!).
The best part? They taste even better the next day – if they last that long!
Ingredients for Gluten-Free Lemon Bars
Okay, let’s talk ingredients—this is where the magic happens! I’ve tested this recipe more times than I can count, and these exact measurements give you that perfect balance of tangy and sweet every single time. Here’s what you’ll need:
- 1 cup gluten-free flour blend – My go-to is King Arthur’s Measure for Measure because it behaves just like regular flour. (No weird aftertaste, I promise!)
- ½ cup unsalted butter, softened – And when I say softened, I mean leave it on the counter for 30 minutes until your finger leaves a gentle indent. Microwaving ruins the texture!
- ¼ cup powdered sugar – Sift it if yours is lumpy—it makes the crust extra tender.
- 1 cup granulated sugar – Regular white sugar works best here for that smooth filling.
- 2 large eggs – Room temperature is key! Cold eggs make the filling stubborn.
- 2 tablespoons lemon zest – Use organic lemons if you can, and zest them right before mixing for maximum flavor.
- ¼ cup fresh lemon juice – About 2 medium lemons. Bottled juice? Absolutely not—it’s all about that bright, fresh squeeze!
- ¼ teaspoon baking powder – Just a pinch to give the filling a little lift without puffing up too much.
- Pinch of salt – Balances all the sweetness. I use kosher salt because it dissolves evenly.
See? Nothing fancy—just simple ingredients done right. Now let’s make some magic!
Equipment Needed
Before we dive in, let me tell you—you probably already have everything you need! Here’s my trusty lineup:
- 8×8-inch baking pan – Metal works best for that golden crust (glass can make the edges too dark)
- Medium mixing bowl – For that dreamy crust mixture
- Whisk – My secret weapon for lump-free lemon filling
- Rubber spatula – To scrape every last bit of lemony goodness into the pan
See? No fancy gadgets required. Just grab these and let’s bake!
How to Make Gluten-Free Lemon Bars
Alright, let’s get to the fun part—making these sunshiney bars! I’ll walk you through each step so they turn out perfect. Just follow along—you’ve got this!
Preparing the Crust
First, preheat your oven to 350°F (175°C). Grab that softened butter—it should feel like spreading consistency. In your mixing bowl, combine the gluten-free flour, powdered sugar, and pinch of salt. Add the butter and use your fingers or a fork to mix until it looks like coarse sand. Now, press it firmly into your baking pan—I mean really press it! A flat-bottomed glass helps get it even. Pop it in the oven for 15 minutes until it’s just starting to turn golden at the edges.
Making the Lemon Filling
While the crust bakes, let’s make that luscious filling. Whisk the eggs and granulated sugar together until they’re completely smooth—no grainy bits! Add the lemon zest, lemon juice, and baking powder. Keep whisking until everything is beautifully combined. The mixture should be slightly frothy and smell like a lemon grove. (Yes, I always take a big sniff—it’s the best part!)
Baking and Cooling
When the crust is ready, pull it out and immediately pour the filling over the hot crust. Carefully return it to the oven for 20 minutes—the filling should be set but still have a slight jiggle in the center. Let it cool completely in the pan (patience is hard, I know!). Once cooled, dust with powdered sugar and slice into squares. For the cleanest cuts, chill them for an hour first—but I won’t judge if you sneak a warm bite straight from the pan!
Tips for Perfect Gluten-Free Lemon Bars
Want to take your lemon bars from good to wow? Here are my tried-and-true tips for absolute perfection:
- Chill for cleaner cuts – Let the bars cool completely, then pop them in the fridge for an hour. They’ll slice like a dream, and the flavors get even better as they set.
- Zest before juicing – Always zest your lemons before cutting and squeezing them. It’s way easier, and you’ll capture every bit of that citrusy magic.
- Press that crust! – Don’t be shy—press the crust firmly into the pan. A flat-bottomed glass helps get it nice and even, which means no soggy spots later.
- Test for doneness – The filling should jiggle slightly in the center but not look wet. Overbaking makes it rubbery, so keep an eye on it!
- Use a sharp knife – Wipe your knife clean between cuts for those picture-perfect edges. Trust me, it makes all the difference.
Follow these, and you’ll have lemon bars that look and taste like they came straight from a bakery!
Variations of Gluten-Free Lemon Bars
Want to mix things up? These lemon bars are super flexible! Try swapping the gluten-free flour blend for almond flour—just add an extra tablespoon since it’s more absorbent. For dairy-free, coconut oil works beautifully instead of butter (use refined if you don’t want coconut flavor). Feeling fancy? A sprinkle of toasted coconut on top adds a tropical twist. The possibilities are endless—have fun with it!
Serving and Storing Gluten-Free Lemon Bars
These lemon bars shine brightest when you give them a snowy dusting of powdered sugar right before serving—it makes that tangy filling pop! Leftovers? (If you have any!) Store them in an airtight container in the fridge for up to 3 days. The crust stays surprisingly crisp! For longer storage, freeze individual bars between parchment paper—just thaw at room temperature when that lemon craving hits again.
Nutritional Information for Gluten-Free Lemon Bars
Here’s the scoop on what’s in these sunny treats—each bar packs about 150 calories with that perfect balance of sweet and tart. They’ve got 8g of fat (mostly from that glorious butter) and 18g carbs. Not too shabby for a dessert that tastes this indulgent! Of course, these are just estimates—your exact numbers might dance a bit depending on ingredient brands or how generously you dust with powdered sugar. But hey, life’s too short to stress over every crumb when lemon bars this good are involved!
Common Questions About Gluten-Free Lemon Bars
I get asked about these lemon bars all the time—here are the questions that pop up most often in my kitchen (and my honest answers!):
- “Can I use bottled lemon juice?” Please don’t! Fresh juice makes all the difference in flavor. Bottled stuff tastes flat and can even have a weird aftertaste. Squeezing 2 lemons takes 2 minutes—totally worth it!
- “My filling didn’t set—what went wrong?” Usually means it needed another minute or two in the oven. The center should jiggle slightly like Jell-O, not look wet. Next time, check at 20 minutes—if it’s still loose, add 3-5 more minutes.
- “Can I freeze these?” Absolutely! Freeze them undusted in a single layer first, then stack with parchment between bars. They’ll keep for 2 months—thaw at room temperature before dusting with sugar.
- “Help! My crust stuck to the pan!” Two tricks: 1) Line your pan with parchment paper with overhanging edges, or 2) Let the bars cool completely before cutting—they release better when not piping hot.
Still have questions? Drop them in the comments—I love troubleshooting baking adventures with you!
Share Your Gluten-Free Lemon Bars Experience
Did you make these sunny lemon bars? I’d love to hear how they turned out! Drop a comment below—tell me if you stuck to the recipe or added your own twist. Happy baking!