Skip to content
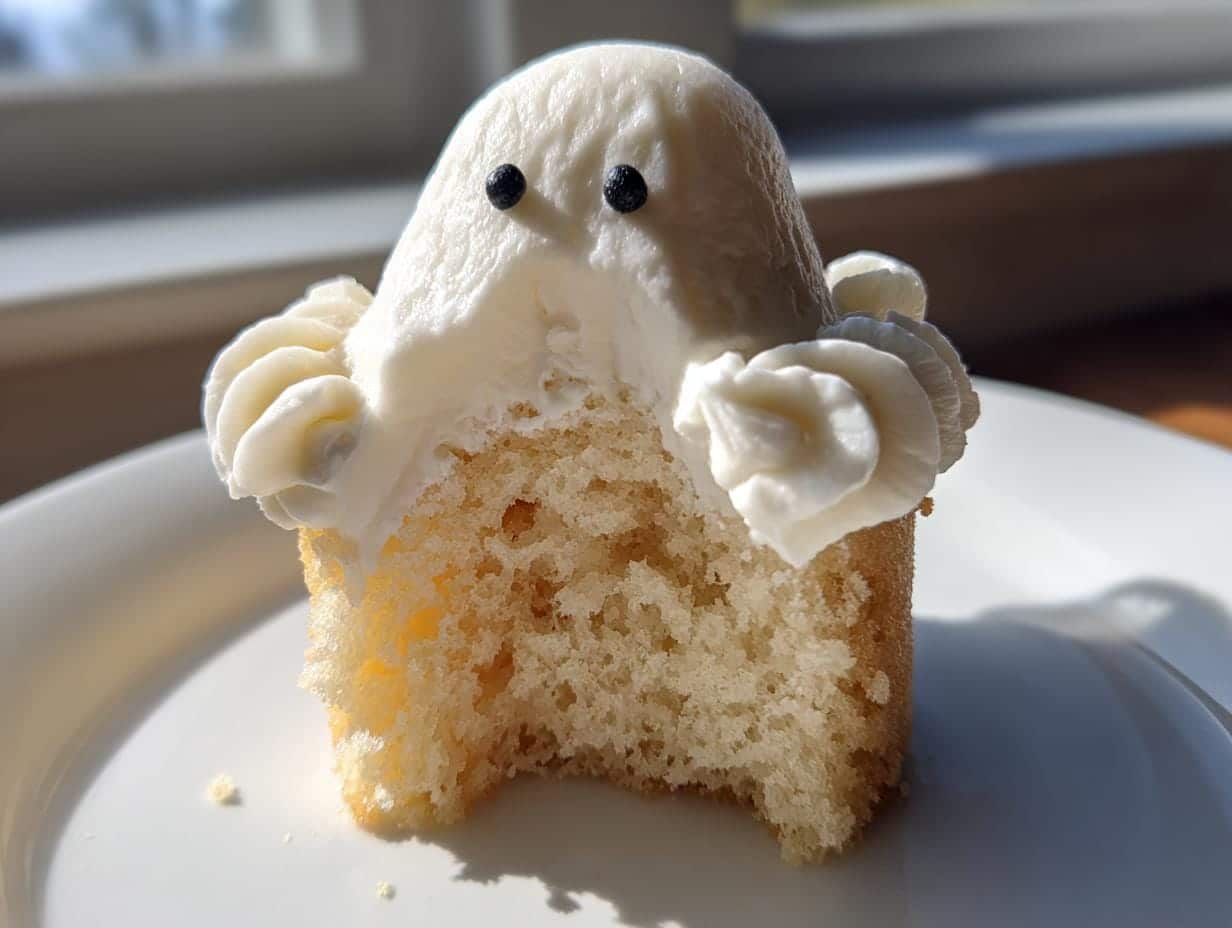
Nothing screams Halloween baking quite like a batch of spooky Ghostly Cupcakes! I still remember the first time I made these for my niece’s Halloween party—her little friends went wild for the cute ghost frosting staring back at them. These aren’t just any cupcakes; they’re soft, fluffy, and topped with the most adorable (and delicious) white frosting ghosts you’ll ever pipe. The best part? They’re surprisingly simple to make, even if you’re not a decorating pro. Every October, my kitchen turns into a ghostly cupcake factory, and trust me—once you try these, they’ll become your go-to Halloween treat too.

Table of contents:
Why You’ll Love These Ghostly Cupcakes
Let me tell you why these little spooky treats have become my Halloween obsession—and why they’ll steal your heart too:
- So easy even goblins could make them – No fancy skills needed! The simple batter comes together in minutes, and the ghost piping is way easier than it looks (I promise).
- Total party showstoppers – Last year, my Ghostly Cupcakes disappeared faster than actual ghosts at my Halloween bash. That white frosting against black cupcake liners? Pure magic.
- Kid-approved creativity – My niece loves helping pipe the ghosts and giving them funny faces. You can make them silly, scary, or downright adorable.
- Endless decorating possibilities – Add sprinkles, edible glitter, or even mini chocolate tombstones. Make them your own spooky masterpiece!
Honestly? The hardest part is resisting eating all the frosting before it even hits the cupcakes—not that I’d know anything about that…
Ingredients for Ghostly Cupcakes
Gather these simple ingredients – you probably have most in your pantry already! The magic happens when they all come together:
- 1 1/2 cups all-purpose flour (spooned and leveled – no packing!)
- 1 cup granulated sugar (regular white sugar works perfectly)
- 1/2 cup unsalted butter, softened (leave it out for 30 minutes – your fingers should leave a slight dent)
- 2 large eggs (room temperature helps them blend smoothly)
- 1/2 cup milk (whole milk makes them extra tender)
- 1 tsp vanilla extract (the good stuff – it makes a difference!)
Ingredient Notes & Substitutions
No stress if you need to swap things! Use gluten-free 1:1 flour if needed, or almond milk for dairy-free. Short on butter? Margarine works in a pinch, though the flavor won’t be quite as rich. And if your ghosts need to be vegan, flax eggs (1 tbsp ground flax + 3 tbsp water per egg) do the trick! Just promise me one thing – don’t skip the vanilla. That’s what makes these taste like little clouds of happiness.
How to Make Ghostly Cupcakes
Okay, time for the fun part – let’s bring these spooky little treats to life! I’ve made these so many times I could probably do it in my sleep, but don’t worry – I’ll walk you through every step:
- Preheat your oven to 350°F (175°C) – This gives it time to reach the perfect temperature while you mix the batter. Line your muffin tin with those cute black cupcake liners (trust me, the contrast makes the ghosts pop!).
- Whisk together the dry ingredients – In a medium bowl, combine the flour, baking powder, and salt. I like to give it a good whisk for about 30 seconds to make sure there are no lumps hiding in there.
- Cream the butter and sugar – Use a hand mixer or stand mixer to beat the softened butter and sugar until it’s light and fluffy, about 2-3 minutes. This is where the magic starts – you’ll see it transform from grainy to almost whipped cream consistency.
- Add eggs one at a time – Crack those room temperature eggs in, mixing well after each one. Then mix in the vanilla. The batter should look smooth and shiny now.
- Alternate dry and wet ingredients – Add about 1/3 of the flour mixture, then half the milk, repeating until everything’s incorporated. Mix just until combined – overmixing makes tough cupcakes!
- Fill and bake – Spoon batter into liners until they’re about 2/3 full. Bake for 18-20 minutes until a toothpick comes out clean. Let them cool completely before frosting – I know it’s hard to wait, but warm cupcakes make melty ghosts!
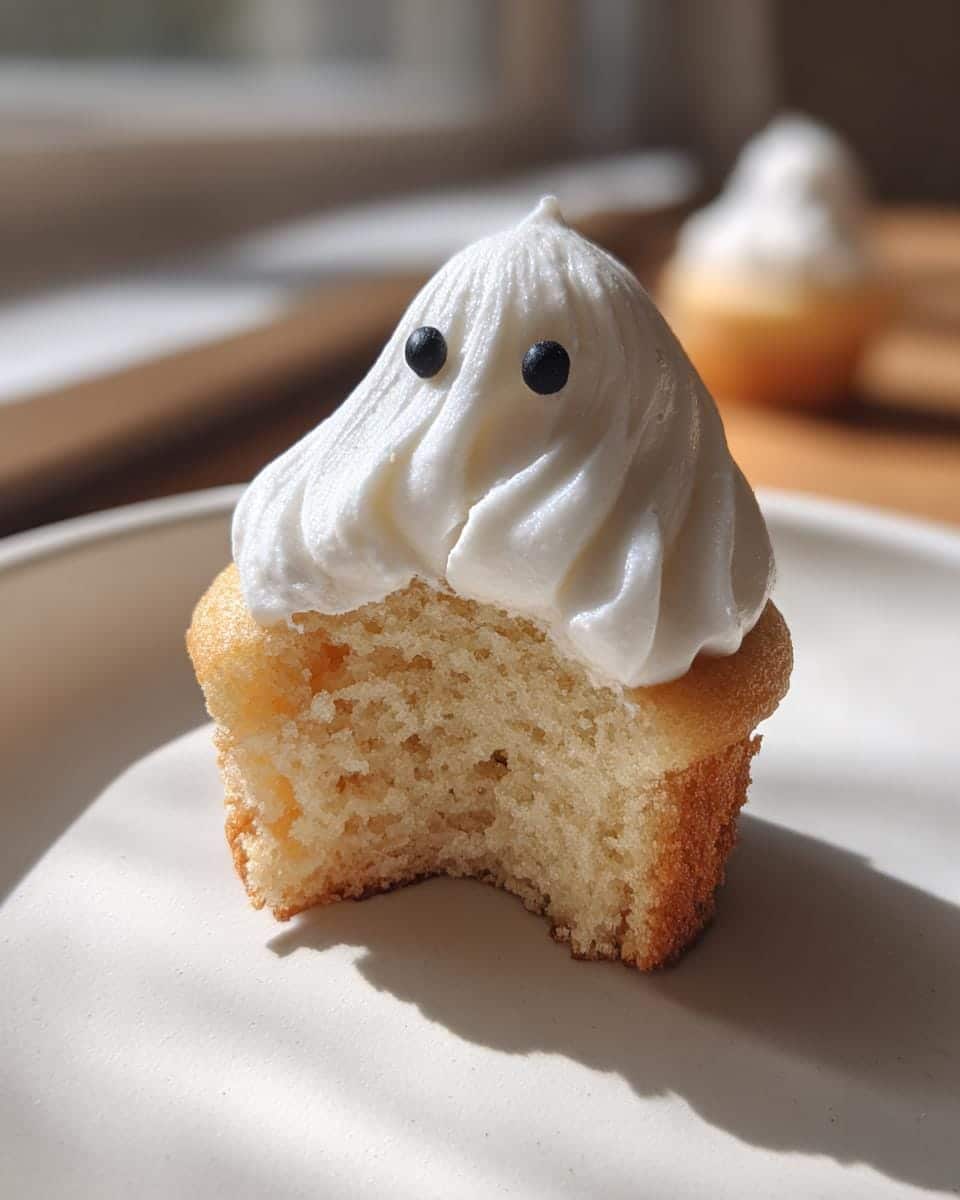
Creating the Ghostly Frosting
Now for the star of the show – those adorable ghost tops! Start by beating the softened butter until it’s creamy (about 1 minute). Gradually add the powdered sugar, then vanilla and milk. You want it thick enough to hold shape – if it’s too stiff, add milk a teaspoon at a time. Too runny? More powdered sugar!
For piping, use a large round tip or just snip the corner off a plastic bag. Pipe a tall spiral starting at the cupcake’s center, pulling up to form the ghost’s “body.” Want wispy ghosts? Give the bag a little wiggle as you lift. If your frosting gets too soft, just pop it in the fridge for 10 minutes.
Decorating Your Ghostly Cupcakes
Time to give your ghosts personality! Use black decorating gel to dot on eyes – two small dots for cute ghosts, squiggly eyes for spooky ones. No gel? Mini chocolate chips work too (pointy side in!). For extra fun, add a tiny edible pearl for a ghostly “mouth” or dust with edible glitter for a magical glow.
Tips for Perfect Ghostly Cupcakes
After making hundreds of these spooky treats (and learning from plenty of ghostly mishaps!), here are my hard-won secrets:
- Mix batter until just combined – Overmixing develops gluten and makes dense cupcakes. A few flour streaks are fine – they’ll disappear during baking!
- Keep frosting cool – If your kitchen’s warm, chill the frosting bowl for 10 minutes before piping. Ghosts hold their shape better when the butter’s slightly firm.
- Store in single layers – These cupcakes stay fresh for 3 days in an airtight container, but stack them carefully – ghosts bruise easily! A toothpick in each cupcake prevents smushed frosting when covering.
- Freeze unfrosted – Make cupcakes ahead and freeze them for up to a month. Thaw at room temperature before decorating – perfect for last-minute Halloween parties!
Oh, and one bonus tip from my niece: ghosts taste better when eaten by flashlight!
Frequently Asked Questions
Over the years, I’ve gotten so many questions about these Ghostly Cupcakes – here are the ones that pop up most often:
Can I make these cupcakes ahead of time?
Absolutely! The unfrosted cupcakes freeze beautifully for up to a month. Just wrap them tightly in plastic wrap once completely cooled. When you’re ready to serve, thaw at room temperature and frost fresh – the ghosts will look like you just baked them! The frosting itself can be made 2-3 days ahead and kept in the fridge (just let it soften slightly before piping).
Help! My frosting is too runny – how do I fix it?
No panic! Pop your frosting bowl in the fridge for 15-20 minutes to firm up the butter. If it’s still too soft after chilling, gradually add more powdered sugar (about 1/4 cup at a time) until it holds peaks. The perfect ghost frosting should be thick enough that when you lift the beaters, the peaks hold their shape for a few seconds before gently falling over.
What’s the best piping tip for ghost shapes?
I swear by a simple large round tip (like Wilton #1A) for classic ghost shapes. But here’s a secret – you don’t actually need a tip at all! Just snip the corner off a plastic bag (about 1/2 inch opening) and pipe tall swirls directly onto the cupcakes. The imperfect edges actually make the ghosts look more ethereal and spooky – bonus!
Can I make these gluten-free or vegan?
You sure can! For gluten-free cupcakes, use your favorite 1:1 gluten-free flour blend. Vegan versions work great with flax eggs (1 tbsp ground flax + 3 tbsp water per egg) and dairy-free milk/butter alternatives. Just note that vegan frosting may be softer – add extra powdered sugar as needed for piping consistency.
Nutritional Information
Want to know what’s haunting your Halloween treats? Each Ghostly Cupcake packs about 280 calories – but hey, ghosts are weightless, so these calories don’t count, right? (I wish!) These nutrition facts are estimates based on standard ingredients – your exact numbers may vary slightly depending on brands and substitutions. Everything in moderation… unless it’s Halloween, then all bets are off!
Share Your Spooky Creations
I’d scream with delight to see your Ghostly Cupcakes haunting the internet! Tag me @HauntedBakery on Instagram or use #GhostlyCupcakes so I can spot your spooky masterpieces. Did your ghosts turn out silly or scary? Did the kids go wild for them? Share your photos – I live for these Halloween baking adventures! Bonus points if you caught someone trying to sneak frosting when you weren’t looking…
For more baking inspiration, check out our recipes section. You might also enjoy our apple crumb cake or these fun easy butter cookies. Don’t forget to follow us on Pinterest for even more delicious ideas!
Print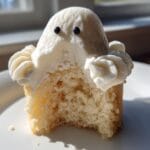
15 Ghoulishly Easy Ghostly Cupcakes Your Kids Will Love
- Total Time: 40 minutes
- Yield: 12 cupcakes
- Diet: Vegetarian
Description
Deliciously spooky cupcakes perfect for Halloween, with a ghostly white frosting topping.
Ingredients
- 1 1/2 cups all-purpose flour
- 1 cup granulated sugar
- 1/2 cup unsalted butter, softened
- 2 large eggs
- 1/2 cup milk
- 1 tsp vanilla extract
- 1 1/2 tsp baking powder
- 1/4 tsp salt
- 2 cups powdered sugar (for frosting)
- 1/2 cup unsalted butter, softened (for frosting)
- 1 tsp vanilla extract (for frosting)
- 2 tbsp milk (for frosting)
- Black decorating gel (for eyes)
Instructions
- Preheat oven to 350°F (175°C). Line a muffin tin with cupcake liners.
- In a bowl, mix flour, baking powder, and salt. Set aside.
- In another bowl, cream butter and sugar until light and fluffy.
- Add eggs one at a time, then mix in vanilla.
- Alternate adding dry ingredients and milk, mixing until smooth.
- Fill cupcake liners 2/3 full. Bake for 18-20 minutes or until a toothpick comes out clean.
- Cool cupcakes completely before frosting.
- For frosting, beat butter until creamy. Gradually add powdered sugar, vanilla, and milk until smooth.
- Pipe frosting onto cupcakes to create ghost shapes.
- Use black decorating gel to add eyes.
Notes
- For a smoother frosting, sift powdered sugar before mixing.
- Let cupcakes cool completely before frosting to prevent melting.
- Store cupcakes in an airtight container for up to 3 days.
- Prep Time: 20 minutes
- Cook Time: 20 minutes
- Category: Dessert
- Method: Baking
- Cuisine: American