Skip to content
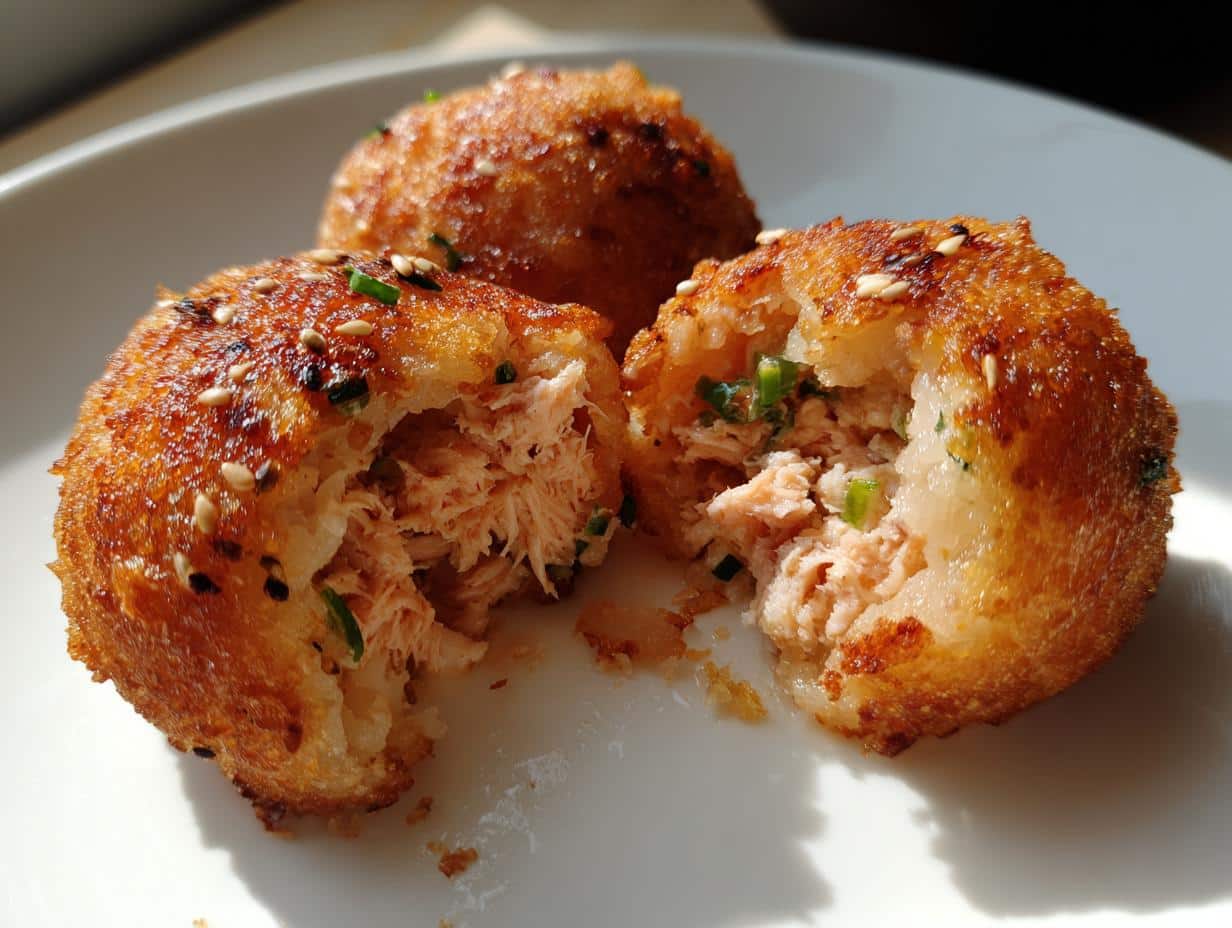
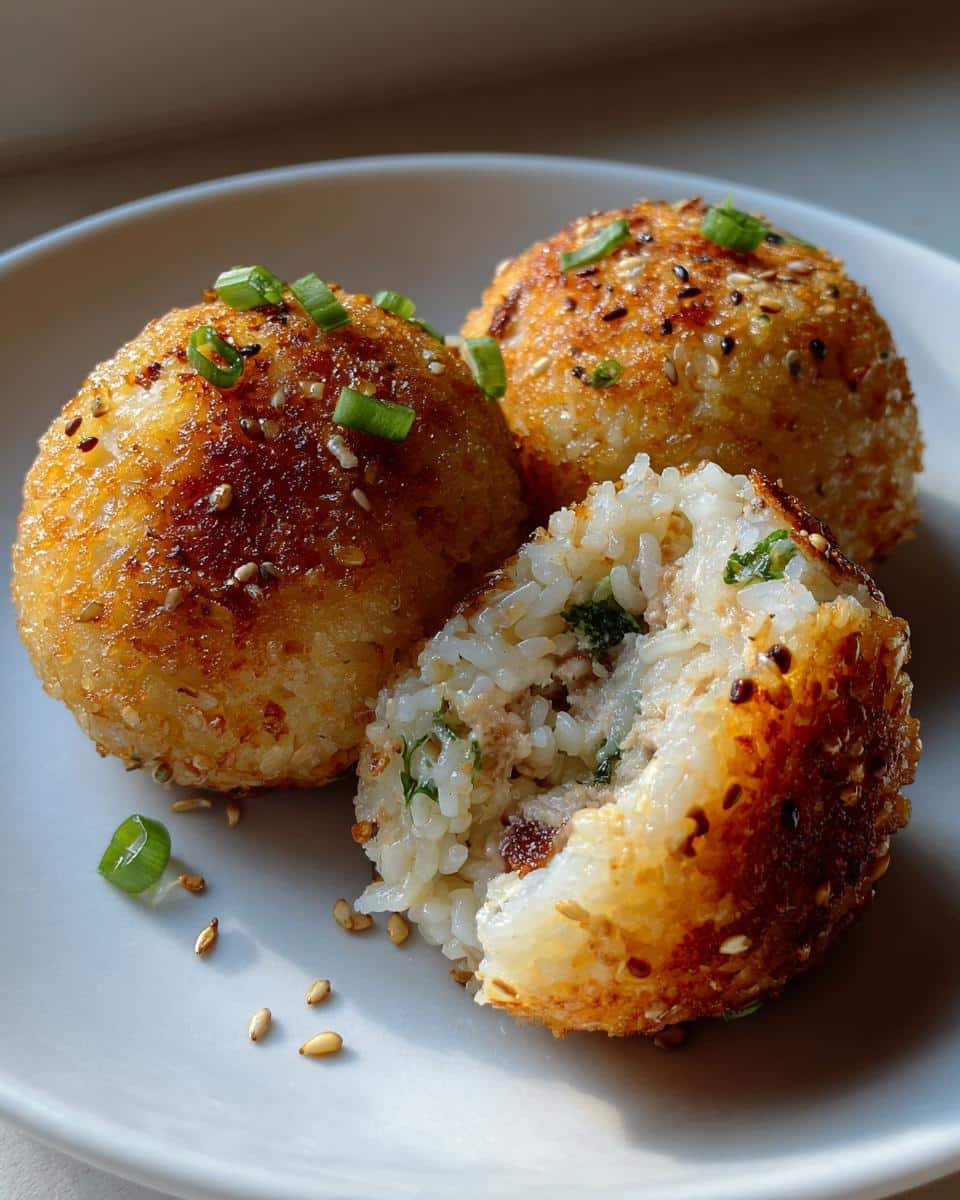
There’s something magical about how a few simple ingredients—tuna, mayo, and rice—transform into the most satisfying little snack. These Tuna Mayo Rice Balls have saved me countless times when hunger strikes, and I need something quick, tasty, and no-fuss. They’re a staple in Japanese lunchboxes for a reason! Soft, slightly sticky rice hugs a creamy, savory tuna filling with just the right tang from mayo and soy sauce. Best part? No cooking required—just mix, shape, and enjoy. I love making these for picnics, late-night cravings, or even as an easy lunch prep. Trust me, once you taste them, you’ll wonder how you ever lived without them.
Why You’ll Love These Tuna Mayo Rice Balls
Oh, where do I even start? These little flavor bombs have become my go-to for so many reasons:
- Lightning fast – You can whip these up in 10 minutes flat. Perfect when hunger hits hard and you need something now.
- No cooking required – Just mix, shape, and done! My kind of recipe on busy days when even turning on the stove feels like too much effort.
- Totally customizable – Add more mayo if you like it creamy, extra soy sauce for saltiness, or throw in some sriracha if you’re feeling spicy.
- Meal prep superstar – They keep beautifully in the fridge for quick snacks all week. (Though mine never last that long!)
Seriously, once you try these, you’ll be hooked just like I am. They’re dangerously easy and delicious! For more easy recipes, check out our recipes section.
Ingredients for Tuna Mayo Rice Balls
Gather these simple ingredients—you probably have most in your pantry already! The key is using freshly cooked rice (leftover rice works too, but warm rice binds better) and well-drained tuna (press it with a fork to remove excess liquid). Here’s what you’ll need:
- 2 cups cooked Japanese short-grain rice (still slightly warm)
- 1 can tuna in water (drained very well—I squeeze it in a paper towel)
- 2 tbsp mayonnaise (Japanese Kewpie mayo if you have it!)
- 1 tsp soy sauce (adjust to taste)
- 1 tsp sesame oil (for that nutty aroma)
- 1 tbsp chopped green onions (the green parts for color)
- Salt and pepper to taste (don’t skip—it balances everything)
How to Make Tuna Mayo Rice Balls
Don’t let the simplicity fool you – there’s an art to making these little guys perfect! Follow these steps, and you’ll have restaurant-worthy rice balls in no time.
Mixing the Filling
First, grab a medium bowl and dump in your well-drained tuna. Break it up with a fork until it’s nice and flaky. Now add the mayo (I always start with 1 tablespoon and add more later if needed), soy sauce, and that magical sesame oil. Mix gently – you want everything combined but not mushy. Here’s my trick: taste it! Needs more salt? Add a pinch. Want more umami? Another dash of soy sauce. The green onions go in last for freshness.
Shaping the Rice Balls
Here’s where things get fun! Wet your hands with cold water – this is crucial to prevent sticking. Scoop about 1/4 cup of rice into your palm, make a small well in the center, and add a spoonful of tuna mixture. Gently fold the rice over the filling, pressing just enough to hold its shape. Rotate in your hands, compacting lightly – think “gentle hug,” not “death grip.” If it falls apart, wet your hands again. Pro tip: make them slightly smaller than a golf ball for perfect bite-sized treats!
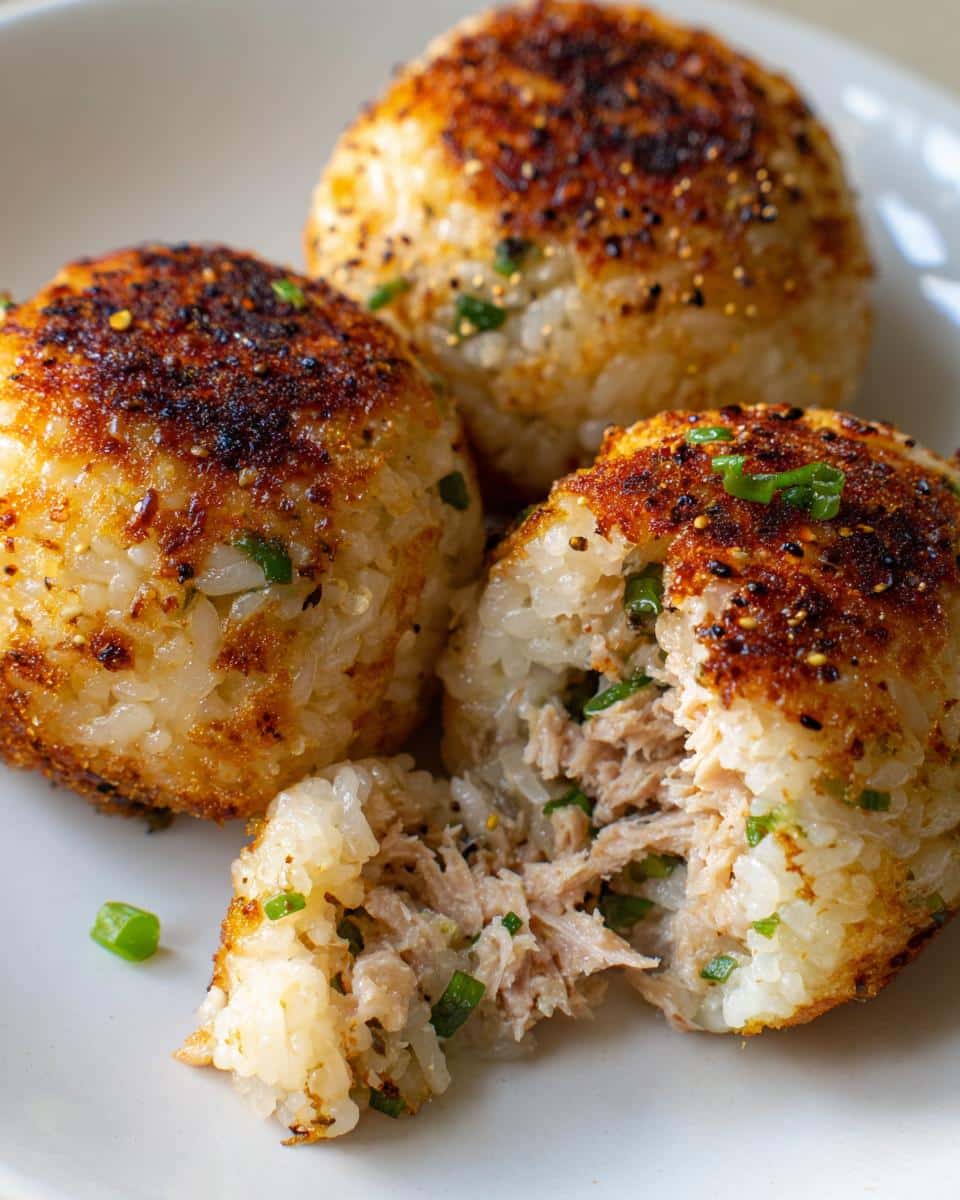
Serve immediately while the rice is still slightly warm for that irresistible soft texture. Watch them disappear! You can find more delicious recipes like this on our Pinterest page.
Tips for Perfect Tuna Mayo Rice Balls
After making these dozens of times, here are my foolproof tricks for the best rice balls every time:
- Warm rice is your friend – Cold rice won’t stick properly. If using leftovers, microwave for 15 seconds first.
- Mayo adjustment station – Start with less mayo than you think – you can always add more! I like mine moist but not soggy.
- Sesame seed magic – Roll finished balls in toasted sesame seeds for crunch. Black and white mixed look gorgeous!
- Wet hands, happy shaping – Keep a bowl of water nearby to rewet hands between balls – they’ll glide right off your fingers.
These little tweaks make all the difference between good and “Oh my god, give me the whole batch!” rice balls.
Variations for Tuna Mayo Rice Balls
Once you’ve mastered the basic version, try these fun twists! For extra creaminess, mash in half an avocado with the tuna. Spice lovers, mix in sriracha or chili crisp—my “cheat” is a dash of cayenne. Craving crunch? Fold in finely chopped cucumber or shredded carrots. My friend swears by adding a sprinkle of furikake before shaping. The possibilities are endless—make them your own!
Serving and Storing Tuna Mayo Rice Balls
These rice balls taste absolute best fresh—the rice stays soft and the filling creamy. But if you must store them (we all need snacks for later!), pop them in an airtight container with parchment between layers. They’ll keep in the fridge for 2 days max—after that, the rice dries out. To revive them, microwave for 10-15 seconds just to take the chill off. Pro tip: pack them for picnics—they’re sturdy little travelers!
Nutritional Information for Tuna Mayo Rice Balls
Here’s the scoop on what’s in these tasty little guys (per rice ball—but who stops at just one?). Note: Values are estimates and may vary based on ingredient brands and sizes.
- Calories: 80
- Protein: 3g
- Carbs: 10g
- Fat: 3g
- Sodium: 120mg
Not bad for something so satisfying, right? The tuna packs protein while keeping things light.
Frequently Asked Questions
I get asked about these tuna mayo rice balls all the time! Here are the top questions from my friends (and my hungry family):
- “Can I use brown rice?” Absolutely! Just know it won’t stick together quite as well. Try adding an extra teaspoon of mayo to help bind it.
- “How long do they last?” About 2 days in the fridge—but they’re best eaten fresh! The rice dries out over time.
- “Can I freeze them?” I don’t recommend it—the texture gets weird when thawed. They’re so quick to make fresh anyway!
- “What if I don’t have sesame oil?” No worries! Just skip it, though you’ll miss that nutty flavor. A tiny bit of olive oil works in a pinch.
Still have questions? Just ask—I’ve probably tested every variation imaginable!
Ready to Make Tuna Mayo Rice Balls?
Go grab that bowl and give these a try—I swear you’ll fall in love with how easy and delicious they are. And when you do, tell me all about it! Nothing makes me happier than hearing when these little rice balls become someone’s new obsession.
Print
10-Minute Tuna Mayo Rice Balls – Irresistible & Easy!
- Total Time: 10 mins
- Yield: 8 rice balls
- Diet: Low Calorie
Description
Simple and tasty tuna mayo rice balls, perfect for a quick snack or lunch.
Ingredients
- 2 cups cooked rice
- 1 can tuna (drained)
- 2 tbsp mayonnaise
- 1 tsp soy sauce
- 1 tsp sesame oil
- 1 tbsp chopped green onions
- Salt and pepper to taste
Instructions
- Mix tuna, mayonnaise, soy sauce, sesame oil, and green onions in a bowl.
- Add cooked rice and gently combine.
- Season with salt and pepper.
- Wet your hands and shape the mixture into small balls.
- Serve immediately or refrigerate for later.
Notes
- Use freshly cooked rice for best texture.
- Adjust mayo and soy sauce to taste.
- Add sesame seeds for extra crunch.
- Prep Time: 10 mins
- Cook Time: 0 mins
- Category: Snack
- Method: No-Cook
- Cuisine: Japanese