Skip to content
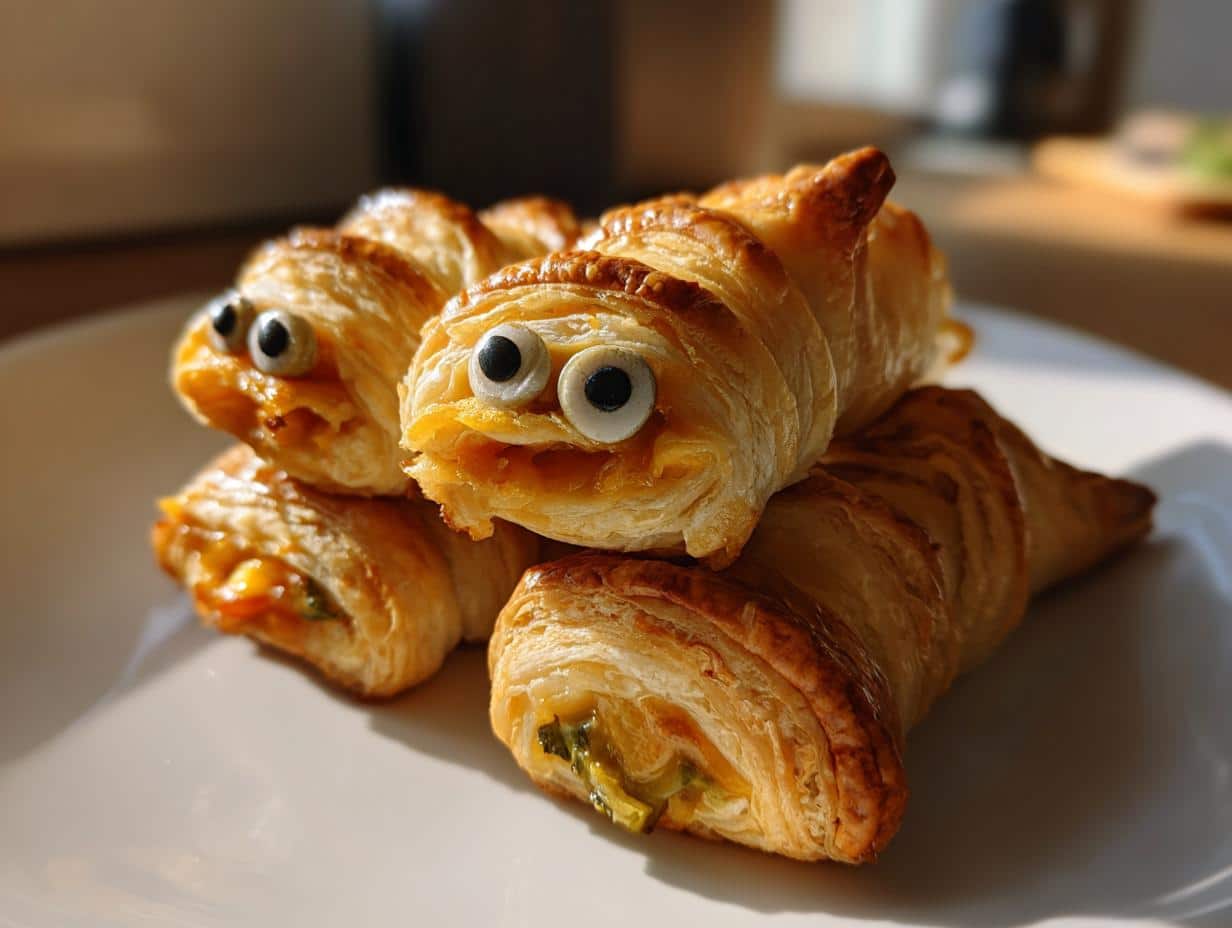
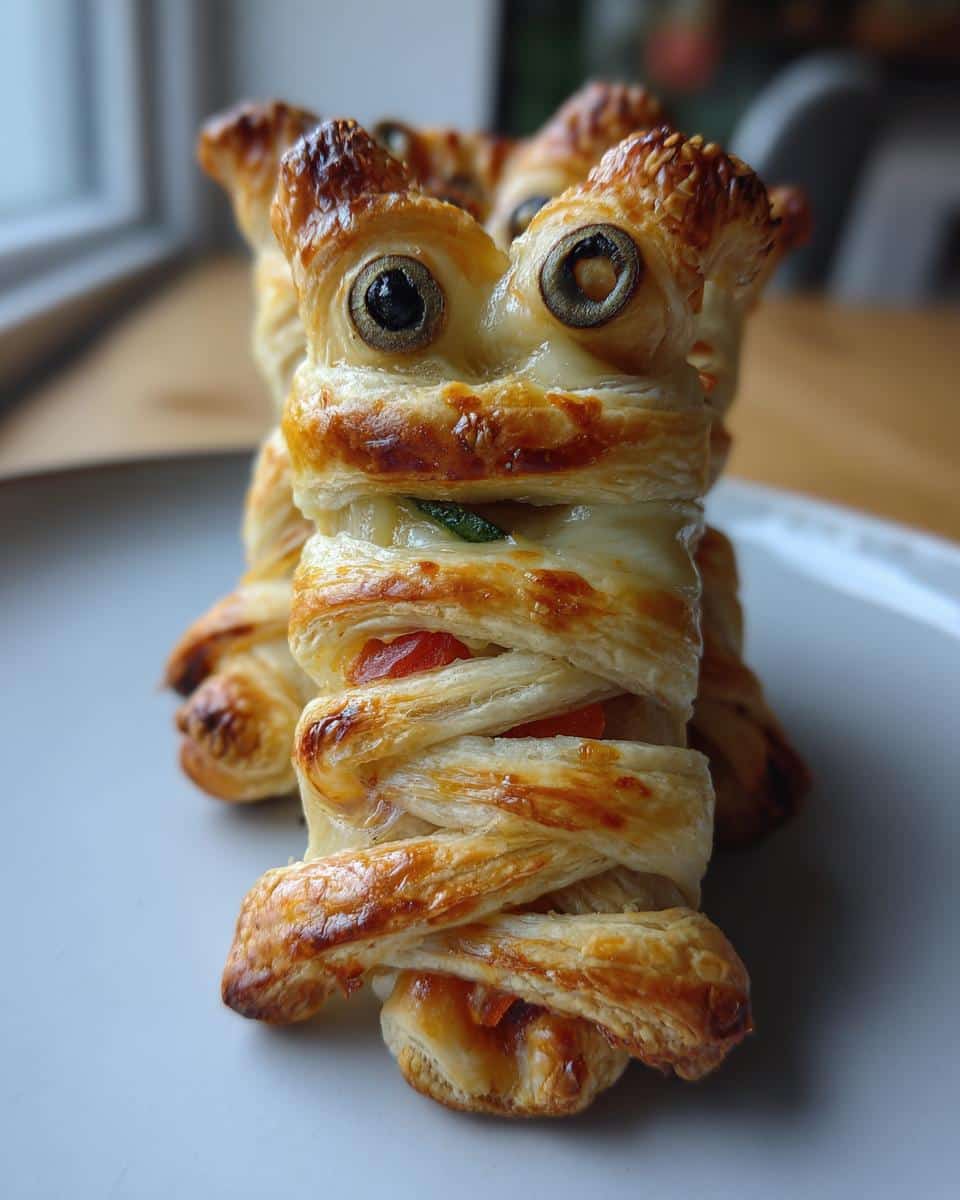
Nothing gets a party started like a tray of adorable, slightly spooky mummy-wrapped foods! I still remember the first time I made these for my niece’s Halloween bash – the kids went wild for them, and honestly? The adults couldn’t stop sneaking bites either. There’s something magical about transforming ordinary ingredients into these little wrapped-up treasures.
Mummy-wrapped foods have become my go-to for any themed gathering because they’re equal parts delicious and delightful. Whether it’s Halloween, an Egyptian-themed party, or just a Tuesday when you want to make dinner fun, these edible mummies never fail to impress. The best part? They’re ridiculously easy to make – just wait until you see how simple puff pastry or pizza dough becomes these cute little bandaged bundles with just a few clever twists!
Why You’ll Love These Mummy-Wrapped Foods
Trust me, once you try making these, they’ll become your secret weapon for every party. Here’s why:
- So easy a mummy could do it: Seriously, if you can wrap a present, you can make these. The dough does all the work for you!
- Endless creative possibilities: Cheese? Check. Pepperoni? Check. Leftover rotisserie chicken? Absolutely. These little guys adapt to whatever’s in your fridge.
- Instant crowd-pleasers: The “aww” factor is real – kids and adults alike go nuts for these edible mummies. I’ve seen grown men fight over the last one!
- Perfect make-ahead party food: Prep them in the morning, pop in the oven when guests arrive, and boom – you look like a kitchen wizard.
Ingredients for Mummy-Wrapped Foods
Gather these simple ingredients, and you’ll be wrapping like a pro in no time! I’ve learned through trial and error (and a few mummy mishaps) that having everything prepped makes the process so much smoother.
- 1 package puff pastry or pizza dough (thawed if frozen – trust me, wrestling with frozen dough is no fun)
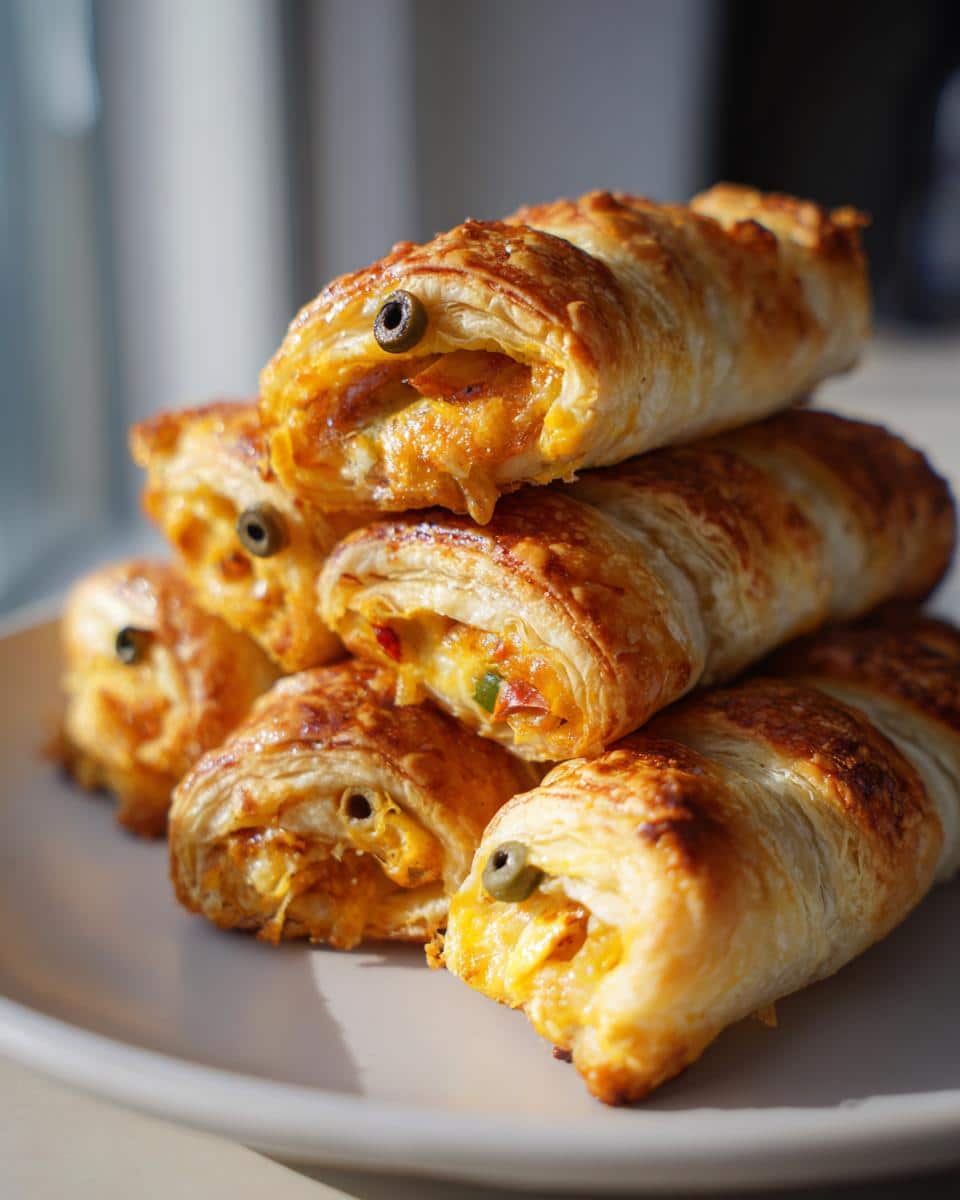
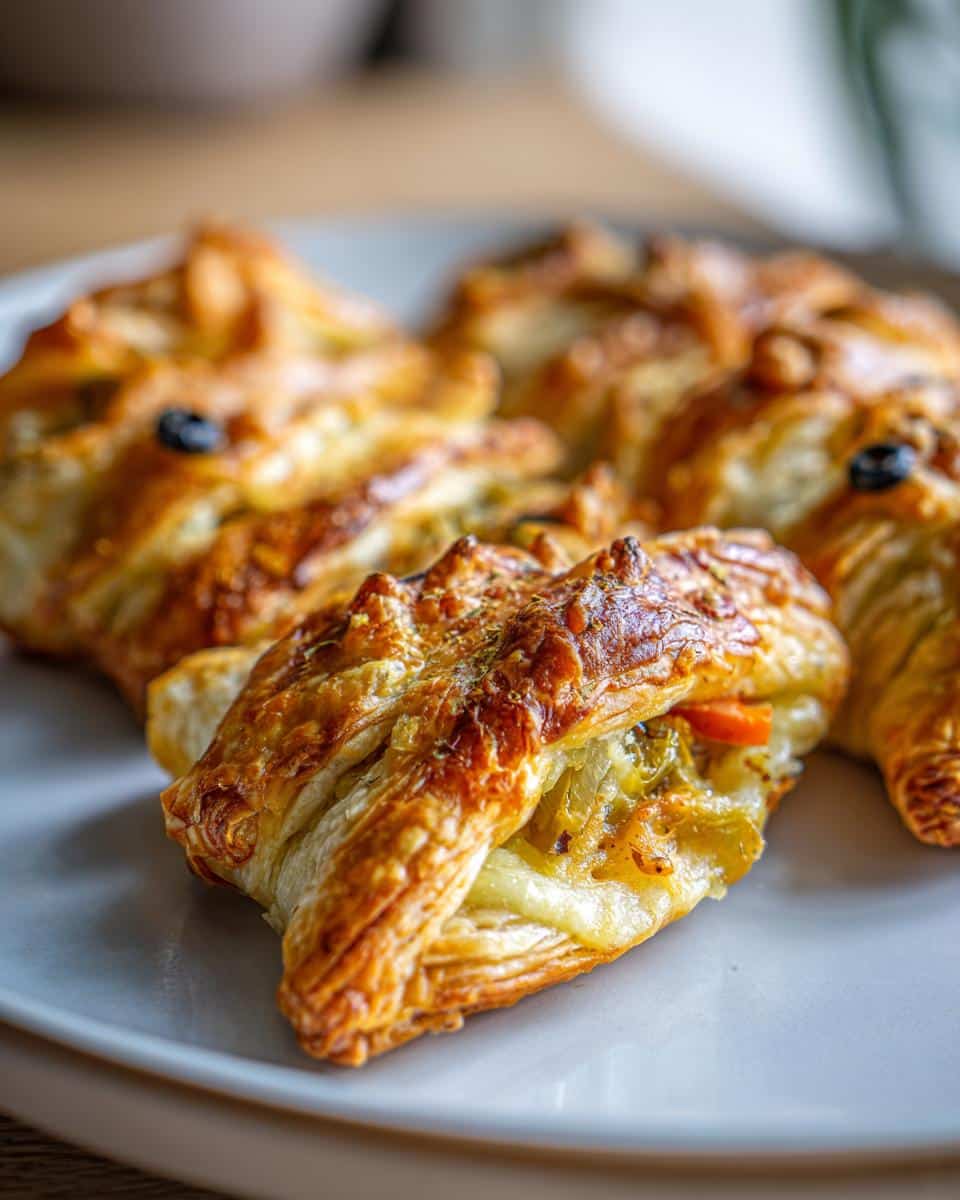
- 1 cup fully cooked filling – my favorites are sharp cheddar cubes, pepperoni slices, or roasted veggie mix (but get creative!)
- 1 large egg (beaten with a splash of water for that perfect golden egg wash)
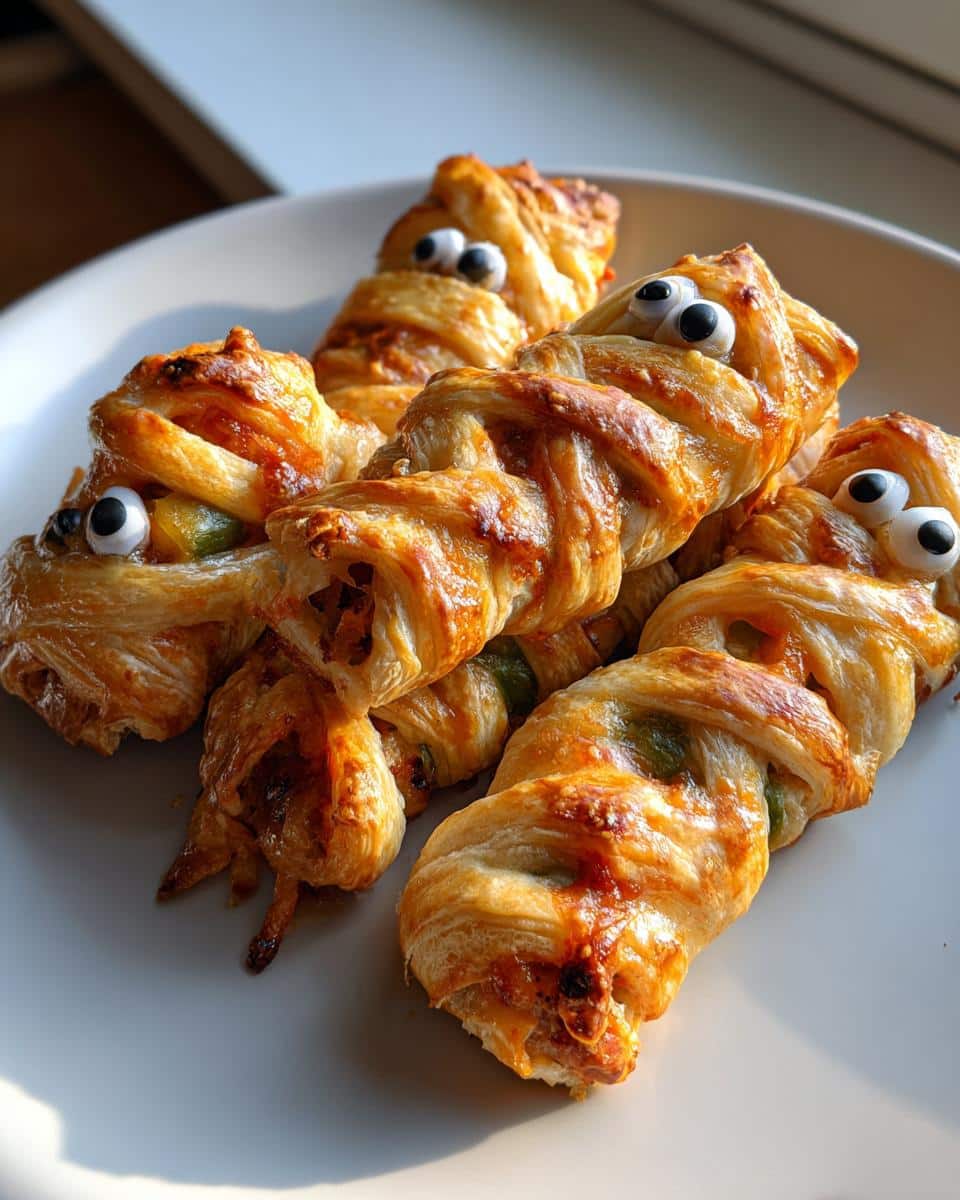
- Black olive slices or edible candy eyes (the eyes make all the difference – I once used capers in a pinch and… well, let’s just stick to olives!)
Pro tip: If your filling is too wet, pat it dry with paper towels – soggy mummies are sad mummies! And don’t skip the egg wash – it’s what gives our little wrapped friends that perfect golden-brown “ancient artifact” look.
Equipment You’ll Need
You probably already have everything you need, but let’s double-check – here’s my trusty toolkit for making perfect mummy-wrapped foods every time:
- Baking sheet (lined with parchment for easy cleanup)
- Rolling pin (or an empty wine bottle in a pinch – we’ve all been there!)
- Pastry brush (for that essential egg wash)
- Sharp knife or pizza cutter (for clean dough strips)
See? Nothing fancy needed – just basic kitchen gear to unleash your inner mummy-wrapping artist!
How to Make Mummy-Wrapped Foods
Okay, let’s get wrapping! I promise this is way easier than it looks – just follow these simple steps, and you’ll have a tray of adorable mummy-wrapped foods that’ll steal the show at any party.
Step 1: Prep the Dough and Filling
First things first – preheat that oven to 375°F (190°C). While it’s heating up, roll out your dough on a lightly floured surface until it’s about ¼-inch thick. Here’s my secret: don’t roll too thin, or your “bandages” might tear! Then grab your sharp knife or pizza cutter and slice the dough into strips about ¼-inch wide – they don’t need to be perfect, uneven edges make them look more authentically mummy-like!
Meanwhile, make sure your filling is ready to go – remember, it needs to be fully cooked already since we’re just warming everything through. I like to cut cheese into small cubes or shred chicken into bite-sized pieces at this stage.
Step 2: Assemble the Mummies
Now for the fun part! Place your filling pieces about 2 inches apart on your prepared baking sheet – this gives them room to puff up without sticking together. Then start crisscrossing those dough strips over each piece, leaving little gaps between “bandages” so you can see the filling peeking through.
Don’t worry about being too neat – the messier, the better! Just make sure all the filling is covered with at least a couple strips. Pro tip: if your dough gets too warm and sticky while working, pop it in the fridge for 5 minutes to firm up.
Step 3: Bake and Decorate
Brush your assembled mummies with that egg wash we prepared earlier – this gives them that perfect golden-brown “ancient artifact” look. Then into the oven they go for 15-20 minutes, until they’re beautifully golden and puffed up.
Here’s where the magic happens: while they’re still warm but not piping hot, gently press in those olive slices or candy eyes. I like to use kitchen tweezers for precision, but toothpicks work too! The heat helps the eyes stick, but adding them post-bake keeps them looking fresh and prevents them from melting.
And voila! You’ve just created the cutest, tastiest mummy-wrapped foods that’ll have everyone at your party oohing and aahing!
Tips for Perfect Mummy-Wrapped Foods
After making countless batches of these little wrapped wonders, I’ve picked up some tricks that really take them to the next level:
- Chill that dough: If your strips start getting sticky, pop them in the fridge for 5-10 minutes. Cold dough is much easier to work with!
- Egg wash is essential: Don’t skip it – that golden shine makes all the difference between “meh” and “wow!”
- Serve warm: These are best fresh from the oven when the cheese is gooey and the pastry is crisp. Reheat leftovers in the oven, not the microwave!
- Get creative with fillings: I love mixing it up – try swapping half the cheese for pepperoni or adding a smear of pesto under the “bandages” for extra flavor.
Trust me, these little tweaks make all the difference between good mummy-wrapped foods and absolutely amazing ones!
Creative Variations
Oh, the fun you can have with these mummy-wrapped foods! Once you’ve mastered the basics, try these tasty twists:
- Pizza party: Swap in pepperoni and mozzarella for mini mummy pizzas (my kids beg for these!)
- Fancy schmancy: Spinach-artichoke dip filling takes these from cute to gourmet real quick
- Vegan vibes: Dairy-free cheese and roasted veggies work perfectly for plant-based pals
- Breakfast batch: Scrambled eggs and cheese wrapped in crescent roll dough – spooky morning magic!
Bonus tip: When I’m in a hurry, I grab crescent roll dough – it’s already pre-cut into triangles that tear perfectly into mummy bandages!
Serving and Storage
These mummy-wrapped foods shine brightest when served fresh from the oven – that’s when the pastry is crispiest and the cheese is gloriously gooey! If you’ve got leftovers (though I rarely do), store them in an airtight container in the fridge for up to 2 days. To revive that just-baked magic, pop them in a 350°F oven for 5-7 minutes – the microwave will make them soggy, and nobody wants a limp mummy!
Nutritional Information
Now, I’ll be honest with you – these mummy-wrapped foods are all about fun and flavor rather than counting calories! The exact nutritional info will totally depend on what fillings you choose and how generously you wrap them up. Going with veggie fillings? Lighter. Packing them with cheese and pepperoni? Well… let’s just say your taste buds will be very happy!
As a general rule, remember that nutritional values are estimates and can vary widely based on the specific ingredients you use. The puff pastry or dough will be the main factor, while your fillings determine the protein and other nutrients. If you’re watching certain dietary needs, you can absolutely tweak the recipe – try whole wheat dough or lean protein fillings to make them a bit lighter.
But hey, some occasions call for pure deliciousness without overthinking it – and that’s exactly what these fun mummy-wrapped foods deliver!
Frequently Asked Questions
Can I make mummy-wrapped foods ahead of time?
Absolutely! Assemble them up to a day in advance and keep them covered in the fridge until ready to bake. Perfect for stress-free party prep – just add 1-2 extra minutes to the bake time if going straight from the fridge.
What fillings work best for mummy-wrapped foods?
My golden rule: anything that won’t leak! Cubed cheese, sliced pepperoni, cooked sausage, or roasted veggies are foolproof. Avoid super wet fillings unless you pat them dry first – soggy mummies are no fun!
Can I freeze these after baking?
You bet! Cool completely, then freeze in a single layer before transferring to a freezer bag. Reheat at 350°F for 10-12 minutes – they’ll taste nearly fresh-baked!
No puff pastry on hand – what can I substitute?
Pizza dough works great, and crescent roll dough is my secret shortcut! Even wonton wrappers can make adorable mini mummies if you’re feeling fancy.
Now it’s your turn! Try this recipe for your next party and share your creepy creations – tag me in your mummy masterpieces!
For more fun recipes and entertaining ideas, check out our Pinterest page!
Print
4 Easy Mummy-Wrapped Foods That Wow Every Halloween Party
- Total Time: 35 minutes
- Yield: 4–6 servings
- Diet: Vegetarian
Description
A creative way to present and preserve food by wrapping it like a mummy, perfect for Halloween or themed parties.
Ingredients
- 1 package of puff pastry or pizza dough
- 1 cup of your favorite filling (e.g., cheese, meat, or vegetables)
- 1 egg (for egg wash)
- Black olives or edible eyes for decoration
Instructions
- Preheat your oven to 375°F (190°C).
- Roll out the dough and cut it into thin strips.
- Place your filling in the center of a baking sheet.
- Wrap the dough strips around the filling to create a mummy effect.
- Brush with egg wash for a golden finish.
- Bake for 15–20 minutes or until golden brown.
- Add olive slices or edible eyes before serving.
Notes
- Use precooked fillings to ensure even baking.
- Experiment with different fillings for variety.
- Serve warm for the best texture.
- Prep Time: 15 minutes
- Cook Time: 20 minutes
- Category: Appetizer
- Method: Baking
- Cuisine: American