Skip to content
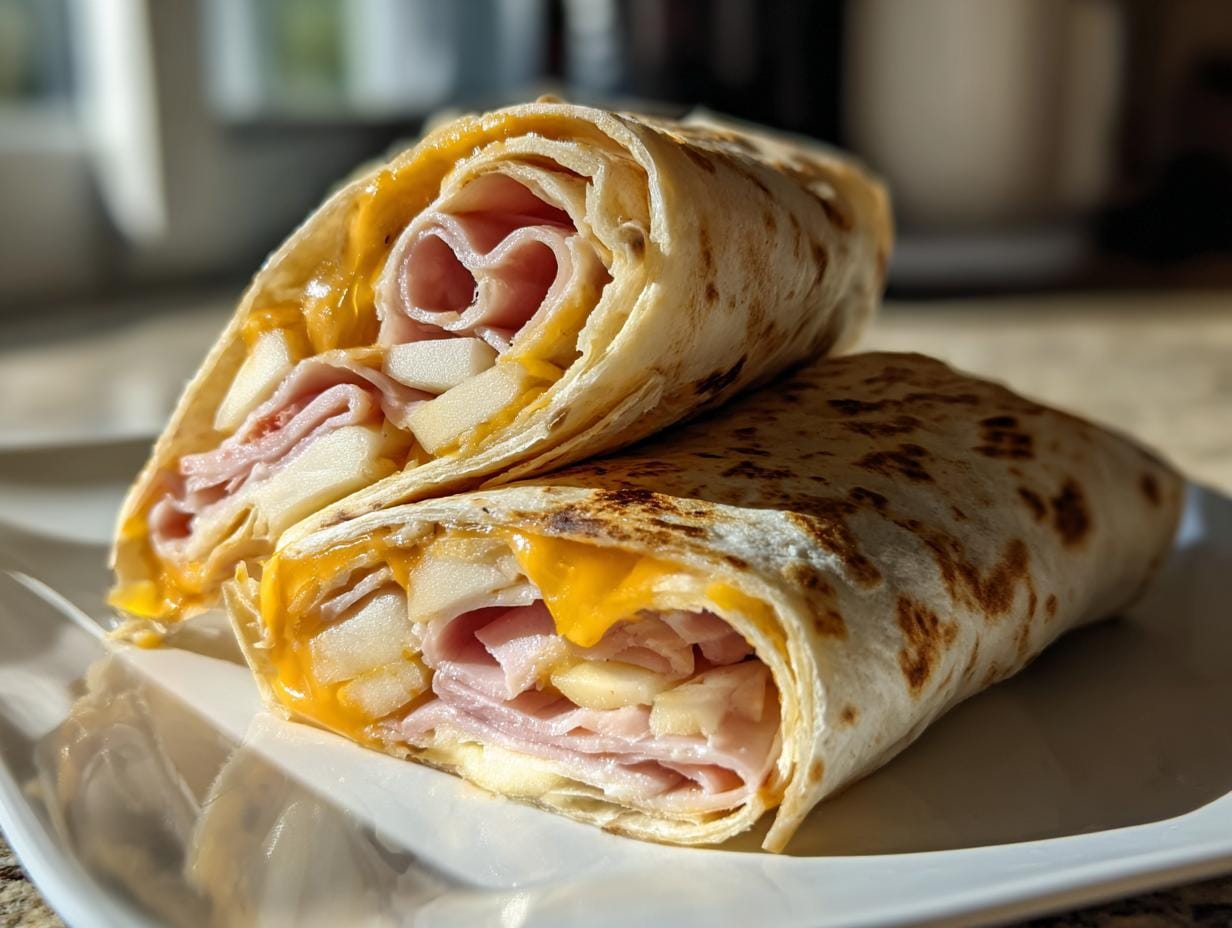
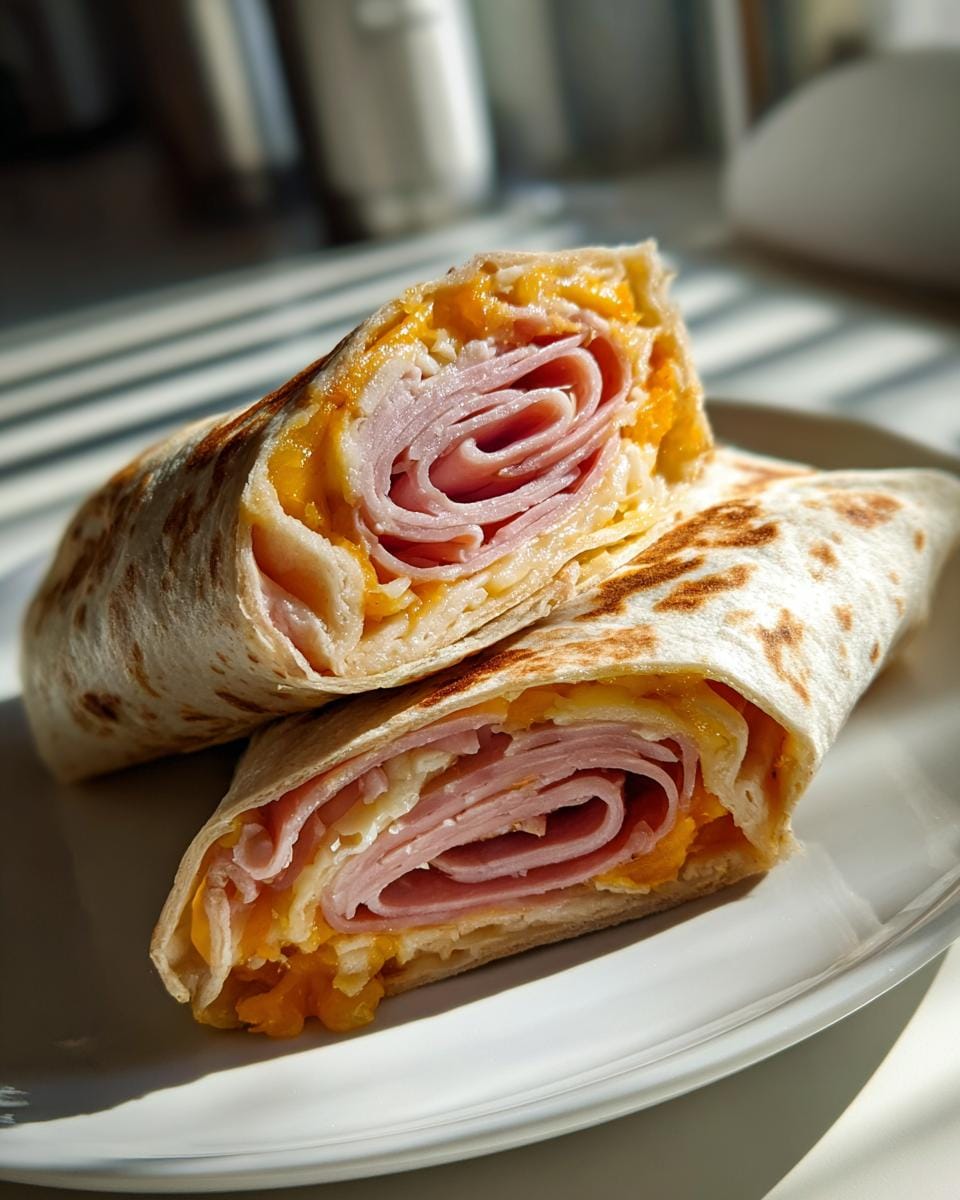
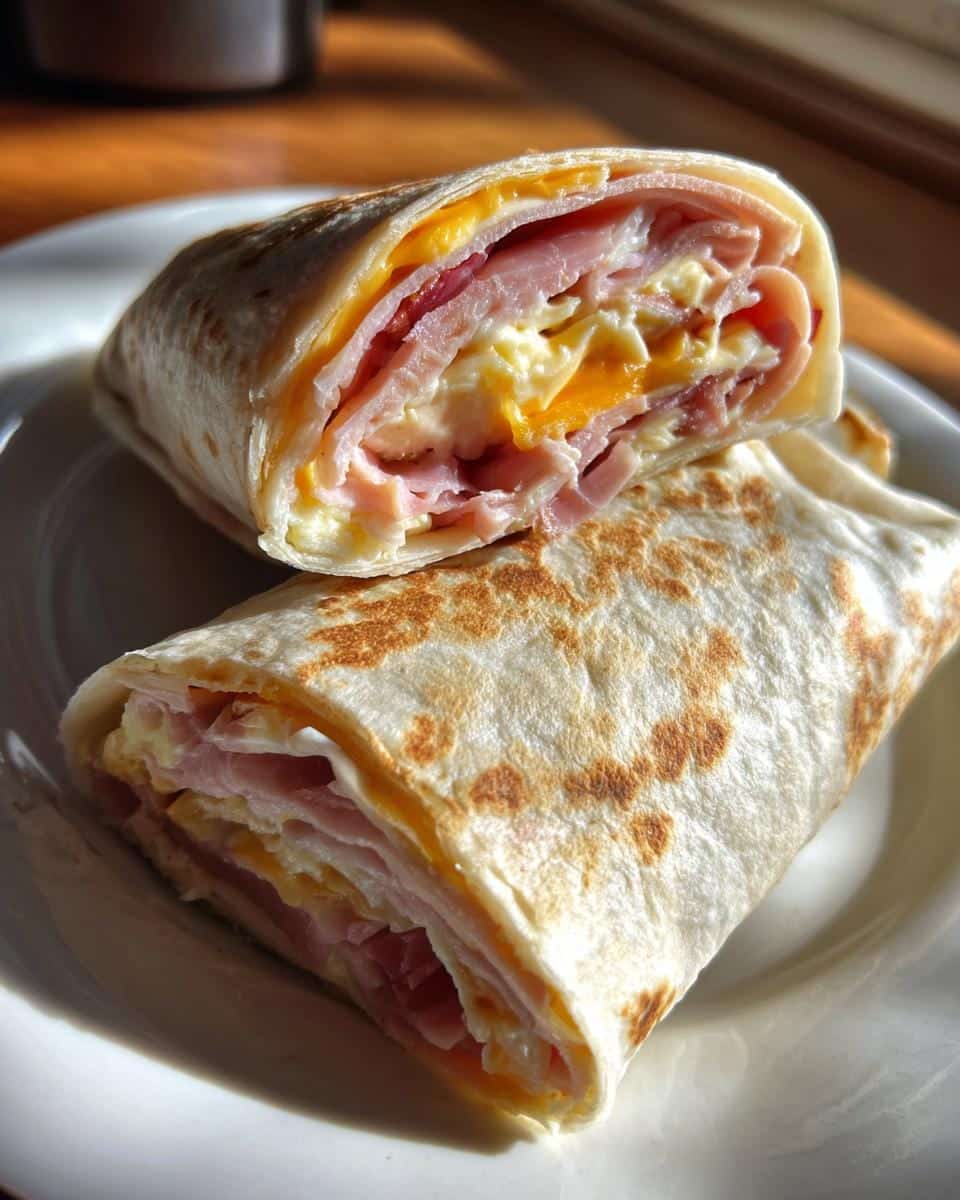
I’ve lost count of how many times these ham, apple & cheese wraps have saved my lunch game—whether I’m rushing out the door or need a no-fuss snack that actually satisfies. The magic? That perfect dance of savory ham, crisp apple, and melty cheddar, all hugged by a soft tortilla. It’s the kind of combo that makes you pause mid-bite and think, “Why aren’t all lunches this easy?” Over years of packing quick meals (three kids will teach you efficiency fast!), I’ve learned that simple ingredients, balanced just right, beat complicated recipes every time. Sweet, salty, and ready in minutes—trust me, this wrap’s a keeper.
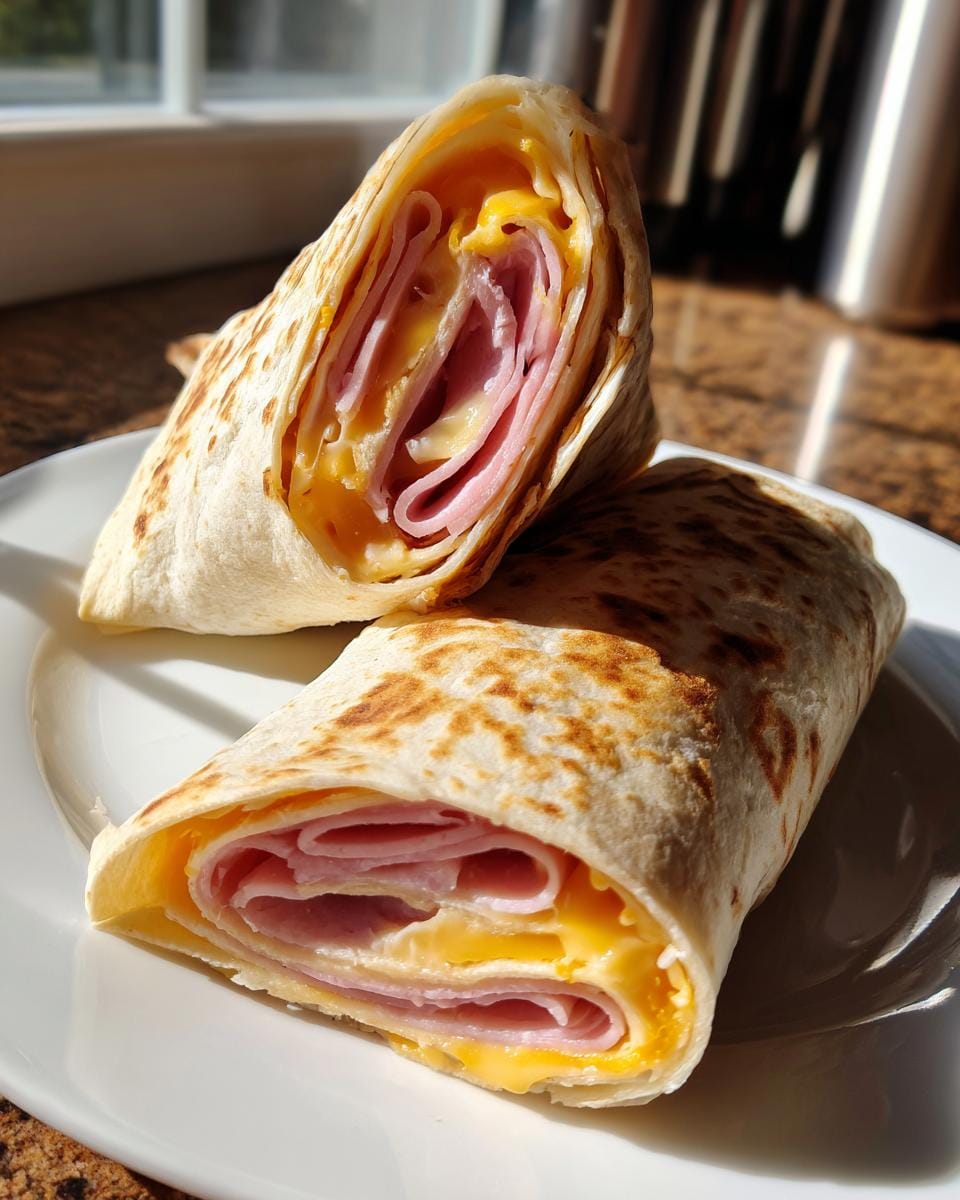
Table of contents:
Ingredients for Ham, Apple & Cheese Wraps
Here’s everything you’ll need to make these irresistible wraps—I promise it’s all super basic, but the combo is pure magic. I’ve tweaked these amounts over dozens of lunchbox packings to get the perfect balance in every bite:
- 4 large flour tortillas (10-inch works best—big enough to hold all the goodness without tearing)
- 8 slices of good-quality ham (I like honey-glazed, but any thinly sliced deli ham works)
- 1 crisp apple, thinly sliced (Granny Smith’s tartness cuts through the richness, but use what you love)
- 4 slices of sharp cheddar cheese (the sharper the better—it stands up to the sweet apple)
- 1 tablespoon mustard (optional, but trust me, Dijon adds a lovely tangy kick)
Pro tip from my lunch-packing fails: If you’re prepping ahead, pat those apple slices dry with a paper towel to keep the tortilla from getting soggy. And don’t skip slicing the apples thin—thick chunks make rolling tricky!
How to Make Ham, Apple & Cheese Wraps
These wraps come together faster than you can say “lunchtime!” but there’s a little technique to getting them perfectly rolled and packed with flavor. Follow these steps and you’ll be wrapping like a pro:
Step 1: Prep Your Tortilla
Lay your tortilla completely flat on a clean counter or cutting board—I can’t stress this enough! Any wrinkles or folds now will make rolling messy later. If your tortillas are stiff, warm them for 10 seconds in the microwave first (just don’t overdo it or they’ll tear).
Step 2: Layer the Fillings
Start with two slices of ham laid slightly overlapping in the center—this creates a sturdy base. Then arrange those pretty apple slices in a single layer (about 5-6 slices per wrap). Top with a cheese slice that you’ve either folded in half or torn to fit. Now’s the time to add that optional mustard if you’re using it—just a thin swipe across the cheese does the trick!
Step 3: Roll Tightly
Here’s where the magic happens: fold about an inch of the sides inward to trap the fillings, then roll away from yourself firmly but gently. I like to tuck as I go—imagine you’re rolling a sleeping bag! The tighter the roll, the less likely fillings will escape when you bite in. If it feels loose, unroll and try again (we’ve all been there).
Why You’ll Love These Wraps
Listen, I don’t blame you if you get addicted to these ham, apple & cheese wraps—they’ve got that magical combo of speed, flavor, and convenience that makes them a total lunchbox hero. Here’s why they’ve become my go-to for crazy days:
- Ready in 5 minutes – No cooking, no fuss. I’ve literally made these while half-asleep when the kids were yelling for lunch. That’s my kind of recipe.
- Perfect sweet-savory combo – The salty ham and sharp cheddar play off the crisp apple so well, it’s like they were made for each other. Every bite keeps your taste buds guessing!
- Kid-friendly and portable – These wraps survive backpacks, picnic baskets, and car rides like champs. My picky eaters don’t even realize they’re eating fruit—shhh!
Seriously, once you taste that salty-sweet crunch wrapped up in soft tortilla goodness, you’ll wonder how you ever settled for boring sandwiches. And hey, if you’re anything like me, you’ll start stashing extra apples in your bag just to make these on the fly!
Ingredient Substitutions & Tips
Look, I get it—sometimes you gotta work with what’s in the fridge, or your kid suddenly decides they hate cheddar (classic). Here are my tried-and-true swaps that keep these wraps delicious without a last-minute grocery run:
- Turkey lovers? Swap the ham for smoked turkey—it adds a nice depth. Rotisserie chicken works too in a pinch!
- Cheese haters? (Okay, weird, but I’ve seen it happen.) Gouda melts like a dream, or try Swiss for a milder flavor. Vegan? A smear of hummus adds creaminess.
- Not a mustard fan? Honey or even a thin layer of apple butter makes a killer sweet alternative. My aunt swears by mixing mayo with a dash of cinnamon—sounds wild, but try it!
Pro tip: Avoid super juicy apples like Red Delicious—they’ll turn your wrap into a sad, soggy mess. If that’s all you’ve got, toss the slices with a tiny bit of lemon juice and pat them dry first. And if you’re packing these ahead? Keep the apple slices separate and assemble at lunchtime—crispness guaranteed!
One last thing: if your tortillas keep cracking when rolling, they’re too dry. A quick 5-second zap in the microwave with a damp paper towel over them makes them so much more pliable. You’re welcome!
Serving Suggestions
These ham, apple & cheese wraps are total showstoppers all on their own, but if you’re looking to turn lunch into something special, I’ve got some foolproof pairings that’ll have everyone asking for seconds. My kids go nuts when I serve these with:
- Crunchy sides: A handful of dill pickles or crisp carrot sticks balances the wrap’s soft texture perfectly. Sometimes I’ll even sneak in some cucumber ribbons—they look fancy but take 30 seconds to make with a veggie peeler!
- Simple salads: A lemony kale salad or classic coleslaw adds freshness without overpowering the wraps. Pro tip: Dress the salad lightly so it doesn’t make the tortilla soggy if they touch.
- Fun presentation: Cutting the wraps diagonally not only looks gorgeous on a plate, it makes them easier for little hands to hold. I arrange them like little pinwheels—instant lunchbox wow-factor!
For parties? Stack these wraps whole on a wooden board with small bowls of extra mustard and apple slices for dipping. Trust me, they disappear faster than you can say “more please!” And if you’re packing them to-go, tuck a grape tomato or two in the container—they’re like edible confetti that keeps the meal colorful.
Storage & Reheating
Here’s the thing about these wraps – they’re absolute perfection when freshly made, but life happens! If you need to stash them away (hey, meal prep warriors, I see you), here’s how to keep them tasting great:
Short-term storage: Wrap each one tightly in foil or wax paper – the foil helps prevent the tortilla from drying out. They’ll stay yummy at room temp for about 4 hours (great for school lunches!) or in the fridge for up to 24 hours. Just know the tortilla will soften a bit from the apple’s moisture – still delicious, just not as crisp.
Reheating tip: If you want to warm them up, always remove the foil first (safety first, friends!) and microwave for just 10-15 seconds. Any longer and you’ll have a rubbery mess. Better yet? Unwrap and crisp them in a dry skillet over medium heat for a minute per side – that brings back that fresh-made magic!
What NOT to do:
- Don’t freeze them – the apples turn weirdly soggy when thawed
- Don’t leave them wrapped in plastic – they’ll get sweaty and sad
- Don’t pack with super wet ingredients (looking at you, juicy tomatoes) unless you’re eating immediately
My weekday hack? Prep all the components separately – sliced apples in a baggie with a paper towel, cheese and ham stacked in containers. Then assemble at work or school. Takes 30 seconds and you get that perfect fresh-wrap experience every time!
Ham, Apple & Cheese Wraps FAQs
I get asked about these wraps all the time – here are the most common questions that pop up, along with my real-world tested answers:
Can I make these wraps ahead of time?
Yes, but with a little strategy! They’re absolutely best fresh, but if you need to prep ahead, wrap them tightly in foil and store in the fridge for up to 24 hours. The tortilla softens slightly, but the flavors actually meld together nicely. Just avoid adding mustard until right before eating – it can make the tortilla soggy over time.
Will gluten-free tortillas work for this recipe?
Absolutely! I’ve made these with both corn and almond flour tortillas for gluten-free friends, and they work great. The key is warming them slightly first (about 5 seconds in the microwave) so they don’t crack when rolling. Bonus: gluten-free versions often hold up better against moisture from the apples too! For more gluten-free options, check out our gluten-free recipes.
What type of apple works best in these wraps?
You want something crisp that won’t turn mushy – Granny Smith is my gold standard for its perfect tart-sweet balance and sturdy texture. Fuji and Honeycrisp are great too. Avoid mealy apples like Red Delicious – they’ll make your wrap soggy faster than you can say “lunchtime disaster!” Pro tip: if your apples are extra juicy, blot the slices with a paper towel before assembling.
Nutritional Information
Okay, let’s talk numbers—but keep in mind these ham, apple & cheese wraps are way more than just stats on a page! Here’s the nutritional breakdown per wrap based on my standard recipe (and yes, I’ve done the math so you don’t have to):
- Calories: 320
- Protein: 18g (that’s about as much as 3 eggs!)
- Carbohydrates: 35g
- Sugar: 8g (mostly from the natural apple goodness)
- Fiber: 3g
- Fat: 12g
Important note: These values are estimates based on typical ingredients—your exact nutrition will vary depending on your specific brands and any optional add-ins you choose. That tablespoon of mustard? Adds about 5 calories. Swapping cheddar for Swiss? Changes the fat content slightly. The beauty of cooking at home means you control what goes in!
What I love about these numbers? They show this isn’t just empty snack calories—you’re getting solid protein from the ham and cheese, fiber from the apple and tortilla, and enough staying power to keep you full till dinner. Plus, unlike store-bought wraps loaded with preservatives, you know exactly what’s fueling your body here. Now that’s what I call smart eating! For more healthy meal ideas, explore our recipes.
Try This Recipe and Share Your Twist in the Comments
Alright, lunchtime heroes—now it’s your turn! Whip up these ham, apple & cheese wraps and make them your own. Maybe you’ll add a sprinkle of crushed walnuts for crunch, or swap in smoked turkey for a different twist. Whatever you do, I want to hear about it! Drop your clever variations (or hilarious lunch-packing fails—we’ve all been there) in the comments below. Your idea might just become someone else’s new go-to meal!

Irresistible 4-Ingredient Ham, Apple & Cheese Wraps Your Kids Will Devour
- Total Time: 5 minutes
- Yield: 4 wraps
- Diet: Low Lactose
Description
A quick and tasty wrap combining ham, apple, and cheese for a balanced meal.
Ingredients
- 4 tortilla wraps
- 8 slices of ham
- 1 apple, thinly sliced
- 4 slices of cheddar cheese
- 1 tbsp mustard (optional)
Instructions
- Lay out a tortilla wrap on a flat surface.
- Place 2 slices of ham on the wrap.
- Add apple slices and a slice of cheese on top.
- Spread mustard if desired.
- Roll the wrap tightly and cut in half.
- Repeat for remaining wraps.
Notes
- Use any preferred cheese variety.
- Add greens like spinach for extra nutrition.
- Prep Time: 5 minutes
- Cook Time: 0 minutes
- Category: Lunch
- Method: No-Cook
- Cuisine: American