Skip to content
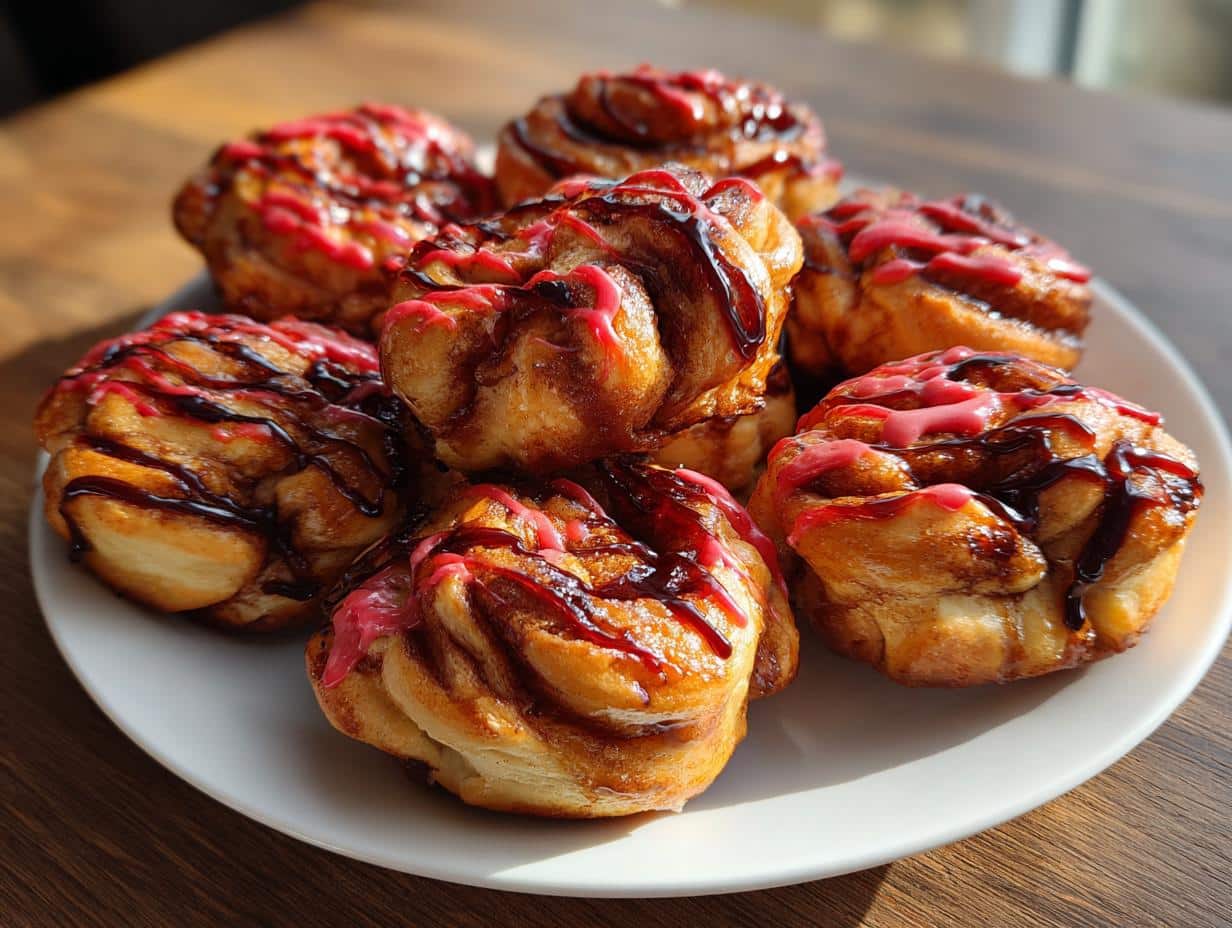
Okay, confession time—I used to be that person who spent HOURS making elaborate Halloween treats until I discovered these ridiculously easy cinnamon roll brains. Now? Total game-changer. With just a can of refrigerated dough and some red frosting, you can whip up the creepiest (and tastiest) breakfast or dessert in under 30 minutes.
My kids go nuts for them every year—last Halloween, they even “operated” on the rolls with plastic knives before devouring them. The best part? No fancy skills needed. Just twist, bake, and drizzle for instant spooky magic. Trust me, these easy Halloween cinnamon roll brains will steal the show at any party or just make a Tuesday morning way more fun.
Table of contents:
Why You’ll Love These Easy Halloween Cinnamon Roll Brains
Listen, these cinnamon roll brains aren’t just tasty—they’re practically magic. Here’s why they’re my go-to Halloween treat:
- Super fast: From fridge to plate in under 30 minutes (perfect for last-minute party panic!)
- Kid-approved: My little monsters beg me to make these every October (and they love helping with the “brain surgery”)
- Minimal mess: Just one bowl, one baking sheet, and way less cleanup than carving pumpkins
- Spooky but sweet: Scary enough for Halloween but still that classic cinnamon roll comfort we all crave
- No baking degree needed: If you can twist a phone cord, you can make these brainy beauties
Seriously, they’re the easiest way to add instant Halloween fun to your table. BOO-tiful and delicious!
Ingredients for Easy Halloween Cinnamon Roll Brains
Alright, let’s talk ingredients—and yes, I promise this list is shorter than a ghost’s attention span! Here’s everything you’ll need to create these wickedly simple cinnamon roll brains:
- 1 can (8 oz) refrigerated cinnamon roll dough – The shortcut queen! Look for the kind that comes with icing—we’ll repurpose that later. (*Pro tip: Store brand works just as well as name brand here!)
- 1/4 cup red frosting – For the glorious “blood” drizzle. Use premade or mix powdered sugar with red food coloring until it’s pourable but not runny.
- 1 tbsp black food coloring gel (optional) – My secret weapon for adding creepy vein details. Gel works better than liquid—it won’t make your frosting watery.
That’s seriously it! I told you this was easy. Now, if you’re feeling fancy, you could grab some edible eyeball sprinkles to plop on top… but honestly? The brains look terrifyingly awesome all on their own.
Equipment You’ll Need
Before we start our deliciously creepy baking adventure, let’s round up our tools – and I promise, your kitchen probably has everything already!
- Baking sheet – No need for fancy pans, that trusty old sheet pan works perfectly
- Parchment paper (optional) – My lazy cleanup secret to prevent sticky “brain matter”
- Small bowl – For mixing up our bloody frosting masterpiece
- Oven – Obviously! Just set it and forget it
- Plastic knife or toothpick – For those optional but oh-so-fun vein details
See? Told you it was simple. Now let’s get spooky!
How to Make Easy Halloween Cinnamon Roll Brains
Alright, let’s turn that innocent can of dough into something gloriously creepy! I promise this is easier than trying to keep a straight face during a horror movie. Here’s the step-by-step magic:
Shaping the Brain Design
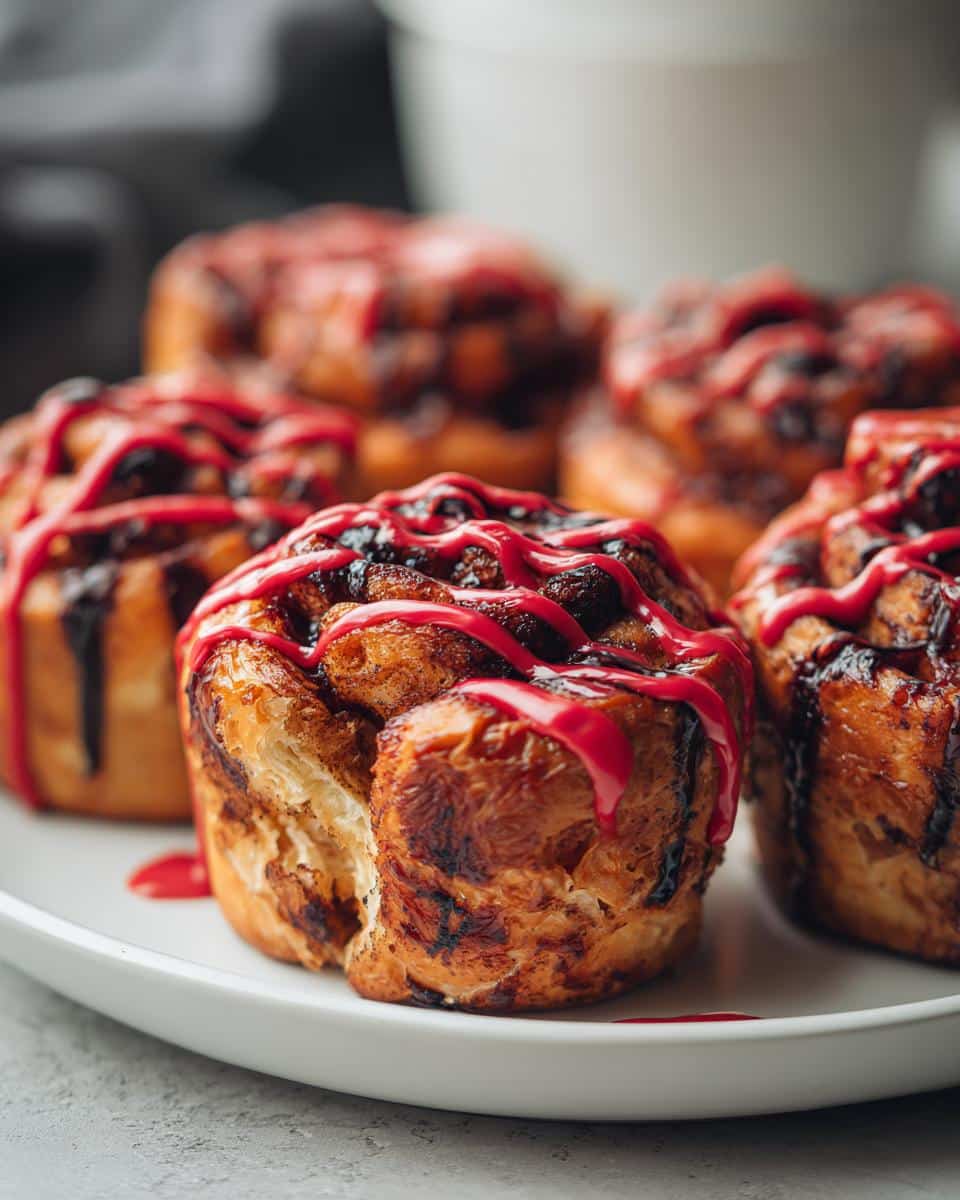
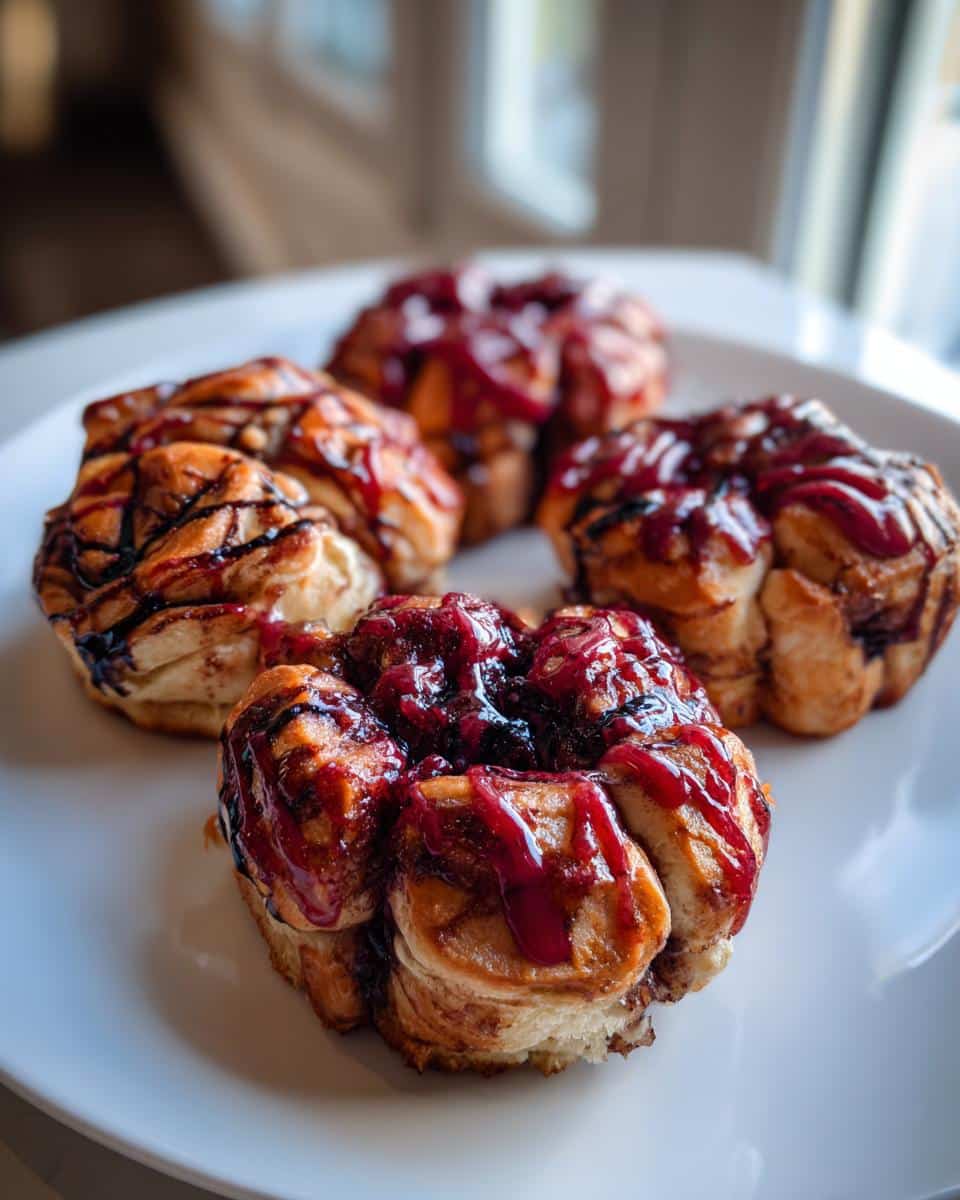
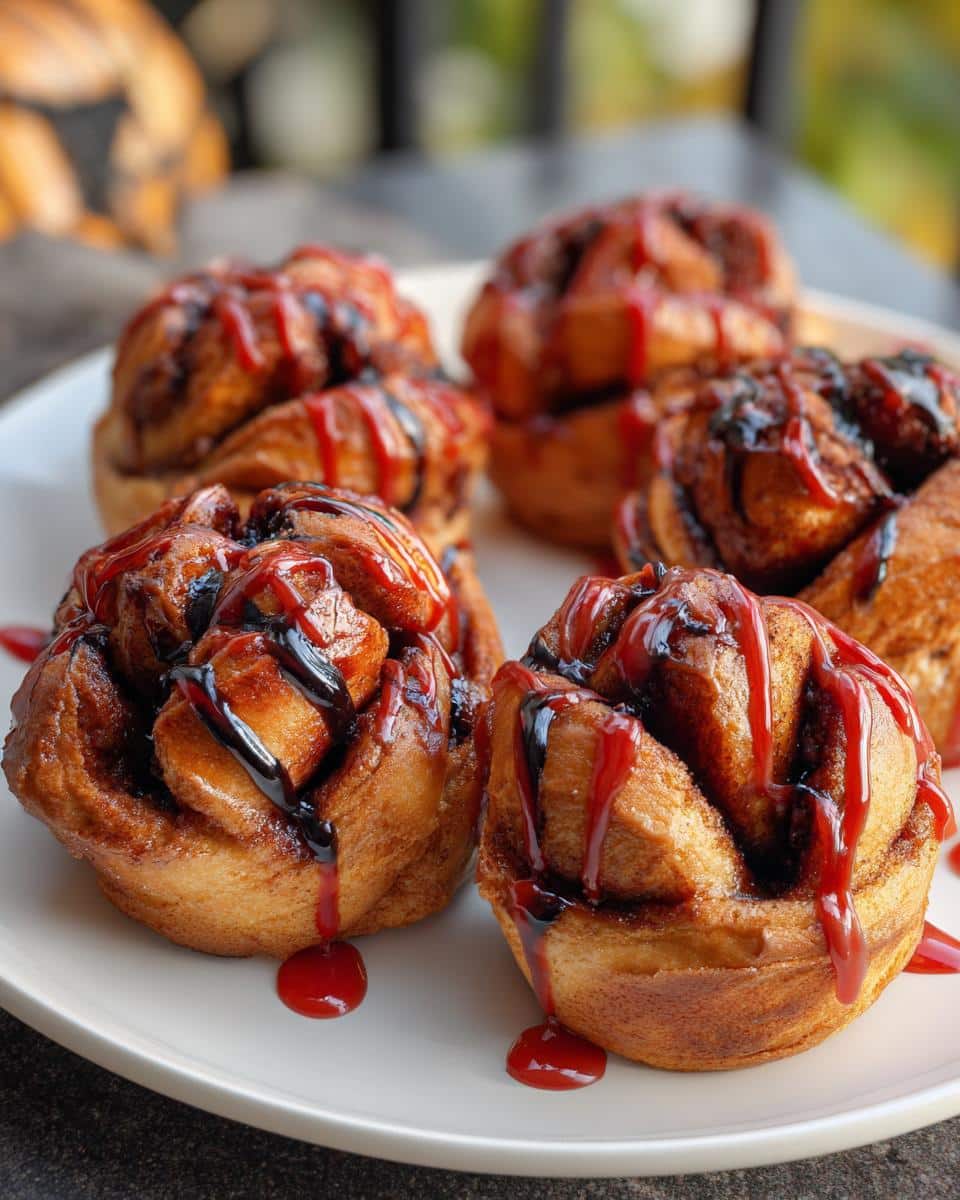
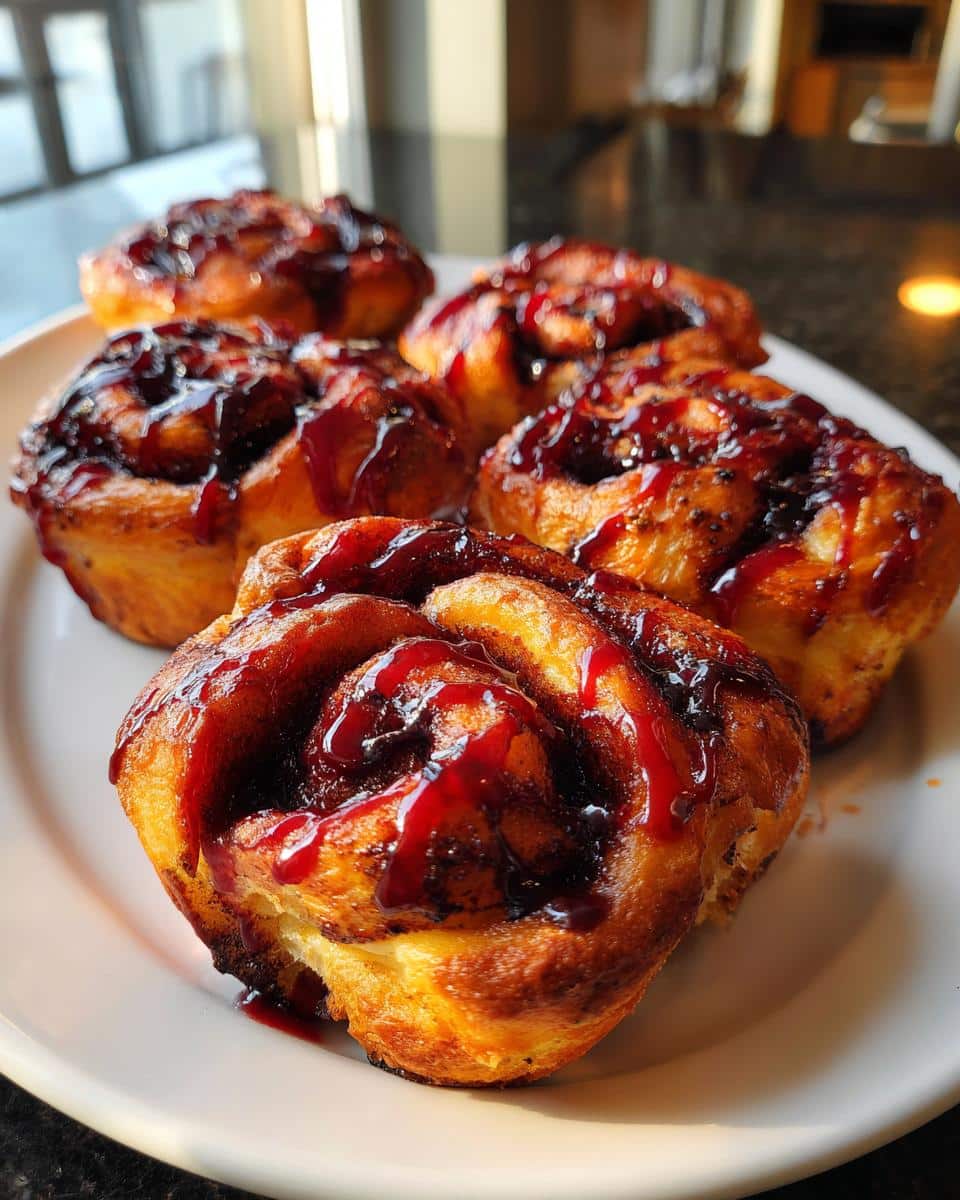
First, pop open that cinnamon roll can (the scariest part is that *whoosh* sound—gets me every time!). Unroll each cinnamon roll into a long strip—don’t worry if it’s not perfect, brains are lumpy by nature! Now the fun part: twist each strip into squiggly “S” shapes, then coil them into brain-like mounds on your baking sheet. Overlap some sections and leave gaps to create those signature brain folds. Pro tip: If your dough tears, just pinch it back together—it’ll bake up fine and add to the creepy texture!
Baking and Decorating
Slide your brainy creations into a 375°F oven for 10-12 minutes. You’ll know they’re done when they turn golden and smell like cinnamon heaven. Now the dramatic part—let them cool for just 5 minutes (any longer and the frosting won’t ooze properly!). Drizzle that red frosting like you’re creating a horror movie scene—zigzag it between the folds for maximum gore effect. Want extra creep factor? Use a toothpick dipped in black gel to draw wiggly “veins” between the frosting lines. Stand back and admire your deliciously terrifying masterpiece!
Tips for Perfect Easy Halloween Cinnamon Roll Brains
After making these creepy cinnamon roll brains more times than I can count (and yes, sometimes with zombie-like morning brain fog), here are my absolute can’t-live-without tips:
- Frosting too thick? Add milk 1/2 tsp at a time until it drizzles like fresh “blood”
- Dough too sticky? Dust your fingers with flour—it helps shape those brain folds without frustration
- Watch the clock! Overbaked brains lose their squishy texture—pull them at 10 minutes and check
- Vein hack: Use a clean paintbrush dipped in black gel for super fine details
- Serving trick: Warm plates make the frosting ooze dramatically (kids LOVE this!)
Remember—imperfections just make them look more authentically brain-like. Now go scare up some delicious fun!
Ingredient Substitutions
Ran out of something? No problem—here’s how to adapt:
- No canned dough? Use homemade cinnamon roll dough (just roll it out thin before twisting)
- Out of red frosting? Mix powdered sugar with strawberry jam or melted red candy melts
- No food gel? Melt chocolate chips and pipe thin “veins” instead—equally creepy!
See? Halloween baking disasters aren’t scary when you’ve got backup plans!
Serving Suggestions
Oh, the dramatic reveal is half the fun with these creepy cinnamon roll brains! Here’s how I love to serve them for maximum Halloween impact:
- Breakfast of champions: Pair with a steaming mug of “witch’s brew” (hot chocolate with green food coloring and marshmallow eyeballs)
- Dessert table star: Surround them with gummy worms and Oreo “dirt” for a mad scientist lab setup
- Spooky brunch: Serve alongside scrambled “eggs” (vanilla pudding) with plastic spiders crawling out
- Midnight snack: Just hand ’em out on napkins—they’re scary good all by their lonesome!
My personal favorite? Placing them on a vintage medical tray with plastic tongs. The kids go wild pretending to be mad scientists at breakfast!
Storage and Reheating
Okay, let’s be real—these cinnamon roll brains rarely last long enough to store! But if you’ve got leftovers (miraculously), here’s the scoop: Store them in an airtight container at room temp for up to 2 days. To revive that just-baked magic, pop them in the microwave for 10-15 seconds—just enough to make the frosting ooze again like fresh “brain matter.” If they last until day 3 (doubtful!), they make amazing bread pudding—turns out brains are versatile!
Nutritional Information
Okay, let’s be real—we’re not eating cinnamon roll brains for their health benefits! But for those curious (or watching their “daily zombie intake”), here’s the scoop on what’s in these tasty little horrors. Important: These values are just estimates and can vary depending on your specific ingredients—especially between different brands of dough and frosting.
Per brain (that sounds so wrong but so right):
- Calories: Around 180-200 (mostly from that glorious cinnamon sugar swirl!)
- Sugar: 12-15g (because what’s a brain without its sweet thoughts?)
- Fat: 6g (makes those brain folds extra tender)
Honestly? Worth every bite. These are Halloween treats, people—save the guilt for January!
Frequently Asked Questions
I’ve gotten SO many questions about these cinnamon roll brains over the years—here are the ones that pop up most often (along with my slightly chaotic but always honest answers!):
Can I use homemade dough instead of canned?
Absolutely! My grandma’s cinnamon roll recipe works beautifully—just roll it out thinner than usual before twisting into brain shapes. Bonus: homemade dough lets you add extra cinnamon for more “vein” definition. But no shame in the canned dough game—I use it 90% of the time because, well, laziness wins!
Help! My frosting looks pink instead of bloody red!
Oh honey, we’ve all been there. Here’s my secret: mix in a drop of brown food coloring with your red—it deepens the color instantly without making it look like Pepto-Bismol. Gel colors work better than liquid for intense shades. In a pinch? A smidge of cocoa powder works too!
Can I make these ahead of time?
You bet! Bake the brains the night before, then store them uncovered at room temp (so the frosting doesn’t get soggy). Right before serving, zap them for 10 seconds in the microwave to get that fresh-baked ooze effect. The black “veins” are best added right before serving though—they can bleed if done too early.
Are these too scary for little kids?
From experience? Nope! My preschooler calls them “silly spaghetti brains” and devours them happily. If you’re worried, skip the black veins or serve with cute Halloween napkins to lighten the mood. The giggles when they “operate” on the rolls with plastic knives are totally worth it!
Can I freeze the unbaked dough brains?
Ooh, smart thinking! Yes—shape them first, freeze on a tray until solid (about 2 hours), then bag them up. When Halloween morning hits, bake straight from frozen adding 3-5 extra minutes. The frosting should still be added fresh though—frozen frosting gets weirdly grainy.
Share Your Spooky Creations
Okay, I NEED to see your creepy cinnamon roll masterpieces! There’s nothing I love more than scrolling through photos of all the wonderfully weird brainy creations you guys come up with. Seriously—your creative twists always blow my mind (pun totally intended).
Snap a pic of your “operated” breakfast brains, your mad scientist lab setup, or that time your dog photobombed your Halloween brunch (true story—my golden retriever once stole an entire brain roll mid-photo shoot). Tag me @ScaryGoodBaker and use #BrainsForBrunch so I can feature your spooky genius! You can find more fun ideas on Pinterest.
Bonus: Every Halloween, I pick my favorite to reshare—last year’s winner added gummy worms crawling out of the “brain” folds. Pure nightmare fuel (the delicious kind)! Now go forth and bake terrifyingly tasty memories!

“7 Spooky Easy Halloween Cinnamon Roll Brains Kids Adore”
- Total Time: 22 mins
- Yield: 8 rolls
- Diet: Vegetarian
Description
Easy-to-make cinnamon rolls shaped like brains for a fun Halloween treat.
Ingredients
- 1 can (8 oz) refrigerated cinnamon roll dough
- 1/4 cup red frosting
- 1 tbsp black food coloring (optional for veins)
Instructions
- Preheat oven to 375°F (190°C).
- Unroll the cinnamon roll dough and separate into strips.
- Twist and shape the strips to resemble brain-like folds.
- Place on a baking sheet and bake for 10-12 minutes or until golden.
- Let cool slightly, then drizzle with red frosting.
- Use black food coloring to add vein details if desired.
Notes
- Use store-bought dough for convenience.
- Adjust frosting thickness for a blood-like effect.
- Serve warm for the best texture.
- Prep Time: 10 mins
- Cook Time: 12 mins
- Category: Dessert
- Method: Baking
- Cuisine: American