Skip to content
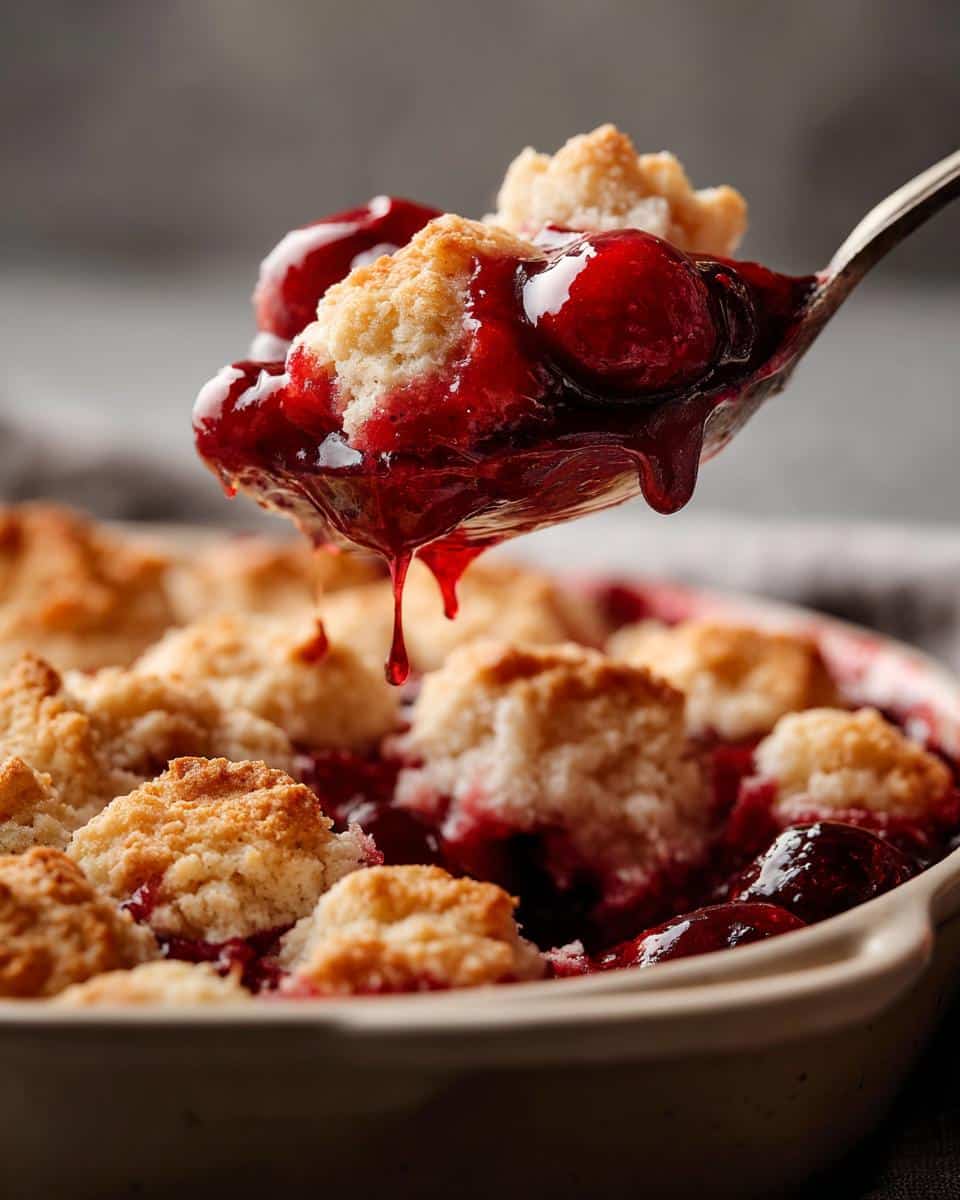
Nothing says summer like the smell of cherry cobbler bubbling away in the oven. It’s one of those desserts that feels like home—simple, comforting, and packed with juicy, sweet-tart cherries under a golden biscuit topping. I still remember my grandma pulling hers out of the oven, the fruit juices bubbling up around the edges, the whole kitchen smelling like pure happiness. We’d hardly let it cool before diving in, scooping warm spoonfuls onto plates with melting vanilla ice cream.
This cherry cobbler recipe is my go-to when I want that same nostalgic magic without fuss. It’s forgiving (no fancy pie crust skills required!) and adaptable—I’ve made it with everything from backyard cherries to frozen fruit in a pinch. The best part? That buttery topping soaks up just enough cherry syrup while staying perfectly crisp on top. Whether it’s for a weeknight treat or the star of your next potluck, this cobbler never lasts long at my table.
Why You’ll Love This Cherry Cobbler
This isn’t just any cobbler—it’s the kind of dessert that’ll have people begging for seconds (and the recipe). Here’s why it’s my forever favorite:
- Effortless magic: No rolling pins or pastry skills needed—just dump, stir, and bake. Even my 10-year-old nephew can make it!
- Berry flexible: Out of cherries? I’ve swapped in peaches, blueberries, even mixed berries when my orchard haul ran low.
- Crowd-pleaser: That crispy-but-tender biscuit topping? It’s basically edible happiness. Serve it warm with melting ice cream and watch faces light up.
- Nostalgia in a dish: One bite transports me right back to Grandma’s kitchen every single time.
Cherry Cobbler Ingredients
Gathering the right ingredients is half the battle with cobbler – but don’t worry, this list is as simple as the recipe itself. Here’s what you’ll need to create that perfect balance of juicy cherries and buttery topping:
- 4 cups cherries, pitted – Fresh is ideal when they’re in season (I wait all year for those dark, plump Bing cherries!), but frozen work great too – just don’t thaw them first or you’ll get a soupy mess.
- 1 cup granulated sugar (divided) – We’ll split this between the fruit and the topping. Pro tip: If your cherries are super sweet, you can knock this back to ¾ cup.
- 1 tablespoon cornstarch – Our secret weapon against runny cobbler! It thickens those gorgeous cherry juices just right.
- 1 teaspoon vanilla extract – The good stuff, please! It amplifies the cherry flavor beautifully.
- 1 cup all-purpose flour – No need to sift, just fluff it with a fork before measuring.
- 1½ teaspoons baking powder – Make sure yours is fresh – it should fizz when you sprinkle some in water.
- ½ teaspoon salt – Trust me, this tiny amount makes all the flavors pop.
- ½ cup milk – Whole milk gives the richest topping, but I’ve used 2% in a pinch.
- ¼ cup unsalted butter, melted – I microwave it in the mixing bowl to save dishes. Watch it closely – burnt butter is no one’s friend!
See? Nothing fancy, just honest ingredients that work magic together. Now let’s get mixing!
How to Make Cherry Cobbler
Alright, let’s get this beauty in the oven! I promise it’s easier than you think – just follow these simple steps and you’ll have that dreamy cobbler scent filling your kitchen in no time.
Prepare the Cherry Filling
First things first: preheat that oven to 375°F (190°C). While it’s heating up, grab your cherries and toss them in a big bowl with ½ cup of the sugar, the cornstarch, and vanilla. Here’s my trick: whisk the cornstarch and sugar together before adding to the cherries – it prevents those pesky little white clumps. Mix until every cherry is coated in that sweet, glossy syrup. Pour this gorgeousness into your baking dish – I use a 9-inch round or an 8×8 square, but honestly, anything ovenproof works!
Make the Biscuit Topping
Now for the magic blanket that’ll cover those cherries! In another bowl (or heck, just wipe out the cherry bowl), whisk together the flour, remaining ½ cup sugar, baking powder, and salt. Here’s where you need to be gentle – pour in the milk and melted butter and stir just until the batter comes together. A few lumps? Perfect! Overmixing makes tough biscuits, and we want clouds, not hockey pucks. The batter should be thick but pourable – like pancake batter’s slightly denser cousin.
Assemble and Bake
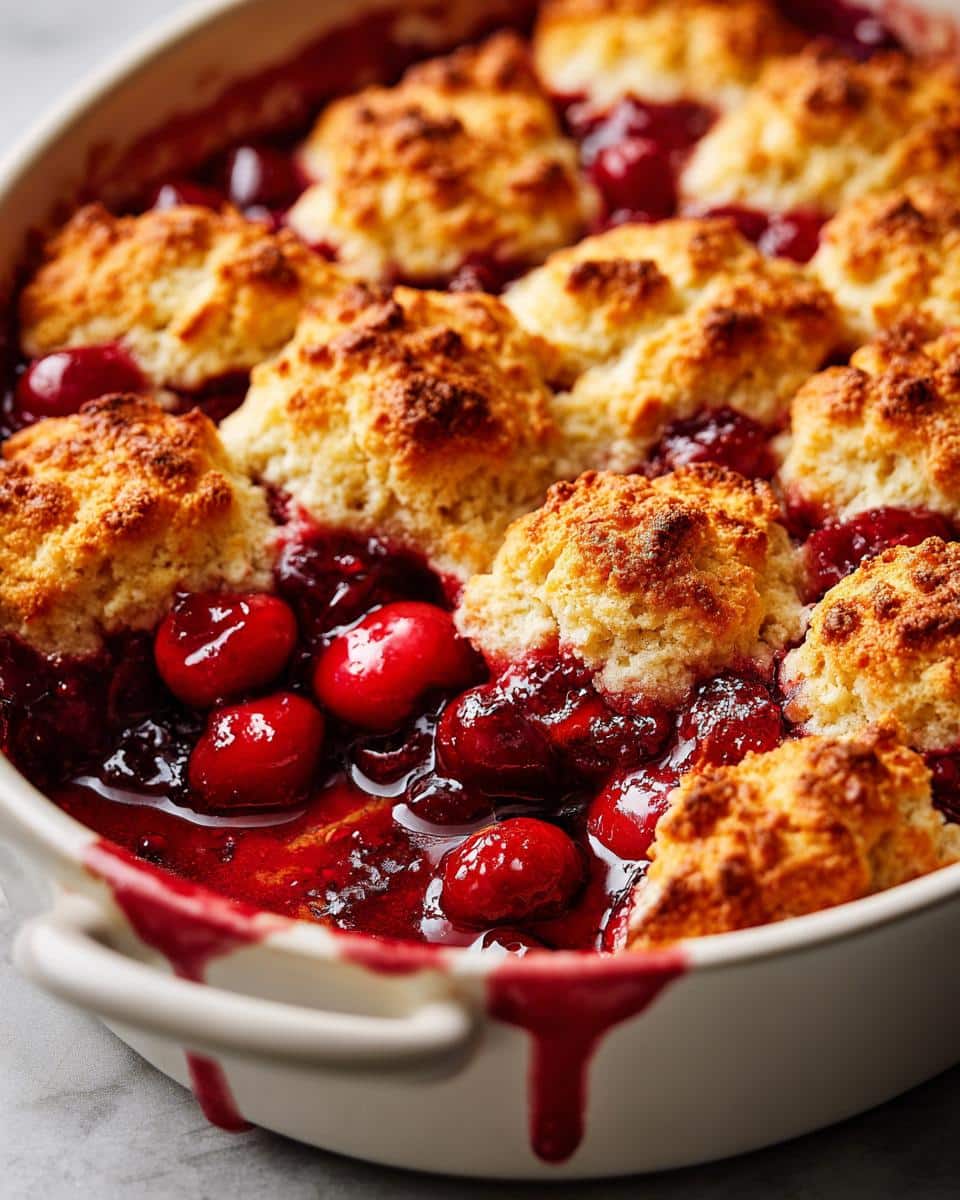
Time to bring it all together! Drop spoonfuls of that dreamy batter right over your cherry filling – don’t stress about covering every millimeter. Those little gaps let the cherry juices bubble up in the most gorgeous way. Pop it in the oven for 35-40 minutes. You’ll know it’s done when the topping is golden brown (like a perfect sugar cookie) and the cherries are bubbling like crazy around the edges. Pro tip: If the top’s browning too fast, just lay a piece of foil loosely over it. Let it cool for at least 10 minutes – I know it’s hard, but those molten cherry juices need to thicken up!
Tips for the Best Cherry Cobbler
Want to take your cobbler from good to wow? Here are my foolproof tips:
- Sweetness check: Taste your cherries! If they’re tart, bump up the sugar by ¼ cup. For super sweet ones, you can cut back a bit.
- Flavor boost: Add ½ teaspoon almond extract to the filling—it makes the cherries taste even more cherry-like. Trust me on this!
- Prevent sogginess: If using frozen cherries, toss them straight into the mix—don’t thaw them first. They’ll hold their shape better.
- Perfect topping: For extra crunch, sprinkle a little coarse sugar over the batter before baking. It’s like a little sparkle of magic!
Cherry Cobbler Variations
One of the best things about cobbler is how easily you can mix it up. Honestly, I’ve made so many versions of this recipe, I’ve lost count! Here are my favorite twists to keep things exciting:
- Berry Bliss: Swap in a mix of blueberries, raspberries, and blackberries for a colorful summer cobbler. The tartness of the berries pairs beautifully with the sweet topping.
- Peach Perfection: When peaches are in season, I can’t resist using them. Just peel and slice them, and use the same sugar and cornstarch ratio. Add a pinch of cinnamon for extra warmth.
- Spiced Cherry: Add ½ teaspoon of cinnamon and a pinch of nutmeg to the cherry filling. It gives the cobbler a cozy, almost holiday-like vibe.
- Chocolate Cherry: For a decadent twist, sprinkle ½ cup of dark chocolate chips over the cherry filling before adding the batter. It’s like a cherry chocolate dream in every bite!
Honestly, the possibilities are endless—just let your pantry (and your mood!) guide you. What’s your favorite variation? I’m always looking for new ideas to try! Check out more recipes here!
Serving Suggestions
Oh, serving cherry cobbler is where the real fun begins! Here’s how I turn this simple dessert into pure magic:
Temperature matters: Let it cool just long enough so you don’t burn your tongue—about 10-15 minutes. That wait lets the juices thicken slightly but keeps it gloriously warm. I like to serve generous spoonfuls straight from the baking dish—those rustic edges and uneven topping bits have so much charm!
The perfect pairing: A scoop of vanilla ice cream melting over warm cobbler is practically required in my house. The cold creaminess against the tart cherries? Absolute perfection. On lazy days, I’ll dollop fresh whipped cream instead—sometimes with a hint of almond extract whisked in for extra flavor.
Portion size: This recipe makes about 6 good-sized servings… in theory. Between you and me, my husband and I have been known to polish off half the pan ourselves! If you’re serving it after a big meal, you might stretch it to 8 smaller portions—but don’t count on leftovers.
Breakfast bonus: (Don’t judge!) Any leftover cobbler tastes amazing reheated with yogurt the next morning. The cherries get even richer overnight!
Storing and Reheating Cherry Cobbler
Let’s be real—leftover cobbler is a rare occurrence in my house. But if you somehow manage to have some left (or you’re planning ahead), here’s how to keep it tasting like it just came out of the oven:
Storing Your Cobbler
First, let it cool completely—I usually leave mine on the counter for about an hour. Then, cover it tightly with plastic wrap or aluminum foil. It’ll keep in the fridge for 3-4 days, though the topping will soften a bit (still delicious, just not as crisp). If you want to freeze it, wrap individual portions in plastic and then foil—they’ll last up to 3 months in the freezer. I like to label them with the date so I don’t forget!
Reheating Like a Pro
Here’s the trick to bringing that cobbler back to life:
- Oven method: My go-to! Preheat to 350°F (175°C), remove any plastic wrap, and cover the dish loosely with foil. Bake for 15-20 minutes if refrigerated, or 25-30 minutes if frozen (no need to thaw first). Remove the foil for the last 5 minutes to crisp up the topping.
- Air fryer hack: For single servings, pop a portion in the air fryer at 325°F (160°C) for 5-7 minutes. It works surprisingly well to revive the crispiness!
- Microwave (in a pinch): Not ideal, but if you’re desperate, microwave individual portions for 30-second bursts until warmed through. Just know the topping won’t be crispy this way.
One last tip? If your reheated cobbler needs a little refresh, sprinkle it with a tiny bit of sugar and broil for a minute—instant crispy magic! Now you’ve got no excuse not to enjoy cobbler anytime the craving strikes.
Cherry Cobbler Nutrition Information
Okay, let’s be real—cherry cobbler isn’t exactly health food, but life’s too short not to enjoy dessert! Here’s the scoop on the nutrition breakdown per serving (based on 6 servings). Keep in mind, these are estimates—your results might vary slightly depending on your ingredients and portion size.
- Calories: 280
- Carbohydrates: 52g
- Sugar: 35g
- Fat: 8g
- Saturated Fat: 5g
- Protein: 3g
- Sodium: 220mg
- Fiber: 2g
- Cholesterol: 20mg
Now, I’m not a nutritionist, so take these numbers with a grain of salt (or sugar, in this case). If you’re watching your intake, you can tweak things a bit—like cutting back on the sugar or using a lower-fat milk. But honestly? Sometimes you just need to indulge. Pair it with a scoop of ice cream, and call it a happy day!
Frequently Asked Questions
I’ve gotten so many questions about this cherry cobbler over the years—here are the ones that pop up most often, along with all my hard-earned baking wisdom!
Can I use canned cherries instead of fresh or frozen?
You absolutely can! Drain them well first (save that juice for smoothies!), and reduce the sugar to ¼ cup since canned cherries are usually packed in syrup. Just know the texture will be softer—but still delicious. My grandma used to make it this way when fresh cherries were out of season.
How do I keep the biscuit topping from getting soggy?
Two secrets: First, don’t thaw frozen cherries—the extra moisture makes the topping steam instead of bake. Second, make sure your oven is fully preheated before baking. That initial blast of heat helps set the topping fast. If you’re still worried, sprinkle a teaspoon of sugar over the batter—it creates a protective crispy crust!
Can I make this cherry cobbler ahead of time?
Totally! Assemble it up to 24 hours ahead, cover, and refrigerate. Add 5-10 minutes to the bake time since it’s going in cold. The filling might release more juice, but that just means more syrup for your ice cream to soak up!
Why did my cobbler turn out too runny?
Usually it’s one of three things: not enough cornstarch (measure carefully!), overly juicy fruit (toss frozen cherries with an extra ½ tbsp cornstarch), or cutting into it too soon. Let it rest 15 minutes—those juices thicken as they cool. If it’s still soupier than you like, serve it in bowls and call it cherry cobbler soup (wink).
Can I use gluten-free flour for the topping?
Yes! I’ve had great results with a 1:1 gluten-free flour blend. The texture’s slightly more delicate, so handle the batter gently. For extra insurance, add ¼ teaspoon xanthan gum if your blend doesn’t include it. My celiac friend says it’s the only dessert she requests when she visits!