Skip to content
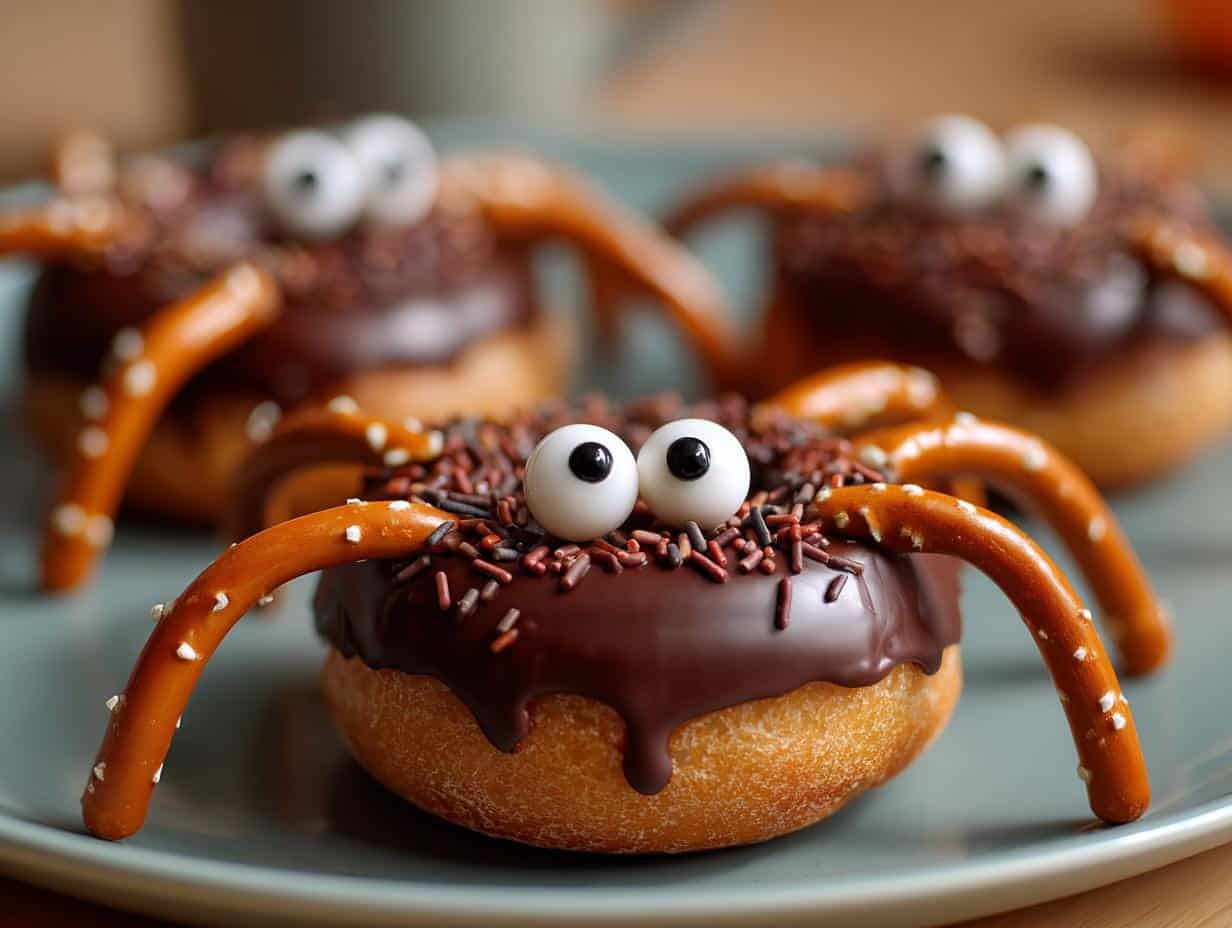
Every Halloween, my kitchen transforms into a spooky bakery, and these donut spiders steal the show! I still remember the first time my niece squealed with delight when I brought out a platter of these creepy-crawly treats – they’re that magical combination of silly and scary that kids adore.
The best part? You probably have most of the ingredients already. Chocolate donuts become plump spider bodies, pretzel sticks turn into spindly legs, and suddenly you’ve got yourself an army of edible arachnids! They take minutes to assemble but always get the biggest reactions at parties. Trust me, once you see how easy and fun these are to make, you’ll want to add them to your yearly Halloween tradition too.
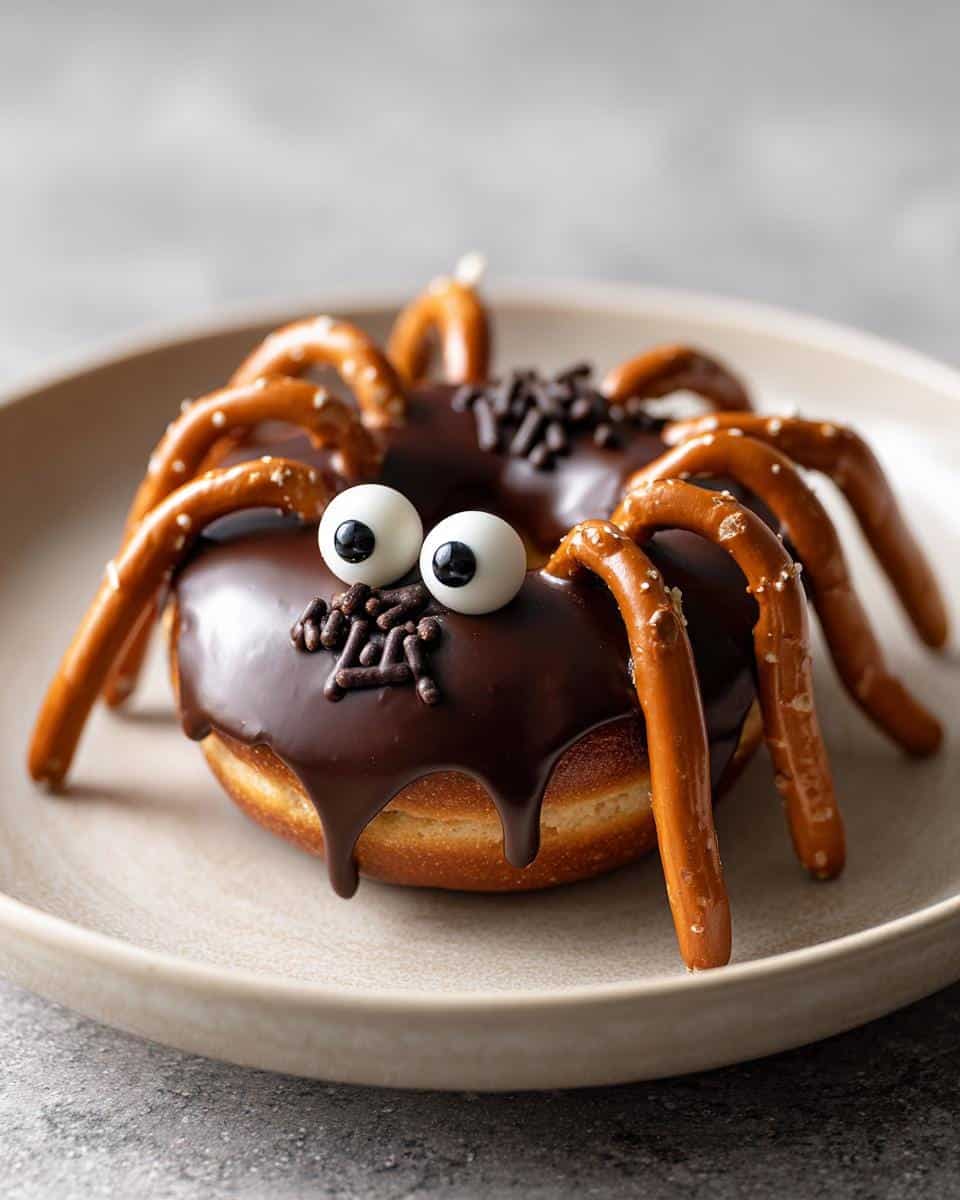
Table of contents:
Why You’ll Love These Donut Spiders
These adorable creepy-crawlies are my go-to Halloween trick because they’re:
- Instant crowd-pleasers – Kids giggle, adults snap photos, everyone wants to eat them!
- Foolproof to make – Seriously, if I can assemble these while managing sugar-hyper kids, anyone can
- Customizable – Go scary with extra legs or make ’em cute with rainbow sprinkles
Perfect for Halloween Parties
I’ve lost count of how many times these have disappeared from the dessert table first. The “ewww!” to “yum!” factor is unbeatable – they look impressively spooky but taste like familiar, delicious donuts. Pro tip: make extra because guests always sneak second (and third!) spiders.
No Baking Required
When you’re already juggling costumes, decorations and a million other Halloween prep tasks, the last thing you need is oven drama. These come together in 10 minutes flat – just assemble, decorate, and watch your little monsters devour them!
Ingredients for Donut Spiders
Here’s what you’ll need to create these eight-legged wonders (and yes, they’re intentionally eight-legged – my niece counted!):
- 12 chocolate frosted donuts (the standard 3-inch size works perfectly)
- 24 pretzel sticks (you’ll snap these in half for legs)
- 1 tube black decorating icing (the 0.5 oz size holds just enough)
- 24 candy eyeballs (the medium 1/4-inch size gives the best spooky look)
That’s it! No fancy ingredients – just simple stuff that makes magic happen. I usually grab everything at my regular grocery store’s baking aisle.
Equipment You’ll Need
The beauty of these donut spiders? You barely need any tools! Just grab:
- A flat plate or tray
- Your hands (to snap those pretzels!)
- An airtight container if not serving right away
That’s seriously it – no fancy gadgets required!
How to Make Donut Spiders
Okay, let’s make some creepy-crawly magic happen! These come together so fast you’ll have a whole spider army before your favorite Halloween movie finishes its opening credits. Here’s my foolproof method:
Step 1: Prepare the Donut Base
First, lay your chocolate donuts out on a clean, flat surface – I like using a big cutting board or baking sheet. Give them a little wiggle to make sure they’re sitting evenly. Pro tip: if any donuts have uneven frosting, place that side face down so your spiders look perfectly creepy!
Step 2: Add Pretzel Legs
Now for the fun part – snapping pretzel sticks in half to make 48 little legs (yes, I did the math so you don’t have to!). Gently push four pretzel pieces into each side of the donut at an angle – they should look like spider legs scurrying outward. Don’t worry if some break, crooked legs make them look even more realistically creepy!
Step 3: Attach Eyeballs
Time to bring these spiders to life! Pipe small dots of black icing where you want the eyes, then press on the candy eyeballs. Hold them for a few seconds until the icing starts to set. For extra scary points, make some cross-eyed or give them uneven eyes! Let them sit for about 5 minutes so the icing hardens completely.

See? Told you it was easy! Now just arrange your spider squad on a platter and watch them disappear faster than you can say “trick or treat!”
Tips for Perfect Donut Spiders
Want your spider squad to be extra creepy-crawly? Here are my battle-tested tricks:
- Use thick icing – thin stuff makes eyeballs slide right off!
- Break pretzels over a bowl – catches crumbs and keeps your workspace clean
- Make some spiders with 7 legs – looks like they lost one in battle (kids love this!)
- For super creepy spiders, add extra legs – nobody said spiders have to follow anatomy rules!
Variations & Serving Ideas
Got creative Halloween vibes? Switch it up! Try white icing with mini chocolate chips for spooky ghost donuts instead. For a graveyard scene, arrange spiders crawling over crumbled Oreo “dirt” with cookie tombstones. My kids love when I serve them with warm apple cider (bonus points for plastic spider rings on the cups!). If you’re feeling extra, tint some coconut green for “spider-infested grass” under your creepy crew!
Storage & Freshness Tips
These little critters are best enjoyed fresh – the pretzel legs lose their crunch if stored too long. If you must keep them, pop them in an airtight container for up to 4 hours (but really, they never last that long in my house!). Pro tip: assemble right before serving for maximum creepy-crawly effect.
Nutritional Information
Just between us – we’re not making these donut spiders for their health benefits! But because I know some folks like to track, here’s the scoop per spider (based on standard ingredients):
- Calories: About 150
- Sugar: 10g
- Fat: 8g
- Carbs: 20g
Important note: These values can change depending on your exact donut brand and how generous you are with the icing! Consider this your friendly reminder that Halloween is about fun, not counting every gram – save that for January!
Frequently Asked Questions
Q: Can I use gluten-free donuts for this recipe?
Absolutely! Just swap in your favorite gluten-free chocolate donuts – the spiders will look and taste just as spooktacular. My friend’s daughter has celiac, and we use gluten-free pretzels too for her special batch.
Q: How early can I make these before my party?
Honestly? I wouldn’t assemble them more than 2 hours ahead – the pretzels start losing their crunch. What I do is prep all the materials (broken pretzels, icing ready) and let kids decorate their own spiders as a party activity!
Q: What if my candy eyeballs keep falling off?
Been there! Try these fixes:
- Let the icing sit for 1 minute before attaching eyes (it gets tackier)
- Use thicker decorating gel instead of runny icing
- For emergency repairs, a tiny dab of peanut butter works as edible glue!
Q: Can I make these with other types of donuts?
Oh yes! Get creative – powdered donuts make great ghost donuts with black icing eyes, or use chocolate-covered cake donuts for extra large spiders. Just avoid jelly-filled ones (trust me, messy legs!).


12 Spooktacular Donut Spiders That Will WOW Halloween Guests!
- Total Time: 10 minutes
- Yield: 12 donut spiders
- Diet: Vegetarian
Description
Fun and spooky donut spiders perfect for Halloween treats.
Ingredients
- 1 pack of chocolate donuts
- 1 pack of pretzel sticks
- 1 tube of black icing
- 1 pack of candy eyeballs
Instructions
- Place a chocolate donut on a flat surface.
- Break pretzel sticks in half and insert them into the sides of the donut to create legs.
- Use black icing to attach candy eyeballs to the top of the donut.
- Let the icing set before serving.
Notes
- Store in an airtight container to keep fresh.
- Best served the same day for optimal texture.
- Prep Time: 10 minutes
- Cook Time: 0 minutes
- Category: Dessert
- Method: No-Bake
- Cuisine: American