Skip to content
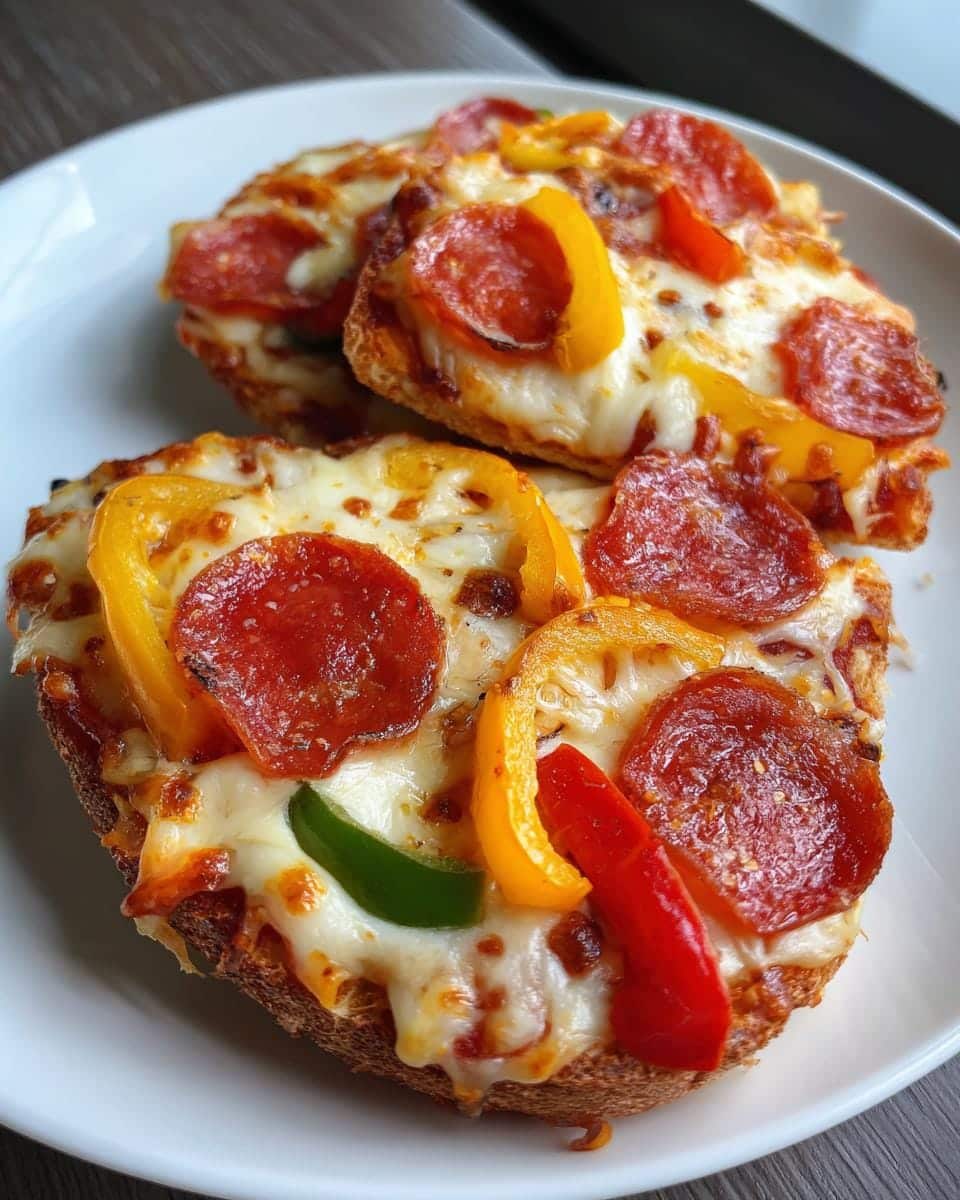
You know those days when you’re staring into the abyss of your fridge, wondering what to pack for lunch that won’t make your kids (or let’s be honest – you) groan? I’ve been there too many times to count. That’s why I fell head over heels for these DIY Pizza Lunchables – they’re the perfect solution for busy weekdays, picnics, or even after-school snacks. My kids actually cheer when they see these little pizza rounds peeking out of their lunchboxes, and honestly? I might sneak a few for myself too. The best part? You control the ingredients, skip the preservatives, and get that fresh-from-the-oven taste whenever you want. Trust me, once you try homemade, those store-bought versions just won’t cut it anymore.
Table of contents:
Why You’ll Love These DIY Pizza Lunchables
Okay, let me count the ways these little pizza gems will change your lunch game. First off, they’re crazy customizable—swap pepperoni for grilled chicken, mushrooms for pineapple (no judgment here!), or go wild with pesto instead of red sauce. My kid’s current obsession? A “taco pizza” version with black beans and a sprinkle of taco seasoning. Second, they come together in under 30 minutes, which is basically a miracle when you’re scrambling to pack lunches at 7 AM. And here’s the kicker: they actually stay fresh in lunchboxes! The dough holds up beautifully at room temp, so no sad, soggy mess by noon. Plus, watching tiny hands assemble their own mini masterpieces? Priceless.
Ingredients for DIY Pizza Lunchables
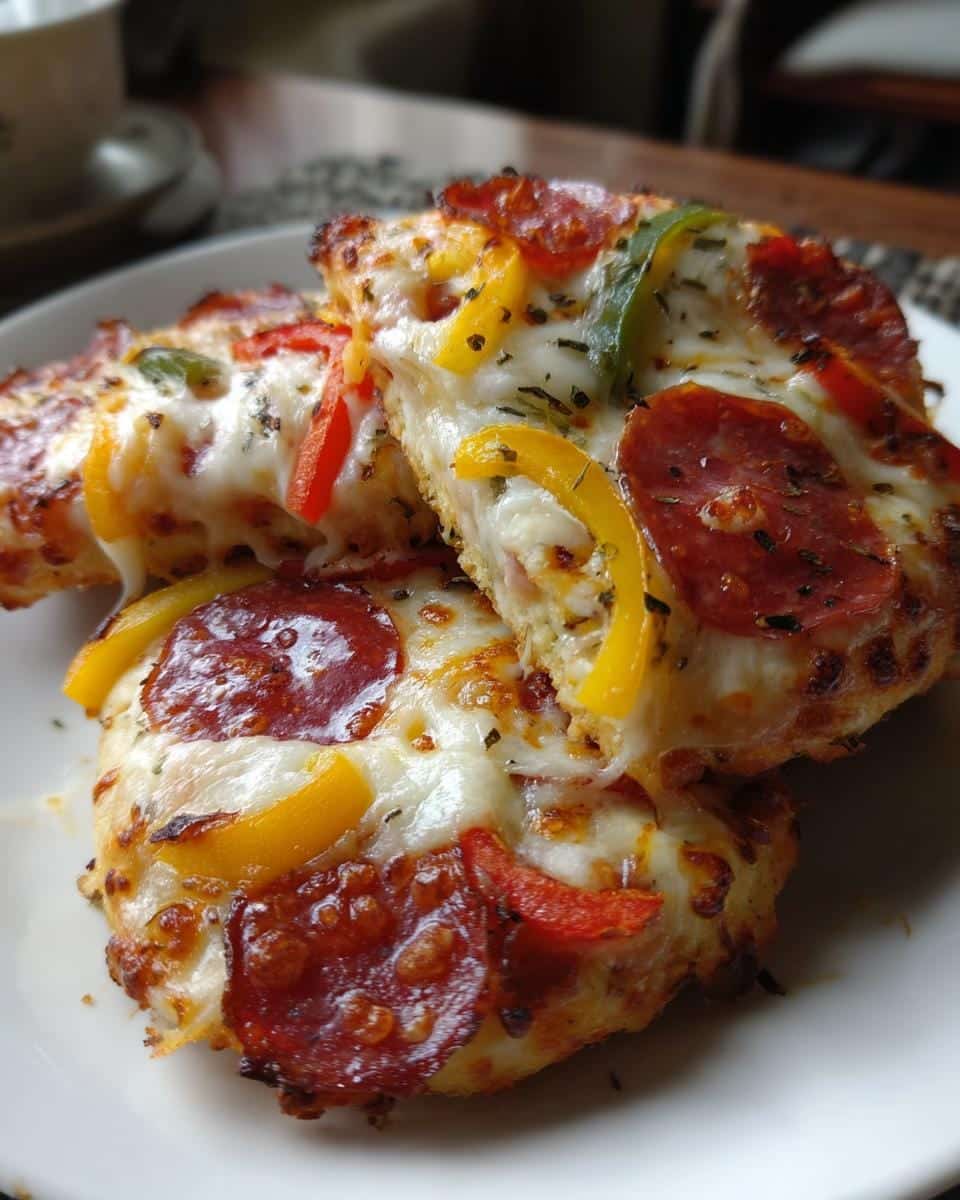
Let me tell you exactly what you’ll need to make these adorable pizza bites – and why each ingredient matters. First up, 1 cup of pizza dough (homemade or store-bought, no shame in shortcuts!). For the sauce, ½ cup of your favorite pizza sauce – I like mine with extra garlic, but use whatever makes your taste buds happy. Now the cheese – measure out 1 cup of shredded mozzarella (pack it lightly in the measuring cup for accuracy). For toppings, I always grab ¼ cup each of sliced pepperoni, bell peppers, and mushrooms, but here’s the fun part – these are just suggestions! Raid your fridge for whatever looks good.
Equipment You’ll Need for DIY Pizza Lunchables
Don’t worry – you won’t need any fancy gadgets for these! Just grab a rolling pin (or an empty wine bottle in a pinch – we’ve all been there!), a baking sheet, and a round cutter about 3 inches wide. No cutter? A glass works perfectly! That’s seriously all you need to create these little pizza wonders. I always keep these basics in my “lunch prep zone” for quick assembly.
How to Make DIY Pizza Lunchables
Alright, let’s get our hands doughy! Making these pizza lunchables is easier than convincing kids to eat their veggies – and way more fun. Follow these simple steps and you’ll have lunchbox magic ready in no time.
Preparing the Dough
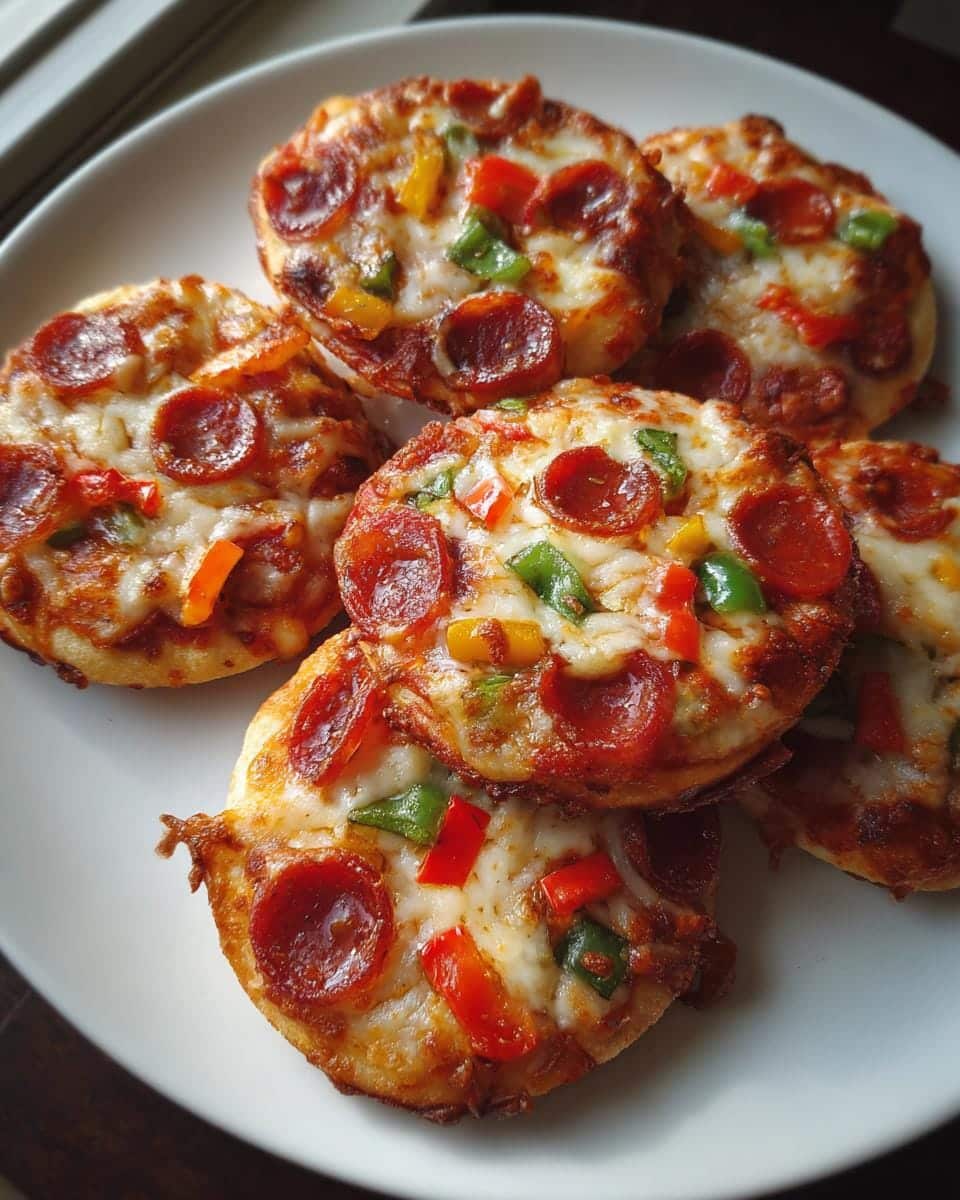
First, dust your counter with a little flour – just enough so the dough doesn’t stick to everything (trust me, I’ve learned this the hard way). Roll out your pizza dough to about ¼ inch thick – think “thin enough to be crispy but thick enough to hold toppings.” Now grab that round cutter or glass and press straight down to make perfect little circles. Pro tip: twist slightly as you lift for clean edges! You should get about 12-15 circles from one cup of dough. Arrange them on your baking sheet like happy little pizza moons.
Adding Toppings
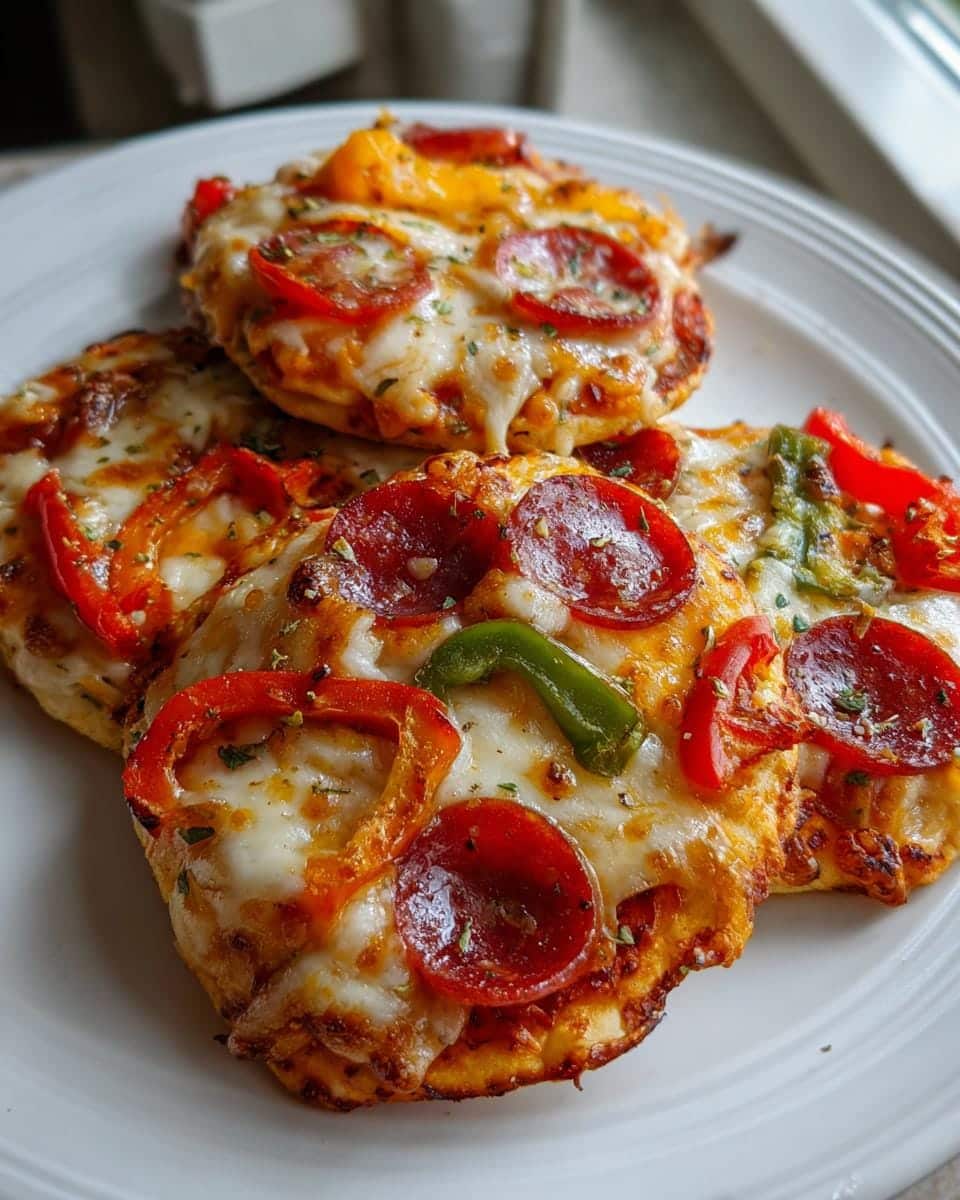
This is where the party starts! Spread about a teaspoon of sauce on each dough circle – don’t go overboard or you’ll get soggy pizza (we’re aiming for “flavorful” not “flooded”). Sprinkle cheese generously – I like to pinch small clusters rather than just dumping shredded cheese for better melt coverage. Now the fun part: topping time! Arrange your pepperoni slices artfully (or haphazardly – this isn’t MasterChef), then scatter those colorful veggies. My trick? Place heavier items like mushrooms toward the center so they don’t slide off during baking.
Baking and Cooling
Pop your soon-to-be masterpieces into a preheated 400°F oven and set your timer for 10 minutes. Resist the urge to peek constantly – that blast of heat when you open the oven door affects cooking. They’re done when the edges turn golden and the cheese bubbles like a miniature volcano. Let them cool completely on the baking sheet – about 15 minutes – before packing. This prevents condensation in lunch containers (no one likes a steamed pizza). The best part? That heavenly smell filling your kitchen will have everyone asking “Is it ready yet?”
Tips for Perfect DIY Pizza Lunchables
After making these way too many times (not sorry!), I’ve picked up some tricks to guarantee pizza lunchable perfection every time. First, chill your dough for 10 minutes before rolling – it prevents sticking and gives you cleaner cuts. When adding sauce, leave a tiny bare border (like a quarter-inch) around the edges – this stops the dreaded “soggy crust syndrome.” For cheese, freeze your shredded mozzarella for 5 minutes before sprinkling – it melts more evenly without browning too fast. And here’s my secret weapon: a light brush of olive oil on the crust edges before baking gives that irresistible golden crunch. Oh, and if your veggies release water while baking? Just pat them dry with a paper towel first – game changer!
Variations for DIY Pizza Lunchables
Oh, the possibilities are endless with these little pizzas! Swap mozzarella for goat cheese crumbles with fig jam (sounds fancy, tastes amazing). My veggie-loving friends adore roasted zucchini and ricotta, while my nephew insists on BBQ chicken with red onions. Breakfast pizza? Yes please – scrambled eggs and bacon bits work shockingly well. The dough’s your canvas – paint it however you like!
Serving and Storing DIY Pizza Lunchables
Here’s how I keep these pizza bites tasting fresh-as-baked all day! For lunchboxes, layer them between parchment paper in an airtight container – it keeps them from sticking together. Room temperature is fine for 4-5 hours, but if you’re packing ahead, store them in the fridge for up to 2 days. Want to freeze? Just pop cooled pizzas in a freezer bag with parchment dividers – they reheat beautifully in the toaster oven for 3 minutes. Pro tip: pack sauce in a separate tiny container for dipping to prevent sogginess!
Nutritional Information for DIY Pizza Lunchables
Just a heads up – these numbers can change based on your exact ingredients (extra cheese, anyone?). Per pizza: about 250 calories, 10g protein, and way more flavor than anything store-bought. Always check your specific brands for precise counts!
Frequently Asked Questions About DIY Pizza Lunchables
Q1. Can I make these pizza lunchables ahead of time?
Absolutely! These DIY pizzas are meal prep superstars. Bake them completely cooled, then store in an airtight container in the fridge for up to 2 days. For longer storage, freeze them individually – they’ll keep their flavor and texture beautifully for about a month.
Q2. What’s the best way to reheat these pizza bites?
I swear by the toaster oven for reheating – just 2-3 minutes at 350°F brings back that perfect crispiness. If you’re in a pinch, the microwave works too (about 20 seconds), but the crust won’t be as crispy. Pro tip: sprinkle a few drops of water on top before microwaving to prevent dryness!
Q3. Can I use gluten-free dough for these lunchables?
You bet! I’ve tested this with several gluten-free pizza dough mixes, and they work wonderfully. Just remember gluten-free dough tends to be stickier – I recommend chilling it longer before rolling and using plenty of flour on your surface.
Q4. How do I prevent the toppings from sliding off?
Two tricks: First, place heavier ingredients like meats toward the center. Second, give your cheese layer a gentle press into the sauce before adding other toppings – this creates a “glue” effect. Works like a charm!
For more delicious ideas, check out our Pinterest page!
Print
Irresistible 15-Minute DIY Pizza Lunchables Kids Crave
- Total Time: 22 minutes
- Yield: 4 servings
- Diet: Vegetarian
Description
A fun and easy way to make your own pizza lunchables at home. Perfect for kids and adults alike.
Ingredients
- 1 cup pizza dough
- 1/2 cup pizza sauce
- 1 cup shredded mozzarella cheese
- 1/4 cup sliced pepperoni
- 1/4 cup sliced bell peppers
- 1/4 cup sliced mushrooms
Instructions
- Preheat your oven to 400°F (200°C).
- Roll out the pizza dough and cut into small circles.
- Spread pizza sauce on each dough circle.
- Add shredded mozzarella cheese and your favorite toppings.
- Bake for 10-12 minutes until the crust is golden.
- Let cool before serving.
Notes
- You can customize toppings to your preference.
- Store leftovers in an airtight container for up to 2 days.
- Great for meal prep or school lunches.
- Prep Time: 10 minutes
- Cook Time: 12 minutes
- Category: Lunch
- Method: Baking
- Cuisine: Italian