Skip to content
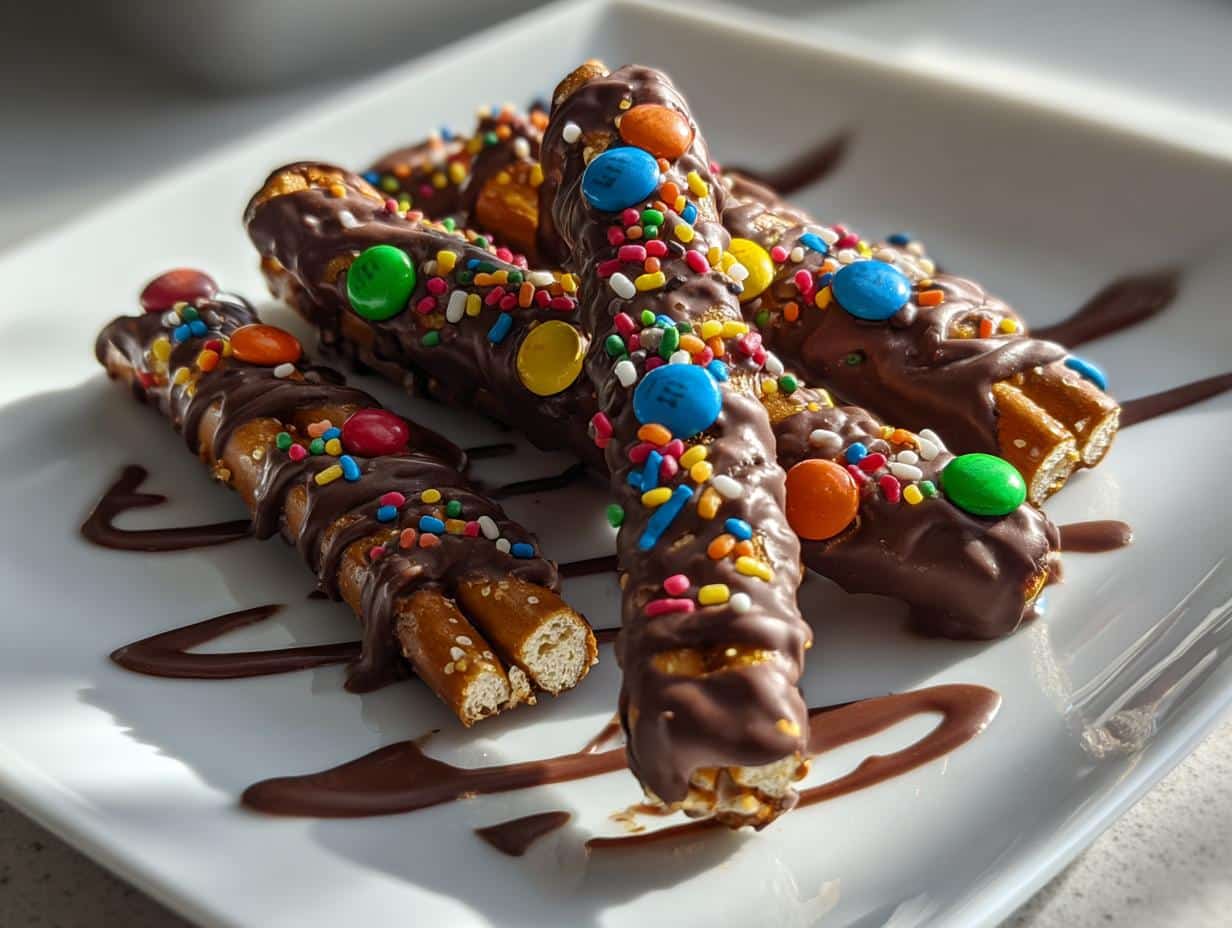
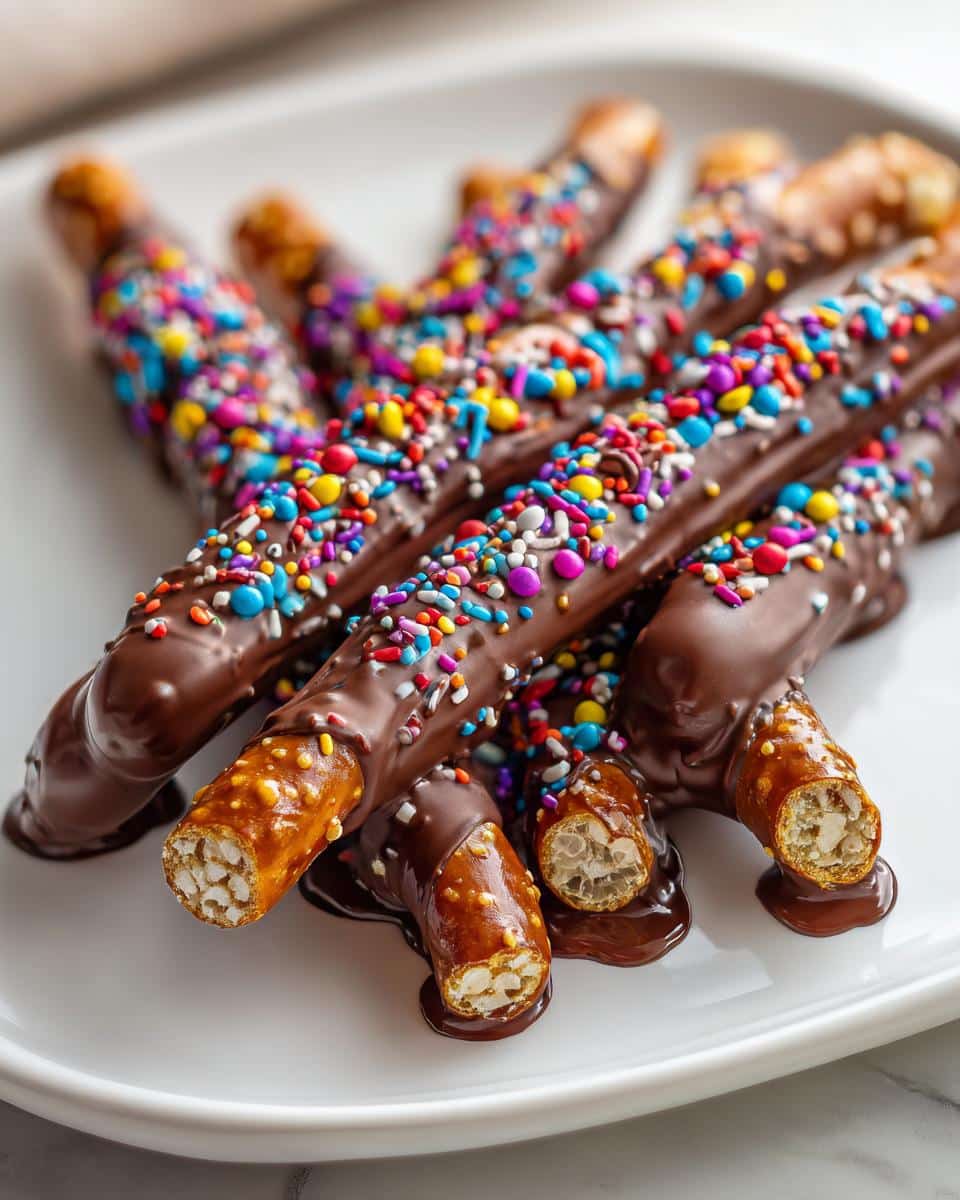
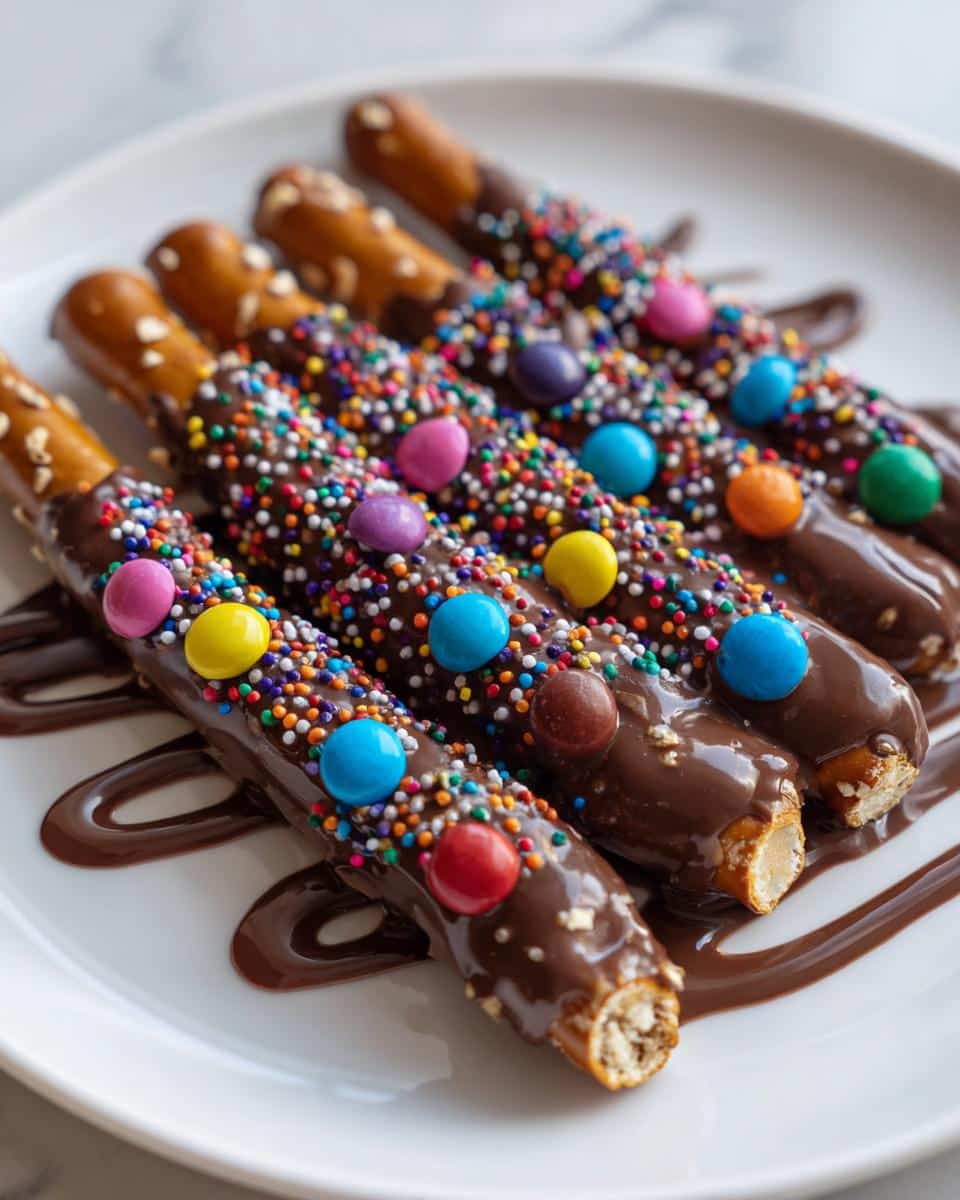
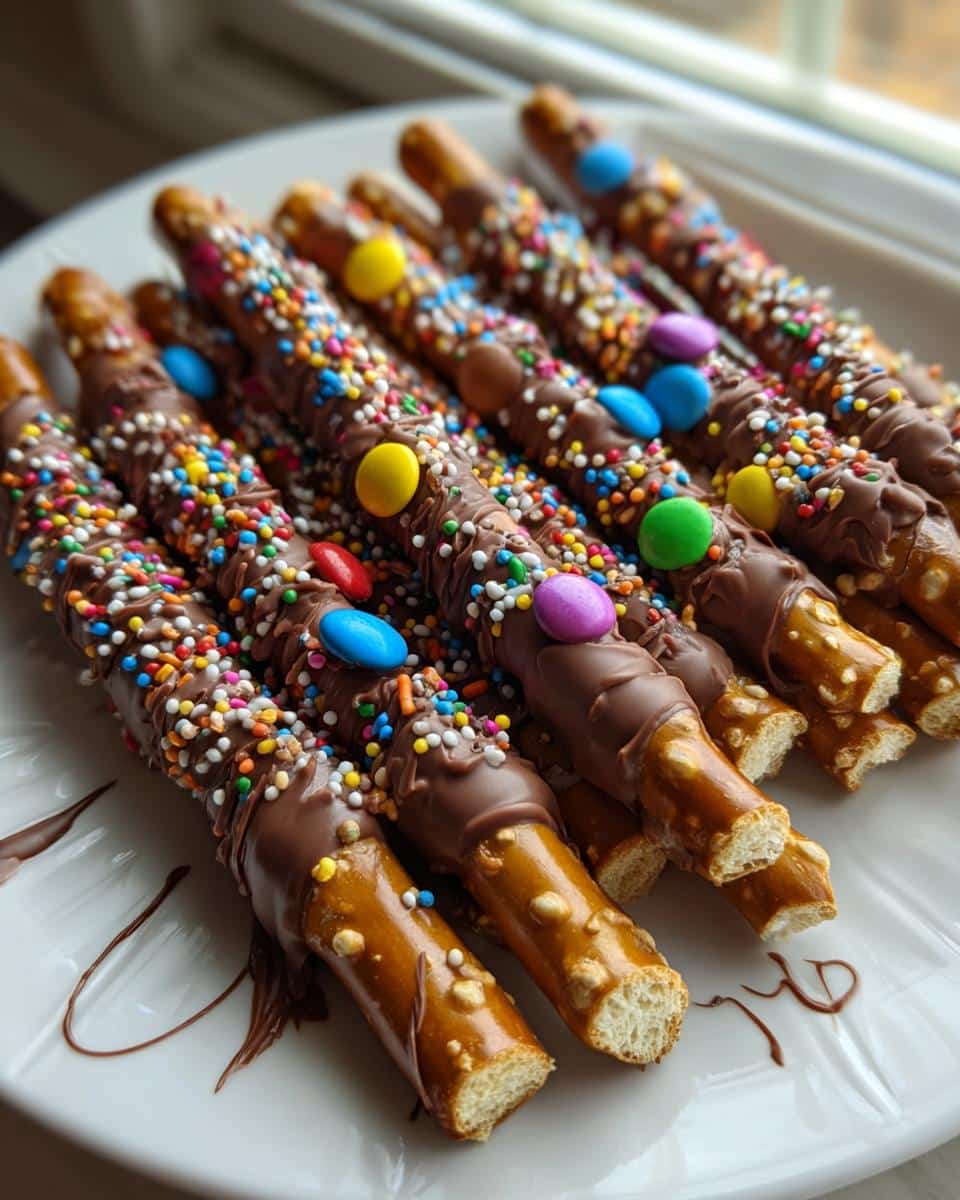
You know those treats that make everyone go, “Ooooh!” when you bring them out? That’s exactly what happens with these decorated pretzel rods. They’re crunchy, chocolatey, and totally customizable—perfect for parties, gifts, or just snacking when you need something sweet and salty. I first made them for my niece’s birthday party, and let me tell you, they disappeared faster than the balloons popped!
The best part? They’re so easy. Seriously, if you can melt chocolate and dip things, you’re already halfway there. Whether you’re prepping for game night, packing teacher gifts, or just craving a fun snack, these pretzel rods are your new best friend. And trust me, once you start decorating them with all those sprinkles, nuts, or candies, you won’t be able to stop!
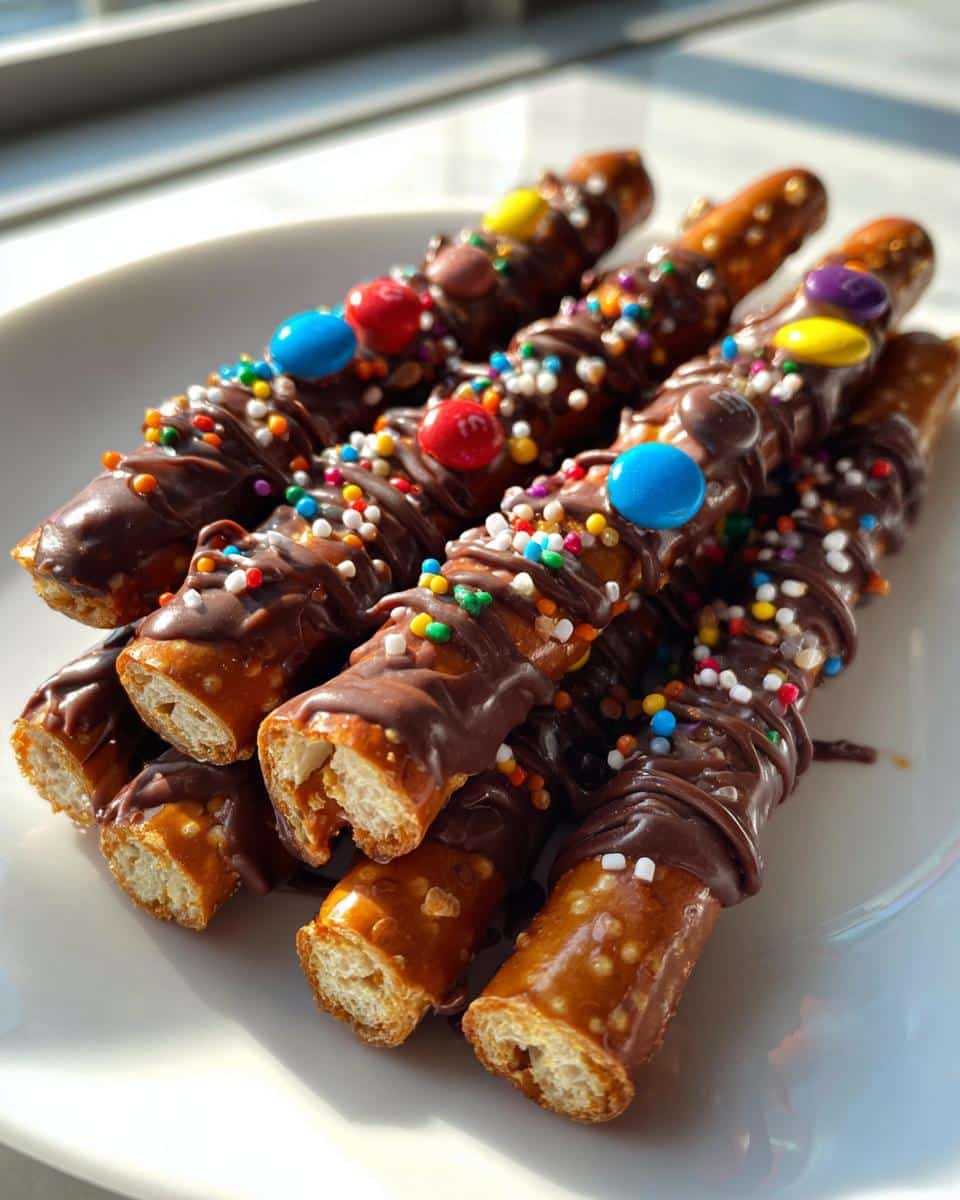
Table of contents:
Why You’ll Love These Decorated Pretzel Rods
You’re going to adore these pretzel rods—I just know it. Here’s why:
- So easy: If you can melt chocolate and dip stuff, you’ve got this. No fancy skills required!
- Endlessly customizable: Go wild with sprinkles, nuts, or crushed cookies—make them match any party theme.
- Quick fix: From zero to snack hero in under 30 minutes, even if you’re scrambling last-minute.
- Fun for everyone: Kids love decorating them, adults love eating them. Total crowd-pleaser.
Seriously, these little rods pack a big punch of joy. You’ll see!
Ingredients for Decorated Pretzel Rods
Here’s what you’ll need to make magic happen:
- Pretzel rods: 1 standard bag (about 20 rods) – go for thick ones so they hold all that chocolatey goodness
- Chocolate chips: 1 cup (milk, dark, or white – use good quality like Ghirardelli or Guittard)
- Coconut oil: 1 tbsp (this makes the chocolate perfectly dippable)
- Toppings galore: Think rainbow sprinkles, crushed peanuts, mini M&Ms, toffee bits, or even sea salt for a fancy twist
That’s it! Simple ingredients, but oh the possibilities. Pro tip: Have all your toppings ready in shallow bowls before you start dipping – it makes decorating way easier when the chocolate’s still warm and melty.
Equipment You’ll Need
Gather these trusty tools—you probably already have most of them in your kitchen:
- Microwave-safe bowl: For melting that chocolate to silky perfection
- Baking sheet: A standard half-sheet pan works great
- Parchment paper: Lifesaver for easy cleanup and no-stick drying
- Measuring spoons: That tablespoon of coconut oil makes all the difference
See? Nothing fancy required. Now let’s make some magic happen!
How to Make Decorated Pretzel Rods
Alright, let’s get down to the fun part! Making these decorated pretzel rods is as easy as 1-2-3 (okay, maybe 1-2-3-4-5), but I promise you’ll feel like a pro after your first batch. Here’s exactly how I do it:
- Prep your station: Line that baking sheet with parchment paper – this is crucial unless you want chocolate-covered pans. Trust me, I learned the hard way!
- Melt the chocolate: Combine chocolate chips and coconut oil in your microwave-safe bowl. Microwave in 30-second bursts, stirring well between each. Stop when it’s mostly melted – the residual heat will finish the job. Overheating = grainy chocolate, and we don’t want that!
- Dip with confidence: Hold a pretzel rod at one end and dunk it halfway into the chocolate. Twirl it gently as you lift it out to let excess drip off. This is your moment to shine!
- Decorating time: While the chocolate’s still wet, roll or sprinkle on your toppings. Pro tip: Hold the rod over the topping bowl as you decorate – catches the excess for reuse.
- Let them set: Lay each rod on the prepared sheet. The waiting game begins! They’ll need about 15-20 minutes to harden completely. If you’re impatient (like me), 10 minutes in the fridge speeds things up.
See? No fancy skills needed, just happy dipping! The hardest part is resisting eating them all before they’re fully set. I won’t judge if you “sample” one early though…
Tips for Perfect Decorated Pretzel Rods
Want your pretzel rods to be absolutely flawless? Here are my tried-and-true secrets:
- Quality counts: Splurge on good chocolate chips—they melt smoother and taste infinitely better than bargain brands.
- Work fast: Chocolate sets quickly, so have all toppings ready before you start dipping.
- Storage smarts: Keep them in an airtight container with parchment between layers to prevent sticking.
- Temperature matters: If your kitchen’s warm, pop them in the fridge for 10 minutes to set the chocolate firmly.
Little things make a big difference—your taste buds will thank you!
Variations for Decorated Pretzel Rods
Oh, the possibilities! Half the fun is getting creative with these pretzel rods. Here are some of my favorite twists:
- Chocolate swap: Try peanut butter chips, mint chocolate, or even ruby chocolate for a gorgeous pink hue.
- Drizzle magic: After the first coat sets, zigzag contrasting chocolate over the top for bakery-worthy stripes.
- Seasonal spins: Crushed candy canes for Christmas, pastel sprinkles for Easter—they adapt to any holiday.
- Grown-up versions: Add a pinch of espresso powder to dark chocolate or roll in crushed pretzels with sea salt.
Your imagination’s the limit—I dare you to try something wild!
Serving and Storing Decorated Pretzel Rods
These pretzel rods shine brightest when served at room temperature—the chocolate gets that perfect snap when you bite into them. For parties, I love arranging them upright in a tall glass or mason jar so everyone can grab one easily. They make such a cute centerpiece!
Storing them is a breeze too. Just pop them in an airtight container with parchment paper between layers (so they don’t stick together) and they’ll stay fresh for up to a week. Though let’s be honest—they rarely last that long in my house! If your kitchen runs warm, the fridge works too—just let them come to room temp before serving for best texture.
Nutritional Information for Decorated Pretzel Rods
Each pretzel rod clocks in at about 80 calories—just enough to satisfy that sweet-salty craving without going overboard. Of course, your exact count will vary depending on toppings (looking at you, extra sprinkles!). Here’s the breakdown per rod:
- Calories: 80
- Sugar: 5g
- Sodium: 90mg
- Fat: 4g
Remember, these are estimates—your mileage may vary based on chocolate type and how generous you get with those toppings!
Frequently Asked Questions About Decorated Pretzel Rods
Got questions? I’ve got answers! Here are the pretzel rod queries I hear most often:
- “What’s the best chocolate to use?” Hands down, good quality chocolate chips like Ghirardelli or Guittard. The cheap stuff tends to seize up or taste waxy. And that tablespoon of coconut oil? Non-negotiable for perfect dipping consistency!
- “How do I keep them fresh?” Airtight container is key! Layer them with parchment paper so they don’t stick together. They’ll stay crisp for about a week (if they last that long).
- “Can kids help decorate?” Absolutely! This is the perfect kitchen project for little hands. Just set up a “decorating station” with bowls of toppings and let them go wild. Messy hands = happy memories!
- “What creative toppings have you tried?” Oh honey, everything! Crushed Oreos, freeze-dried strawberries, even crushed potato chips for that ultimate sweet-salty combo. The possibilities are endless!
Still curious? Drop your question in the comments—I love chatting about these tasty treats!
Share Your Decorated Pretzel Rods
I’d love to see your creations! Snap a pic of your decorated pretzel rods and share it in the comments—let’s inspire each other with more delicious ideas! You can also find more inspiration on Pinterest.

Irresistible Decorated Pretzel Rods in 20 Minutes
- Total Time: 25 mins
- Yield: 20 pretzel rods
- Diet: Vegetarian
Description
Easy-to-make decorated pretzel rods perfect for parties, gifts, or snacks.
Ingredients
- 1 bag pretzel rods
- 1 cup chocolate chips (milk, dark, or white)
- 1 tbsp coconut oil
- Assorted toppings (sprinkles, crushed nuts, mini M&Ms, etc.)
Instructions
- Line a baking sheet with parchment paper.
- Melt chocolate chips with coconut oil in a microwave-safe bowl in 30-second intervals, stirring until smooth.
- Dip each pretzel rod halfway into the melted chocolate.
- Roll in toppings or sprinkle them on top.
- Place on parchment paper to set for 15-20 minutes.
Notes
- Store in an airtight container for up to a week.
- Use high-quality chocolate for best results.
- Customize toppings for different occasions.
- Prep Time: 10 mins
- Cook Time: 5 mins
- Category: Dessert
- Method: No-Bake
- Cuisine: American