Skip to content
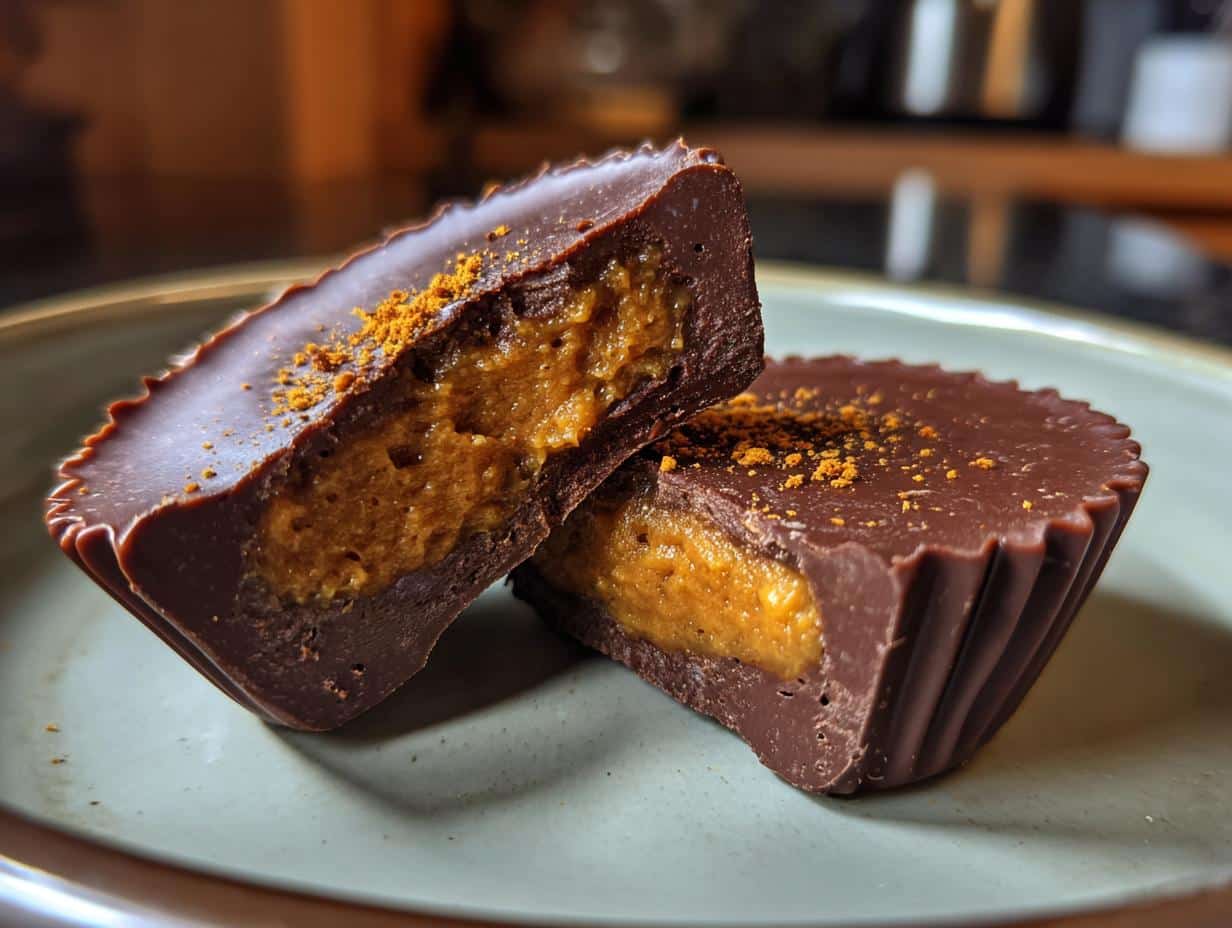
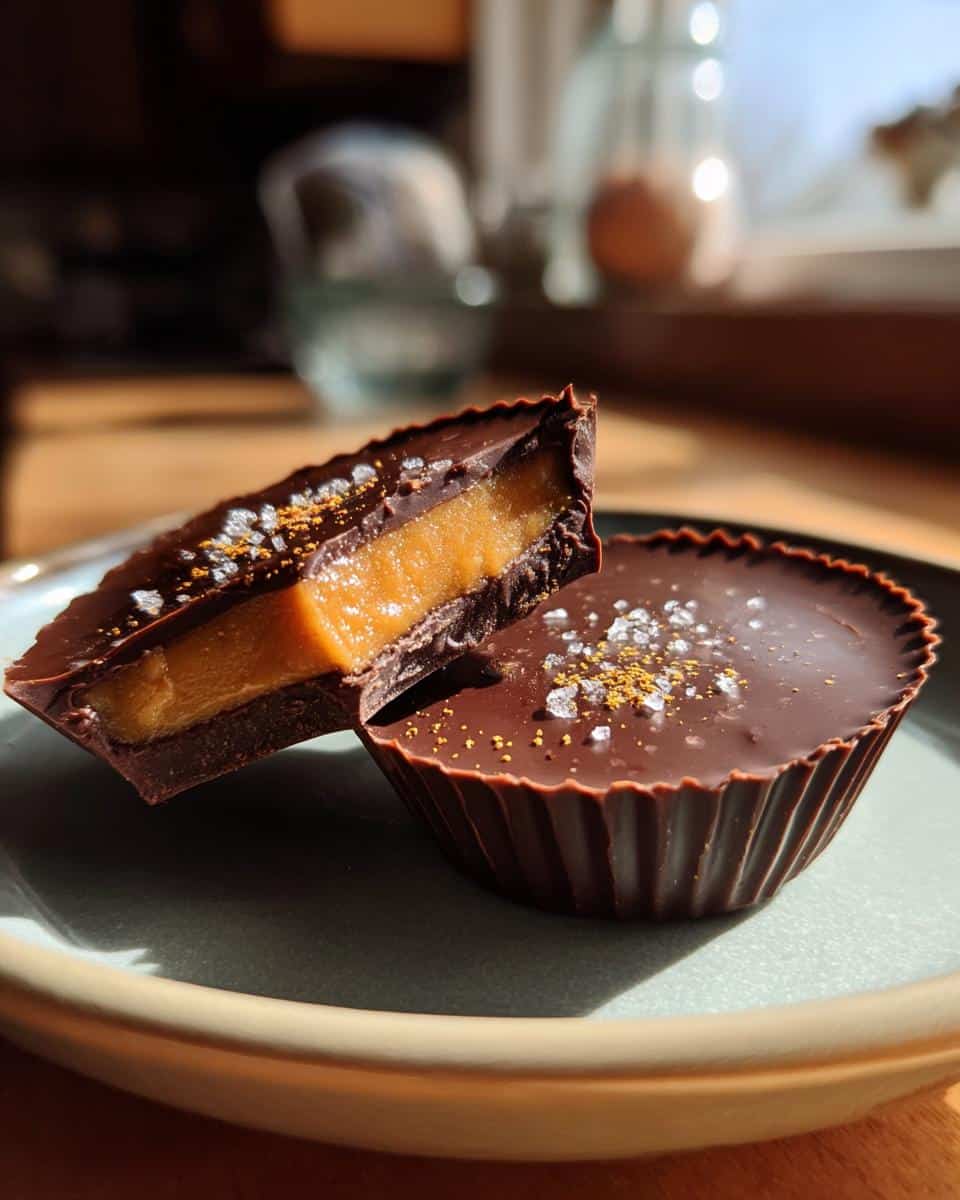
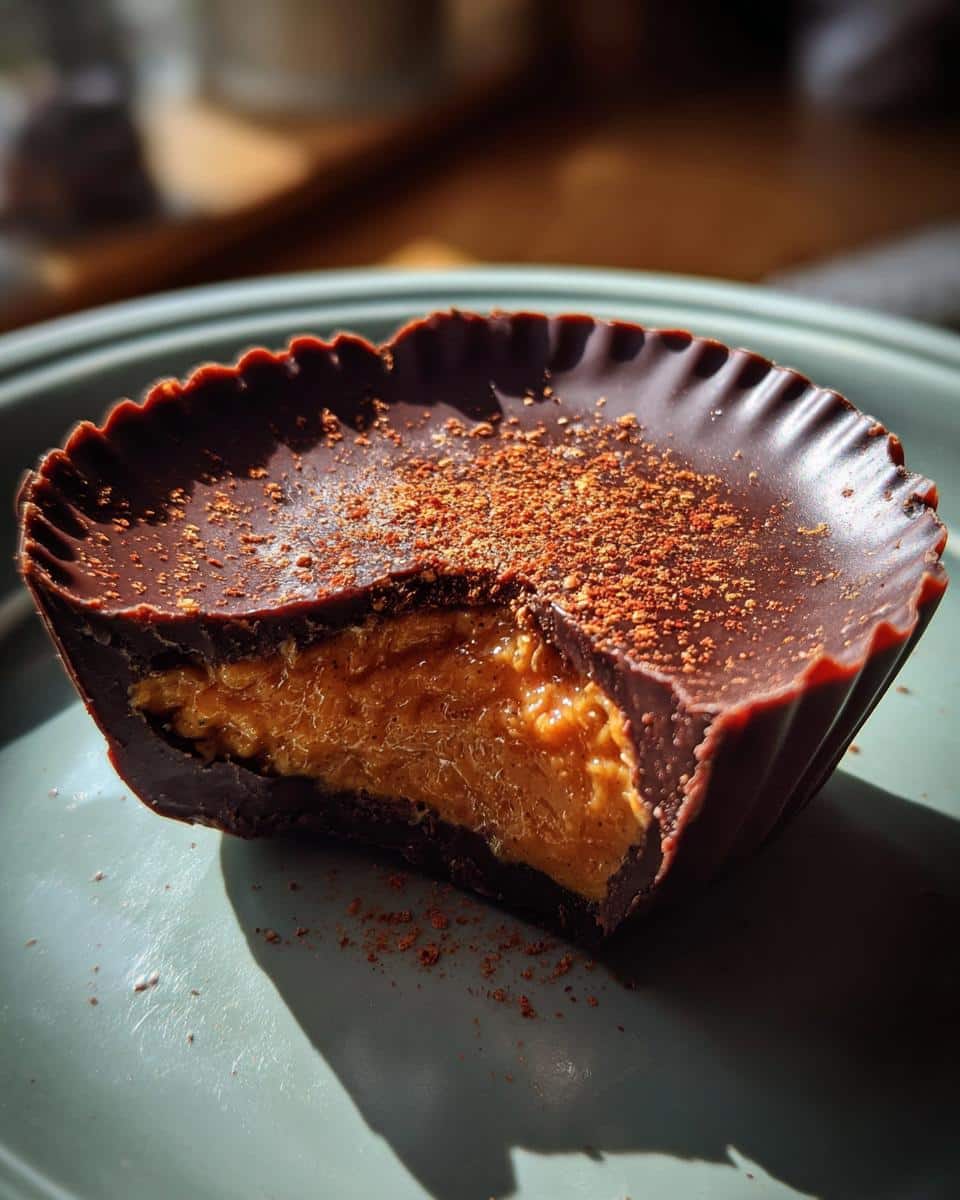
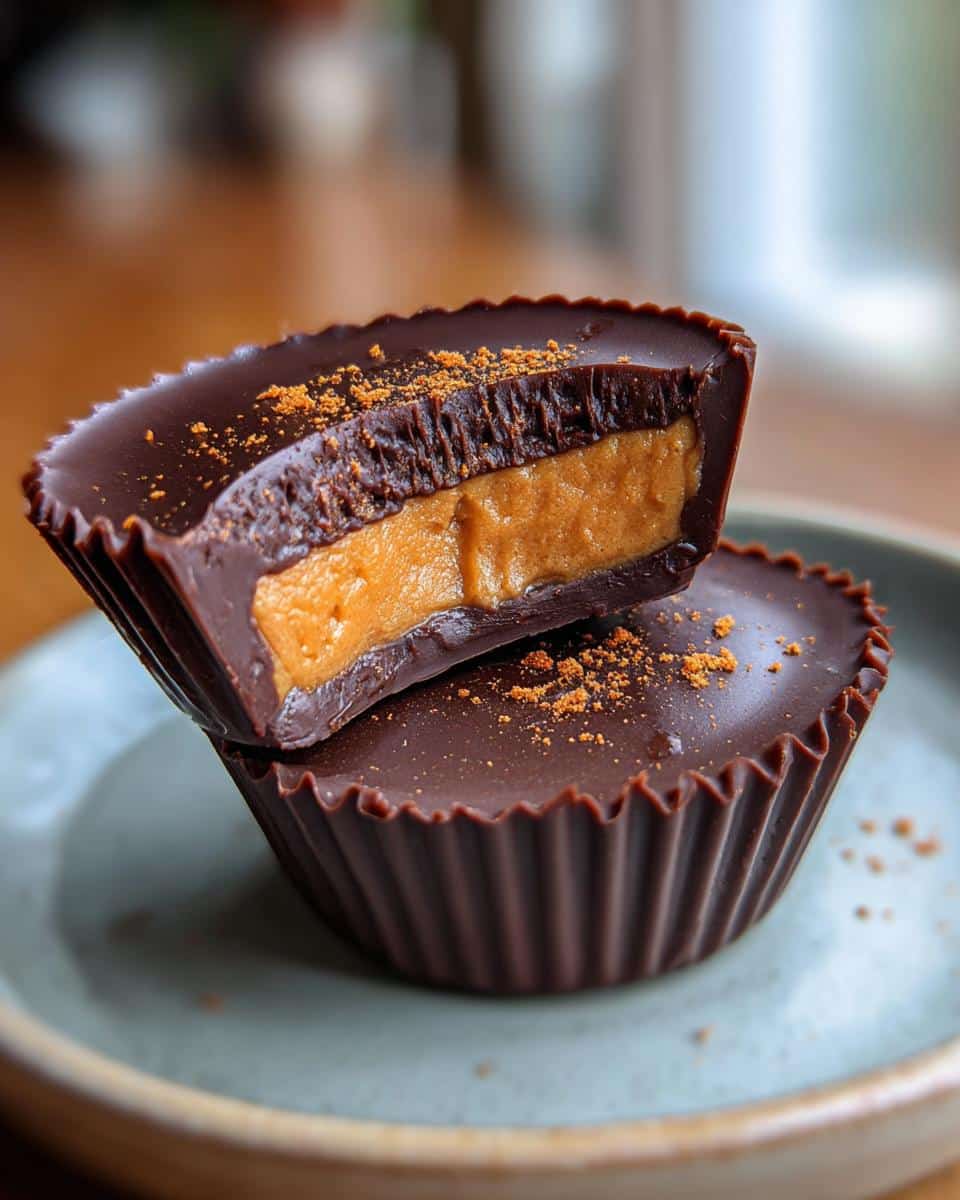
You know those moments when you’re craving something indulgent but still want to keep it dairy-free? That’s exactly how my obsession with these Dairy Free Chocolate Pumpkin Butter Cups started. Picture this: rich, melty chocolate hugging a spiced pumpkin filling so creamy it feels like a fall-inspired hug in every bite. I first whipped these up when my best friend—who’s lactose intolerant—came over for coffee, and now she begs me to make them every October. The best part? They come together with just five simple ingredients and zero baking. Trust me, even non-vegans won’t believe these decadent cups are completely plant-based!
Table of contents :
Why You’ll Love These Dairy Free Chocolate Pumpkin Butter Cups
Let me count the ways these little cups will steal your heart:
- Effortless magic: Just melt, layer, and chill – no oven required!
- Creamy dreamy: That pumpkin filling is so velvety, you won’t miss dairy one bit
- Fall in a bite: Warm pumpkin spice + rich chocolate = autumn’s perfect pairing
- For everyone: Vegan, gluten-free, and allergy-friendly without sacrificing flavor
- Quick fix: Ready in about an hour start to finish (though they never last that long!)
Seriously, these disappear faster than fall leaves in the wind at my house.
Ingredients for Dairy Free Chocolate Pumpkin Butter Cups
Gather these simple, quality ingredients – trust me, each one matters:
- 1 cup dairy-free chocolate chips (my go-to is Enjoy Life brand for perfect meltability)
- ½ cup smooth pumpkin puree (not pie filling! Libby’s works great here)
- 2 tbsp pure maple syrup (grade A for that caramel depth)
- 1 tsp pumpkin pie spice (or make your own blend if you’re fancy)
- ¼ tsp salt (just a pinch to make all the flavors pop)
That’s it! Five pantry staples between you and chocolate-pumpkin bliss.
Equipment You’ll Need
No fancy gadgets required – just these basics from your kitchen:
- Muffin tin (standard 12-cup does the trick)
- Cupcake liners (go for foil ones – they peel off cleaner)
- 2 mixing bowls (one for chocolate, one for pumpkin filling)
- Microwave or double boiler (I’m team microwave with 30-second bursts!)
- Spoon or small cookie scoop (for that perfect pumpkin dollop)
See? You’ve probably got everything already!
How to Make Dairy Free Chocolate Pumpkin Butter Cups
Okay, let’s get to the fun part! Making these cups is so easy you’ll wonder why you haven’t been making them weekly. Just follow these simple steps and you’ll have perfect little pumpkin-chocolate treasures in no time.
Step 1: Melt the Chocolate
First things first – let’s melt that chocolate! I always use the microwave method because it’s foolproof. Just pop those dairy-free chocolate chips in a microwave-safe bowl and heat in 30-second bursts, stirring well between each. Watch closely – chocolate burns faster than you’d think! When it’s about 90% melted, stop and let the residual heat do the rest. This keeps it silky smooth.
Step 2: Layer the Chocolate Cups
Now grab your lined muffin tin. Spoon about 1 tablespoon of melted chocolate into each liner, then use the back of the spoon to coat the bottom and sides evenly. This creates our chocolate “cup”. Pop these in the fridge for 10 minutes to set – no cheating on the time! The chocolate needs to be firm enough to hold our pumpkin filling.
Step 3: Prepare the Pumpkin Filling
While the chocolate chills, make your pumpkin butter magic. Simply mix together the pumpkin puree, maple syrup, pumpkin pie spice, and salt until smooth and creamy. Taste it – this is where I sometimes add an extra drizzle of maple syrup if I want it sweeter. The mixture should be thick but spreadable, like pudding.
Step 4: Assemble and Chill
Now for the grand finale! Spoon about 2 teaspoons of pumpkin filling into each chocolate cup. Then cover with another tablespoon of melted chocolate, spreading it to seal the edges. Back in the fridge they go for at least 1 hour to set completely. I know it’s tempting, but don’t rush this – that chilling time is what gives them that perfect snap when you bite in!
Tips for Perfect Dairy Free Chocolate Pumpkin Butter Cups
After making dozens (okay, maybe hundreds) of these, I’ve learned all the tricks for pumpkin butter cup perfection:
- Chocolate matters: Splurge on good dairy-free chips – cheaper ones might not melt smoothly
- Drain that pumpkin: If your puree looks watery, blot it with a paper towel first
- Chill time is sacred: Set a timer between layers – impatience leads to messy cups!
- Room temp fillings: Let pumpkin mix sit 5 minutes so it spreads easily without tearing chocolate
- Mini muffin magic: For bite-sized treats, use a mini muffin tin and halve the baking times
Follow these and you’ll get picture-perfect cups every single time!
Variations for Dairy Free Chocolate Pumpkin Butter Cups
Want to mix things up? Try these easy twists:
- Nutty swap: Replace half the pumpkin with almond butter for extra richness
- Crunch factor: Stir chopped pecans or walnuts into the pumpkin filling
- Coconut dream: Add shredded coconut to the chocolate layer for tropical vibes
- Spice it up: Kick up the heat with a pinch of cayenne in the chocolate
The beauty? You can’t mess these up – have fun experimenting!
Storage and Serving Suggestions
Here’s how to keep your pumpkin butter cups at their best:
- Store them right: Keep in an airtight container in the fridge – they’ll stay perfect for up to a week
- Chill before serving: That 30 minutes out of the fridge makes all the difference for the ideal texture
- Gift beautifully: Stack them in mini cupcake liners for festive edible presents
Pro tip: Hide a few in the back of the fridge for yourself – these disappear fast!
Nutritional Information
Now, I’m no nutritionist, but here’s the scoop on these tasty cups (see what I did there?). Keep in mind these are estimates – your exact numbers might dance around a bit depending on your specific ingredients. Per delightful cup, you’re looking at roughly:
- 120 calories of pure pumpkin-chocolate joy
- 6g fat (the good kind from that quality chocolate)
- 15g carbs – most from natural maple sweetness
- 2g fiber thank you, pumpkin!
Not bad for something that tastes this indulgent, right?
Frequently Asked Questions
I get so many questions about these Dairy Free Chocolate Pumpkin Butter Cups – here are the ones that pop up most often:
Can I use regular chocolate chips if I’m not dairy-free? Absolutely! Regular chocolate works just fine, but the dairy-free version keeps them vegan. Just know that milk chocolate might make them sweeter – I’d reduce the maple syrup slightly if you go that route.
How long do these keep in the fridge? About a week in an airtight container – if they last that long! The pumpkin filling stays fresh thanks to all that chocolate protection.
My chocolate seized up – what now? Don’t panic! Add a teaspoon of coconut oil and stir gently – it usually brings it back to silky smooth. And next time, go slower with those microwave bursts.
Can I freeze them? You bet! They freeze beautifully for up to 2 months. Just thaw in the fridge overnight before serving.
Try this recipe and share your results! Tag me so I can see your pumpkin-chocolate masterpieces! Find more recipes.
Print
Dairy Free Chocolate Pumpkin Butter Cups in 5 Magical Steps
- Total Time: 1 hr 15 mins
- Yield: 12 cups
- Diet: Vegan
Description
Rich chocolate cups filled with creamy pumpkin butter, perfect for a dairy-free treat.
Ingredients
- 1 cup dairy-free chocolate chips
- 1/2 cup pumpkin puree
- 2 tbsp maple syrup
- 1 tsp pumpkin pie spice
- 1/4 tsp salt
Instructions
- Melt dairy-free chocolate chips.
- Line a muffin tin with cupcake liners.
- Spoon melted chocolate into liners, coating bottoms and sides.
- Chill until firm.
- Mix pumpkin puree, maple syrup, pumpkin pie spice, and salt.
- Fill cups with pumpkin mixture.
- Top with remaining melted chocolate.
- Chill until set.
Notes
- Store refrigerated.
- Use smooth pumpkin puree.
- Adjust sweetness to taste.
- Prep Time: 15 mins
- Cook Time: 0 mins
- Category: Dessert
- Method: No-Bake
- Cuisine: American