Skip to content
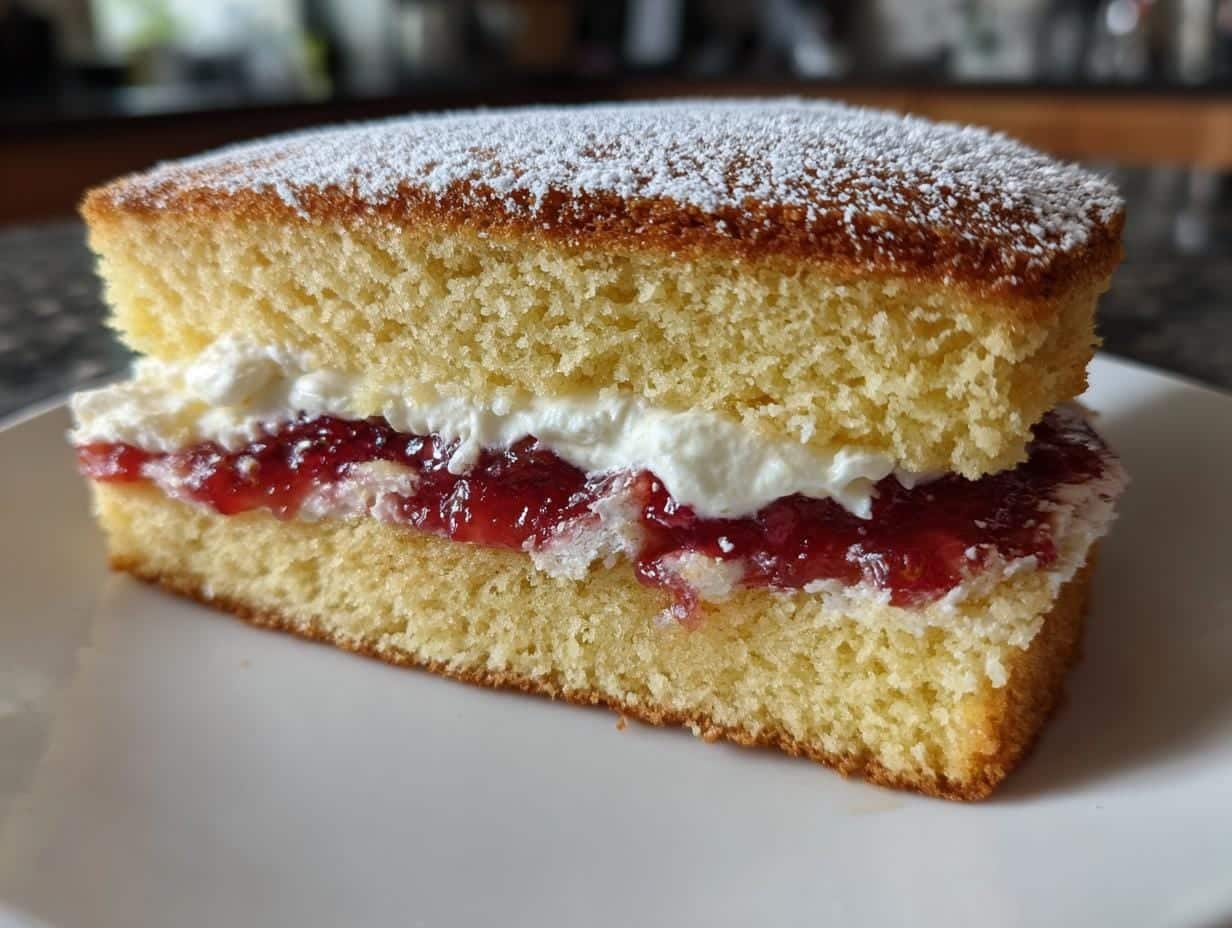
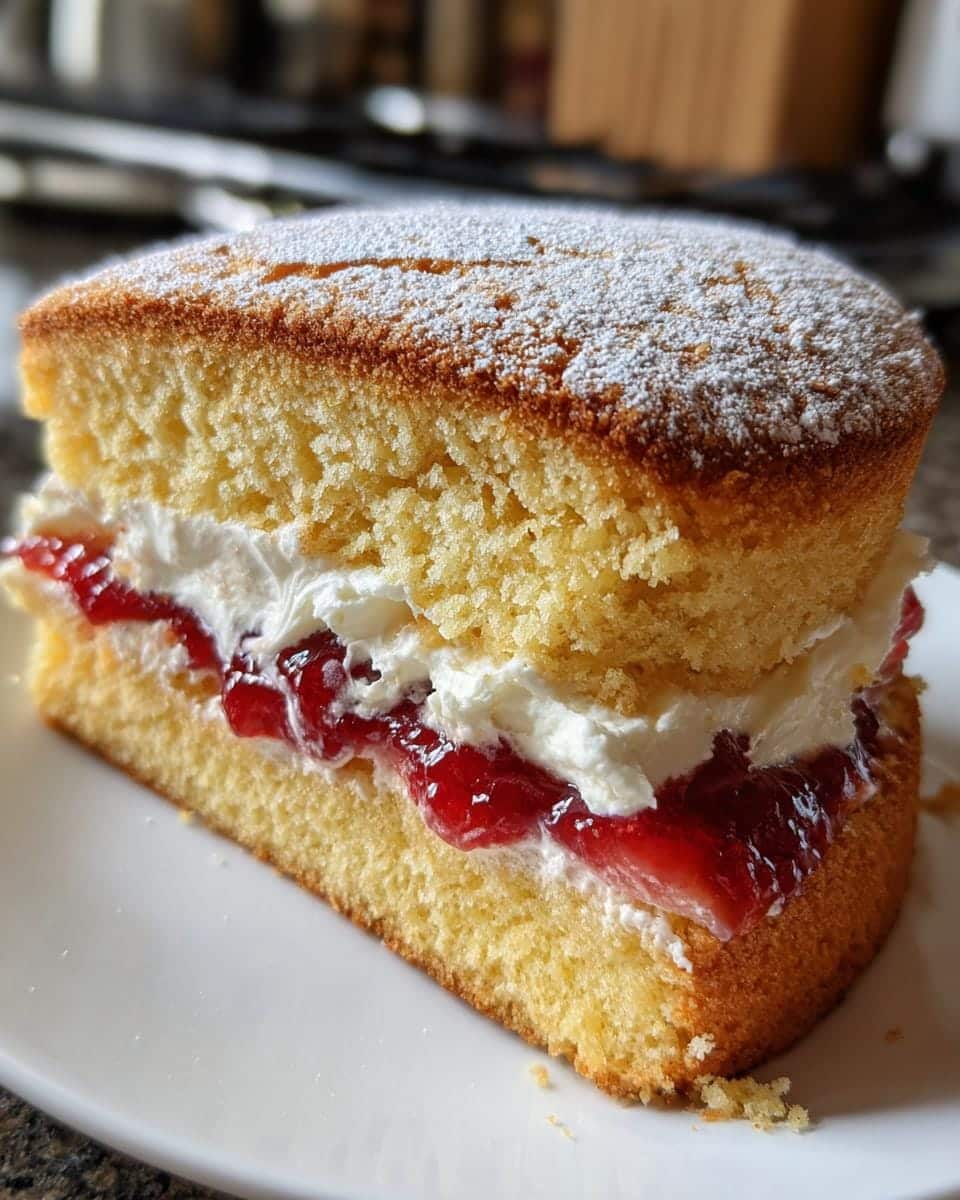
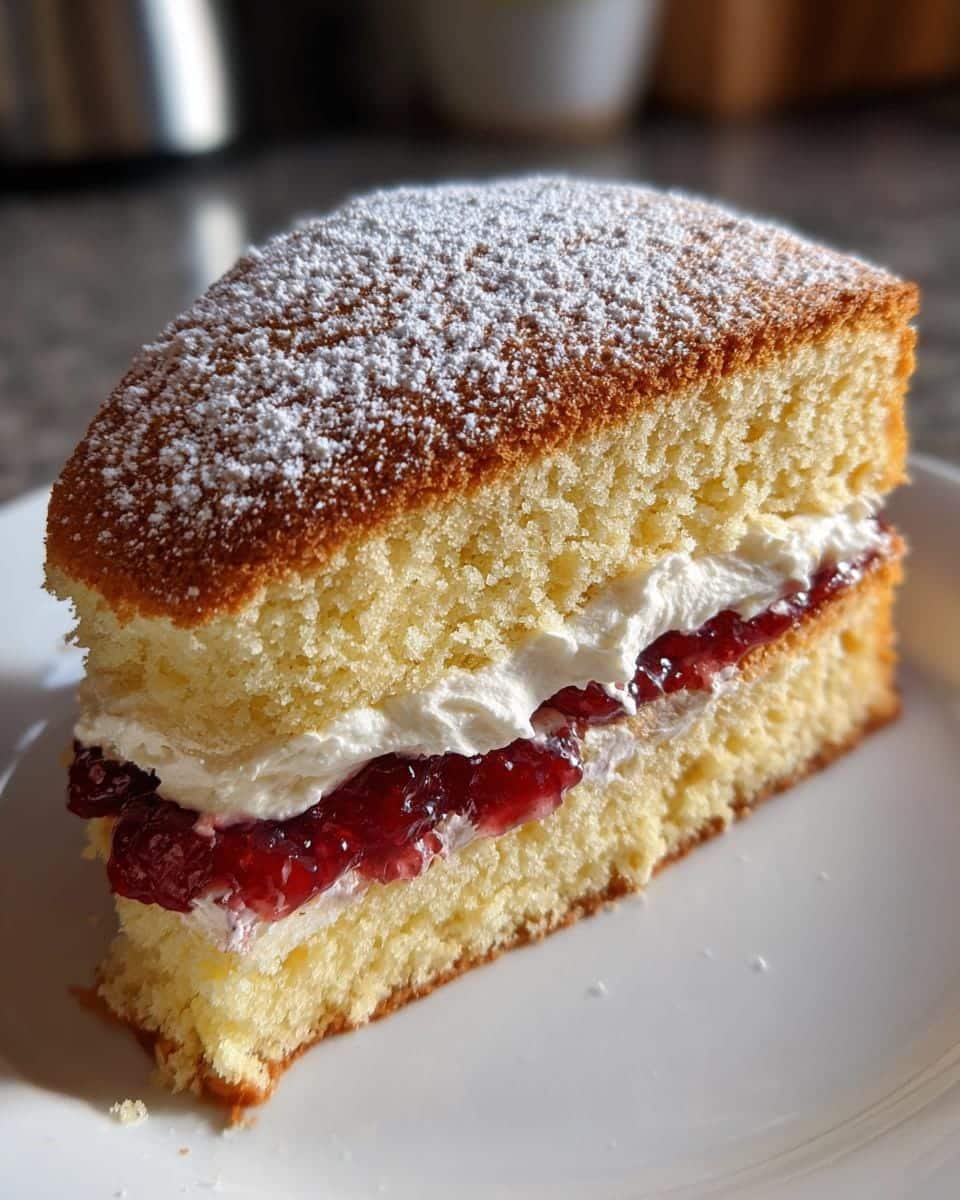
There’s nothing quite like the first bite of a Classic Victoria Sponge Cake – that delicate crumb sandwiched with sweet jam and pillowy cream takes me straight back to childhood tea times at my aunt’s house. She’d serve slices on her floral china plates while the kettle whistled, and we’d giggle as powdered sugar dusted our noses. This traditional British bake remains my absolute favorite for good reason: it’s simple yet elegant, light as air yet satisfying, and oh-so-perfect with a cuppa. The combination of fluffy vanilla sponge, tangy strawberry jam, and rich cream creates pure magic – one bite explains why Queen Victoria herself adored this teatime treat!
Table of contents:
Why You’ll Love This Classic Victoria Sponge Cake
This isn’t just any cake – it’s THE cake that’ll make you feel like a proper British baker! Here’s why this Victoria sponge deserves a spot in your recipe rotation:
- Timeless perfection: This is the authentic recipe passed down through generations – none of those modern twists that mess with perfection!
- Pantry staples only: No fancy ingredients here – just butter, sugar, eggs and flour transform into something magical.
- The ultimate teatime companion: That first bite with a steaming cuppa? Absolute bliss that’ll transport you to a cozy English cottage.
- Guaranteed crowd-pleaser: Whether it’s a birthday, picnic, or just because – nobody can resist this classic beauty.
- Beginner-friendly: If you can cream butter and sugar, you can absolutely nail this traditional bake.
Trust me, once you’ve tasted a proper Victoria sponge made this way, those shop-bought versions will never compare!
Ingredients for Classic Victoria Sponge Cake
Here’s the beautiful thing about a proper Victoria sponge – you probably have everything you need in your kitchen right now! But listen, there’s a reason my aunt always measured everything exactly and fussed over little details. These simple ingredients make all the difference when treated right:
- 200g softened butter – And I mean properly softened! Leave it out until it gives easily when pressed (about 2 hours). Cold butter won’t cream properly, and melted butter makes the cake heavy.
- 200g caster sugar – That fine texture dissolves perfectly into the butter. Granulated will work in a pinch, but caster gives that dreamy melt-in-your-mouth quality.
- 4 large eggs – Room temperature, please! Cold eggs can make your batter separate. Crack them into a bowl first – nobody wants shell surprises!
- 200g self-raising flour – Sift it! I know it’s an extra step, but those little flour lumps can ruin our perfect rise.
- 1 tsp vanilla extract – The good stuff, none of that artificial flavoring. It makes all the difference in that delicate sponge.
- 100g strawberry jam – Go for quality here. The bright, fruity tang cuts through the richness perfectly.
- 150ml whipped cream – Whipped just until soft peaks form. Overdo it and your filling will be stiff!
- Icing sugar for dusting – That snowy finish isn’t just pretty – it adds the perfect sweet touch.
See? Nothing fancy, but each ingredient plays its part in creating sponge cake magic!
Equipment You’ll Need
Now don’t panic – you don’t need fancy gadgets to make this beauty! Just gather these trusty basics from your kitchen:
- A couple of good mixing bowls (one large, one medium)
- Electric hand mixer or stand mixer (though a wooden spoon and strong arm will work in a pinch!)
- Two 20cm round cake tins – non-stick if possible
- Wire rack for cooling (essential unless you like soggy bottoms)
- Spatula for scraping every last bit of delicious batter
- Sieve for that all-important flour sifting
That’s it! See? Nothing too complicated – just the simple tools that make baking this classic an absolute joy.
How to Make Classic Victoria Sponge Cake
Alright, let’s get to the fun part – turning those simple ingredients into a showstopper! I’ve made this cake more times than I can count, and trust me, these little tricks make all the difference between good and absolutely perfect.
Preparing the Cake Batter
First things first – cream that butter and sugar like your life depends on it! I use my electric mixer on medium speed for a good 3-4 minutes until the mixture turns pale, fluffy, and almost white. You’ll know it’s ready when it looks like whipped cream and holds slight peaks when you lift the beaters. This step creates all those tiny air bubbles that give our sponge its signature lightness.
Now for the eggs – add them one at a time, mixing well after each addition. Here’s my secret: crack them into a small bowl first in case of shells (we’ve all been there!). If the mixture starts to look curdled, don’t panic – just add a tablespoon of your flour and keep going. Once all eggs are incorporated, it should look smooth and glossy.
Time for the flour! Sift it over the mixture in two batches, then fold gently with a large metal spoon or spatula. I use a figure-eight motion, scraping from the bottom to incorporate everything evenly. Stop the second time you can’t see flour streaks – overmixing is the enemy of a light sponge!
Baking and Cooling the Sponge Cakes
Divide the batter evenly between your prepared tins – I like to weigh them to be precise. Smooth the tops with a knife, then give each tin a gentle tap on the counter to release any big air bubbles.
Into the oven they go! The magic temperature is 180°C (160°C fan) – no hotter or the cakes will brown too quickly. Set your timer for 20 minutes, but don’t open the door before then! The cakes are done when they’re golden, spring back when lightly pressed, and a skewer comes out clean.
Now, the crucial cooling step: leave the cakes in their tins for exactly 5 minutes – this helps them set. Then run a knife around the edges and turn them out onto a wire rack. If you try to assemble them while warm, you’ll end up with a jammy, creamy mess (learned that the hard way!). Wait until they’re completely cool – about an hour should do it.
Assembling Your Classic Victoria Sponge Cake
Now comes the best part – turning those beautiful golden sponges into a showstopper! Here’s how I do it to get perfect layers every time:
First, pick your flattest sponge for the bottom (don’t worry if they domed slightly – that’s normal!). Spread the strawberry jam right to the edges with the back of a spoon. My aunt taught me to leave about a 1cm border so it doesn’t squish out when you cut slices – smart thinking!
Next, the whipped cream – dollop it right in the center and gently spread outward with a palette knife. The trick is to use just enough pressure to spread it without dragging crumbs into the cream. Stop about 2cm from the edge – trust me, you want that “jam peeking out” look when you slice into it!
Carefully place the second sponge on top, pressing ever so slightly in the center to secure it. A light dusting of icing sugar through a fine sieve gives that picture-perfect finish. And voila! You’ve just created a proper British classic that would make Queen Vic proud.
Pro Tips for Perfect Classic Victoria Sponge Cake
After burning through countless batches (literally, in some cases!), I’ve learned these golden rules for Victoria sponge success:
- Room temp is non-negotiable: Cold butter won’t cream properly, and chilly eggs can make your batter separate. Plan ahead!
- Fold like you mean it: Overmixing develops gluten = tough cake. Stop the moment flour disappears – a few lumps are better than overworked batter.
- Weigh your divided batter: Eyeballing leads to lopsided layers. My kitchen scale ensures identical cakes every time.
- The finger test never lies: If the sponge springs back when lightly pressed, it’s done. Toothpick tests can deceive with such a light cake!
- Assemble just before serving: This keeps the sponge fresh and prevents the cream from making it soggy. Your patience will be rewarded!
Follow these, and you’re guaranteed to impress – maybe even earn a royal warrant!
Serving and Storing Suggestions
Oh, that magical moment when you’re ready to serve your masterpiece! For the full British tea-time experience, slice your Victoria sponge into elegant wedges – I find a sharp serrated knife dipped in hot water gives the cleanest cuts. Serve on pretty plates with piping hot tea (Earl Grey is my favorite pairing), and watch everyone’s eyes light up at that perfect jam-and-cream cross-section!
Now, about leftovers (as if there ever are any!): if you must store it, pop any remaining cake in an airtight container in the fridge. The sponge will stay fresh for up to 2 days, though the texture’s best eaten within 24 hours. Pro tip: if refrigerating, let slices come to room temperature for 15 minutes before serving – that cream filling tastes so much better when it’s not ice-cold!
Classic Victoria Sponge Cake Variations
While the traditional jam-and-cream version will always have my heart, sometimes I love shaking things up with these delicious twists! My favorite alternative filling is tangy lemon curd – just swap out the strawberry jam for thick homemade lemon curd. The citrus zing cuts through the richness beautifully. Or try fresh raspberries mashed with a bit of sugar instead of jam – the jewel-like berries peeking through the cream make such a pretty summer treat!
For something truly decadent, I’ll sometimes use chocolate ganache in place of cream and cherry jam instead of strawberry. It turns the classic sponge into something reminiscent of a Black Forest gateau! The beauty of this recipe is how adaptable it is – once you’ve mastered the perfect sponge, the filling combinations are endless. Just remember: whatever you choose, keep the quantities similar to the original so your cake stays beautifully balanced.
Nutritional Information
Now, I’m no nutritionist, but here’s the scoop on what’s in each slice of this heavenly cake! Keep in mind these numbers can wiggle a bit depending on your exact ingredients – that fancy French butter or organic jam might change things up. For a standard slice (that’s 1/8 of our beauty), you’re looking at about 350 calories with 20g of that glorious butterfat, 25g of sweet sugary goodness, and 5g of protein from those eggs. Not bad for something that tastes like pure happiness, eh?
Frequently Asked Questions
Absolutely! Swap the self-raising flour for a gluten-free blend (with added xanthan gum) and 2 tsp baking powder. The texture will be slightly denser but still delicious. Just remember to fold extra gently as GF batters can be fragile!
Don’t panic – we’ve all been there! Usually it means either: 1) the oven door was opened too soon, 2) the cake wasn’t quite baked through, or 3) the batter was overmixed. Next time, set a timer, do the finger test, and remember – gentle folds win the race!
You clever baker! The sponges freeze beautifully for up to a month – just wrap them tightly in cling film. Thaw at room temperature before assembling. For best results though, I always recommend adding the cream filling fresh on the day you’re serving.!
No worries! Regular granulated sugar works fine – just pulse it in a blender for a few seconds to make it finer. Or be patient and let it dissolve completely during the creaming process (might take an extra minute or two).
For more baking inspiration, check out our Pinterest!
Print
Irresistible Classic Victoria Sponge Cake Recipe for Tea Time Bliss
- Total Time: 45 minutes
- Yield: 8 servings
- Diet: Vegetarian
Description
A light and fluffy sponge cake filled with jam and cream, perfect for afternoon tea.
Ingredients
- 200g softened butter
- 200g caster sugar
- 4 eggs
- 200g self-raising flour
- 1 tsp vanilla extract
- 100g strawberry jam
- 150ml whipped cream
- Icing sugar for dusting
Instructions
- Preheat oven to 180°C (160°C fan). Grease and line two 20cm round cake tins.
- Beat butter and sugar until pale and fluffy.
- Add eggs one at a time, mixing well after each.
- Fold in flour and vanilla extract gently.
- Divide mixture between tins and smooth tops.
- Bake for 20-25 minutes until golden and springy.
- Cool in tins for 5 minutes, then transfer to wire racks.
- Once cooled, spread jam on one cake, top with cream, then place second cake on top.
- Dust with icing sugar before serving.
Notes
- Use room temperature ingredients for best results.
- Don’t overmix the batter to keep it light.
- Store in an airtight container for up to 2 days.
- Prep Time: 20 minutes
- Cook Time: 25 minutes
- Category: Dessert
- Method: Baking
- Cuisine: British