Skip to content
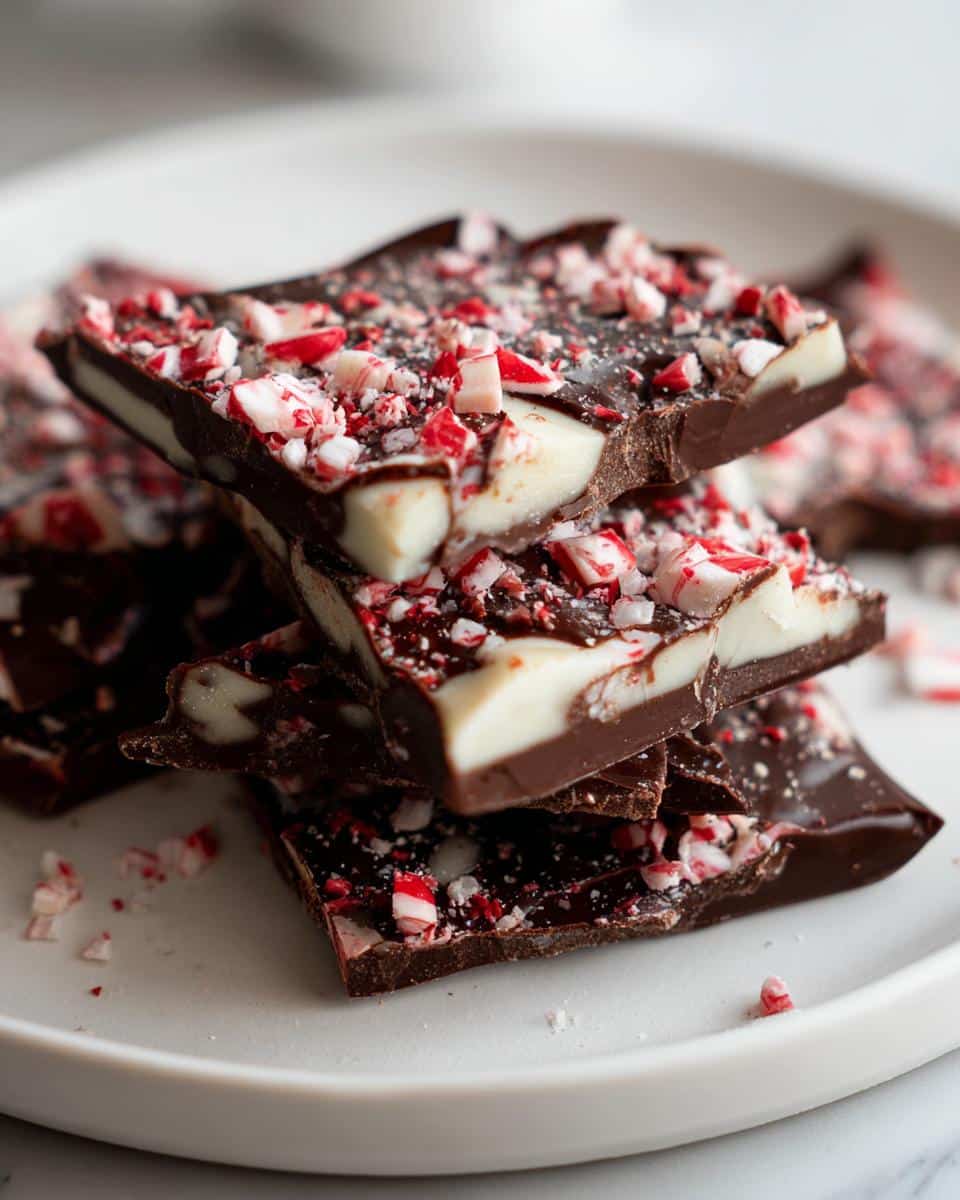
You know those holiday treats that look fancy but are secretly easy? That’s my Chocolate Peppermint Bark—it’s been my go-to festive gift for years because it wows everyone with zero stress. I first made it at my mom’s kitchen counter when I was 12 (and yes, there was a minor peppermint explosion), but now it’s my signature December move. The magic? Just layers of rich dark chocolate, creamy peppermint-infused white chocolate, and crunchy candy canes. It’s like winter in edible form—cool, sweet, and impossible to stop nibbling. Perfect for cookie swaps, hostess gifts, or sneaky midnight fridge raids. Trust me, once you try this, you’ll understand why my friends start hinting for it around Thanksgiving.
Why You’ll Love This Chocolate Peppermint Bark
This recipe has been my holiday lifesaver for years, and here’s why it’ll become yours too:
- Quick magic: From fridge to gift box in under an hour – perfect when you realize you forgot to make something for the party
- No-bake bliss: Zero oven time means more time for wrapping presents (or watching holiday movies)
- Festive wow factor: The layered chocolate and crushed candy canes look like you spent hours
- Crowd-pleaser: I’ve never met anyone who could resist just one more piece
- Kid-friendly fun: My nieces love helping crush the candy canes (and sneaking samples)
Ingredients for Chocolate Peppermint Bark
This couldn’t be simpler – just four ingredients create pure holiday magic:
- 12 oz dark chocolate (chopped – I prefer 70% cacao for that grown-up richness)
- 12 oz white chocolate (chopped – the good stuff melts smoother)
- 1 tsp peppermint extract (not mint – that subtle difference matters!)
- 1/2 cup crushed candy canes (about 6 regular-sized ones smashed in a bag with a rolling pin – my favorite stress reliever)
Pro tip: Measure everything before starting – when chocolate’s melted, you’ll want to move fast!
Equipment You’ll Need
Gather these basics – you probably already have them lurking in your kitchen:
- Baking sheet (standard half-sheet size works perfectly)
- Parchment paper (trust me, skip the wax paper disaster I learned about the hard way)
- Double boiler (or improvise with a heatproof bowl over simmering water)
- Spatula (for that satisfying chocolate spreading)
That’s it! No fancy gadgets needed – just good old-fashioned chocolate therapy.
How to Make Chocolate Peppermint Bark
Don’t let the fancy look fool you – this comes together with just a few simple steps. The key is working in layers and letting each one set properly. Here’s how I make mine (with all the tips I’ve learned through many peppermint-scented trials):
Step 1: Prepare the Dark Chocolate Layer
First, line your baking sheet with parchment paper – this prevents sticking and makes cleanup a breeze. Now, melt the dark chocolate in your double boiler (or a bowl set over simmering water). Stir constantly with a spatula until it’s smooth as silk – no lumps! Pour it onto your prepared sheet and spread evenly with your spatula. Pop it in the fridge for exactly 15 minutes – this gives it just enough time to set without getting too hard.
Step 2: Add the Peppermint White Chocolate Layer
While the dark chocolate chills, melt your white chocolate the same way. This is where the magic happens – stir in that peppermint extract (just one teaspoon gives the perfect cool kick). When the dark layer is set but still slightly tacky, carefully pour and spread the white chocolate over it. Work quickly but gently – we want distinct layers with a pretty marbled effect where they meet. Back into the fridge it goes for another 15 minutes.
Step 3: Finish with Candy Canes
Here comes the fun part! Take your crushed candy canes (I go for some coarse and some fine pieces for texture) and sprinkle them evenly over the still-tacky white chocolate. Gently press them in with clean hands. Now the final chill – 30 minutes in the fridge until completely firm. When it’s ready, break it into rustic pieces (I like irregular shards – they look more artisanal). The satisfying snap when it breaks is pure holiday joy!
Tips for Perfect Chocolate Peppermint Bark
After years of making this (and yes, a few chocolate disasters), here are my can’t-skip secrets:
- Chocolate matters: Splurge on good quality – cheap chocolate seizes easier and tastes waxy
- Crush smart: Put candy canes in a zip-top bag and roll gently – you want some powder and some chunks
- Timing is everything: Spread each layer while the chocolate is warm but not hot to prevent melting the layer below
- Storage trick: Keep parchment between layers if stacking in a tin to prevent sticking
Bonus tip: Always make extra – this disappears faster than holiday cookies!
Variations for Chocolate Peppermint Bark
While I adore the classic version, sometimes I like to mix it up – here are my favorite twists:
- Milk chocolate swap: Use all milk chocolate for a sweeter version the kids beg for
- Nutty crunch: Add chopped toasted almonds or pecans between layers – the toasty flavor pairs perfectly
- Peppermint patty style: Skip the white chocolate and add peppermint extract to dark chocolate for intense mint lovers
- Festive colors: Swirl red food coloring into white chocolate before spreading for a candy cane effect
The best part? You can’t mess it up – every variation disappears just as fast!
Storing and Serving Chocolate Peppermint Bark
Here’s how I keep my peppermint bark fresh and festive all season long! Store it in an airtight container at room temperature (if your house isn’t too warm) or in the fridge – it stays perfect for up to 2 weeks. For gifting, I love stacking pieces in clear cellophane bags tied with ribbon, or arranging them in pretty holiday tins with parchment between layers. Pro tip: It makes the best last-minute hostess gift when you’re running late to a party (not that I’d know anything about that…). Serve it on your prettiest holiday platter at room temperature so the chocolate gets that perfect melt-in-your-mouth texture.
Nutritional Information
Nutritional values are estimates per piece (based on 24 servings): 120 calories, 7g fat (4g saturated), 14g carbs, 10g sugar, 1g protein. Always check specific product labels for exact details.
Frequently Asked Questions
After sharing this recipe for years, I’ve fielded every peppermint bark question imaginable! Here are the ones that pop up most:
Can I use chocolate chips instead of chopped chocolate?
Technically yes, but chopped bars melt smoother – chips have stabilizers that can make the texture weird. If you must use chips, add a teaspoon of coconut oil to help them melt evenly.
How long does homemade peppermint bark last?
Kept airtight at cool room temp, it stays fresh about 2 weeks (if it lasts that long!). The fridge extends it another week, but let pieces come to room temp before serving for best texture.
What’s your best gifting tip?
Layer pieces vertically in clear holiday bags – shows off those pretty layers! Include a cute tag with storage instructions so recipients enjoy it at its peak.
My white chocolate seized – help!
Been there! Try stirring in a tablespoon of vegetable shortening until smooth again. Next time, make sure no water sneaks into your bowl – even steam can cause chaos.
Can I make this vegan?
Absolutely! Use dairy-free dark and white chocolates (check labels carefully). Coconut oil-based peppermint extract works perfectly too.
Share Your Chocolate Peppermint Bark
I’d love to see your holiday creations! Snap a photo of your peppermint bark masterpiece and tag me – nothing makes me happier than seeing my recipe bring joy to your kitchen. Happy crunching!