Skip to content
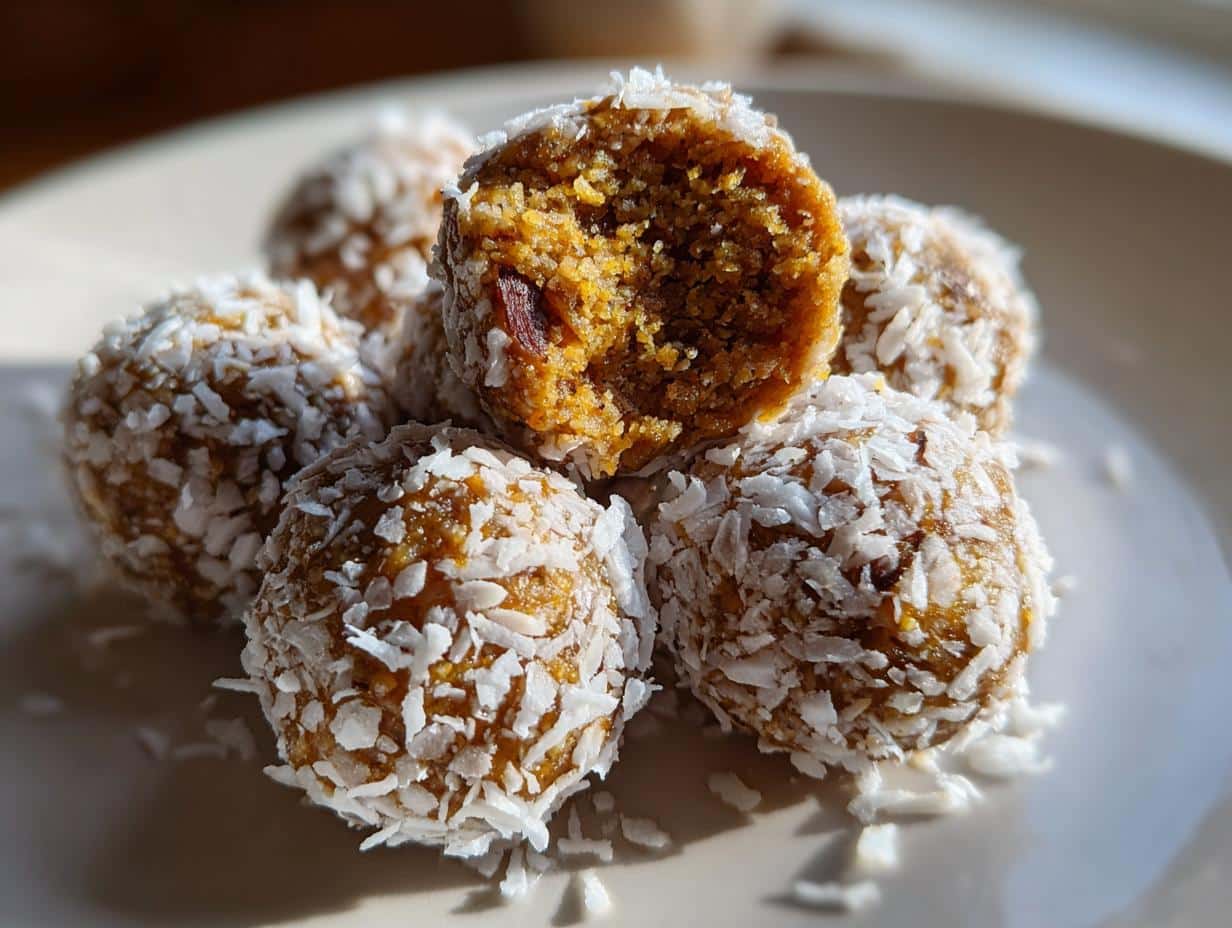
Let me tell you about my go-to snack obsession: Almond Bliss Balls. These little bites are my secret weapon for when I need a quick energy boost or just something sweet without the guilt. They’re no-bake, which means I can whip them up in minutes—no oven, no fuss. Plus, they’re packed with wholesome ingredients like almonds, dates, and cocoa powder. I started making them during a crazy workweek when I needed something portable and satisfying, and now they’re a staple in my fridge. Trust me, once you try these, you’ll be hooked. Perfect for busy mornings, afternoon slumps, or even a midnight treat!

Why You’ll Love These Almond Bliss Balls
These Almond Bliss Balls are a game-changer, and here’s why:
- Quick and easy: Ready in just 10 minutes—no baking, no waiting.
- Healthy and energizing: Packed with almonds and dates for a natural energy boost.
- Perfectly portable: Toss them in your bag for a snack on the go.
- Customizable: Swap ingredients to suit your taste or dietary needs.
- Kid-friendly: Even picky eaters can’t resist these sweet, bite-sized treats.
Seriously, they’re the snack you didn’t know you needed until now!
Ingredients for Almond Bliss Balls
Here’s what you’ll need to make these no-bake wonders:
- 1 cup almonds
- 1 cup pitted dates
- 2 tbsp cocoa powder
- 1 tbsp almond butter
- 1 tsp vanilla extract
- Pinch of salt
- 2 tbsp shredded coconut (for coating)
That’s it! Simple, wholesome, and ready in no time.
Ingredient Notes & Substitutions
Don’t stress if you’re missing something—these Almond Bliss Balls are super flexible! Use walnuts or cashews instead of almonds, or swap dates for honey or maple syrup (adjust the quantity to taste). If you’re vegan, ensure your cocoa powder and almond butter are dairy-free. For a nut-free version, try sunflower seeds and tahini. And if you’re not a fan of coconut, roll them in cocoa powder or chopped nuts instead. Easy, right?
How to Make Almond Bliss Balls
Okay, let’s get rolling—literally! Making these bliss balls is so easy, you’ll wonder why you ever bought store-bought snacks. Here’s how it’s done:
- First, toss your almonds into a food processor and pulse until they’re finely chopped. You want them to look like coarse sand—not powder, not whole pieces.
- Add in the dates, cocoa powder, almond butter, vanilla, and that pinch of salt. Now, let the machine work its magic! Process until the mixture starts clumping together like cookie dough. This usually takes about 1-2 minutes—you’ll know it’s ready when you can pinch some between your fingers and it holds its shape.
- Time to get your hands dirty! Scoop out tablespoon-sized portions and roll them into balls. If the mixture sticks too much, wet your hands slightly—it helps tremendously.
- Roll each ball in shredded coconut until coated. The coconut adds such a nice texture contrast to the rich, fudgy center.
- Pop them in the fridge for at least 30 minutes to firm up. I know it’s tempting to skip this step, but trust me, it makes all the difference in texture!
Tips for Perfect Almond Bliss Balls
Here are my hard-earned tricks for bliss ball success:
- If your mixture seems too dry, add 1/2 teaspoon of water or almond milk at a time until it comes together.
- For extra decadence, roll the balls in melted dark chocolate after the coconut coating.
- Store them between layers of parchment paper to prevent sticking.
- Want more protein? Add a scoop of your favorite vanilla or chocolate protein powder to the mix!
Storing Almond Bliss Balls
These little energy bites keep beautifully in an airtight container in the fridge for up to 2 weeks—if they last that long! For longer storage, freeze them in a single layer first, then transfer to a freezer bag. They’ll stay perfect for 3 months. Just thaw at room temperature when those snack cravings hit!
Nutritional Information for Almond Bliss Balls
Each Almond Bliss Ball is a guilt-free treat packed with goodness! Here’s the estimated nutritional breakdown per serving (1 ball):
- Calories: 120
- Fat: 7g
- Protein: 3g
- Carbohydrates: 12g
- Fiber: 3g
- Sugar: 8g
Keep in mind, these values may vary slightly depending on ingredient brands or substitutions. Enjoy these bites knowing they’re as nourishing as they are delicious!
FAQs About Almond Bliss Balls
Got questions? I’ve got answers! Here are the most common things people ask me about these addictive little bites:
Can I use a blender instead of a food processor?
Yes, but be careful! Blenders can over-process the mixture quickly. Pulse in short bursts and scrape down the sides often. A food processor works best, but a high-powered blender will do in a pinch.
Are these bliss balls gluten-free?
Absolutely! All the ingredients are naturally gluten-free. Just double-check your cocoa powder and almond butter labels if you’re highly sensitive.
Why won’t my mixture stick together?
Your dates might be too dry. Try soaking them in warm water for 10 minutes first, then drain well. Or add an extra teaspoon of almond butter or water to help bind everything.
Can I make these nut-free?
Of course! Swap almonds for sunflower seeds and use sunflower seed butter instead of almond butter. They’ll still be deliciously rich and satisfying.
How long do they take to set in the fridge?
About 30 minutes does the trick, but I often leave them overnight. The longer they chill, the firmer and more flavorful they become!
Share Your Almond Bliss Balls
Made these? I’d love to see your creations! Snap a pic, tag me, or leave a review—it makes my day knowing you’re enjoying these little bites as much as I do!