Skip to content
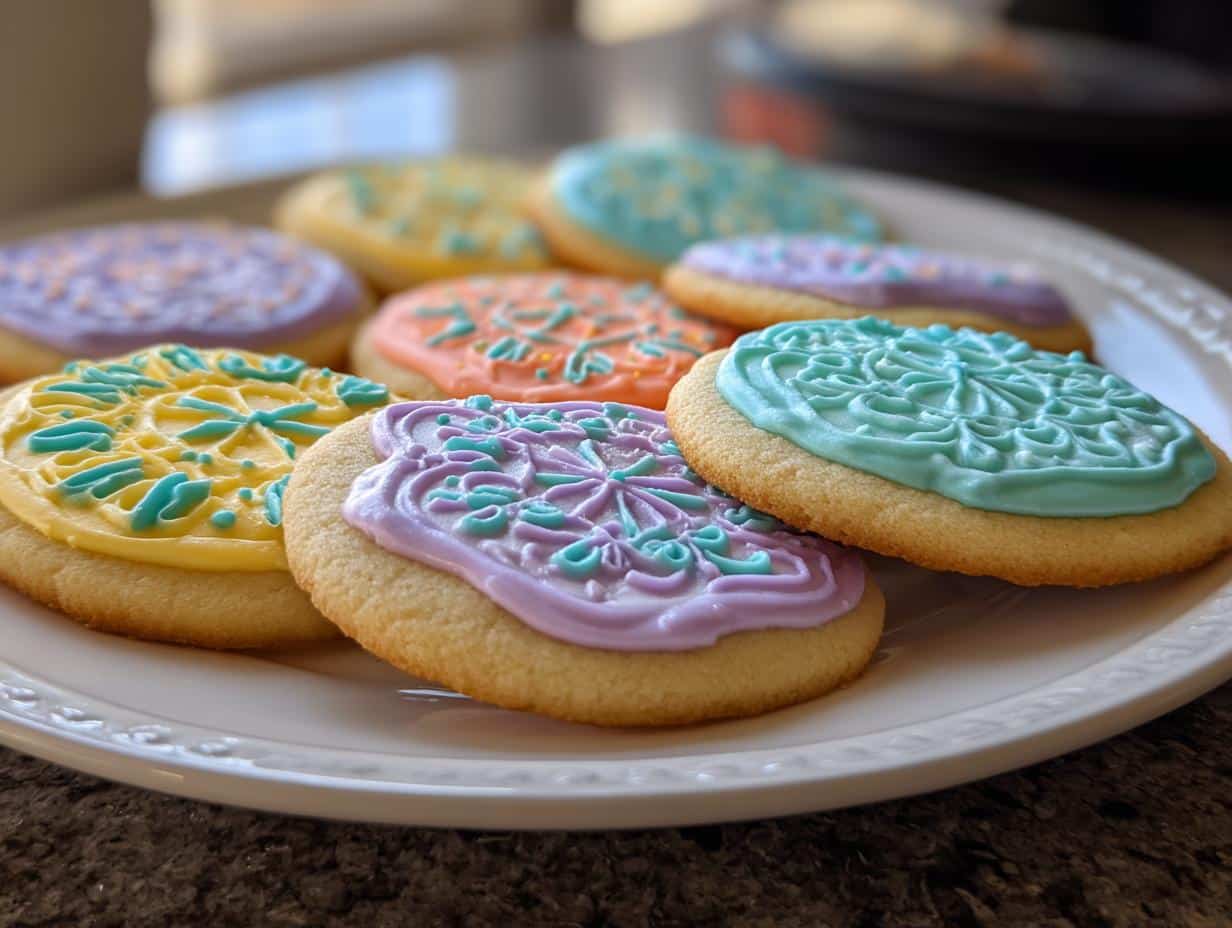
Every Easter morning, you’ll find me elbow-deep in flour, rolling out these beloved Delicious Easter Cookies while the kids hunt for eggs. This recipe’s been our family tradition since my great-aunt handed me her handwritten recipe card (complete with butter stains and vanilla-scented smudges) at my first spring bake sale. What makes these cookies special? That perfect balance – crisp edges with soft centers, just sweet enough to let your colorful decorations shine. I’ve watched three generations of little fingers press sprinkles into the icing, and I swear they taste even better when decorated with love.
The magic happens in under an hour, but these cookies create memories that last forever. Whether you’re starting a new tradition or looking to upgrade your Easter dessert spread, this recipe delivers that nostalgic, buttery goodness every time. Plus, they’re practically begging for creative decorations – from pastel flood icing to those adorable speckled egg designs that always wow on Instagram.
Why You’ll Love These Delicious Easter Cookies
Listen, if there’s one recipe that deserves a permanent spot in your Easter traditions, it’s these cookies. Here’s why:
- Effortless magic: The dough comes together in minutes with basic pantry staples – no fancy ingredients required
- Forgiving texture: They bake up soft yet sturdy enough for little hands to decorate without crumbling
- Blank canvas fun: Those smooth surfaces beg for creative icing, from simple drizzle to intricate spring designs
- Memory maker: I’ve lost count of how many flour-dusted kitchen memories we’ve made with this recipe
- Versatile base: The subtle vanilla flavor lets your decorations shine while still tasting amazing plain
Trust me, one bite of these buttery delights and you’ll understand why they’ve been my Easter staple for 15 years running.
Ingredients for Delicious Easter Cookies
Here’s the beautiful simplicity of this recipe – just seven basic ingredients transform into Easter magic. But let me tell you, quality matters here:
- 1 cup (that’s 2 sticks) unsalted butter, softened – And I mean properly softened! Leave it out 30 minutes until it gives slightly when pressed (not melty!)
- 1 cup granulated sugar – Pack it gently in your measuring cup like you’re tucking in a baby bunny
- 1 large egg – Room temperature, please! Cold eggs make the butter seize up
- 2 teaspoons pure vanilla extract – None of that imitation stuff – this is where the flavor sings
- 3 cups all-purpose flour – Fluff it first, then spoon into your measuring cup
- 1 teaspoon baking powder – Fresh is best – check your expiration date!
- 1/2 teaspoon fine sea salt – The secret weapon that balances all that sweetness
See? Nothing weird or fancy – just honest ingredients that work together like spring flowers and sunshine.
Equipment You’ll Need
Now, don’t go thinking you need fancy gadgets for these Easter cookies! Here’s what I always pull from my kitchen:
- A trusty stand mixer (or just a big bowl and wooden spoon if you want the arm workout)
- Rolling pin – mine’s an old wooden one that’s seen better days but rolls like a dream
- Easter cookie cutters (bunnies, eggs, flowers – the more the merrier!)
- Parchment paper – lifesaver for easy cleanup and no-stick baking
- Cooling racks – crucial unless you like soggy-bottomed cookies
That’s it! Though I won’t judge if you add a glass of milk to your “equipment” list like I do.
How to Make Delicious Easter Cookies
Okay, let’s get our hands floury! These cookies come together in three simple phases – mixing, shaping, and decorating. Don’t let their cuteness fool you – this is one of those rare recipes where following the steps exactly gives you perfect results every time.
Preparing the Dough
First things first – preheat that oven to 350°F (175°C) and line your baking sheets with parchment. Now, the fun begins! In your mixer bowl, beat the softened butter and sugar until it’s light and fluffy – about 2 minutes. This isn’t just mixing, it’s aerating! Then add the egg and vanilla, mixing just until incorporated. Here’s my golden rule: don’t overbeat after adding the egg or you’ll end up with tough cookies. Gradually add your dry ingredients (I like to sift them together first) until you’ve got a soft, pliable dough that holds together when pinched.
Cutting and Baking the Cookies
Flour your surface lightly and roll the dough to about 1/4-inch thickness – any thinner and they’ll burn, any thicker and they won’t cook evenly. Press those cute Easter shapes firmly into the dough (I always start from one edge and work across to minimize re-rolling). Pop them onto your prepared sheets, leaving about an inch between each cookie. Bake for 8-10 minutes until you see just the faintest golden tinge around the edges. They’ll still look soft in the center – that’s perfect! Let them rest on the pan for 2 minutes before transferring to racks to cool completely.
Decorating Your Delicious Easter Cookies
Oh, the decorating – where creativity meets sugar rush! Wait until the cookies are completely cool (patience, grasshopper!) or your icing will melt right off. I love using royal icing for detailed work – it dries hard and glossy. For beginners, a simple powdered sugar glaze with food coloring works wonders. Pro tip: outline your shapes first with thicker icing, then “flood” with thinned icing. Add sprinkles while wet, or pipe on details after the base layer dries. The options are endless – pastel flowers, polka-dot eggs, even little bunny faces!
Tips for Perfect Delicious Easter Cookies
After countless Easter baking sprees, I’ve learned a few tricks that make all the difference with these cookies:
- Chill when sticky: If your dough feels too soft after mixing, wrap it and pop it in the fridge for 20-30 minutes. Cold dough holds shapes better!
- Roll evenly: I place wooden dowels on either side of my dough as guides – instant perfect thickness every time.
- Flour smartly: Dust your surface lightly – too much flour makes dry cookies, too little sticks to your cutter.
- Store right: Keep decorated cookies between parchment layers in an airtight container – they’ll stay fresh for up to a week.
Remember, even “imperfect” cookies taste amazing – ask my kids who always “test” the broken ones!
Variations for Your Delicious Easter Cookies
Want to mix things up? Here are my favorite ways to put a fun twist on these classics:
- Citrus kick: Add 1 tablespoon lemon or orange zest to the dough for a sunny spring flavor
- Nutty notes: Swap half the vanilla for almond extract – smells like Easter morning!
- Spice it up: A teaspoon of cinnamon makes them taste like snickerdoodles in bunny shapes
- Colorful dough: Knead in a few drops of food coloring before rolling for pastel cookies
The best part? You can’t mess them up – every version disappears just as fast!
Storing and Freezing Instructions
Here’s how to keep your Delicious Easter Cookies fresh as spring flowers! Undecorated cookies freeze beautifully – just stack them between parchment in an airtight container for up to 3 months. Decorated cookies? They’ll stay perfect in a single layer (no squishing those cute designs!) for a week at room temperature. I always stash a few extras in the freezer – they thaw in minutes when surprise guests arrive!
FAQs About Delicious Easter Cookies
Can I use margarine instead of butter?
Oh honey, Grandma would roll over in her grave! Real butter makes all the difference in texture and flavor. Margarine tends to make these cookies spread too thin and lose that perfect soft-yet-sturdy bite. If you must substitute, use high-quality European-style butter for best results.
How long do these cookies stay fresh?
Properly stored in an airtight container (with parchment between layers), they’ll stay delicious for up to a week. The undecorated cookies actually get better after a day as the flavors meld. Decorated ones are best within 3-4 days before the icing starts to soften.
My dough is too sticky – what now?
Don’t panic! This happens to me when the kitchen’s warm. Simply wrap the dough in plastic and chill for 20-30 minutes. The butter firms up and suddenly it’s dreamy to work with. Too much flour added? The cookies will be tough – better to be patient!
Can I make the dough ahead?
Absolutely! The dough keeps beautifully wrapped tight in the fridge for 3 days or frozen for a month. Just let it soften slightly at room temperature before rolling. Perfect for getting a jumpstart on Easter baking!
Nutrition Information
Just between us? I’m not one to count calories when it comes to Easter treats! These cookies pack all the joy of the season with butter, sugar, and love. Exact nutrition varies based on your ingredients and decorations, but trust me – every bite is worth it when shared with those you cherish most.
Print
Irresistible Delicious Easter Cookies Recipe in 7 Steps
- Total Time: 30 minutes
- Yield: 24 cookies
- Diet: Vegetarian
Description
Make these delicious Easter cookies for your holiday celebration. They are soft, buttery, and perfect for decorating with colorful icing.
Ingredients
- 1 cup unsalted butter, softened
- 1 cup granulated sugar
- 1 large egg
- 2 teaspoons vanilla extract
- 3 cups all-purpose flour
- 1 teaspoon baking powder
- 1/2 teaspoon salt
Instructions
- Preheat your oven to 350°F (175°C). Line baking sheets with parchment paper.
- In a bowl, cream together butter and sugar until light and fluffy.
- Beat in the egg and vanilla extract until well combined.
- In a separate bowl, whisk flour, baking powder, and salt.
- Gradually add dry ingredients to the wet mixture, mixing until dough forms.
- Roll out dough to 1/4-inch thickness and cut into Easter-themed shapes.
- Bake for 8-10 minutes or until edges are lightly golden.
- Cool on wire racks before decorating.
Notes
- Chill dough for 30 minutes if too sticky.
- Store cookies in an airtight container for freshness.
- Use royal icing for detailed decorations.
- Prep Time: 20 minutes
- Cook Time: 10 minutes
- Category: Dessert
- Method: Baking
- Cuisine: American