Skip to content
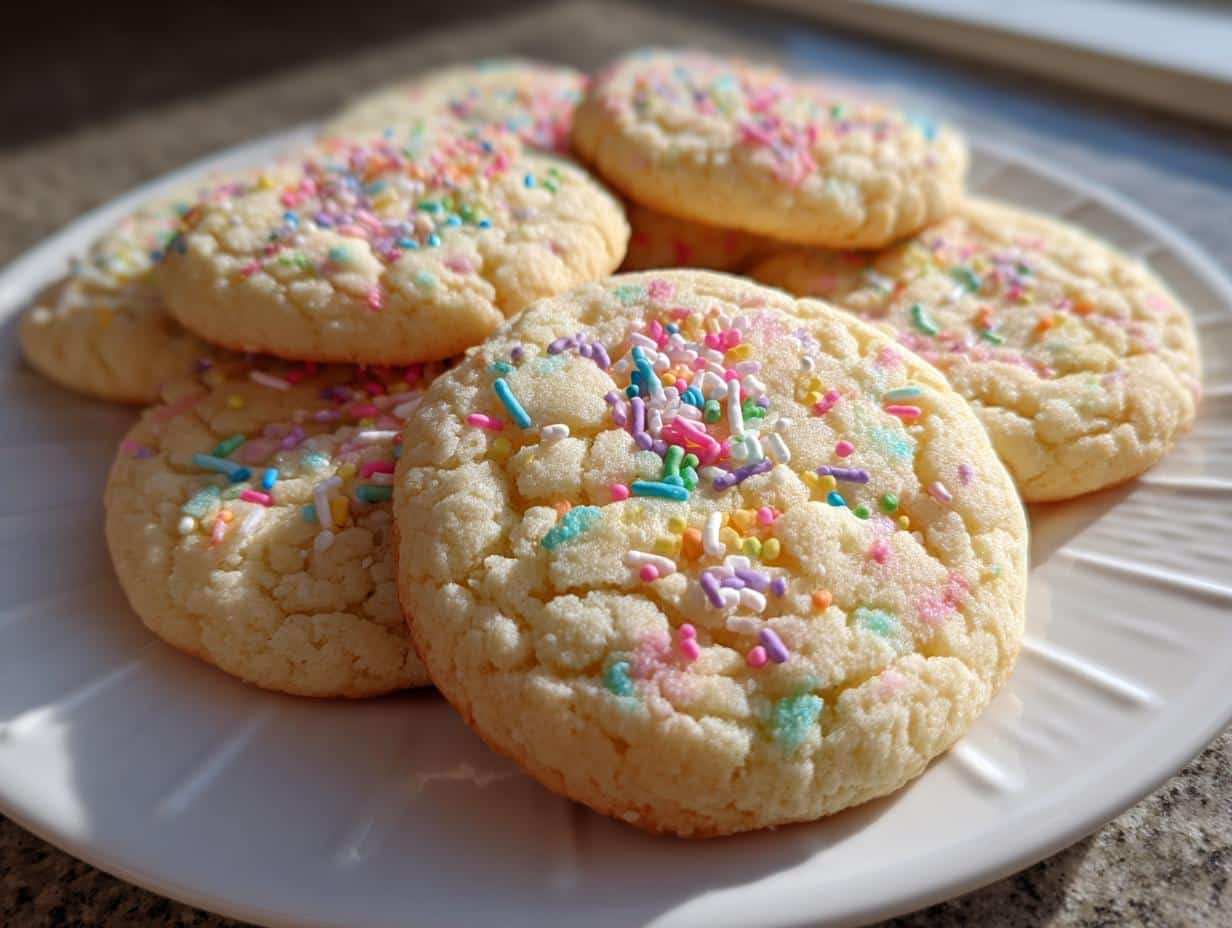
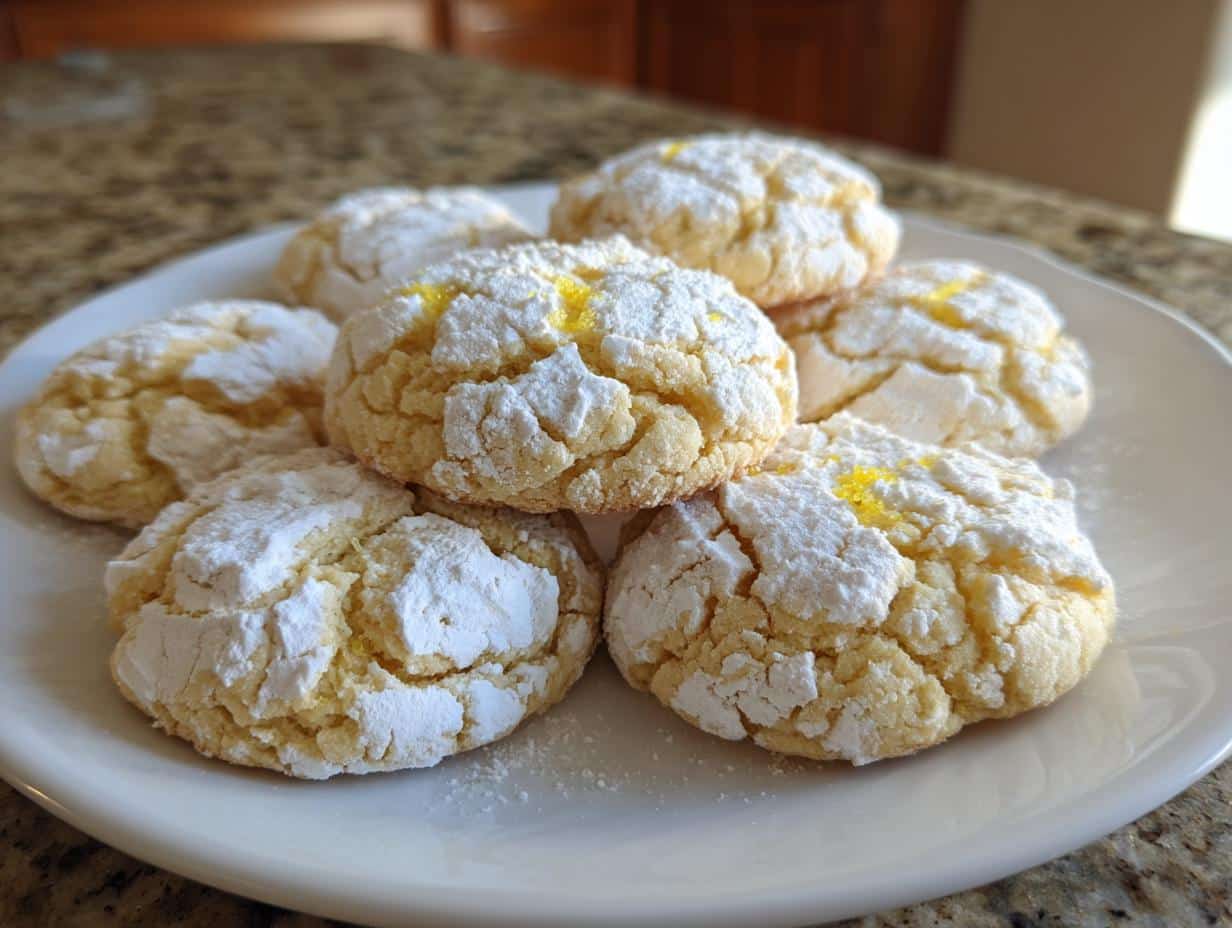
Easter morning at my house always smelled like vanilla and sugar – that’s when my mom would pull out her big mixing bowl and let us kids help make her famous Easter cookies. I still remember standing on a chair, flour dusting my nose, as we shaped dough balls and covered them in rainbow sprinkles. Those simple cookies became our family’s sweet tradition, and now I make them every year with my own kids.
What I love about these Easter cookies is how effortlessly festive they are. With just a few pantry staples and maybe some food coloring, you can create cheerful treats that feel special without being fussy. They’re soft, buttery, and hold sprinkles perfectly – the kind of cookie that disappears fast from holiday platters. Whether you’re hosting a big Easter brunch or just want a fun kitchen project with little ones, this recipe delivers smiles every time.
Why You’ll Love These Easter Cookies
Trust me, these aren’t just any cookies – they’re little bites of holiday joy! Here’s why they’ve been my go-to Easter treat for years:
- Quick & easy: From bowl to baking sheet in under 20 minutes (perfect for last-minute Easter basket stuffers!)
- Kid-approved fun: Little hands love rolling dough balls and showering them with sprinkles
- Customizable colors: Mix pastel food coloring into the dough for a rainbow of Easter hues
- Crowd-pleasing texture: Soft centers with slightly crisp edges that hold their shape beautifully
- Festive but simple: Looks fancy with minimal effort – just wait for the compliments!
The best part? These cookies taste like childhood memories and new traditions all at once.
Ingredients for Easter Cookies
Here’s everything you’ll need to make these cheerful Easter cookies – I promise it’s all simple stuff you probably have in your pantry right now! The magic is in how these basic ingredients come together.
- 2 cups all-purpose flour (spooned and leveled – no packing!)
- 1/2 cup granulated sugar (the regular white kind works perfectly)
- 1/2 cup butter, softened (this means it should dent easily when pressed – about 30 minutes out of the fridge)
- 1 large egg (room temperature blends smoother)
- 1 tsp pure vanilla extract (the good stuff makes a difference!)
- 1/2 tsp baking powder (check it’s fresh for best rise)
- 1/4 tsp salt (just enough to balance the sweetness)
- Food coloring (optional) (gel works better than liquid for vibrant pastels)
- Sprinkles (optional) (Easter-themed ones are extra festive!)
See? Nothing fancy – just good ingredients prepped right. Now let’s make some cookie magic!
Equipment You’ll Need
No fancy gadgets required here – just the basics every baker already has in their kitchen! Here’s what you’ll want to grab:
- Large mixing bowl (my trusty ceramic one gets the job done)
- Wooden spoon or electric mixer (I actually prefer mixing by hand for these!)
- Baking sheet (no need to grease if you’ve got a good non-stick one)
- Wire rack (for that all-important cooling step)
- Measuring cups/spoons (eyeballing never works with baking!)
That’s seriously it! See why I love this recipe? Simple tools, spectacular results.
How to Make Easter Cookies
Okay, let’s get to the fun part! Making these Easter cookies is seriously easy, but I’ve got some little tricks that make all the difference. Follow these steps, and you’ll have perfect holiday treats in no time.
Step 1: Mix Dry Ingredients
First things first – preheat that oven to 350°F (175°C). While it’s warming up, grab your biggest mixing bowl. Here’s my secret: whisk together the flour, baking powder, and salt before adding the sugar. This helps everything distribute evenly so you don’t get bitter pockets of baking powder. I like to sift mine through a fine mesh strainer if I’m feeling fancy – it makes the cookies extra tender!
Step 2: Cream Wet Ingredients
Now for the good stuff! In another bowl (or right in your stand mixer if you’re using one), beat that softened butter until it’s creamy. “Softened” means it should dent easily when you press it – not melted, not rock hard. Add the sugar gradually and beat until it’s light and fluffy – about 2 minutes with a mixer. Then mix in the egg and vanilla until just combined. Don’t overmix here!
Step 3: Shape and Decorate
Time to get creative! If you’re using food coloring, divide the dough now and knead in a few drops until you get pretty pastel shades. Roll tablespoon-sized portions between your palms – I make mine slightly smaller than a ping pong ball. Place them on your baking sheet about 2 inches apart, then gently flatten the tops with your palm or a glass. Now comes the best part – shower them with sprinkles! Press lightly so they stick.
Step 4: Bake to Perfection
Slide those beauties into your preheated oven and set a timer for 10 minutes. Peek at 8 minutes – you want the edges just starting to turn golden while the centers still look slightly underdone. They’ll keep cooking on the sheet for a minute after you take them out. Transfer to a wire rack after 2 minutes – this prevents soggy bottoms. Let them cool completely (if you can resist!) before serving.
See? Simple as can be, but oh-so-special. Now try not to eat them all before Easter morning!
Tips for Perfect Easter Cookies
After making these Easter cookies for years (and yes, plenty of trial and error!), I’ve picked up some foolproof tricks:
- Chill sticky dough: If your dough feels too soft after mixing, pop it in the fridge for 20-30 minutes. Cold dough holds its shape better!
- Gel food coloring wins: Liquid food coloring can make dough sticky, but gel gives vibrant pastels without changing the texture.
- Press sprinkles gently: A light tap ensures they stick without flattening your cookies too much.
- Cool completely before storing: Wait until cookies reach room temperature before tucking them away to prevent sogginess.
- Layer with parchment: When storing, place parchment between layers to keep sprinkles intact.
These little tweaks make all the difference between good cookies and wow cookies!
Easter Cookie Variations
Oh, the possibilities! While I adore the classic version, sometimes I like to mix things up with these fun twists:
- Citrus sparkle: Add 1 tbsp lemon or orange zest to the dough for a fresh spring flavor
- Almond joy: Swap vanilla for almond extract and top with sliced almonds
- Cutout cuties: Chill dough 1 hour, then roll and cut into Easter shapes like bunnies or eggs
- Coconut clouds: Mix in 1/2 cup shredded coconut for tropical vibes
- Chocolate drizzle: Melt white chocolate and zigzag over cooled cookies
The best part? You can let your Easter creativity run wild – every batch tells its own sweet story!
Serving and Storing Easter Cookies
These Easter cookies taste best with a cold glass of milk (just like when I was a kid!), but they’re also heavenly with afternoon tea or coffee. For Easter brunch, I love arranging them on a pastel platter with fresh berries – the colors just pop!
Store leftovers (if you have any!) in an airtight container at room temperature for up to 5 days. The cookies stay surprisingly soft, though the sprinkles might lose a little crunch after day 3. Honestly? They never last that long in my house!
Easter Cookies Nutritional Information
Now, I’m no nutritionist, but here’s the scoop on what’s in these sweet little Easter treats! Keep in mind these are estimates – your exact numbers might vary depending on ingredients and how big you make your cookies.
- Calories: About 120 per cookie
- Sugar: 5g (that’s the fun part!)
- Fat: 5g (butter makes everything better)
- Protein: 2g (egg power!)
- Carbs: 15g (worth every bite)
Everything in moderation, right? That’s why I always say one cookie… plus maybe just one more!
FAQs About Easter Cookies
Over the years, I’ve gotten so many questions about these Easter cookies – here are the ones that pop up most often! If you’ve got a question I haven’t answered, just shout in the comments.
Can I freeze the dough?
Absolutely! These Easter cookies freeze beautifully. Just roll the dough into balls (without sprinkles yet) and freeze on a baking sheet. Once solid, transfer to a freezer bag. When ready to bake, add 1-2 minutes to the baking time – no thawing needed!
How can I make these vegan?
Easy peasy! Swap the butter for vegan butter sticks (I like Earth Balance), use a flax egg (1 tbsp ground flax + 3 tbsp water), and check your sprinkles are plant-based. They’ll taste just as delicious!
Why did my cookies spread too much?
Oh honey, I’ve been there! Usually it means your butter was too soft or your oven wasn’t hot enough. Next time, chill the dough for 30 minutes before baking, and double-check your oven temp with a thermometer.
Can I use natural food coloring?
You bet! Beet powder, turmeric, and spirulina make gorgeous natural hues. Just know the colors will be more subtle than artificial dyes – but just as festive!
How far in advance can I make these?
The dough keeps refrigerated for 3 days, or bake the cookies up to 2 days before Easter. Store in an airtight container with parchment between layers to keep them fresh!
Final Thoughts
There you have it – my family’s favorite Easter cookies that always disappear faster than the Easter Bunny himself! I’d love to hear how yours turn out. Did you try any fun variations? Snap a photo and tag me – nothing makes me happier than seeing your kitchen filled with the same sweet memories mine holds. Happy baking!
Print
Irresistible Easter Cookies That Steal the Show in 20 Minutes
- Total Time: 27 minutes
- Yield: 24 cookies
- Diet: Vegetarian
Description
Delicious Easter cookies perfect for celebrating the holiday with family and friends.
Ingredients
- 2 cups all-purpose flour
- 1/2 cup sugar
- 1/2 cup butter, softened
- 1 egg
- 1 tsp vanilla extract
- 1/2 tsp baking powder
- 1/4 tsp salt
- Food coloring (optional)
- Sprinkles (optional)
Instructions
- Preheat oven to 350°F (175°C).
- Mix flour, sugar, baking powder, and salt in a bowl.
- Add softened butter, egg, and vanilla extract. Mix well.
- Divide dough and add food coloring if desired.
- Roll dough into small balls and place on baking sheet.
- Flatten slightly and add sprinkles.
- Bake for 10-12 minutes until edges are golden.
- Cool on wire rack before serving.
Notes
- Store in airtight container for up to 5 days.
- Dough can be refrigerated for 30 minutes if too sticky.
- Use pastel colors for Easter theme.
- Prep Time: 15 minutes
- Cook Time: 12 minutes
- Category: Dessert
- Method: Baking
- Cuisine: American