Skip to content
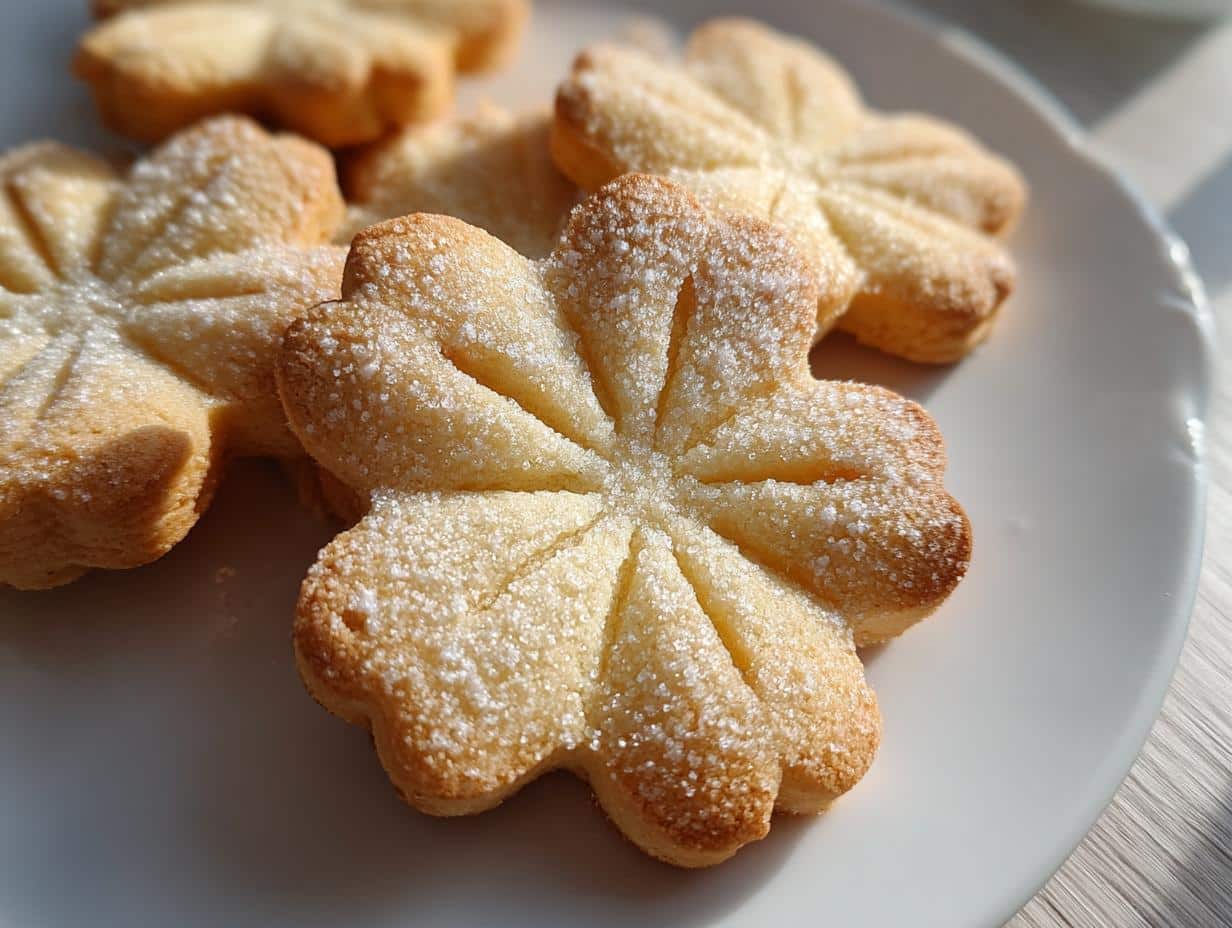
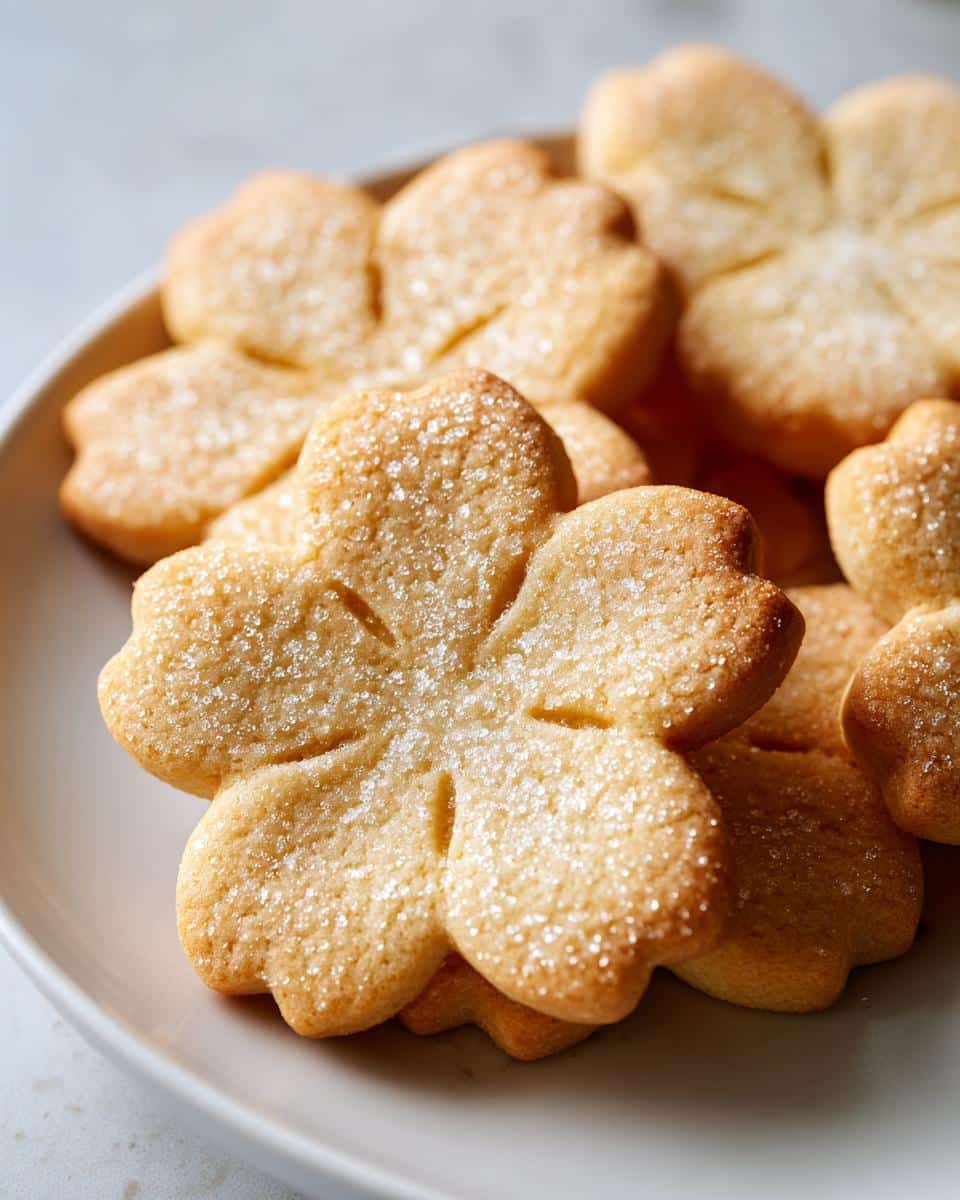
Nothing says springtime quite like pulling a fresh batch of Easter Blossom Cookies out of the oven! These delicate, buttery delights have been my go-to Easter treat ever since I discovered how something so simple can bring so much joy. That moment when the floral-shaped cookies emerge golden from the oven fills my kitchen with warmth and sweetness – just like the season itself.
What I love most about these cookies is how they capture Easter’s cheerful spirit. Whether I’m using pastel food coloring for a soft look or going bold with vibrant hues, they always turn out looking like little edible flowers. Trust me, your family will adore them as much as mine does. They’re perfect for Easter baskets, spring tea parties, or just as a sweet treat to celebrate longer days and blooming gardens.
Why You’ll Love These Easter Blossom Cookies
These cookies have stolen my heart (and probably will steal yours too) for so many reasons:
- Easy as pie – Seriously, if you can cream butter and sugar, you’re halfway there! The dough comes together in minutes.
- Festive flair – Nothing screams “Happy Easter!” quite like these cheerful blossom shapes appearing on your dessert table.
- Endless options – Go wild with food coloring, sprinkles, or even flavored extracts to make them your own.
- That melt-in-your-mouth texture – The perfect balance of crisp edges and tender centers makes these irresistible.
I’ve made these for years, and they never fail to impress – whether for Easter brunch or as sweet little gifts wrapped inIdle cellophane bags.
Ingredients for Easter Blossom Cookies
Here’s what you’ll need to create these gorgeous little blooms – and trust me, using the right ingredients makes all the difference! Gather everything before you start – there’s nothing worse than realizing mid-mix that your butter isn’t soft enough.
- 1 cup unsalted butter, softened (key word: softened! It should give slightly when pressed but still hold its shape)
- 1/2 cup granulated sugar (regular white sugar works best here for that perfect crisp edge)
- 2 cups all-purpose flour (always spoon and level – don’t scoop directly from the bag!)
- 1 tsp vanilla extract (the good stuff – imitation just won’t give you that rich flavor)
- 1/4 tsp salt (just a pinch to balance the sweetness)
For decorating (all optional but oh-so-fun):
- Gel food coloring (pastels for Easter eggs, brights for spring flowers)
- Sprinkles, nonpareils, or edible glitter (because everything’s better with sparkle!)
How to Make Easter Blossom Cookies
Alright, let’s get baking! These Easter Blossom Cookies come together so easily, but there are a few key tricks I’ve learned over the years to make them absolutely perfect every time. Follow these steps, and you’ll have a batch of gorgeous floral cookies ready before you know it!
Step 1: Cream Butter and Sugar
First things first – preheat your oven to 350°F (175°C) and line your baking sheets with parchment paper. Now, grab that softened butter and sugar – this is where the magic starts! Beat them together with a hand mixer (or a strong arm and a wooden spoon) for about 2 minutes until the mixture turns light, fluffy, and almost white in color. Trust me, don’t rush this step! Properly creamed butter and sugar creates those dreamy melt-in-your-mouth cookies we all love.
Step 2: Shape and Decorate
Once your dough comes together (it should feel like playdough but not sticky), roll tablespoon-sized portions into balls. Flatten each slightly with your palm – no need to be perfect! Here comes the fun part: take a butter knife and make five shallow cuts around the edges to create petal shapes. Want extra sparkle? Gently press sprinkles into the centers before baking. Pro tip: rotate your cookie sheet halfway through baking for even browning – they’re done when the edges just start to turn golden (about 10-12 minutes).
The hardest part? Letting them cool completely on the rack before decorating (if you can resist sneaking one warm!). The cookies firm up as they cool, making them easier to handle. But hey, I won’t judge if you “test” one straight from the oven – I do it every time!
Tips for Perfect Easter Blossom Cookies
After making hundreds (okay, maybe thousands) of these cookies over the years, I’ve picked up some foolproof tricks that’ll take your Easter Blossom Cookies from good to amazing:
- Chill that dough! If your dough feels sticky after mixing, pop it in the fridge for 30 minutes. Cold dough holds its shape better when you’re making those pretty petal cuts.
- Go for gel colors – Regular food coloring can make the dough watery, but gel gives you those vibrant Easter hues without messing with the texture.
- Cool sheets between batches – Hot baking sheets melt dough before it even gets in the oven! I keep an extra sheet pan in rotation so I always have a cool one ready.
- Less is more with sprinkles – A light hand with decorations keeps the delicate floral shape visible. Just a pinch in the center looks perfect!
Follow these simple tips, and you’ll have bakery-worthy cookies every time – promise!
Variations for Easter Blossom Cookies
One of my favorite things about this recipe is how easily you can mix it up! Here are some delicious twists I’ve tried (and loved) over the years:
- Citrus sunshine – Swap vanilla for lemon or orange zest – about 1 tablespoon gives the perfect bright flavor that screams spring!
- Floral notes – Try almond or rose extract instead of vanilla for a sophisticated twist (just use half the amount at first – these flavors pack a punch!).
- Pastel rainbow – Divide the dough and tint small batches different colors before shaping – the kids love helping with this one!
The possibilities are endless – once you master the basic recipe, let your creativity bloom!
Storing and Serving Easter Blossom Cookies
Here’s my foolproof system for keeping these delicate cookies fresh and delicious! Store them in an airtight container at room temperature – they’ll stay perfect for up to 5 days (if they last that long!). Layer them between sheets of parchment paper to prevent sticking.
These blossoms shine brightest served with afternoon tea or as part of an Easter brunch spread. The buttery flavor pairs beautifully with fresh berries or a dollop of lemon curd. For a special touch, arrange them on a pretty platter with edible flowers – instant spring centerpiece!
Nutritional Information
Here’s the scoop on what’s inside these sweet treats – just remember these are estimates and can vary based on your specific ingredients. Each Easter Blossom Cookie contains about:
- 120 calories
- 7g fat (4g saturated)
- 12g carbohydrates
- 5g sugar
- 1g protein
Not bad for such a delightful little indulgence! Of course, if you go wild with the sprinkles (like I sometimes do), those numbers might creep up a bit.
FAQs About Easter Blossom Cookies
Can I freeze Easter Blossom Cookies?
Absolutely! These freeze beautifully both as dough and baked cookies. For dough, roll into balls and freeze on a tray before transferring to bags. Baked cookies keep best in airtight containers with parchment between layers – they’ll stay fresh for up to 3 months!
Can I substitute margarine for butter?
I don’t recommend it – real butter gives that signature rich flavor and perfect texture. If you must substitute, use high-quality European-style margarine, but expect a slightly different result.
Why are my cookies spreading too much?
Usually this means your butter was too soft or your oven wasn’t hot enough. Try chilling the dough for 30 minutes before baking, and always preheat your oven properly!
Can I make these without food coloring?
Of course! The natural golden color from the butter is lovely on its own. You can also dust them with powdered sugar for a simple, elegant look.
How do I get crisp petal edges?
The secret is making shallow, quick cuts with a sharp knife right before baking – don’t press too deep! A slight twist as you pull the knife away helps define the petals.
Share Your Easter Blossom Cookies
I’d love to see your beautiful creations! Tag me on Instagram @MyKitchenAdventures with your Easter Blossom Cookies – nothing makes me happier than seeing your cookie masterpieces. Bonus points if you got creative with colors and decorations!
Print
10 Divine Easter Blossom Cookies That Wow Everyone
- Total Time: 32 minutes
- Yield: 24 cookies
- Diet: Vegetarian
Description
Delicate Easter blossom cookies with a buttery texture and floral design.
Ingredients
- 1 cup unsalted butter, softened
- 1/2 cup granulated sugar
- 2 cups all-purpose flour
- 1 tsp vanilla extract
- 1/4 tsp salt
- Food coloring (optional)
- Sprinkles or edible decorations (optional)
Instructions
- Preheat oven to 350°F (175°C). Line baking sheets with parchment paper.
- Cream butter and sugar until light and fluffy.
- Mix in vanilla extract.
- Gradually add flour and salt, mixing until dough forms.
- Divide dough and add food coloring if desired.
- Roll dough into small balls and flatten slightly.
- Use a knife to create petal indentations.
- Decorate with sprinkles.
- Bake for 10-12 minutes until edges are lightly golden.
- Cool on wire racks before serving.
Notes
- Chill dough for 30 minutes if too soft.
- Store in an airtight container for up to 5 days.
- Use gel food coloring for vibrant hues.
- Prep Time: 20 minutes
- Cook Time: 12 minutes
- Category: Dessert
- Method: Baking
- Cuisine: American